Table of Contents
Advertisement
proform.com
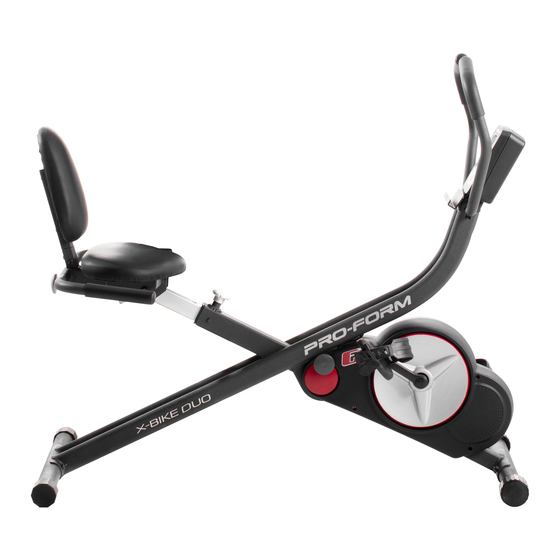
Model No. PFEX11916.3
Serial No.
Write the serial number in the space
above for reference.
Serial
Number
Decal
ACTIVATE YOUR
WARRANTY
To register your product and
activate your warranty today,
go to my.proform.com.
CUSTOMER CARE
For service at any time, go to
proformservice.com.
Or call 1-888-533-1333
Mon.–Fri. 6 a.m.–6 p.m. MT
Sat. 8 a.m.–12 p.m. MT
Please do not contact the store.
CAUTION
Read all precautions and
instructions in this manual before
using this equipment. Keep this
manual for future reference.
USER'S MANUAL
Advertisement
Table of Contents

Subscribe to Our Youtube Channel
Related Manuals for Pro-Form X-BIKE DUO


Summary of Contents for Pro-Form X-BIKE DUO
- Page 1 proform.com Model No. PFEX11916.3 Serial No. USER’S MANUAL Write the serial number in the space above for reference. Serial Number Decal ACTIVATE YOUR WARRANTY To register your product and activate your warranty today, go to my.proform.com. CUSTOMER CARE For service at any time, go to proformservice.com.
-
Page 2: Table Of Contents
TABLE OF CONTENTS WARNING DECAL PLACEMENT ............. . .2 IMPORTANT PRECAUTIONS . -
Page 3: Important Precautions
IMPORTANT PRECAUTIONS WARNING: To reduce the risk of serious injury, read all important precautions and instructions in this manual and all warnings on your exercise bike before using your exercise bike. ICON assumes no responsibility for personal injury or property damage sustained by or through the use of this product. - Page 4 STANDARD SERVICE PLANS...
-
Page 5: Before You Begin
The and toning the body. The X-BIKE DUO exercise bike model number and the location of the serial number provides a selection of features designed to make your decal are shown on the front cover of this manual. -
Page 6: Part Identification Chart
PART IDENTIFICATION CHART Use the drawings below to identify the small parts needed for assembly. The number in parentheses below each drawing is the key number of the part, from the PART LIST near the end of this manual. The number following the key number is the quantity needed for assembly. -
Page 7: Assembly
ASSEMBLY • To hire an authorized service technician to • To identify small parts, see page 6. assemble this product, call 1-800-445-2480. • In addition to the included tool(s), assembly • Assembly requires two persons. requires the following tool(s): one Phillips screwdriver •... - Page 8 3. Identify the Front Stabilizer (3) and attach it to the Frame (1) with two M8 x 60mm Bolts (75) and two M8 Locknuts (67) (only one side is shown). 4. Attach the Rear Stabilizer (4) to the Upright (2) with two M8 x 60mm Bolts (75) and two M8 Locknuts (67).
- Page 9 6. Orient the Seat Frame (8) near the Seat Post (7) as shown. Pull the Pin Knob (20) outward, slide the Seat Frame onto the Seat Post, and then release the Pin Knob into one of the two adjustment holes (B) in the Seat Post. Next, insert the Seat Axle (57) through the Seat Frame (8) and the Seat Post (7).
- Page 10 9. Attach the Backrest (11) to the Seat Bracket (9) with two M6 x 40mm Screws (77). 10. The Console (6) can use four D batteries (not included); alkaline batteries are recommended. Do not use old and new batteries together or alkaline, standard, and rechargeable batter- ies together.
- Page 11 12. Identify the Right Pedal (55). Using an adjustable wrench, firmly tighten the Right Pedal (55) clockwise into the Right Crank Arm (18). Firmly tighten the Left Pedal (56) counter- clockwise into the Left Crank Arm (not shown). IMPORTANT: You must turn the Left Pedal counterclockwise to attach it.
-
Page 12: How To Use The Exercise Bike
HOW TO USE THE EXERCISE BIKE HOW TO USE THE UPRIGHT POSITION Adjust the Seat Frame (8) to the Move the Frame (1) to the upright position. Place upright posi- tion. Pull the Seat your foot on the Rear Stabilizer (4) and hold the Seat Frame (8) with one hand in the indicated location. - Page 13 HOW TO USE THE RECUMBENT POSITION Adjust the Seat Frame (8) to the Move the Frame (1) to the recumbent position. recumbent posi- tion. Pull the Seat Place your foot on the Rear Stabilizer (4) and hold the Seat Frame (8) with one hand in the indicated location. Frame Pin (33) outward, move the Seat Frame to the...
- Page 14 HOW TO USE THE STORAGE POSITION See the lower drawing at the left. Next, pull upward on the Seat Frame (8) and pull the Frame Pin (13) When the exercise bike is not in use, it can be moved outward with your other hand. Then, move the Upright to a compact storage position.
- Page 15 CONSOLE DIAGRAM FEATURES OF THE CONSOLE The console also offers a selection of preset work- outs. Each preset workout automatically changes the IMPORTANT: To activate your console and begin resistance of the pedals and prompts you to maintain using its exclusive features, see assembly step 13 a target speed as it guides you through an effective on page 11.
- Page 16 HOW TO USE THE MANUAL MODE The upper display—This display will show your pedal- 1. Turn on the console. ing speed in revolutions per minute (RPM) and your Press any button or begin pedaling to turn on the power output in watts. The console.
- Page 17 HOW TO USE A PRESET WORKOUT To pause the console, stop pedaling. When the console is paused, the displays will pause. To con- tinue your workout, simply resume pedaling. 1. Turn on the console. To reset the displays to zero, press the On/Reset Press any button or begin pedaling to turn on the button.
- Page 18 THE OPTIONAL CHEST HEART RATE MONITOR As you exercise, keep your pedaling speed within the target speed zone for the current segment by increasing or decreasing your pedaling speed or Whether your by increasing or decreasing the resistance of the goal is to pedals.
- Page 19 3. Connect your tablet to the console. To disconnect your heart rate monitor from the console, press and hold the iFit Sync button on the console until Press the iFit Sync button on the console; the the LED on the console turns solid green. console pairing number will appear in the display.
-
Page 20: Maintenance And Troubleshooting
MAINTENANCE AND TROUBLESHOOTING MAINTENANCE then carefully pull the Right Shield away from the exer- cise bike. Regular maintenance is important for optimal Note: For clarity, the right shield is not shown in performance and to reduce wear. Inspect and properly tighten all parts each time the exercise bike is used. -
Page 21: Exercise Guidelines
EXERCISE GUIDELINES Aerobic Exercise—If your goal is to strengthen your WARNING: cardiovascular system, you must perform aerobic Before beginning this exercise, which is activity that requires large amounts or any exercise program, consult your physi- of oxygen for prolonged periods of time. For aerobic cian. -
Page 22: Part List
PART LIST Model No. PFEX11916.3 R0518A Key No. Qty. Description Key No. Qty. Description Frame Handlebar Clamp Upright Handlebar Bushing Front Stabilizer Crank Cap Rear Stabilizer Long Pulley Spacer Handlebar Short Pulley Spacer Console Pivot Axle Seat Post Pivot Bushing Seat Frame Right Pedal/Strap Seat Bracket... -
Page 23: Exploded Drawing
EXPLODED DRAWING Model No. PFEX11916.3 R0518A... -
Page 24: Ordering Replacement Parts
ORDERING REPLACEMENT PARTS To order replacement parts, please see the front cover of this manual. To help us assist you, be prepared to provide the following information when contacting us: • the model number and serial number of the product (see the front cover of this manual) •...
Need help?
Do you have a question about the X-BIKE DUO and is the answer not in the manual?
Questions and answers