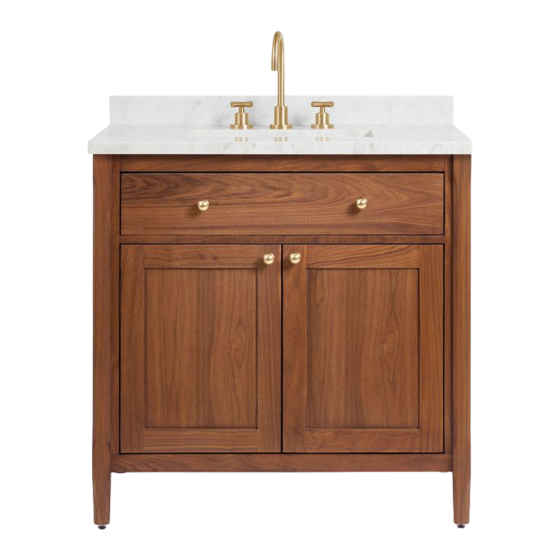
Summary of Contents for Williams-Sonoma LADD C110368
- Page 1 Assembly Instructions Williams-Sonoma Inc. Instructions d’assemblage Instrucciones de Ensamblaje Pottery Barn – Pottery Barn Teen – Pottery Barn Kids – Williams Sonoma Home – West Elm – Rejuvenation – Mark and Graham 07-Jan-2022 1/19 LADD 36" Vanity...
- Page 2 Assembly Instructions Williams-Sonoma Inc. Instructions d’assemblage Instrucciones de Ensamblaje Pottery Barn – Pottery Barn Teen – Pottery Barn Kids – Williams Sonoma Home – West Elm – Rejuvenation – Mark and Graham 07-Jan-2022 2/19 45’ ENGLISH Do not dispose of any packaging or contents of the shipping carton until assembly is completed to avoid accidentally discarding small parts or hardware.
- Page 3 Assembly Instructions Williams-Sonoma Inc. Instructions d’assemblage Instrucciones de Ensamblaje Pottery Barn – Pottery Barn Teen – Pottery Barn Kids – Williams Sonoma Home – West Elm – Rejuvenation – Mark and Graham 07-Jan-2022 3/19...
-
Page 4: Before You Begin
Assembly Instructions Williams-Sonoma Inc. Instructions d’assemblage Instrucciones de Ensamblaje Pottery Barn – Pottery Barn Teen – Pottery Barn Kids – Williams Sonoma Home – West Elm – Rejuvenation – Mark and Graham 07-Jan-2022 4/19 BEFORE YOU BEGIN • Marble top is both heavy, and until installed, fragile. Please have a helper and use caution when moving marble top. -
Page 5: Tools And Materials
Assembly Instructions Williams-Sonoma Inc. Instructions d’assemblage Instrucciones de Ensamblaje Pottery Barn – Pottery Barn Teen – Pottery Barn Kids – Williams Sonoma Home – West Elm – Rejuvenation – Mark and Graham 07-Jan-2022 5/19 BEFORE YOU BEGIN (cont’d) Make sure to observe all local plumbing codes. - Page 6 Assembly Instructions Williams-Sonoma Inc. Instructions d’assemblage Instrucciones de Ensamblaje Pottery Barn – Pottery Barn Teen – Pottery Barn Kids – Williams Sonoma Home – West Elm – Rejuvenation – Mark and Graham 07-Jan-2022 6/19 CARE INSTRUCTIONS Dust often using a clean, soft, dry and lint-free cloth.
- Page 7 Assembly Instructions Williams-Sonoma Inc. Instructions d’assemblage Instrucciones de Ensamblaje Pottery Barn – Pottery Barn Teen – Pottery Barn Kids – Williams Sonoma Home – West Elm – Rejuvenation – Mark and Graham 07-Jan-2022 7/19 Consulter un professionnel à la quincaillerie locale concernant le produit d’étanchéité.
- Page 8 Assembly Instructions Williams-Sonoma Inc. Instructions d’assemblage Instrucciones de Ensamblaje Pottery Barn – Pottery Barn Teen – Pottery Barn Kids – Williams Sonoma Home – West Elm – Rejuvenation – Mark and Graham 07-Jan-2022 8/19...
- Page 9 Assembly Instructions Williams-Sonoma Inc. Instructions d’assemblage Instrucciones de Ensamblaje Pottery Barn – Pottery Barn Teen – Pottery Barn Kids – Williams Sonoma Home – West Elm – Rejuvenation – Mark and Graham 07-Jan-2022 9/19 PREP THE VANITY BASE Remove the drawers, note their location to ensure they go back into their original positions.
- Page 10 Assembly Instructions Williams-Sonoma Inc. Instructions d’assemblage Instrucciones de Ensamblaje Pottery Barn – Pottery Barn Teen – Pottery Barn Kids – Williams Sonoma Home – West Elm – Rejuvenation – Mark and Graham 07-Jan-2022 10/19 • Remove the wooden shelf by unscrews from the bottom of the shelf clips. Mark locations and set aside in a safe place.
- Page 11 Assembly Instructions Williams-Sonoma Inc. Instructions d’assemblage Instrucciones de Ensamblaje Pottery Barn – Pottery Barn Teen – Pottery Barn Kids – Williams Sonoma Home – West Elm – Rejuvenation – Mark and Graham 07-Jan-2022 11/19 ATTACH THE VANITY BASE TO THE WALL •...
- Page 12 Assembly Instructions Williams-Sonoma Inc. Instructions d’assemblage Instrucciones de Ensamblaje Pottery Barn – Pottery Barn Teen – Pottery Barn Kids – Williams Sonoma Home – West Elm – Rejuvenation – Mark and Graham 07-Jan-2022 12/19 ATTACH THE UNDERMOUNT SINK TO THE TOP (CONT’D)
- Page 13 Assembly Instructions Williams-Sonoma Inc. Instructions d’assemblage Instrucciones de Ensamblaje Pottery Barn – Pottery Barn Teen – Pottery Barn Kids – Williams Sonoma Home – West Elm – Rejuvenation – Mark and Graham 07-Jan-2022 13/19 ATTACH TOP TO VANITY BASE...
-
Page 14: Install Backsplash
Assembly Instructions Williams-Sonoma Inc. Instructions d’assemblage Instrucciones de Ensamblaje Pottery Barn – Pottery Barn Teen – Pottery Barn Kids – Williams Sonoma Home – West Elm – Rejuvenation – Mark and Graham 07-Jan-2022 14/19 INSTALL BACKSPLASH Apply a bead of caulk at the back of the top and BACK of the backsplash. - Page 15 Assembly Instructions Williams-Sonoma Inc. Instructions d’assemblage Instrucciones de Ensamblaje Pottery Barn – Pottery Barn Teen – Pottery Barn Kids – Williams Sonoma Home – West Elm – Rejuvenation – Mark and Graham 07-Jan-2022 15/19 CONNECT FAUCETS AND PLUMBING Keep these clearances in mind when routing plumbing APPROX.
- Page 16 Assembly Instructions Williams-Sonoma Inc. Instructions d’assemblage Instrucciones de Ensamblaje Pottery Barn – Pottery Barn Teen – Pottery Barn Kids – Williams Sonoma Home – West Elm – Rejuvenation – Mark and Graham 07-Jan-2022 16/19 REINSTALL WOODEN SHELF Insert shelf clips into the holes. Place the wooden shelf onto shelf clips.
- Page 17 Assembly Instructions Williams-Sonoma Inc. Instructions d’assemblage Instrucciones de Ensamblaje Pottery Barn – Pottery Barn Teen – Pottery Barn Kids – Williams Sonoma Home – West Elm – Rejuvenation – Mark and Graham 07-Jan-2022 17/19 ADJUST DRAWERS to create even gaps around them if necessary...
- Page 18 Assembly Instructions Williams-Sonoma Inc. Instructions d’assemblage Instrucciones de Ensamblaje Pottery Barn – Pottery Barn Teen – Pottery Barn Kids – Williams Sonoma Home – West Elm – Rejuvenation – Mark and Graham 07-Jan-2022 18/19 ADJUST DOORS to create even gaps around them if necessary...
- Page 19 Pottery Barn – Pottery Barn Teen – Pottery Barn Kids – Williams Sonoma Home – West Elm – Rejuvenation – Mark and Graham 01-MAR-2022 19/19 DIMENSIONS BACKSPLASH DOOR DOOR BACK PLUMBING ACCESS CUTOUTS Back is ¾” thick plywood BACKSPLASH © 2019 Williams-Sonoma, Inc.


Need help?
Do you have a question about the LADD C110368 and is the answer not in the manual?
Questions and answers