Table of Contents
Advertisement
Quick Links
Advertisement
Table of Contents
Troubleshooting

Related Manuals for Staco Energy 924


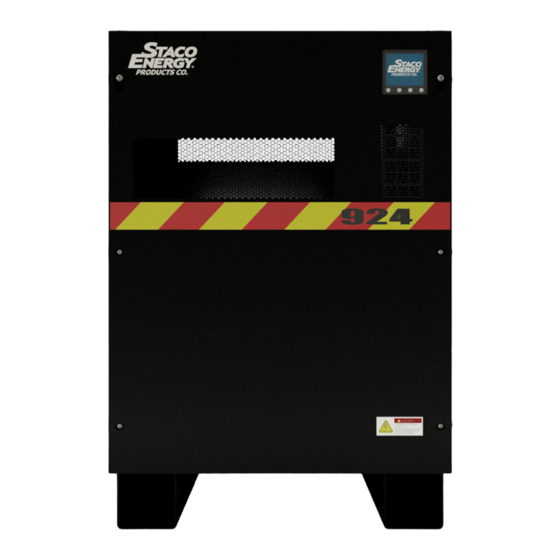
Summary of Contents for Staco Energy 924
- Page 1 Staco 924 230VAC 50Hz 0.75 – 3kW USER MANUAL 003-2704 Rev B...
- Page 2 No reproduction of any part of this manual is permitted without the authorization of Staco Energy Products Company. The Staco Energy Products Company reserves the right to modify the product described herein, in order to improve it, at any time and without notice.
-
Page 3: Safety Warnings
Staco Energy is highly specialized in the development and production of Emergency Lighting Inverter System (ELIS). The ELIS of this series are high quality products, carefully designed and manufactured to ensure optimum performance. Safety Warnings IMPORTANT SAFETY INSTRUCTIONS SAVE THESE INSTRUCTIONS... -
Page 4: Emergency Intervention
DANGER This ELIS contains LETHAL VOLTAGES. All repairs and service should be performed by AUTHORIZED SERVICE PERSONNEL ONLY. There are NO USER SERVICEABLE PARTS inside ELIS. WARNING To reduce the risk of fire or electric shock, install this ELIS in a temperature and humidity controlled, indoor environment, free of conductive contaminants. -
Page 5: Symbols Used In The Manual
Symbols used in the Manual Some elements are highlighted with graphic symbols to alert the user to dangerous operations. Danger / Risk of Electric Shock This symbol indicates the possibility of serious injury or substantial damage to the unit, unless adequate precautions are taken. -
Page 6: Table Of Contents
Table of Contents Safety Warnings ............................ii Emergency Intervention ........................... iii First aid intervention ..........................iii Firefighting measures ........................... iii Symbols used in the Manual ........................iv Protective Equipment ..........................iv GENERAL PRECAUTIONS ........................iv 1. Safety Warnings and EMC instructions ....................1 1.1 ELIS Location .......................... - Page 7 5. Specifications ............................. 32 5.1 General Specification........................32 5.2 Nominal ELIS Current ........................33 5.3 Recommended Wiring ........................34 6. Storage .............................. 34 7. Recommended Replacement Intervals ....................35 Figures Figure 1: ELIS Layout 0.75 - 3.00kW ....................... 3 Figure 2: ELIS Main Components 0.75 - 3.00kW ..................4 Figure 3: 0.75-1.735kW Inverter Rear View .....................
-
Page 8: Safety Warnings And Emc Instructions
1. Safety Warnings and EMC instructions Strictly comply with all warnings and operating instructions in this manual. Save this manual and carefully read the following instructions before installing the unit. Do not operate this unit before reading through all safety information and operating instructions carefully. 1.1 ELIS Location •... -
Page 9: Battery
1.4 Battery • Installation and servicing of batteries should be performed or supervised by personnel knowledgeable about batteries and required precautions. • Batteries present a risk of electrical shock and burn from high short-circuit current. Observe proper precautions. o Remove watches, rings, or other metal objects. o Use tools with insulated handles. -
Page 10: Installation
2. Installation 2.1 Unpacking and Inspection Shipment consists of ELIS enclosure and separate battery pallet. Unpack and check the contents of each package. The shipping package contains: • (1) User manual (1) USB cable • • (1) Software CD • (1) Battery pallet NOTE: Before installation, inspect the unit and each battery. -
Page 11: Elis Main Components
2.1.2 ELIS Main Components Figure 2: ELIS Main Components 0.75 - 3.00kW 2.2 System Single Line Diagram Page | 4... -
Page 12: Figure 3: 0.75-1.735Kw Inverter Rear View
Figure 3: 0.75-1.735kW Inverter Rear View Figure 4: 2.55kW Inverter Rear View Figure 5: 3.0kW Inverter Rear View Page | 5... -
Page 13: Installation
2.3 Installation Installation and wiring must be set in accordance with the national and local codes. 2.3.1 Battery Installations • Installation and servicing of batteries should be performed or supervised by personnel knowledgeable about batteries and required precautions. • Batteries present a risk of electrical shock and burn from high short-circuit current. Observe proper precautions. -
Page 14: Figure 6: 0.75-0.95Kw System Battery Installation
Item Part Number Description Battery (Note 3) 817-0436 Wire Assy Battery Interconnect Med NOTES: 1. All dimensions are reference only. 2. Maintain minimum 0.025” between batteries for ventilation 2. Batteries, bolts and washers come as part of Staco battery kit and pallet. 4. -
Page 15: Figure 7: 1.15Kw System Battery Installation
Item Part Number Description Battery (Note 3) 817-0435 Wire Assy Battery Interconnect Long 817-0436 Wire Assy Battery Interconnect Med NOTES: 1. All dimensions are reference only. 2. Maintain minimum 0.025” between batteries for ventilation 2. Batteries, bolts and washers come as part of Staco battery kit and pallet. 4. -
Page 16: Figure 8: 1.75Kw System Battery Installation
Item Part Number Description Battery (Note 3) 817-0435 Wire Assy Battery Interconnect Long 817-0436 Wire Assy Battery Interconnect Med NOTES: 1. All dimensions are reference only. 2. Maintain minimum 0.025” between batteries for ventilation 2. Batteries, bolts and washers come as part of Staco battery kit and pallet. 4. -
Page 17: Figure 9: 2.50-3.00Kw System Battery Installation
Item Part Number Description Battery (Note 3) 817-0436 Wire Assy Battery Interconnect Med 817-0435 Wire Assy Battery Interconnect Long 817-0437 Wire Assy Battery Interconnect Short NOTES: 1. All dimensions are reference only. 2. Maintain minimum 0.025” between batteries for ventilation 2. -
Page 18: Elis Input / Output Wiring
2.3.2 ELIS Input / Output Wiring The input and output wiring is located behind enclosure panels. See Figure 2: ELIS Main Components 0.75 - 3.00kW for component layout. NOTE: Connect the earth ground wire first when making wire connection. Disconnect the earth ground wire last when making wire disconnection. -
Page 19: Optional Output Circuit Breakers (Ocb)
2.3.3 Optional Output Circuit Breakers (OCB) Output circuit breaker(s) for distributing and controlling the load connected to the ELIS are available. See Figure 2: ELIS Main Components 0.75 - 3.00kW. A grounding bar & neutral bar are provided with this option. -
Page 20: Normally-Off Hold (Noh) Option
2.3.5 Normally-Off Hold (NOH) Option Normally-Off hold allows for the fixtures, lamps and/or loads connected to the ELIS to immediately begin operating at full-light output in the event of an AC power outage, as required by UL924 egress codes. When utility source is restored, the ELIS will continue supplying power to the connected emergency circuits for the duration of the timer setting. -
Page 21: Epo Connection
2.4 EPO Connection Note: Keep the EPO connector shorted for normal ELIS operation. To activate EPO function, open the terminals. Terminals are shorted/NC for normal ELIS operation. Figure 13: EPO connections WARNING: The EPO, RS-232 and USB circuits are an IEC 60950 safety extra low voltage (SELV) circuit. -
Page 22: Operation
3. Operation 3.1 Button Operation Figure 14: Front Panel Layout on ELIS Button Functions Switch on ELIS: Press and hold for at least 2 seconds • Mute alarm: Once the ELIS is switched on, press and hold for at least 3 •... -
Page 23: Lcd Panel
3.2 LCD Panel Figure 15: ELIS LCD Layout Function Display Backup time information Battery backup time remaining H: hours, M: minutes, S: seconds Configuration and fault information Configurable parameters. See section 3.5 for settings key Warning/fault codes. See sections 3.7 and 3.8 for faults and warnings key Mute operation ELIS alarms are disabled Input, Battery, Temperature, Output &... -
Page 24: Lcd Display Index
ELIS is operating in frequency converter mode ELIS output is normal Battery information Displays battery level by 0-24%, 25-49%, 50-74%, and 75-100% Low battery Battery Fault 3.2.1 LCD display index Abbreviation Display content Meaning Enable Disable Escape High loss Low loss Active open Active close Estimated autonomy time... -
Page 25: Elis Operation
3.4 ELIS Operation 3.4.1 Switch on the ELIS with utility power supply (to Line mode) 1. Verify mains input is connected correctly 2. Close Battery breaker 3. Apply input power. LCD will initialize, input frequency & standby (SD) will be displayed; •... -
Page 26: Switch Off The Elis With Utility Power Supply In Line Mode
3.4.6 Switch off the ELIS with utility power supply in Line mode 1. Press and hold the “OFF” button; 2. ELIS will go to bypass mode and will beep once. NOTE: “Switch Off” means that ELIS is not working on line / ECO / battery / battery test mode. Even though ELIS is switched off, if input or bypass voltage is normal, the internal power supply will still be working;... -
Page 27: Lcd Operation
3.5 LCD Operation 3.5.1 Main interface (home page) The ELIS LCD contains three main parameters: Parameter 3 Parameter 1: Messages or available settings. Refer to 3.5.2.3 Available ELIS settings. Parameter 1 Parameter 2 & Parameter 3: Setting options or values available. - Page 28 3.5.2.3 Available ELIS settings 01: Output voltage setting Interface Setting For 200/208/220/230/240 VAC models: 200: output voltage is 200Vac 208: output voltage is 208Vac 220: output voltage is 220Vac 230: output voltage is 230Vac (Default) 240: output voltage is 240Va 02: Frequency Converter enable/disable Interface Setting...
- Page 29 04: ECO enable/disable Interface Setting Enable or disable ECO function ENA: ECO mode enabled DIS: ECO mode disabled (Default) 05: ECO voltage range setting Interface Setting Set the acceptable high voltage point and low voltage point for ECO mode HLS: High loss voltage in ECO mode +7V to +24V of the nominal voltage (Default: +12V) LLS: Low loss voltage in ECO mode from -7V to -24V of the nominal voltage (Default: -12V)
- Page 30 07: Bypass voltage range setting Interface Setting Set the acceptable high voltage point and acceptable low voltage point for Bypass mode HLS: Bypass high voltage point 230Vac to 264Vac (Default: 264Vac) LLS: Bypass low voltage point 170Vac to 220Vac (Default: 170Vac) 08: Bypass frequency range setting Interface Setting...
- Page 31 10: Programmable outlets setting Interface Setting Backup time limits for programmable outlets 0-999: Backup time in minutes from 0-999 for programmable outlets (connected to non-critical devices) in battery mode (Default: 999) 11: Autonomy limitation setting Interface Setting Backup time limits for general outlets 0-999: Backup time in minutes from 0-999 for general outlets (connected to critical devices) in battery mode DIS: Disable the autonomy limitation...
- Page 32 13: Maximum charger current setting Interface Setting Charger current 1-2kVA: 1/2/4/6/8/10/12: Maximum charger current in Ampere (Default: 2A) 3kVA: 1/2/4/6/8: Maximum charger current in Ampere (Default: 2A) Note: Set the appropriate charger current based on battery capacity used. The recommended charging current is 0.1C~0.3C of battery capacity Battery capacity(AH) Total charging current (A)
- Page 33 16: EPO logic setting Interface Setting EPO function control logic AO: Active Open (Default) When AO is selected, EPO function will activate when Pin 1 and Pin 2 is open AC: Active Closed When AC is selected, EPO function will activate when Pin 1 and Pin 2 is closed 17: External output isolation transformer connection Interface...
- Page 34 19: Acceptable input voltage range setting Interface Setting Acceptable high voltage point and low voltage point for input voltage range HLS: Input high voltage point 280/290/300: High voltage point (Default: 300Vac) LLS: Bypass low voltage point 110/120/130/140/150/160: Low voltage (Default: 110Vac) 00: Exit setting Interface Setting...
-
Page 35: Operating Mode Description
3.5.3 Operating Mode Description Operating Description LCD display mode When input voltage is within acceptable range, UPS Online mode will provide pure and stable AC power to output. The UPS will charge the battery Energy saving mode: When input voltage is within voltage regulation range, ECO mode UPS will supply voltage to output for energy saving. -
Page 36: Trouble Shooting
4. Trouble Shooting 4.1 Warning status When Fault LED flashes and the alarm beeps once every second, there is a fault with the ELIS. The warning code is displayed on LCD panel. Refer to the trouble shooting table 4.3.1 Warnings to determine the nature of the fault. -
Page 37: Trouble Shooting Table
4.3 Trouble shooting table If the ELIS system reports a fault refer to the table below: 4.3.1 Warnings Warning Icon (flashing) Alarm Low Battery Every second Overload Twice per second Battery is not connected Every second Over Charge Every second Site Fault Every second EPO enable... -
Page 38: Troubleshooting Guide
4.3.3 Troubleshooting Guide Symptom Possible cause Remedy The AC input power is not Ensure input power cord is connected properly. firmly connected to the mains. ELIS does not power on when mains is present. The AC input is connected to Plug AC input power cord to AC the ELIS output. -
Page 39: Specifications
5. Specifications 5.1 General Specification 0.75 0.95 1.15 1.73 2.44 Phase Single phase with ground INPUT Nominal Voltage 230 VAC Voltage Range +/-25% @ 100% load ≦ 0.99 @ 100% load Frequency Range 46~54 Hz Power Factor OUTPUT Nominal Voltage, VAC 230 VAC AC Voltage Regulation ±... -
Page 40: Nominal Elis Current
5.2 Nominal ELIS Current Input Output Input Voltage Max Input Output Output (Vac) Current (A) Voltage (Vac) Current (A) 0.75 0.95 1.15 1.73 2.44 13.9 10.6 3.00 17.1 13.0 Page | 33... -
Page 41: Recommended Wiring
5.3 Recommended Wiring NOTE 1: It is recommended to use 75°C copper wire. NOTE 2: Recommended cable sized based on THW cables at 30°C ambient (NEC Table 310.16). If different cables are used or installed at higher ambient, the cable size need to be reviewed Input Output Input... -
Page 42: Recommended Replacement Intervals
7. Recommended Replacement Intervals The Staco ELIS has a long design life. Due to the characteristics of the part, not the design of the ELIS, certain components used in the design have a limited life, even with proper maintenance. Service and maintenance work must be performed only by factory authorized personnel. Staco recommends these limited-life components be periodically inspected and replaced before the expected expiration of their life cycle.
Need help?
Do you have a question about the 924 and is the answer not in the manual?
Questions and answers