
Related Manuals for Excelitas Technologies OmniCure R2000

Summary of Contents for Excelitas Technologies OmniCure R2000
- Page 1 R2000 Radiometer UV/VISIBLE RADIOMETER 250 – 1000 nm USER GUIDE Excelitas Canada Inc. 2260 Argentia Road Mississauga (ON) L5N 6H7 Canada +1 905.821.2600 www.excelitas.com 035-00310R Rev. 3...
- Page 2 USER GUIDE 035-00310R Excelitas Canada Inc. 2022 All rights reserved No part of this publication may be reproduced, transmitted, transcribed, stored in a retrieval system or translated into any language in and form by any means without the prior written consent of Excelitas Canada Inc.
- Page 3 Trademarks: OmniCure® is a trademark of Excelitas Canada Inc. All rights reserved. All other product names are trademarks of their respective owners. All product or software photos shown are for reference only and are subjected to change without notice. Made in Canada. Doc. No. 035-00310R http://www.excelitas.com/omnicure Excelitas Canada Inc.
- Page 4 R2000 Control Panel Software Minimum Computer Specifications: 300+ MHz processor (Pentium or equivalent) Windows 98, 2000 or XP 32 Mb RAM 10 Mb for Software Installation 20 Mb for Data Storage SVGA video 800x600 resolution One available RS-232 Port http://www.excelitas.com/omnicure Excelitas Canada Inc.
-
Page 5: Table Of Contents
Table of Contents INTRODUCTION ............... 6 CONTROL FUNCTIONS & FEATURES ........ 7 FAMILIARIZING YOURSELF WITH THE R2000 RADIOMETER ................... 9 USING THE R2000 RADIOMETER ........13 R2000 R ON ....13 URNING THE ADIOMETER ..........13 ALIBRATION ......14 SING IGHT UIDE DAPTERS... - Page 6 ‘L ’ M ..... 39 ISPLAY NDICATES ESSAGE ‘CLO’ M ..... 39 ISPLAY NDICATES ESSAGE ............. 40 PTICAL ..........41 LECTRICAL ..........41 ECHANICAL RS-232 C OMMUNICATION ONFIGURATION ......42 NVIRONMENTAL ONDITIONS REGULATORY COMPLIANCE ..........43 : ..43 AFETY AND LECTROMAGNETIC OMPATIBILITY HS ..........
-
Page 7: Introduction
Introduction Congratulations on your purchase of the R2000 Radiometer. This radiometer includes revolutionary technology that elevates the performance and accuracy of hand held radiometers to new heights. It joins the Excelitas Canada Inc. family of spot cure and illumination systems, offering the same high level of innovation, quality and reliability that customers have come to expect from Excelitas Canada Inc. -
Page 8: Control Functions & Features
Control Functions & Features Features Benefits Provides accurate Versatile measurement capability broadband measurements suitable for many different light between 250-1000nm Sources Measures power or Allows for industry specific irradiance measures Optical interface collects Eliminates beam intensity and light over a large area radiance dependence Auto-ranging Maintains precision over full... - Page 9 requirements Calibration traceable to Quality assurance NIST Calibration period of 12 Lower cost of operation months Auto turn off Extends battery life and makes operation easier RS-232 connection to Allows calibration and setup of OmniCure Series of UV OmniCure Series of UV Curing Curing Systems Systems RS-232 connection to PC...
-
Page 10: Familiarizing Yourself With The R2000 Radiometer
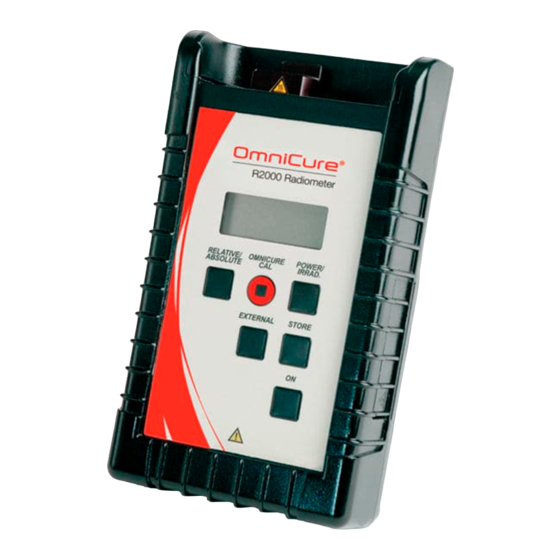
Familiarizing yourself with the R2000 Radiometer Remote Input Connector Note: For connection of optional Display cure site & cure ring radiometer only Front Keypad RS-232 Connector Rubber Boot http://www.excelitas.com/omnicure Excelitas Canada Inc. 2022 All rights reserved Page 9 035-00310R Rev. 3... - Page 11 The R2000 Radiometer comes complete with: 3mm (Red), 5mm (Blue) and 8mm (Green) Light Guide Adapters 6’ Phono-style cable (RS-232) 6’ 9-Pin style cable (RS-232) CD with GUI software and programming notes Carrying case Light Guide Adapter Interfaces Excelitas Canada Inc.
- Page 12 RELATIVE / ABSOLUTE Each press of this button toggles between relative and absolute mode. The default setting is Absolute mode. The Relative mode displays measurements as a percentage of a reference value. OmniCure CAL Used to calibrate and set up compatible OmniCure UV Curing Systems to a specified irradiance.
- Page 13 Rubber Boot A protective, flexible cover that allows the radiometer to stand upright on a flat surface. The rubber boot is optional and can be removed when not desired. When the boot is utilized, the RS-232 connector and Remote Input connector are accessible by lifting flap on the right side of the boot.
-
Page 14: Using The R2000 Radiometer
Using the R2000 Radiometer Turning the R2000 Radiometer ON The R2000 Radiometer is fitted with an ON switch located on the front keypad. Press and release the button. All segments on the display illuminate for 1 second. Note: If a light guide adapter is installed in the optical port, the display will flash the diameter of the light guide adapter for 3 sec. -
Page 15: Using Light Guide Adapters
Excelitas Technologies service center. When calibration is due contact Excelitas Technologies for a return authorization number. Refer to Section 9.0. Using Light Guide Adapters Each R2000 Radiometer includes two standard light guide adapters, 3mm (RED), 5mm (BLUE) and 8mm (GREEN). -
Page 16: Using Non-Standard Size Light Guides
Light Guide Light Guide Adaptor Thumbscrew When the light guide adapter is secured it can remain attached to the light guide if the light guide is removed. To confirm which size light guide is inserted press the ON button simultaneously with the POWER/IRRAD button. The display will show the diameter of the light guide in mm (i.e. -
Page 17: Connecting To A Light Source
Connecting to a Light Source Connect a light guide with corresponding light guide adapter into the optical input port on the R2000 Radiometer. Turn light source ON. Always turn light source OFF before removing light delivery from the R2000 Radiometer. Refer to Section 5 for warnings and safety precautions. -
Page 18: Measuring In Relative Mode
Measuring in Relative Mode The Relative mode displays measurements as a percentage of a reference value. The reference is the power at the point of entering Relative mode. Select either Power or Irradiance mode from the keypad. Adjust the optical source to the desired reference level, and then press the Relative/Absolute button. -
Page 19: Connecting External Radiometer Devices
4.10 Connecting External Radiometer Devices To use the R2000 Radiometer with optional Cure Site and Cure Ring Radiometers, plug the 6-pin Mini-DIN style cable attached to the external device(s) into the Remote Input connector on the side of the R2000 Radiometer. External radiometer devices are available from Excelitas Canada Inc. -
Page 20: Storing Data
Sensor Sensor Sensor Sensor Dongle R2000 Connection via Remote Input Jack With each press of the EXTERNAL keypad button, the display will show, Reading Reading Reading Reading Reading Internal Detector Storing Data 4.11 Storing Data The R2000 Radiometer is able to store measurements based on what is being detected at the time the STORE button is pressed. -
Page 21: Nterfacing With Compatible Omni Cure Uv Curing
number of stored readings. The number will increment each time STORE is pressed and the measurement will be stored. The STORE feature is generally used when the R2000 Radiometer will be connected to a PC via the RS-232 connector. When connected the stored readings are downloaded into a Data Log as seen on the R2000 Control Panel (via the GUI software provided). -
Page 22: Using The R2000 Radiometer With Apc
When the keypad is released a series of dashes ‘----‘ will illuminate across the display which indicates that the set point is being communicated to the OmniCure UV Curing system and calibration is being performed. Once the dashes cease to display the calibration cycle is complete. - Page 23 Operating System Requirements: Microsoft Windows® 95, 98, NT, 2000, ME or XP The R2000 Radiometer comes complete with a CD that includes the R2000 Control Panel software that allows the user to operate and control the Radiometer from a PC. Installing the R2000 Control Panel Software 1) Turn on the PC to be used with the R2000 Radiometer.
- Page 24 A 9-pin serial cable is provided with each R2000 Radiometer. If a problem connecting occurs, a ‘No response from radiometer….’ Error may be displayed. If this occurs click ‘OK’ and check the R2000 Radiometer. Press the ON keypad button as necessary and try connecting again. If a problem connecting occurs, the PC may display a ‘Failed to open COM port’...
- Page 25 Note: This error may also appear if another program is running that is using the COM port that has been selected. The following illustrates the R2000 Control Panel: Based on the settings and data being read from the R2000 Radiometer, the information will display in the respective areas of the Control Panel.
- Page 26 ENTER key. If successful, the background reverts to the default colour. If the transfer fails, the background colour reverts to the default colour but the foreground colour becomes red. A dialogue box will appear indicating that the request failed. Click OK to continue.
- Page 27 Relative Reference – User defined; enter the desired power reference to be used in Relative mode. Custom Adapter Diameter – User defined; when using a non- standard light guide with the R2000 Radiometer enter the applicable diameter of the customized light guide adapter. This information must be entered before the light guide is used into the R2000 Radiometer Light Guide Adaptor –...
- Page 28 Status The Status frame indicates the applicable status modes of the R2000 Radiometer. Cal Required – When checked indicates that the R2000 Radiometer is past its recommended calibration date. This is http://www.excelitas.com/omnicure Excelitas Canada Inc. 2022 All rights reserved Page 27 035-00310R Rev.
- Page 29 equivalent to the ‘CAL’ message that appears on the R2000 Radiometer’s display. Low Battery – When checked indicates that the battery is low and should be replaced. This is equivalent to the ‘BAT’ message that appears on the R2000 Radiometer’s display. No Light Guide –...
- Page 30 Menu Functions To operate and control the R2000 Radiometer from the PC, select desired menu functions located across the top of the R2000 Control Panel. Display Select the Display menu and then select the desired mode of Power, Irradiance, Absolute or Relative. Selected options are indicated as checked boxes in the Display frame.
- Page 31 If a box is checked, this means that this function will not operate from the front keypad of the R2000 Radiometer. Get LGA In the event that the size of the light guide adapter must be re- detected remotely, it can be obtained from the Get LGA menu option at the top of the screen.
- Page 32 Data Log Select the Data Log menu option and select the desired option from the pull down list. Select Clear to clear any existing data that may be resident in the data log. Select Log Current Readings to STORE current readings from the R2000 Radiometer.
- Page 33 http://www.excelitas.com/omnicure Excelitas Canada Inc. 2022 All rights reserved Page 32 035-00310R Rev. 3...
- Page 34 Power Down Select this menu option to power down the R2000 Radiometer. http://www.excelitas.com/omnicure Excelitas Canada Inc. 2022 All rights reserved Page 33 035-00310R Rev. 3...
-
Page 35: Glossary Of Symbols And Safety Precautions
Glossary of Symbols and Safety Precautions CAUTION – RISK OF DANGER Consult accompanying documents CAUTION! Never look into the light emitting end of a light guide. The light could severely damage the cornea and retina of the eye if the light is observed directly. Eye shielding must be used at all times as well as protective clothing to protect exposed skin. - Page 36 SAFETY PRECAUTIONS: WARNING! Should the R2000 Radiometer be used in a manner not specified by Excelitas Canada Inc. the protection provided by the equipment may be impaired. WARNING! The R2000 Radiometer is supplied with a lithium battery. Lithium batteries present a potential fire, explosion or severe burn hazard.
-
Page 37: Troubleshooting
Troubleshooting Error Messages Display Indicates ‘Adc’ Message If an Adc message appear on the display it indicates that there is an internal problem with the unit during power up. If this occurs, it is recommended that the R2000 Radiometer be serviced. -
Page 38: Display Indicates 'Cal' Message
Remove the battery from its holder and replace with the same specified type observing correct polarity (+ and -). Substitution of any other type of battery is not recommended and will void the warranty. Refer to Section 8 for battery reorder information. Close the battery compartment and hand-tighten into place. -
Page 39: Display Indicates 'Lg' Message
If the EXT icon is illuminated on the display with the Err message displayed it indicates that the R2000 Radiometer was unable to communicate with an external adapter. Display Indicates ‘LG’ Message The LG message as illustrated below will appear when the R2000 Radiometer is not detecting a light guide. -
Page 40: Display Indicates 'Loc' Message
Display Indicates ‘Loc’ Message If the Loc message appears on the display when a keypad button is pressed it indicates that the function has been ‘locked out’. Display Indicates ‘CLO’ Message If the “CLO" message appears on the display it indicates that there is something wrong with the Real-Time Clock (RTC). -
Page 41: Optical
7 Technical Specifications* 7.1 Optical Wavelength Range: 250-1000 nm Maximum Range: Power: 1mW – 15W Irradiance: 2mW/cm – 475W/cm Resolution: Power Range: 0.007-1.999mW 0.01mW 2.00-19.99mW 0.01mW 20-199.9mW 0.1mW 200-1999mW 2.00-19.99W 10mW Accuracy: ± 5% typical, ± 10% maximum Auto-ranging: Power: 1 –... -
Page 42: Electrical
7.2 Electrical Battery Type: 3.6 volt Lithium, non-rechargeable 2.2 Ah I/O Ports: Connect only to RS-232 Pin 1 (Shield) – GND equipment that Pin 2 (Ring) – Tx is IEC 950 Pin 3 (Tip ) – Rx compliant Remote Input Port: 6-Pin Mini-DIN connector (use only with optional Cure Site &... -
Page 43: Environmental Conditions
Environmental Conditions Operating Environment Conditions Installation Category II Pollution Degree 2 Ambient Temperature: 10 to 35 degrees Celsius Relative Humidity: 15% to 95% (non-condensing) Atmospheric Pressure: 700 to 1060 hPa Altitude: 2000 meters (maximum) Transport and Storage Conditions Temperature: -10 to 60 degrees Celsius Relative Humidity: 10% to 100% (non-condensing) Atmospheric Pressure:... -
Page 44: Regulatory Compliance
Regulatory Compliance Safety and Electromagnetic Compatibility: The R2000 Radiometer has been tested and found to comply with product safety and electromagnetic compatibility requirements. For a complete list of tests and for certification details, please contact your OmniCure representative or visit: https://www.excelitas.com/product/omnicure-r2000-uv- radiometer CE Marking... - Page 45 generates, uses, and can radiate radio frequency energy and, if not installed and used in accordance with the instruction manual, may cause harmful interference to radio communications. Operation of this equipment in a residential area is likely to cause harmful interference in which case the user will be required to correct the interference at their own expense.
-
Page 46: China Rohs
China RoHS The symbol above indicates that this product is in compliance with China RoHS requirements. Hazardous Substances Polybromin Polybrom Part Hexavalent ated Lead Mercury Cadmium inated Name Chromium diphenyl (Pb) (Hg) (Cd) biphenyls (Cr (VI)) ethers (PBB) (PBDE) Printed circuit board assembl... -
Page 47: Weee Directive
WEEE Directive The symbol above indicates that this product should not be disposed of along with municipal waste, that the product should be collected separately, and that a separate collection system exists for all products that contain this symbol within member states of the European Union. -
Page 48: Accessories
9 Accessories Excelitas Canada Inc. carries a full line of replacement parts, supplies and accessories for the R2000 Radiometer. Our team of light-based technology experts can recommend light delivery solutions for a range of manufacturing, illumination and biomedical applications. We also welcome custom requests for unique light delivery requirements. - Page 49 5mm Proximity Adapter Reorder No. 019-01041 Lamp Output Adapter - Optional Reorder No. 019-01033 http://www.excelitas.com/omnicure Excelitas Canada Inc. 2022 All rights reserved Page 48 035-00310R Rev. 3...
-
Page 50: Warranty
10 Warranty Excelitas Technologies warrants, to the original purchaser for a period of one (1) full year, calculated from the date of purchase, that the equipment sold is free from defects in material and workmanship. In the event of a claim under this guarantee, the equipment is to be sent postage and carriage paid, including a description of the fault, to the Excelitas Technologies Service Centre. - Page 51 This guarantee may not form the basis for any claims for damages, in particular not for compensation of consequential damages. Warning There are no User serviceable parts within the R2000 Radiometer. Opening the main R2000 Radiometer enclosure will void the warranty. http://www.excelitas.com/omnicure Excelitas Canada Inc.
-
Page 52: Contact Information
11 Contact Information Excelitas Canada Inc. 2260 Argentia Road Mississauga, Ontario L5N 6H7 CANADA Tel.: +1 905 821-2600 Toll: +1 800 668-8752 (USA and Canada) Fax: +1 905 821-2055 https://www.excelitas.com/omnicure-x-cite-inquiries Technical Assistance: techsupport@excelitas.com https://www.excelitas.com/ox_service_request_form For a complete listing of Authorized OmniCure Distributors and Service Centres, please go to https://www.excelitas.com/dealer-search http://www.excelitas.com/omnicure... - Page 53 http://www.excelitas.com/omnicure Excelitas Canada Inc. 2022 All rights reserved Page 52...
Need help?
Do you have a question about the OmniCure R2000 and is the answer not in the manual?
Questions and answers