Table of Contents
Advertisement
Advertisement
Table of Contents

Related Manuals for ClonerAlliance ViewPro


Summary of Contents for ClonerAlliance ViewPro
- Page 1 ClonerAlliance ViewPro User Manual...
- Page 2 ClonerAlliance ViewPro User Manual This documentation describes how to use ClonerAlliance ViewPro (Model: CA-997VP) device. Copyright Notice Copyright © ClonerAlliance Inc. All rights reserved. Documentation Version 1.0.1 No part of this publication may be reproduced, transmitted, transcribed, stored in a retrieval system, or translated into any language or computer language, in any form or by any means, electronic, mechanical, magnetic, optical, chemical, manual, or otherwise, without the prior written permission of ClonerAlliance Inc.
- Page 3 Before using ClonerAlliance ViewPro, please ensure that you read and understand the safety precautions below: 1. Do not attempt to open the case of ClonerAlliance ViewPro or modify it in any way, as this will void the warranty. 2. Keep ClonerAlliance ViewPro away from water and other liquids, as this may cause the unit to malfunction.
-
Page 5: Table Of Contents
............22 How to Playback the Recorded Files on ClonerAlliance ViewPro? Playback the Recorded files on ViewPro directly . - Page 6 ............48 Setting for live stream in ClonerAlliance Helper (Windows) .
-
Page 7: Getting Started
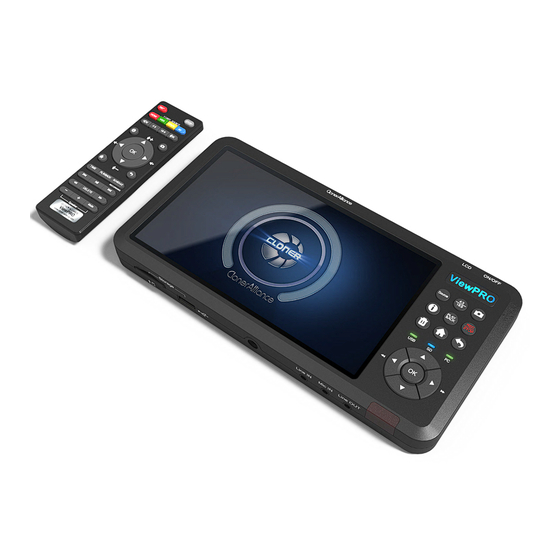
GETTING STARTED 1.1 Box Contents a. Power Adapter b. Remote Control c. ClonerAlliance ViewPro d. User Manual e. USB-A to Micro-B cable f. HDMI Cable g. MMI Cable h. Tripod... -
Page 8: Product Diagram
ClonerAlliance ViewPro User Manual 1.2 Product Diagram 1. SD Card slot: Insert SD Card 2. USB slot: Insert a USB flash drive or mobile hard disk and record videos to this storage medium. 3. Tripod Hole: Mount the device to a tripod. - Page 9 11. IN: Connect an HDMI Cable between the video player 8. To PC: Connect the USB-A to Micro-B Cable between and ClonerAlliance ViewPro. PC and ClonerAlliance ViewPro for recording videos 12. MMI: MMI input(AV, VGA, YPbPr) port. Please don’t to PC.
- Page 10 ClonerAlliance ViewPro User Manual ViewPro Indicator Storage Indicator • Switch input sources • Display the information about source and recording • Adjust the aspect ratio • Playback the recorded files • Take a snapshot • Start/Stop recording • Delete recorded files •...
-
Page 11: Indicator Diagram
ClonerAlliance ViewPro User Manual 1.3 Indicator Diagram 1. ViewPro indicator • Color: Stable BLUE • Status: Recording Resolution is 1920*1080. • Color: Stable GREEN • Status: Recording Resolution is 1280*1024/1280*720 /1024*768. 1.3. Indicator Diagram... - Page 12 ClonerAlliance ViewPro User Manual 2. Storage indicator USB Indicator No USB Storage Device connected Solid Green USB Storage Device is connected Blinking Green In recording process and saving files to USB Storage Device SD Indicator No SD Card inserted Solid Blue...
-
Page 13: Remote Diagram
ClonerAlliance ViewPro User Manual 1.4 Remote Diagram Start recording. Set the system time Stop recording. Play back the contents in the storage device Select HDMI as the input signal. Schedule the recording tasks Select VGA as the input signal. Back to the previous file Select YPbPr as the input signal. -
Page 14: Osd Menu How To Navigate Device Menu
OSD MENU HOW TO NAVIGATE DEVICE MENU 2.1 Settings Menu You can use the remote or the control panel of ClonerAlliance ViewPro to adjust settings. Please press button to display settings menu. • Show up the Settings Menu There are four categories of settings: 1. -
Page 15: System Settings
ClonerAlliance ViewPro User Manual 2.2 System Settings • Show time – On: System time shows on the screen. – Off: System time doesn’t show on the screen. • Record Resolution – 1920*1080 – 1280*1024 – 1280*720 – 1024*768 • Bitrate –... - Page 16 ClonerAlliance ViewPro User Manual • Loop recording – On: Enable loop recording. Under this setting, when the USB storage device is full, it will keep recording and previous files will be overwritten. – Off: Disable loop recording. Under this setting, when the USB storage device is full, it will stop recording automatically.
-
Page 17: Image Settings
ClonerAlliance ViewPro User Manual 2.3 Image Settings • Brightness Adjust the brightness. • Contrast Adjust the contrast. • Saturation Adjust the saturation. • Backlight Adjust the backlight. • Decoder update Update decoder. • Encoder update Update encoder. • Restore Restore default settings. -
Page 18: Audio Settings
ClonerAlliance ViewPro User Manual 2.4 Audio Settings • HDMI Volume: Set the volume of HDMI. • Mic Volume: Set the volume of Mic. • Line in Volume: Set the volume of Line in. • Speaker Volume: Set the volume of speaker. -
Page 19: Schedule Settings
ClonerAlliance ViewPro User Manual 2.5 Schedule Settings • Schedule Recording – On: Enable schedule recording. – Off: Disable schedule recording. • Schedule mode – Once – Every Day • Time ranges – Max task number is up to 5 * Press the right and left arrows to choose a setting category... -
Page 20: How To Record Videos To The Usb/Sd Storage Device? Connect
Tips: If you want to monitor the output image on TV, you can connect ClonerAlliance ViewPro from OUT port to TV via an HDMI cable. Please note that the output image will either display on the screen of ClonerAlliance ViewPro or the TV, it can NOT... - Page 21 ClonerAlliance ViewPro User Manual Tips: When recording to USB storage devices, please use a premium USB flash drive or mobile hard disk with high speed to avoid unexpected problems such as file loss. 3.1. Connect...
-
Page 22: Record Videos
• Record videos with the buttons on ClonerAlliance ViewPro 1. Power on all devices, the video image from the video player will be displayed on the screen of ClonerAlliance ViewPro. If a TV is connected to the OUT port of ClonerAlliance ViewPro, then the video will be displayed on the TV. - Page 23 ClonerAlliance ViewPro User Manual 3. Press the Rec/Stop button on ClonerAlliance ViewPro, then the storage LED will blink blue or green, which indicates ClonerAlliance ViewPro is in the process of recording. 3.2. Record videos...
- Page 24 • Record videos with the remote included with ClonerAlliance ViewPro 1. Power on all devices, the video image from the video player will be displayed on the screen of ClonerAlliance ViewPro. If a TV is connected to the OUT port of ClonerAlliance ViewPro, then the video will be displayed on the TV.
- Page 25 2. Before recording, please make sure that you have inserted a USB storage device or SD card to ClonerAlliance ViewPro device. 3. Press the Rec button on the Remote of ClonerAlliance ViewPro, then the storage LED will blink blue or green, which indicates ClonerAlliance ViewPro is in the process of recording.
- Page 26 ClonerAlliance ViewPro User Manual 3.2. Record videos...
-
Page 27: Take Snapshots
Remote at any time. If you got Mic connected, you also can adjust the volume of Mic during recording by pressing the volume up/down button on the Remote. 5. Press the Stop button on ClonerAlliance ViewPro remote, check the status of storage indicators, when the LED turns to solid blue or green, it indicates the videos have been saved. -
Page 28: Record Live Commentary Or Voice-Over
ClonerAlliance ViewPro can capture and mix dual audio channels coming from game console and your microphone. Capture your live commentary with the microphone jack, which is built into ClonerAlliance ViewPro. Plug a microphone and then capture your gameplay with your live voice! •... - Page 29 ClonerAlliance ViewPro User Manual It is compatible with most 3.5mm audio standard MICs, you can mix your voice into source video. • Connect Line in Line in socket is compatible with 3.5mm audio connector, such as audio mix device, mp3 players and cell phones.
- Page 30 ClonerAlliance ViewPro User Manual You can easily mix audio via “Line in”by using 3.5mm audio cable to connect to audio devices. After connected audio device to “Line in”, it will directly mix audio to HDMI embedded audio. It also can be monitored from “Line out”and output devices.
- Page 31 ClonerAlliance ViewPro User Manual You can press volume up/down button on the Remote control of ClonerAlliance ViewPro to adjust the volume of Mic. The up/down buttons on the Remote control: 3.4. Record live commentary or voice-over...
-
Page 32: How To Playback The Recorded Files On Cloneralliance Viewpro
1. Plug the USB storage device or SD card into the “Storage”port of ClonerAlliance ViewPro. 2. Plug the power adapter into the power socket and plug the other end into the 12V port of ClonerAlliance ViewPro. Or you may install batteries into the device for power supply. - Page 33 1. After inserted the storage device to ClonerAlliance ViewPro and powered it up, please press the“PLAYBACK” button on ViewPro or on the remote control to enter the playback mode. You will see a prompt “Select storage device”. 4.1. Playback the Recorded files on ViewPro directly...
- Page 34 ClonerAlliance ViewPro User Manual 2. Choose an inserted storage, you will then see the list of the recorded videos. 4.1. Playback the Recorded files on ViewPro directly...
- Page 35 ClonerAlliance ViewPro User Manual 3. Select your desired file by using the up and down arrow buttons on the remote control/ViewPro. And then press OK to playback the selected video in full screen. 4.1. Playback the Recorded files on ViewPro directly...
- Page 36 4. During playback, you can use up/down/left/right arrow buttons on the remote to choose previous/next/rewind/forward. To go back to“Capture” mode when you are done playing back videos, simply press the“Back” button on the remote several times until you are back in “Capture”mode. 4.1. Playback the Recorded files on ViewPro directly...
-
Page 37: Playback The Recorded Media Files On Tv
ClonerAlliance ViewPro User Manual 4.2 Playback the Recorded media files on TV • Connect 1. Plug the USB flash drive to the USB socket of a smart TV which has built-in media file playback function. 2. Power on the smart TV •... -
Page 38: Playback The Recorded Media Files On Pc
ClonerAlliance ViewPro User Manual 2. Launch USB device on smart TV, then playback the files ClonerAlliance ViewPro recorded. 4.3 Playback the Recorded media files on PC • Connect 1. Plug the USB flash drive to the USB socket of PC. - Page 39 ClonerAlliance ViewPro User Manual FYI. You may Playback the recorded video files with VLC media player. Please download VLC media player software at: https://www.videolan.org/vlc/index.html If you need to Edit the recorded video files with MP4-Cloner, please download MP4-Cloner at: https://static.cloner-alliance.
-
Page 40: Schedule Recording
5.1 Set the system time Press on the remote or on the control panel of ClonerAlliance ViewPro, select ”System Setting” in the OSD menu. Set the system time by using the four arrow buttons, then press button to finish the setting. -
Page 41: Schedule A Recording
Set the schedule mode, start time and finish time by using the four arrow buttons on the remote control. Then press BACK button on remote, it will save the scheduled tasks automatically. Then ClonerAlliance ViewPro will start to record videos automatically at the scheduled time. Tips: 1. - Page 42 ClonerAlliance ViewPro User Manual time, we strongly recommend that you install a button battery to prevent the system time from being reset due to power outages. 2. If you want to record certain TV channel’s video, do select the TV channel first.
-
Page 43: How To Connect To Pc And Record Videos Directly
6.2 How to get the registration code? Please register ClonerAlliance Helper first before using, otherwise there is a watermark when you use the trial version. Launch ClonerAlliance Helper. Click ”Input registration code” button in the auto pop-up Register window. Fill in your proper Email... - Page 44 Scan the QR code below or visit https://www.cloner-alliance.com/register/ to get your registration code of ClonerAlliance Helper. The S/N of ClonerAlliance ViewPro is in the form of CVXXXXXXXX. VXXXXXXXX Click.Here If you get trouble in the process(server issue), don’t be discouraged, just send us an email with your S/N and order ID. Our support will send you the code directly(in 18 hours).
-
Page 45: Connect Cloneralliance Viewpro With Other Devices
ViewPro device to select the correct input signal. 2. Plug the power adapter into the power socket and plug the other end into the 12V port of ClonerAlliance ViewPro. Or install batteries into the device for power supply. - Page 46 After all devices have been connected properly, please power on all connected devices. The Windows operating system will prompt“Found a new hardware” and install the driver automatically. Please make sure ClonerAlliance ViewPro is connected successfully and “ClonerAlliance ViewPro Audio/Video”appears in the Device Manager (Right click My Computer –...
- Page 47 ClonerAlliance ViewPro User Manual 6.3. Connect ClonerAlliance ViewPro with other devices.
-
Page 48: Record/Capture Videos On Pc
1. After all devices are connected properly, power on the video source device and launch ClonerAlliance Helper on PC. • When you use ClonerAlliance ViewPro for the first time or restore all settings to the default, you may see the following black screen: 6.4. - Page 49 ClonerAlliance ViewPro User Manual It’s quite easy to fix it. Please visit Tips of black screen to find the answer. 2. If everything is ok and you will see the image of the video source as below: 6.4. Record/Capture videos on PC...
- Page 50 ClonerAlliance ViewPro User Manual 3. Click to start recording. Software interfaces may vary depending on the version. 4. Click to stop recording. 6.4. Record/Capture videos on PC...
- Page 51 ClonerAlliance ViewPro User Manual Tip: During recording, you can also click to pause at anytime. When you want to resume, please click to continue recording. Besides, you can Click to take screenshots, click to capture GIF animation. 5. After recording, click to view the captured files, then double click the files to play back directly.
- Page 52 ClonerAlliance ViewPro User Manual 6. ClonerAlliance Helper also supports recording videos at the scheduled time. Click to enter the ”Setup” window. Then click the ”+” button. Please enable schedule recording first, and set the recording duration, starting time and repeat mode for schedule recording.
- Page 53 ClonerAlliance ViewPro User Manual 6.4. Record/Capture videos on PC...
-
Page 54: How To Livestream/Record With Obs/Cloneralliance Helper
2. Connect the USB-A to Micro-B cable between the “To PC”port and the USB port of PC. 3. Plug the power adapter into the power socket and plug the other end into the 12V port of ClonerAlliance ViewPro. Or install batteries into the device for power supply. -
Page 55: Setting For Live Stream In Cloneralliance Helper (Windows)
You may make a selection according to your own demand. 7.3 Setting for live stream in ClonerAlliance Helper (Windows) 1. Install and register ClonerAlliance Helper first. Then run it on your computer. See details about Install and register ClonerAlliance Helper (Windows Users) 2. - Page 56 Then click ”Add” to confirm settings and add a live stream server. 3. Please click to start live streaming. 4. At the same time, you also can click to capture the streaming videos. 7.3. Setting for live stream in ClonerAlliance Helper (Windows)
-
Page 57: Setting For Preview Video In Obs Studio
ClonerAlliance ViewPro User Manual 7.4 Setting for preview video in OBS studio 1. Run Open Broadcaster Software (OBS Studio). You may download OBS at: https://obsproject.com/download 7.4. Setting for preview video in OBS studio... - Page 58 ClonerAlliance ViewPro User Manual 2. Please click “+”below “Sources”and select “Video Capture Device”from the pop-up menu, then click “OK”. 7.4. Setting for preview video in OBS studio...
- Page 59 ClonerAlliance ViewPro User Manual 3. In the “Properties for Video Capture Device”window, select “ClonerAlliance ViewPro Video”in the dropdown list of “Device”, and then scroll down to the “Audio Output Mode”option. Please select “Output desktop audio (DirectSound)”in the drop-down list. Click “OK”to save the settings.
- Page 60 ClonerAlliance ViewPro User Manual 4. Now you can preview the video. Note: Please do NOT run ClonerAlliance Helper and any Third-Party Live Streaming Software like OBS Studio at the same time. You need to run each of them separately. 7.4. Setting for preview video in OBS studio...
-
Page 61: Frequently Asked Questions
Something went wrong”on LCD/TV. Please click here to find the answer. USB storage device is not detected, can not start recording, what should I do? Please proceed as follows: 1. Insert the USB storage device or SD card before powering on ClonerAlliance ViewPro. - Page 62 4GB at most due to the limitation of FAT32 format. Once the recorded file size exceeds these limitations accordingly, ClonerAlliance ViewPro will generate a new video file automatically to continue the record.(If needed, you may use bundled Windows software MP4-Cloner to combine them into...
- Page 63 ViewPro. FYI. If you want to rename the screenshot and still want to be able to view it on your TV through the ViewPro, please make sure the file name is in English without other language text and less than 70 bytes.
- Page 64 Please use another video player for a try. FYI. The recorded files may be very large in size. Try playing them back on a PC or Mac with a better CPU and graphics card. What is the best method to get help from ClonerAlliance? Chatting with our professional technical support by Live Chat is the best method to solve all problems quickly and efficiently.
- Page 65 ClonerAlliance ViewPro User Manual Due to time difference, internet connection or any other unexpected factors, ClonerAlliance technical support may miss your chat request. Don’t worry. If we missed your chat request, we will get back to you ASAP. All questions will be answered in 24 hours.
-
Page 66: Supported Resolution
SUPPORTED RESOLUTION Max up to 3840x2160@30fps 1920x1080 (50p), 1920x1080 (60p), 1920x1080 (24p), 1920x1080 (25p), 1920x1080 (30p), 1920x1080 (50i), 1920x1080 (60i), 1360x768 (60p), Input 1280x1024 (60p), 1280x720 (60p), 1280x768 (60p), 1280x800 (60p), 1024x768 (60p), 720x480 (60i), 720x480 (50i), 640x480 (60p), 720x480 (60p), 720x576 (50p) Output 1920x1080@60fps... -
Page 67: Product Specifications
PRODUCT SPECIFICATIONS Output format MP4(H.264) Supported Device NTFS, FAT32, exFAT, MBR, GPT Format Single File Size Maximum 4GB/16GB Video standard (input) HDMI 2.0 standard Input signal HDMI, VGA, YPbPr, AV, Line in, Mic, VGA Audio in Output signals HDMI (pass-through), USB, SD, Micro USB to PC, Line out Bitrate Low: 4Mbps Mid: 10Mbps High: 18Mbps Maximum USB Disk stor-... -
Page 68: After Sales Warranty
AFTER SALES WARRANTY ClonerAlliance Inc. provides 90-Day No Hassle Return(No Additional Fee) and 2-Year Replacement Warranty Service for all hardware. Please rest assured to use ClonerAl- liance products. -
Page 69: Contact Us
CONTACT US If you encounter any problem when using our products, please contact us by support@cloner-alliance.com or call 1-844-9-CLONER (toll free) and we will serve you with utmost satisfaction. We’ll offer a satisfying discount on batch purchase and affiliate program. If you are interested, please contact us by market@cloner-alliance.com. -
Page 70: Disclaimer
DISCLAIMER HDMI is a registered trademark of HDMI Licensing, LLC. USB is a registered trade- mark of USB Implementers Forum. HDMI and USB are registered trademarks of their respective companies. ClonerAlliance Inc. is not affiliated with those companies. - Page 71 Toll free: 1-844-9-CLONER Support Email: support@cloner-alliance.com Market Email: market@cloner-alliance.com www.cloner-alliance.com Copyright ClonerAlliance Inc. All rights reserved.
Need help?
Do you have a question about the ViewPro and is the answer not in the manual?
Questions and answers