Table of Contents
Advertisement
Advertisement
Table of Contents

Related Manuals for FujiFilm Apeos C3060


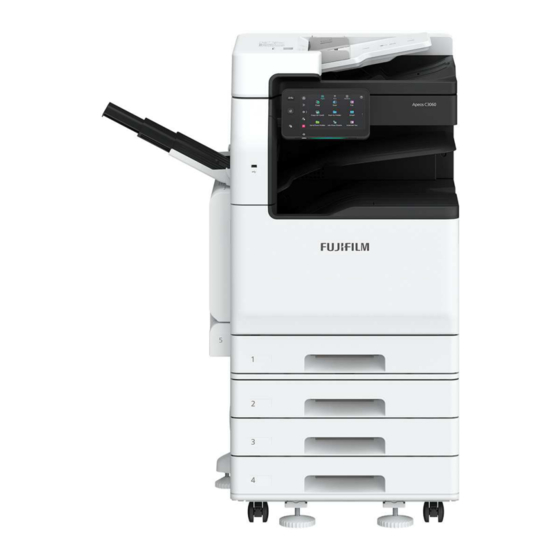
Summary of Contents for FujiFilm Apeos C3060
- Page 1 Quick User Guide Quick User Guide Apeos C3060/C3560/2060...
-
Page 2: Table Of Contents
Features Content Thank you for selecting the FUJIFILM Business Innovation Apeos C3060/2560/2060. (hereafter referred as “the machine”, the “device” or “the printer”. This complimentary user guide describes the fundamental operations on Copy, Print, Scan, and Fax procedures of the machine for ease of use of the machine. -
Page 3: Overview
Overview Control Panel / Touch Screen Overview Log In/ Out (To enter User ID) Power On/ Off Device To Enter Power saver Home Button (displays Home screen) Data LED Indicates when data or faxes are stored Status Lamp Fault/ Error: Blinking with Amber LED Completed Jobs: Breezing with Green LED Document Feeder Power... - Page 4 Copy: Reduce or Enlarge… Allows you to select copy ratio to enlarge or reduce the size of copies 1. Load documents onto the Document Feeder / Platen Glass. 2. Tap on [Copy] on the Services Home screen. 3. On the features list, tap on: a: [Reduce/Enlarge]…...
-
Page 5: 2-Sided Copying
Copy: 2-Sided Copying… Make copies of 1-sided or 2-sided documents on one side or both sides of paper 1. Load documents onto the Document Feeder 2. Tap on [Copy] on the Services Home screen. 3. On the feature list, tap [2 sided] Choose between the option of: 11 Sided : copy a 1-sided document on one side of paper... -
Page 6: Book Copying
Copy: Book Copying & 2-Sided Book Copying… Allows you to copy bound documents such as books into separate sheets of paper 1. Place a book on the Platen Glass face down. 2. Tap [Copy] on the Services Home screen. 3. On the features list, scroll down until: [Book Copying] copies 2 single- sided output b. -
Page 7: Copy Output
Copy: Collated / Uncollated Collated: sorted in sets and arranged in page order (optional: staple/hole punch) Uncollated: printed in group according to specified quantity. 1. Load documents onto the Document Feeder or Platen Glass. 2. Tap [Copy] on the Services Home screen. 3. -
Page 8: Mixed Size Originals
Copy: Mixed Size Originals… Allows different size documents copied onto matching output paper size. 1. Load documents onto the Document Feeder 2. Tap [Copy] on the Services Home screen. 3. On the features list, scroll down until [Mixed Size Originals]. 4. -
Page 9: Pages Per Side
Copy: Pages per Side (N-Up)… Allows you to copy 2, 4, or 8 pages of documents on to a single sheet of paper. 1. Load documents onto the Document Feeder 2. Tap [Copy] on the Services Home screen. 3. On the features list, scroll down to [Pages per Side] 4. -
Page 10: Booklet Creation
Copy: Booklet Creation… This feature copies the documents and form the output sheets into a booklet layout. *optional fold & staple 1. Load documents onto the Document Feeder 2. Tap [Copy] on the Services Home screen. 3. On the features list, scroll down to [Paper Supply] and choose any paper tray with landscape orientation paper. -
Page 11: Edge Erase
Copy: Edge Erase… This feature will erase the dark shadow/ dirty at the edges of document or in the center binding part of the book. 1. Load documents onto the Document Feeder or Platen Glass 2. Tap on [Copy] on the Services Home screen. 3. -
Page 12: Id Card Copying
Copy: ID Card Copying… This feature copies both sides of the ID Card onto the same side of the paper. 1. Load card onto the platen glass (within A5 scan area) Close document cover. 2. Select [Copy (ID Card)] button on the main Services Home screen. -
Page 13: Print
Print: 2-sided print & Job Types Print 2 sided documents. Sets secure print to temporarily store print data in the device with a passcode to protect your files. Files will be printed upon entering passcode. From application, select [Print], select the printer model, click [Printer Properties] / [Preference]. -
Page 14: Release Secure Print
Print: To release Secure Print jobs Files will be printed upon entering your passcode. The following describes how to print, or delete secure print jobs 1. From machine control panel, tap icon. 2. Tap [stored print jobs]. 3. Tap [Secure Print] 4. -
Page 15: Booklet Creation
Print: Booklet Creation (optional finisher) Document can be printed into a 2-side multi-page booklet layout. Output can be finished with booklet finishing, fold and center stapling (optional) From application, select [Print], select the printer model, click [Printer Properties] / [Preference]. 2. -
Page 16: Pages Per Sheet
Print: Pages per Sheet N-Up Allows you to combine multi page document and print onto one sheet of paper From application, select [Print], select the printer model, click [Printer Properties] / [Preference]. From the [Basic] tab, select options: [Pages Per Sheet (N-up)] Choose from 2 to 32 ups. -
Page 17: Watermark
Print: Watermark Document can be printed with texts such as ‘confidential’ over the print job From application, select [Print], select the printer model, click [Printer Properties] / [Preference]. From the Watermark/Form] tab, select [Watermark] Choose from any preset texts or select [New] to create new watermark. - Page 18 Print: PC Fax You can send a fax directly from your computer. Direct fax procedure may vary depending on the application you use. From application, select [Print], select the printer model, click [Printer Properties] / [Preference]. From the [Basic] tab, select [Job Type] [Fax] For more fax options, click on fax tab to select...
-
Page 19: Envelope
Print: Envelope… You can print easily on special paper types such as envelope, glossy, label with a visual image and step by step instruction. 1. From application, select [Print], select the printer model, click [Printer Properties] / [Preference]. 2. On the [Basic] tab, select [Paper Setting Wizard] 3.Select [media type] according to your paper type and click next to proceed... -
Page 20: Scan
Scan: To Email … Allows you to scan a document and send the scanned data as an email attachment 1. Load documents onto the Document Feeder. Tap [Email] icon on the Services Home screen. On the [Email] screen, tap [Address Book]. -
Page 21: Scan To Pc
Scan: To PC Allows you to scan a document and send the scanned data to a network computer (via SMB/FTP) 1. Load documents onto the Document Feeder. Select [Scan] button on the Services Home screen. 3. Tap the [Address Book] to select the recipient and click [OK] 4. -
Page 22: Scan To Folder
Scan: Scan to Folder… Allows you to scan a document and save the scanned data in a registered folder of the machine. 1. Tap [Scan to folder] button on the Services Home screen. From the [Scan to Folder] screen, select a folder to save the scanned document. -
Page 23: Send From Folder
Scan: Send from Folder… Send to folder allows you to save the scanned document, files to be printed out. Select [Send from Folder] button on the Service Home Screen Select the desired folder. Select the file(s) to print and tap [Print] Select the desired feature items as needed... -
Page 24: Advance Scan Features
Advance Scan: Preview, Mixed Sizes Original, Original Type… Additional features that you can select under [E-mail], [Scan to PC], [Store to Folder], [Scan to USB]…. 1. Load documents to scan. On the Services Home screen, select scan destination [Email], [Scan], [Scan to Folder], [Store to USB] 2. -
Page 25: Fax
Fax: Basic Faxing (Single/Broadcast), Faxing a 2- Sided Document Allows to transmit a 2-sized document to single or multiple recipients in a single operation 1. Load documents onto the Document Feeder. 2. Tap [Fax] on the Services Home screen. 3. To enter fax recipient(s) select: [Numeric Keypads] or [Address Book] Press [ADD] to enter more than one fax... -
Page 26: Confirmation Report
Fax: To enable Confirmation Report Automatically prints a transmission report when fax transmission is completed 1. Load documents onto the Document Feeder. 2. Tap [Fax] on the Services Home screen. 3. Click on and scroll to [transmission report] 4. Tap [on] to enable transmission report Tap [Start] button to begin fax process... -
Page 27: Usb Media
USB: Print from USB … Data/Files stored in the USB (2.0) can be printed from the device. Supportable / Recognized files are PDF, JPEG, TIFF, XDW, 1. Insert the USB memory device into the memory slot. 2. The following screen displays upon detected USB device a. -
Page 28: Store To Usb
USB: Scan to USB … Allows you to scan and stored the scanned data to a USB memory device Insert the USB memory device into the memory slot. Note: If the pop up message “USB media has been inserted” is not displayed, tap the [USB] icon on the home screen instead 2. -
Page 29: Mobile Printing
Mobile Printing Allows you to print & scan directly from your mobile via FUJIFILM Print Utility app Download the ‘Print Utility V3’ app via ‘Google Play’ or Apple ‘App Store’ Launch the application and register the machine by tapping [tap here to register] on the bottom of the screen. -
Page 30: Troubleshooting
Maintenance : Clearing Paper Jams NOTE: Follow instructions displayed on the Touch Screen to remove the jammed paper. Paper Jam in the Document Feeder (DADF) 1) Pull up the front handle of the 3) Open the document cover, ) Remove the document. cover and open the cover grip the lever to open the side until it stops. - Page 31 Maintenance: Clearing Paper Jams Note: Follow instructions displayed on the Touch Screen to remove the jammed paper Warning! The machine parts are very hot to touch and remove. Never touch a labeled area indicating 'High Temperature' and 'Caution' to avoid burns. Areas of paper jam include fusing unit [A1], Center Tray Exit [A2], Duplex Unit [A3] Paper Jam in Fusing Unit [A1]...
- Page 32 Maintenance : Replacing Consumables Note: The machine will prompt a message when it is time to order a new Toner Cartridge. Replacing Toner Container Caution: Place a few sheets of paper on the floor before removing the cartridge. This will allow any excess Toner to fall on the paper. Replace Toner Cartridges while the machine powered ON.
-
Page 33: Replacing Consumables
Maintenance: Replacing Consumables Replacing A2 Finisher Staple Cartridge 1: Ensure the machine is not 2: Remove the used cartridge 3: Check to ensure that there is operating and open the front no staple inside of the cover. finisher 5. Remove the jammed staple (1) 4: Push the metal part of the 6: Insert the cartridge into the and return the pushed-up... -
Page 34: Machine/Job Status
Machine Status Billing Information Important: Billing Information is different from On the Machine Panel, tap icon. Usage Counters Select <Device status>, <Billing Information> CWIS properties. User should submit Color Impressions : Total full color (Copies + Prints) meter readings based on the meter from machine Black Impressions : Total B/W (Copies + Prints + Faxes) -
Page 35: Consumables Part No
Consumables Part No. B4/B5 Finisher with A2 Finisher B4/B5 Finisher Standard Unit Booklet Maker Consumables Part Number Product Code Quantity/Box Toner Cartridge Black [K] CT202488 1 unit/box Toner Cartridge Cyan [C] CT202489 1 unit/box Toner Cartridge Magenta [M] CT202490 1 unit/box Toner Cartridge Yellow [Y] CT202491 1 unit/box... -
Page 36: Job Status Screen
Job Status Allows you to check current, pending, and completed jobs. You can also cancel or resume a pending /inactive job. 1. From machine home screen, tap 2. The [All Jobs] screen displays the current or pending jobs. Select a job, to view the status of the job a) Completed [successful] b) Completed with error [unsuccessful] 3. -
Page 37: Register New Address
Register New Address (Email / Fax Recipient) You can register frequently used addresses on the address book. Select address type from Fax, IP Fax, I-fax, Email & Server. (Up to 5000 addresses can be stored. 1. From machine home page, select [Address Book] icon on the top left corner and tap 2. -
Page 38: Support & Downloads
Support & Download (Drivers & Self-help) Check out FUJIFILM Business Innovation website @ fujifilm.com/fbmy... -
Page 39: Ep-Bb Self Registration
For Green Report, kindly Self-Register your account 30 days after activation date. Please follow the steps below to register. Open a web browser and key in the below address https://service-fb.fujifilm.com/direct_app/ An e-mail notification with the personalized URL will be sent via e-mail... - Page 40 Click on the URL and you will be redirected to the following link. Proceed with the application by accepting the Legal Agreements. Complete the Online Application form to Continue. Your application will be processed. Thank you .
- Page 41 Notes...
- Page 42 Notes...
- Page 43 Notes...
- Page 44 This Quick User Guide is printed on FUJIFILM Apeos C3060/2065/2060 Copyright Reserved © 2022 by Customer Training Department FUJIFILM Business Innovation Asia Pacific Pte. Ltd. Printed in Malaysia For Service & Supplies Enquiries (Nationwide) Toll Free : 1-300-88-1163 Online support: fujifilm.com/fbmy...
Need help?
Do you have a question about the Apeos C3060 and is the answer not in the manual?
Questions and answers