Table of Contents
Advertisement
Advertisement
Table of Contents

Related Manuals for Asus ROG SWIFT PG48UQ


Summary of Contents for Asus ROG SWIFT PG48UQ
- Page 2 Product warranty or service will not be extended if: (1) the product is repaired, modified or altered, unless such repair, modification of alteration is authorized in writing by ASUS; or (2) the serial number of the product is defaced or missing.
-
Page 3: Table Of Contents
Contents Notices ......................iv Safety Information ..................v Care & Cleaning ..................vi Takeback Services ..................vii Chapter 1: Product Introduction Welcome! ..................1-1 Package Contents ................ 1-1 Monitor Introduction ..............1-2 1.3.1 Front View ............... 1-2 1.3.2 Back View ............... 1-3 1.3.3 Remote Control ............... -
Page 4: Notices
Notices Federal Communications Commission Statement This device complies with Part 15 of the FCC Rules. Operation is subject to the following two conditions: • This device may not cause harmful interference, and • This device must accept any interference received including interference that may cause undesired operation. This equipment has been tested and found to comply with the limits for a Class B digital device, pursuant to Part 15 of the FCC Rules. These limits are designed to provide reasonable protection against harmful interference in a residential installation. This equipment generates, uses and can... -
Page 5: Safety Information
Safety Information • Before setting up the monitor, carefully read all the documentation that came with the package. • To prevent fire or shock hazard, never expose the monitor to rain or moisture. • Never try to open the monitor cabinet. The dangerous high voltages inside the monitor may result in serious physical injury. • If the power supply is broken, do not try to fix it by yourself. Contact a qualified service technician or your retailer. -
Page 6: Care & Cleaning
This symbol of the crossed out wheeled bin indicates that the product (electrical, electronic equipment, and mercury-containing button cell battery) should not be placed in municipal waste. Please check local regulations for disposal of electronic products. AEEE yönetmeliğine uygundur Care & Cleaning • Before you lift or reposition your monitor, it is better to disconnect the cables and power cord. Follow the correct lifting techniques when positioning the monitor. When lifting or carrying the monitor, grasp the edges of the monitor. Do not lift the display by the stand or the cord. -
Page 7: Takeback Services
Where to find more information Refer to the following sources for additional information and for product and software updates. ASUS websites The ASUS websites worldwide provide updated information on ASUS hardware and software products. Refer to http://www.asus.com Optional documentation Your product package may include optional documentation that may have been added by your dealer. These documents are not part of the standard package. -
Page 8: Chapter 1: Product Introduction
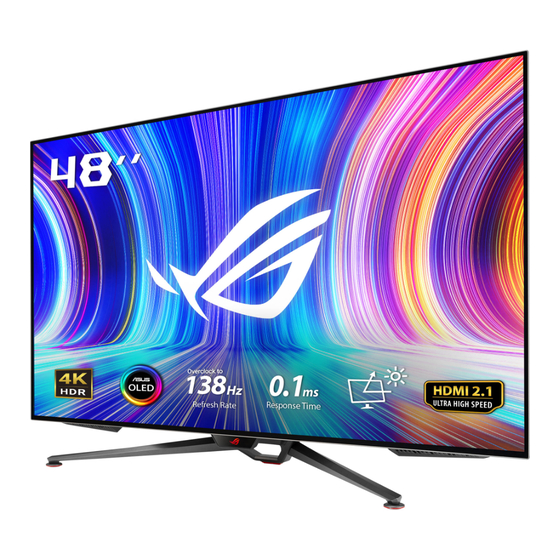
Chapter 1: Product Introduction Welcome! ® Thank you for purchasing the ASUS OLED Gaming monitor! The latest widescreen OLED monitor from ASUS provides a crisper, broader, and brighter display, plus a host of features that enhance your viewing experience. With these features, you can enjoy the convenience and delightful visual experience that the monitor brings to you! Package Contents Check your package for the following items: OLED Monitor Monitor Base Quick Start Guide Warranty Card Power Cord Ultra High Speed HDMI 2.1 Cable DP Cable USB Cable Remote Control Battery Input/Output Port Cover Color Calibration Testing Report ROG Sticker If any of the above items is damaged or missing, contact your retailer immediately. -
Page 9: Monitor Introduction
Close button: • Exit the OSD menu. • Turn on the OSD menu when the monitor enters standby mode or display the "NO SIGNAL" message. Control buttons: • Turn on the OSD menu. Enact the selected OSD menu item. • Increase/Decrease values or moves your selection up/down/left/ right. Power button: Turn the monitor on/off. ASUS LCD Monitor PG48UQ Series... -
Page 10: Back View
1.3.2 Back View HDMI-2 HDMI-1 USB 3.0 downstream ports: These ports are for connection with USB devices, such as USB keyboard/mouse, USB flash drive, etc. USB 3.0 downstream port: This port is for connection with USB flash drive to update the firmware. USB 3.0 upstream port: This port is for connection with a USB upstream cable. The connection enables the USB ports on the monitor. HDMI ports: These ports are for connection with an HDMI compatible device. • A. HDMI2.1: These ports are for connection with an HDMI V2.1 compatible device. • B. HDMI2.0: These ports are for connection with an HDMI V2.0 compatible device. -
Page 11: Remote Control
Shortcut 2 button: By default, it is GameVisual hotkey. To change the hotkey function, go to the MyFavorite > Shortcut > Shortcut2 menu. Volume Down button: Decrease the volume level. Volume Up button: Increase the volume level. For battery replacement: Open the battery cover and install the batteries into the battery compartment. Then replace the battery cover. ASUS LCD Monitor PG48UQ Series... -
Page 12: Gameplus Function
1.3.4 GamePlus Function The GamePlus function provides a toolkit and creates a better gaming environment for users when playing different types of games. The crosshair overlay with 6 different crosshair options letting you choose the one that best suits the game you're playing. There are also on screen timer and stopwatch you can position on the left of the display so you can keep track of the gaming time; while the FPS (frames per second) counter lets you know how smooth the game is running. Sniper function (only available when HDR is disabled on your device) is customized for first-person shooters. You can select the magnification ratio and the type of alignment in sequence. To activate GamePlus: Press the GamePlus hotkey on the remote control. Move the Navigation button up/down to select among different functions. - Page 13 Crosshair (Practice Mode) Sniper (Practice Mode) Timer Stopwatch NEXT BACK/EXIT NEXT BACK/EXIT NEXT BACK/EXIT GamePlus — Sniper GamePlus — Timer GamePlus GamePlus 1.2x 1.2x 1.5x 1.5x 2.0x 2.0x NEXT BACK/EXIT NEXT BACK/EXIT GamePlus — Stopwatch ASUS LCD Monitor PG48UQ Series...
-
Page 14: Gamevisual Function
1.3.5 GameVisual Function The GameVisual function helps you select among different picture modes in a convenient way. To activate GameVisual: Press the GameVisual hotkey on the remote control. Move the Navigation button up/down to select the desired setting. Scenery Mode: This is the best choice for scenery photo displaying • with GameVisual Video intelligence Technology. Racing Mode: This is the best choice for racing game playing with • GameVisual Video intelligence Technology. Cinema Mode: This is the best choice for movie watching with •... -
Page 15: Chapter 2: Setup
Chapter 2: Setup Attaching the Stand Remove the input/output port cover from the rear of the monitor. Then remove the Allen wrench from the cover. Replace the input/output port cover. Then align and install the stand onto its slot. Using the Allen wrench, secure the stand with the four (4) screws. • We recommend that you cover the table surface with soft cloth to prevent damage to the monitor. ASUS LCD Monitor PG48UQ Series... -
Page 16: Cable Management
2.2 Cable Management You can organize the cables with the help of the input/output port cover. Arranging the cables • Using the input/output port cover: the cover can be attached or • detached. Chapter 2: Setup... -
Page 17: Detaching The Stand (For Vesa Wall Mount)
Remove the input/output port cover from the rear of the monitor. Then remove the Allen wrench from the cover. Replace the input/output port cover. Using the Allen wrench, remove the four (4) screws securing the stand. Remove the stand from the monitor. • We recommend that you cover the table surface with soft cloth to prevent damage to the monitor. • The VESA wall mount kit (300 x 300 mm) is purchased separately. • Use only the UL Listed Wall Mount Bracket with minimum weight/load 22.7kg (Screw size: M6 x 15 mm). ASUS LCD Monitor PG48UQ Series... -
Page 18: Connecting The Cables
2.4 Connecting the Cables Connect the cables as the following instructions: HDMI-2 HDMI-1 To connect the power cord: • a. Connect the power adapter securely to the monitor’s DC IN input. b. Connect one end of the power cord to the power adapter and the other end to a power outlet. To connect the DisplayPort/HDMI cable: •... -
Page 19: Turning On The Monitor
You can either press the button on the remote control or the button on the monitor to turn on the monitor. If the Power Indicator function is enabled and an input source is detected, the power LED will light up red to indicate that the monitor is turned on. The power LED will not light up in Power Saving mode. ASUS LCD Monitor PG48UQ Series... -
Page 20: Chapter 3: General Instructions
OSD (On-Screen Display) Menu 3.1.1 How to Reconfigure You can either use the remote control or the Control buttons on the monitor to navigate through the menu and make adjustments. HDMI-1 3840x2160@ 60Hz Racing Mode ROG Swift PG48UQ HDR OFF Gaming Overclocking Image Variable Refresh Rate Color... -
Page 21: Osd Function Introduction
• For supported GPUs, minimum PC system and driver requirements, please contact the GPU manufactures. • GamePlus: Configure the gaming environment. See 1.3.4 GamePlus Function for details. • GameVisual: Select the picture mode. See 1.3.5 GameVisual Function for details. • Shadow Boost: Adjust the monitor gamma curve to enrich the dark tones in an image, making dark scenes and objects much easier to be seen. ASUS LCD Monitor PG48UQ Series... - Page 22 Image Configure the image settings. HDMI-1 3840x2160@ 60Hz Racing Mode ROG Swift PG48UQ HDR OFF Gaming Brightness Image Uniform Brightness Color Contrast Input Select VividPixel PIP/PBP Setup HDR Setting MyFavorite Aspect Control System Setup Blue Light Filter MOVE/ENTER BACK EXIT • Brightness: Adjust the brightness level. •...
- Page 23 Display Color Space Image Color Temp. Color Saturation Input Select Six-axis Saturation Gamma PIP/PBP Setup MyFavorite System Setup MOVE/ENTER BACK EXIT • Display Color Space: Select the color space for the monitor color output. • Color Temp.: Select the desired color temperature. • Saturation: Adjust the saturation level. • Six-axis Saturation: Adjust the saturation for R, G, B, C, M, Y. • Gamma: Set the color mode. ASUS LCD Monitor PG48UQ Series...
- Page 24 Input Select Select your desired input source and toggle the Auto Input Detection function between on and off. The monitor input source will not automatically switch when the Auto Input Detection function is disabled. HDMI-1 3840x2160@ 60Hz Racing Mode ROG Swift PG48UQ HDR OFF Gaming Auto Input Detection Image DisplayPort Color HDMI-1(v2.1)
- Page 25 PIP/PBP Setup Power Key Lock MyFavorite Key Lock System Setup Power Setting OSD Setup BACK MOVE/ENTER EXIT • Language: Select the OSD language. • Sound: Configure the sound related settings. Volume: Adjust the volume level. • • Mute: Enable/Disable the mute function. Sound Source: Select the monitor sound comes from which • source. Sound Output: Set the sound output setting to the speaker, • line out, or headphone. ASUS LCD Monitor PG48UQ Series...
- Page 26 AudioWizard: Select the sound mode. • • USB Hub: Sets the USB Hub availability during standby. • Power Indicator: Turn the power LED indicator on/off. • Power Key Lock: Disable/Enable the Power key. • Key Lock: Enable this function to disable all function keys. Press the Navigation button down for more than five seconds to cancel the key lock function. • Power Setting: Select the power setting mode. If the setting is set to Standard Mode, it may result in higher power consumption. On the other hand, if the setting is set to Power Saving Mode, it may cause limited luminance performance.
- Page 27 • system to automatically adjust the logo brightness to correct the potential picture quality issues. • DisplayPort Stream: Select DisplayPort 1.2 or DisplayPort 1.4 according to the graphic card DP version. • DSC: Enable/Disable the DSC (Display Stream Compression) function. • HDMI CEC: Enable/Disable the HDMI CEC function. If the function is enabled, you can use the remote control to control the devices connected to the monitor through the HDMI ports. • Information: Display the monitor information. • All Reset: Select YES to revert all settings to the factory default mode. ASUS LCD Monitor PG48UQ Series...
-
Page 28: Specifications
3.2 Specifications Panel type OLED Panel size 47.53”W (16:9, 120.7 cm) wide screen Max. resolution 3840 x 2160 Pixel Pitch 0.274mm x 0.274mm 135nits (Normal)(Full-White pattern) Brightness 900nits (HDR 3%) Contrast ratio 1,500,000:1 178˚/178˚ Viewing angle (H/V) Display colors 1.07 Billion colors 0.1ms Response time 8 color temperatures Color temperature selection Analog input DisplayPort v1.4 x 1, HDMI v2.0 x 2, HDMI v2.1 x 2 Digital input Earphone jack Audio output... - Page 29 20 languages (English, French, German, Italian, Spanish, Dutch, Portuguese, Russian, Czech, Croatian, Multi-languages Polish, Romanian, Hungarian, Turkish, Simplified Chinese, Traditional Chinese, Japanese, Korean, Thai, Indonesian) DP cable, HDMI cable, USB cable, power cord, quick Accessories start guide, warranty card, input/output port cover, color calibration testing report, ROG sticker cTUVus, CB, CE, ErP, FCC, ICES-3, CCC, BSMI, CU, C-Tick, VCCI, PSE, J-MOSS, RoHS, WEEE, Windows Compliance and Standards 7 & 10 WHQL, KC, KCC, E-STANDBY, TUV-Flicker Free, TUV Low Blue Light, UkrSEPRO, PSB, MEPS, *Specifications subject to change without notice. 3-10 ASUS LCD Monitor PG48UQ Series...
-
Page 30: Outline Dimensions
Outline Dimensions 1067.9 3-11 Chapter 3: General Instruction... -
Page 31: Troubleshooting (Faq)
• Perform All Reset via OSD. • Select the appropriate color temperature (Color Temp.) via OSD. HDR content is not played • Make sure the input source supports HDR properly playback (with proper system settings and latest software). • Make sure the content is HDR encoded. 3-12 ASUS LCD Monitor PG48UQ Series... -
Page 32: Supported Timing List
Supported Timing List HDMI 2.1 - HDMI1/2 HDMI 2.0 - HDMI3/4 640x480@60Hz 640x480@60Hz 640x480@60Hz 640x480@75Hz 640x480@75Hz 640x480@75Hz 720x480@60Hz 720x480@60Hz 720x480@60Hz 720x576@50Hz 800x600@60Hz 720x576@50Hz 800x600@60Hz 800x600@75Hz 800x600@60Hz 800x600@75Hz 1024x768@60Hz 800x600@75Hz 1024x768@60Hz 1024x768@75Hz 1024x768@60Hz 1024x768@75Hz 1280x720@60Hz 1024x768@75Hz 1152x864@75Hz 1920x1080@60Hz 1280x720@50Hz 1280x720@60Hz 1920x1080@120Hz 1280x720@60Hz 1280x960@60Hz 1920x2160@60Hz...