Advertisement
- 1 Important Safety Information
- 2 Selecting the Right Helmet
- 3 Specifications
- 4 Using Your Helmet Correctly
-
5
Maintaining Your Helmet Correctly
- 5.1 Shell Cleaning
- 5.2 Interior Cleaning
- 5.3 Vent Cleaning
- 5.4 Shield Cleaning
- 5.5 Visor & Shield Removal
- 5.6 Visor & Shield Installation
- 5.7 Cheek Pad Removal
- 5.8 Cheek Pad Installation
- 5.9 Crown Pad Removal
- 5.10 Crown Pad Installation
- 5.11 Chin Curtain Removal
- 5.12 Chin Curtain Installation
- 5.13 Replacement Parts
- 5.14 Do Not Modify Your Helmet
- 6 Storing Your Helmet Correctly
- 7 Helmet Replacement
- 8 Warranty
- 9 Videos
- 10 Documents / Resources

For your safety, it is important that you completely read the owner's manual and all warning labels.
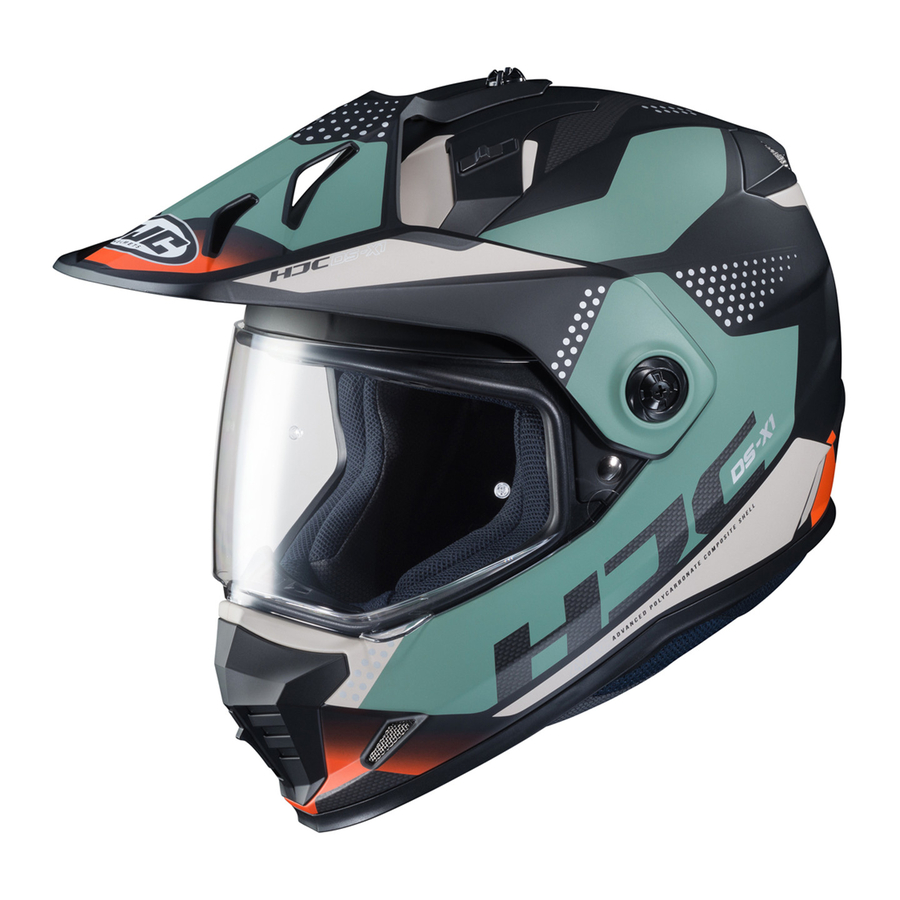
- Advanced Polycarbonate Composite Shell: Revolutionary design with unique integrated visor. Lightweight, superior fit and comfort using advanced CAD technology.
- "ACS" Advanced Channeling Ventilation System: Full front to back airflow flushes heat and humidity up and out.
- Plush, Nylex Interior: Crown and cheek pads are removable and washable.
- Large Eye Port: For maximum visibility and superior goggle fit.
DOT Approved
SIZES: XS-2XL
Please visit www.hjchelmets.com for more information about HJC helmets.
Important Safety Information
The instructions in this manual are designed to help you select the right helmet, wear it properly, take care of it, and know when to replace it. Failure to follow these instruction may increase your risk of serious injury or death in an accident. In order to get the most protection possible from your helmet, you should always do the following:
- Wear your helmet when you ride;
- Handle your helmet carefully to avoid accidental damage; and
- Ride safely – do not take risks because you are wearing a helmet.
Although your HJC helmet is designed to reduce or prevent some injuries when worn, no helmet can protect you from all possible or foreseeable impacts. For example, your helmet cannot protect you from spinal or neck injuries. In addition, there is no guarantee that your helmet will PREVENT injuries to the area of your head that is covered. A low speed accident may even result in serious injury or death.
Selecting the Right Helmet
Never buy a used helmet or borrow someone else's helmet. Over time the protective foam in helmets will adjust to the contours of a user's head. A used or borrowed helmet may not offer as much protection as a new helmet.
Wearing the wrong size helmet can increase your risk of serious injury or death in an accident. A helmet that is too large for your head may be dislodged or knocked off in an accident. To select the right size helmet for your head, follow these instruction:
- Measure your head. Wrap a tape measure around your head about one inch (2.5cm) above your eyebrows.
- Use the sizing chart to select the helmet size that corresponds most closely to your head measurement. If your head size falls between two helmet sizes, try on the larger helmet first and then the smaller size.
Size ChartXS S M L XL 2XL Hat Size 6 5/8 - 6 3/4 6 7/8 - 7 7 1/8 - 7 1/4 7 3/8 - 7 1/2 7 5/8 - 7 3/4 7 7/8 - 8 Centimeter 53-54 55-56 57-58 59-60 61-62 63-64 Inch 20 7/8 - 21 1/4 21 5/8 - 22 22 1/2 - 22 7/8 23 1/4 - 23 5/8 24 - 24 3/8 24 3/4 - 25 1/4 ![]()
The size chart is only for reference. Always try the helmet on and follow this manual's instructions for a proper fit.
- Use the sizing chart to select the helmet size that corresponds most closely to your head measurement. If your head size falls between two helmet sizes, try on the larger helmet first and then the smaller size.
- Try on the helmet by grasping both chin straps to pull the helmet completely onto your head, ensuring that the top of your head is in contact with the top of the helmet interior.
- Check for a proper fit. To make sure your helmet is the right size, check that:
- The helmet inner lining fits snugly around your head.
- The top pad presses firmly on your head.
- The cheek pads contact your cheeks.
- There is no space around your brow under the inner lining. Test this by trying to insert your fingers. If the helmet does not fit snugly, try on a smaller size.
- Check your field of vision when trying on a helmet. Some helmets may obstruct or block your vision when looking left, right, up, or down.
![]()
Always make sure you can see well enough to safely operate your motorcycle. - Test the helmet fit by placing your hands on each side of the helmet. While holding your head as motionless as possible, try rotating your helmet from left to right then up and down. If you can feel the helmet padding sliding on your head, it is too big, try a size smaller. You should feel the helmet move the skin on your head and face as you try to move the helmet.

- Fasten the retention system (chin strap) as tight as possible under your jaw without causing pain. There must be no slack in the strap, and the strap must be tight up against your jaw.
- Test the retention system (chin strap)
- Put your hands on the back of the helmet and try to push the helmet off by rotating it forward.
- Put your hands on the front of the helmet above your forehead (or on the chin guard) and try to push the helmet off by rotating backward.
")
![]()
If helmet comes off or shifts over your eyes, try another size or another model or brand. You must be able to see the edge in your upper field of vision.

")
Repeat steps 3 throught 8 until you find a helmet that fits your head snugly and securely.
Specifications


- Outer Shell
- Rear Venturi Exhausts
- Impact Absorbent Liner
- Comfort Liner
- Lower Rear Exhaust Venturi Vents
- Rubber Edge Trim
- Chin Strap
- Double "D" Ring
- Chin Strap Snap
- Side Chin Vents
- Mouth Vent
- Eyeport Gasket
- Tool-less Shield
- Anti fog lens Pins
- Visor Side Screws
- Visor
- Top Front Vents
- Visor Center Adjust Screw
Using Your Helmet Correctly
To reduce the risk of serious injury or death and to help prevent damage to your helmet:
- Never adjust your helmet accessories while riding – Only make helmet adjustments when stopped.
- Never drop your helmet – Dropping your helmet may crack the shell or damage the protective foam. The damage may not be visible. Your helmet is only designed for ONE impact. Refer to "Helmet Replacement" for more information on what to do after helmet has been dropped.
- Never wear anything between your head and your helmet – this may reduce the effectiveness of your helmet.
- Never hang or hook your helmet on anything including mirror stalks or sissy bars - Doing so may cause damage to the helmet protective foam or liner.
- Never use insect repellent on or around your helmet – insect repellant may damage your helmet's shield, shell, protective foam, or other components.
- Never expose helmet to gasoline or gasoline fumes – Gasoline may damage your helmet's shield, shell, protective foam, or other components.
- Never use a dark or tinted face shield at night or in low visibility conditions.
- If you have any questions on what other substances may damage your helmet, please contact us. - Always wear eye protection – If you are not using a helmet with a face shield, always wear eye protection when riding. Always lock your face shield in place when you are riding.
- Always be alert for sounds – Your helmet may impair your hearing. However, your helmet is not a form of hearing protection.
- Always store your helmet in its helmet bag when not in use to help reduce accidental surface damage.
To reduce the risk of serious injury or death, always use your helmet correctly.
Inspect your helmet
To ensure that your helmet is in the best condition to maximize your protection, always inspect your helmet for damage before riding:
- Check the shield and shield ratchet – re-tighten shield ratchet screws if necessary. Be sure not to over-tighten any screws. Plastic base plate screws can break and plastic screws can strip the screw sleeves if over-tightened.
- Check for helmet damage. If your helmet is damaged or cracked, stop using it immediately. See "Helmet Replacement" section for further information. If your helmet has been dropped, you may not be able to see the damage.
- Check for worn or damaged parts. Plastic components may wear out over time. If you find worn or damaged parts, replace them or purchase a new helmet. See "Replacement Parts" for information on parts replacement.
If parts fall off while riding, your vision may be blocked which could cause an accident.
- Check the retention system (chin strap) for damage. If it is frayed or ripped, replace the helmet.
- Check that all pads are in place. Both of the cheek pads and the crown pads must be in place.
Check Your Face Shield
If your face shield is scratched or damaged it may reduce the visibility-replace if necessary. Always make sure you can see well enough to safely operate your motorcycle.
Fasten the Retention System
Fasten the retention system (chin strap) as tight as possible under your jaw without causing pain. There must be no slack in the strap, and the strap must be snug up against your jaw. If the retention system is not tight, your helmet may become dislodged or knocked off in an accident.
Double "D" Ring
Do not rely on the snap to secure the helmet. The snap is provided only to prevent the strap from flapping in the air. Fasten the retention system only in the following manner:

Visor Adjustment
Visor adjustment is critical to ensure a full range of vision. HJC recommends adjusting the visor to its highest position, lowering it only when riding in muddy conditions to offer better "roost" protection. (DO NOT over tighten the side or center adjustment screws).

Maintaining Your Helmet Correctly
Shell Cleaning
Only use approved methods to clean the helmet. Using other unapproved chemicals or methods may damage the helmet shell or lining. A damaged helmet may increase your risk of serious injury or death in an accident.
Glossy Finish. HJC recommends cleaning your helmet with products designed for automotive cleaning and polishing. All HJC helmets are finished with an automotive type base coat/clear coat finish. Rubbing compounds can be used for deep cleaning to remove many scratches and scuffs. Follow the product's instructions diligently. Over polishing with rubbing compounds can cause light abrasions which may dull the finish of your helmet. Stickers and decals will leave adhesive residue when removed. To remove the adhesive residue, use alcohol swabs. Be certain to immediately wipe away the excess liquid and clean the area with soap and water once the adhesive residue is removed. Do not use excessive pressure while rubbing when attempting to remove the adhesive residue, instead use multiple light treatments.
Non-Glossy Finish. For our flat finish (non-glossy) helmets, we recommend using warm water and mild soap. Use multiple treatments for heavier dirt. Do not use excessive pressure or rubbing compounds while cleaning the surface as a "glossy" effect could be created, running the flat finish appearance.
Interior Cleaning
Although we recommend changing a helmet every 3 to 5 years, the accumulation of sweat, humidity and dirt can deteriorate the fabric and stitching and this may cause odor. To wash HJC removable pads, HJC recommends regular machine washing and air drying. For non-removable interiors, HJC recommends using bacteria and mildew eliminating products such as "Helmet Fresh."
Vent Cleaning
Dirt and debris can find its way into venting of your HJC helmet. Compressed air cans used for cleaning computer keyboards may be used to blow the debris from the ventilation system. It is recommended that you remove any removable pads before doing this process.
Shield Cleaning
The helmet shield is made of polycarbonate materials with a polyurethane abrasion resistance coating. It should be cleaned using a weak solution of mild soap and warm water. Never use hot water, salt water, benzene, thinner, gasoline or any other harsh agents. Treat carefully when cleaning to preserve the abrasion resistant coating. When deep scratches are visible, it is highly recommended that the helmet shield be replaced. Tinted shield are for "Day time use only" and are not suitable for use at night or in conditions of poor visibility.
Visor & Shield Removal
- Unscrew the visor center adjust screw.

- Unscrew the visor side screw.

- The visor and the shield will be automatically released off the helmet.


Visor & Shield Installation
- Align and insert the top of the visor(A) and shield(B) guide into the plate-gear guide.

- Install the bolt ring(C) and the visor side screws(D).

- Install the visor center adjust screw(E).


Always check to make sure helmet pads are installed before using the helmet. A helmet with missing or improperly installed pads may increase your risk of serious injury or death in an accident.
Cheek Pad Removal
There are 3 snaps holding the cheek pad in place.
- Gently pry the check pad away from the interior, releasing the snaps.

- Grasp the cheek pad near its center and gently pull it free from the chin strap.


Cheek Pad Installation
- Feed the chin strap through the opening in the cheek pad.

- Align and fully slide the cheek pad plastic plate between shell and EPS.

- Clip the cheek pad's 3 small male snaps to the 3 female snaps fixed on the shell interior.


Crown Pad Removal
- Grasp the crown pad fabric as close as possible and pull/pry away from the helmet.

- Repeat same at rear.


Crown Pad Installation
- Install the front section first by aligning the plastic shell base and the crown pad plastic sleeve, ensuring that the center and side holes are properly aligned. Press the crown pad plastic sleeve (center portion) into the center of the channel which is built into the plastic shell base, working your way outward to each side.

- Align and snap the two rear snaps into place.


Chin Curtain Removal
- Grasp the chin curtain fabric (one side at a time) at the bottom corners and gently pull the sleeve down and away from the shell.


Chin Curtain Installation
- Center the front plastic sleeve of the chin curtain with the shell. Force the chin curtain's plastic sleeve in between the shell and EPS.


Replacement Parts
Always check to make sure helmet pads are installed before using the helmet. A helmet with missing or improperly installed pads may increase your risk of serious injury or death in an accident.
Do Not Modify Your Helmet
Your HJC helmet is designed to meet DOT standard. Contact HJC America for more information about the DOT standard.
Modifying your helmet may increase your risk of serious injury or death in an accident. Do not modify your HJC helmet. Modifications include the following:
- drilling holes;
- cutting shell, liner, or strap;
- modifying the retention system, including adding a chin cup;
- removing parts;
- painting; and
- attaching accessories that are not manufactured by HJC for this helmet.
If you have questions about modifications, please contact HJC, See back cover for contact information.
Storing Your Helmet Correctly
An improperly stored helmet san become damaged and may increase your risk of serious injury or death in an accident. You should:
- Store helmet in a cool and dry place,
- Keep helmet away from pets and other animals,
- Keep helmet away from heat in excess of 122°F and do not set on or near hot surfaces.
- When helmets left out in the sun for extended periods of time, it may fade overtime.
Helmet Replacement
Although your HJC helmet is constructed with the best materials available to offer a long-lasting product, it will eventually need to be replaced. Immediately replace your helmet if:
- It has suffered an impact. Your helmet is only designed for ONE impact. An impact may fracture the outer shell or compress the impact absorbing liner. You may not be able to detect this damage. Any impact in a crash or a drop from as low as 4 feet is enough to damage your helmet.
- The shell, lining, or retention system is damaged. The helmet shell, the impact absorbing lining, and the retention system must be in good condition to provide you with the most protection.
Even if your helmet has not been damaged, it needs to be replaced every 3 to 5 years depending on how much you use it. Over time, UV rays and adhesive and component aging will damage your helmet. Wearing a damaged helmet may increase your risk of serious injury or death in an accident.
If you are unsure if you need to replace your helmet, contact HJC America before using your helmet again.
Helmet Disposal
If you buy a new helmet, destroy the old one to ensure it cannot be reused. Do not sell or give away your old helmet, even if it has not been damaged. Over time the protective foam in the helmet will adjust to the contours of your head. If someone else uses this helmet it will not provide them with as much protection.
Warranty
HJC hereby extends a limited warranty to the purchaser of a HJC helmet that the helmet is free of defects in materials and workmanship.
Coverage
This warranty is applicable to manufacturer's defects only and is good up to one year from the date of purchase, It does not apply to any problems arising out of wearer's misuse, negligence, modifications, accidents, etc.
Disclaimer
Any warranty of merchantability and any implied warranty are hereby expressly disclaimed. In addition HJC shall not be liable for any consequential damages.
Procedure
In order to receive warranty, please take your helmet, your receipt showing the date of purchase, and a brief memo that includes a description of the problem, your name, and phone number tothe authorized HJC dealer from which you purchased your helmet.
511 S. Harbor Blvd. #V. ● La Habra ● California ● 90631
tel. 562.407.2186 ● fax. 562.802.7706
www.hjchelmets.com
If you have any questions, please e-mail us at: info@hjchelmets.com
HJC VINA LIMITED COMPANY
Made In Vietnam

VideosHJC DS-X1 Helmet Review Video
Documents / Resources
References
Download manual
Here you can download full pdf version of manual, it may contain additional safety instructions, warranty information, FCC rules, etc.
Advertisement


Need help?
Do you have a question about the DS-X1 and is the answer not in the manual?
Questions and answers