Advertisement
Introduction
Comments by Epomaker
If you think any part of this manual needs correction, adjustment or updating, send the team a message at support@epomaker.com. You can also send a message there if you have any issues with your keyboard.
Warranty Information
Epomaker's Warranty covers any factory defects that might affect the proper functionality of your purchase. It doesn't cover any damage that may occur from normal wear and tear. If your product is defective we will send you a replacement unit. Replacement units might require you to send the defective unit back to Epomaker.
We provide a 1 year warranty for our products when bought from our website (Epomaker.com). Your item will not be covered by your 1 year warranty if the inspection shows any sign of modification or changes unsupported by the original product, these include: Changing internal components, Assembling and reassembling the product, Replacing Batteries, etc.
We will ONLY cover the item if it is bought from our stores, you do not have a warranty with us if you bought the item from another reseller or likewise. You are required to contact them to resolve issues.
Where To Buy
Website
http://epomaker.com/
Amazon US
https://www.amazon.com/s?me=A31XCF3C216O31&marketplaceID=ATVPDKIKX0DER
Amazon UK
https://www.amazon.co.uk/s?k=EPOMAKER
Amazon DE
https://www.amazon.de/s?k=EPOMAKER
Aliexpress
https://www.aliexpress.com/store/5877346
Unboxing
What's Included in the box

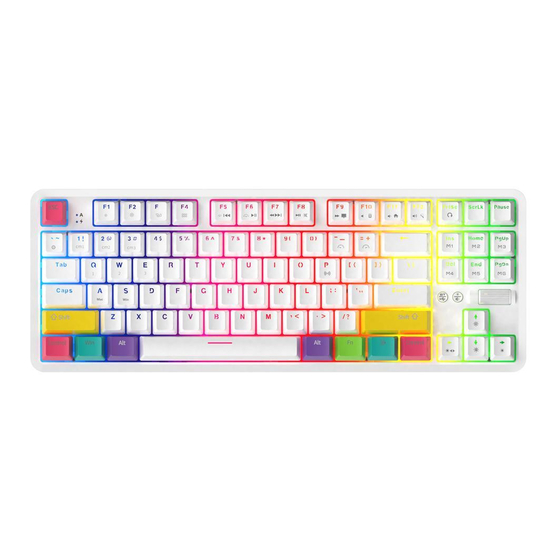
- Epomaker Ajazz K870T
- Ten Rainbow Keycaps
- USB-A to USB-C Cable (1.6m / 5.2ft)
- Ajazz K870T Manual
- Keycap Puller
Keyboard Specifications
Product Brand: Ajazz
Product Model: K870T
Battery Capacity: 2000mAh
Interface Type: USB-C
Bluetooth Capable: Yes
Wired Capable: Yes
Keyboard Dimensions: 362mm x 134mm x 34.5mm
Product Weight: 880g
Keyboard Layout: Tenkeyless, 87 Keys
Reprogrammable: No
Keycap Dimensions

The "units" of a keycap refer to a comparison between a one "unit" standard key. This is such that a 2u key will be two units of a 1u key.
Key Combinations
Mac Keys
| F1 | Decrease Screen Brightness |
| F2 | Increase Screen Brightness |
| F3 | Mission Control Access |
| F4 | Main Control Panel |
| F7 | Previous Song |
| F8 | Play/Pause |
| F9 | Next Song |
| F10 | Mute |
| F11 | Volume - |
| F12 | Volume + |
Windows Keys
| FN + F5 | Previous Song |
| FN + F7 | Next Song |
| FN + F9 | My Computer |
| FN + F10 | Calculator |
| FN + F11 | Homepage |
| Fn + F12 | Search |
System Switching
| FN + S | Windows Mode |
| FN + A | Mac Mode |
Backlight Settings
| FN + INS | Always On/Single On/Single Off |
| FN + Home | Rainbow Options |
| FN + Page Up | Rain/Rainbow Rain/Slow Rain |
| FN + Del | Reactive Press |
| FN + End | Slow Strobe |
| FN + Page Down | Pulsating Waves |
| FN + 1 | FPS Lights* |
| FN + 2 | LOL Lights* |
| FN + 3 | Office Lights* |
| FN + ~ | Record/Save Lighting Mode |
| FN + Up Arrow | Light Brightness + |
| FN + Down Arrow | Light Brightness - |
| FN + Left Arrow | Light Direction |
| FN + Right Arrow | Backlight Color |
| FN + + | Light Speed + |
| FN + - | Light Speed - |
* Lights Can Be Edited
Extra Shortcuts
| FN + WIN | Lock Windows Key |
| FN + P | Bluetooth Pairing Mode |
| FN + Q/W/E | Bluetooth Device Switching |
Quick Startup
Indicator Information
 Caps Lock Indicator - Blue = On
 Charging Indicator - Red = Charging
 Connection Mode - Off = Wired, On = Bluetooth
 Wheel Function - Off = Volume, Backlight Brightness = On
Charging Information
If the battery is low on the keyboard, the FN key will flash to to indicate that the keyboard requires a charge. When the keyboard is charging, you should see the charging indicator, which will be red. When the keyboard is fully charged, this indicator will turn off.
Bluetooth Preface
Wired Mode
Disable the Connection mode to off. Connect the USB-A to USB-C cable. You will see the animation of the lights turning off indicating the keyboard is connected. You do not have to turn on the switch at the back of the keyboard to use wired.
Wireless Mode
Make sure the switch at the back is turned to "On" and the Connection Mode indicator is On, and should be a Blue color. The keyboard is then ready to be paired.
Bluetooth Connection
Windows 10 Bluetooth
- First, charge the keyboard via a USB port on your computer until it has decent charge. You should see the Red light turn off on the indicator when it is full.
- Make sure the switch at the back is turned to "On" and the Connection Mode indicator is On, and should be a Blue color. The keyboard is then ready to be paired.
- First Press FN + P, It will flash a white colour indicating pairing mode.

- Press the windows key, and type "Bluetooth" into the search.
- Select "Bluetooth and other device settings"

- Select "Add Bluetooth or other device"

- Select "Bluetooth" from the add devices section. Make sure your "P" key is still flashing. If it stops flashing, it means your device will not be seen in the Bluetooth list and you will need to press it again so it can be paired to.

- Select the "Key" From the device selection, it might also appear as "Ajazz K870T Keyboard".
- Assign the device to a key. You can assign up to three devices using FN + Q, FN + W, or FN + E.

Your device will then be paired on that specific button. To disconnect/reconnect the keyboard, press the same button until the button turns white.


iOS Bluetooth Setup
- First, charge the keyboard via a USB port on your computer until it has decent charge. You should see the Red light turn off on the indicator when it is full. Make sure the switch at the back is turned to "On" and the Connection Mode indicator is On, and should be a Blue color. The keyboard is then ready to be paired.
- First Press FN + P, It will flash a white colour indicating pairing mode.
- Press the "Settings" Application from the home section on your iDevice.

- Select "Bluetooth" from the Settings. Make sure it is on. Make sure that your device is considered discoverable.
- Assign the device to a key. You can assign up to three devices using FN + Q, FN + W, or FN + E.

- Press "AJAZZ K870T Keyboard" to connect to your Epomaker Ajazz K870T.

When your keyboard is connected to your iPhone, it should show as "Connected". You should be able to type on it normally.

Note: If you want to disconnect the device, you can press the information icon on the side, and then select "Disconnect" or "Forget this device". Your device will then be paired on that specific button. To disconnect/reconnect the keyboard, press the same button until the button turns white.


MacOS Bluetooth
Note: make sure your device is discoverable and turned on.

- Press Command + Space to open Search
- Type "Bluetooth" into the Spacebar, select "Bluetooth" (Don't select Bluetooth File Exchange).
- First, charge the keyboard via a USB port on your computer until it has decent charge. You should see the Red light turn off on the indicator when it is full.
- Make sure the switch at the back is turned to "On" and the Connection Mode indicator is On, and should be a Blue color. The keyboard is then ready to be paired.
- First Press FN + P, It will flash a white colour indicating pairing mode.

- You should see "Ajazz K870T Keyboard" in the Bluetooth devices.
Assign the device to a key. You can assign up to three devices using FN + Q, FN + W, or FN + E when it connects to the device. - Press "Connect" to connect to the keyboard.

- You should see a keyboard symbol that is connected. The mac keyboard assistant dialogue might pop up. Follow through the instructions and the keyboard should register input properly.


Backlight Creation
Create a Backlight Preset

We can assign different colours to the three presets on the lighting. We can change the lighting within FN + 1, FN + 2, and FN + 3.
- Press the recording key by holding FN + ~. This will allow for you to assign lighting to different keys.
- Press any key you would like lit up, and press it multiple times to change the colors, and you can press it a few times and it will turn the light off.
- Press the key you want to save your custom backlighting to. You can place it in either FN + 1, FN + 2, or FN + 3.
- You can then change the colours using FN + Left Arrow if you dislike the colors you picked and want a static color.
Unofficial Software Support
The software introduced by this chapter is not endorsed by Epomaker and should be used at your own risk. We will not be held liable for using this software and should only be used by advanced users. DO NOT DOWNLOAD ANY FIRMWARE! We will not be providing any technical support for this software.
Download Unofficial Software
Download Link: https://drive.google.com/file/d/1EHPGrqPKi1RgJYXHHFy_9UvXto29uQSG/

- Download the file RAKK Lam-Ang Tuner
- Extract the File using 7Zip (https://www.7-zip.org/) or Winrar.

- Run through the installer until it installs the software. Make sure your keyboard is connected in wired mode or it will not detect the device.

- Search for the "RAKK Lam-Ang" software and launch the application.


Custom Backlight Options

- Head to the lighting section of the application

- Select your preset, you can also make user defined ones, if your keyboard is connected, then you will see it change to your desired lighting. You can also select your colour, or "Full Color", which is Rainbow Mode.

Custom Layout Options

- Go to the customize section, select one of the keys you would like to adjust

- Select the keyboard option to reassign to a keyboard key. You can also use this to assign keys, combo keys, etc. Reminder, this is not official software.
Some features might not work.

- Assign the key you would like into the menu, and then click "Ok" to save it to your keyboard.


Custom Macro Creation

- Head to the Macro section of the software, you should see the section which can be used to record and save the macros.

- Enter the name you would like to use for the macro, and then press the "New" button.

- Click "Start Record" and then begin typing, you will see on the right panel it will record your key presses.
- When you are done, click "Stop Recording, and "Apply".


VideosAjazz K870T Review Video
Documents / Resources
References
![epomaker.com]() Epomaker
–
epomaker
Epomaker
–
epomakerAmazon.com
Amazon.co.uk : EPOMAKER
Amazon.de : EPOMAKER
EPOMAKER Store - Amazing prodcuts with exclusive discounts on AliExpress
![drive.google.com]() RAKK Lam-Ang Pro FineTuner V1.00.rar - Google Drive
RAKK Lam-Ang Pro FineTuner V1.00.rar - Google Drive7-Zip
Amazon.com
Download manual
Here you can download full pdf version of manual, it may contain additional safety instructions, warranty information, FCC rules, etc.
Advertisement


Need help?
Do you have a question about the Ajazz K870T and is the answer not in the manual?
Questions and answers