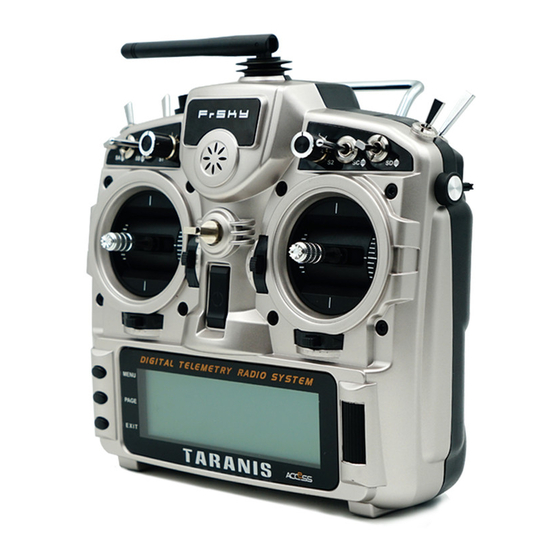
FrSky TARANIS X9D Manual
- Manual (44 pages) ,
- User manual (24 pages) ,
- Instruction manual (2 pages)
Advertisement
BUTTON NAVIGATION
TARANIS has 6 input keys: a standard set of +//ENTER/EXIT, plus 2 contextual MENU and PAGE keys. On the main views, the PAGE key will switch between the different views described in the next section. A long press of the PAGE key will bring up the telemetry display from main screen. A short press of the MENU key will call the model menu, while a long press will call the radio settings menu. In those 2 menus, a short press of the PAGE key goes to the next page, while a long press goes back to the previous one. EXIT goes back to the main views. On the STICKS and MIXER model menu pages, a long press of the MENU key will bring up a channel monitor to allow quickly looking at the result of a change in settings.
The navigation in a menu is simple: The +/- keys will navigate up/down between editable fields, or lines of fields depending on the screen. ENTER will enter the line of fields when applicable, then edit mode. In edit mode, +/- will change the value, ENTER or EXIT will validate the input and return to navigation. EXIT always goes back to the previous navigation level.
In edit mode, we have four 2-key shortcuts available: +/- together: Invert value -/ENTER: Set value to 100 EXIT/PAGE: Set value to -100 MENU/PAGE: Set value to 0
Another handy feature is the auto selection of physical inputs in the relevant fields. Instead of choosing a source or switch with the + and - keys, just move the pot or flick the switch you want, and it will be recognised. For switches the position is also auto-selected, and the +/- double key combination will allow selecting the opposite position in a pinch.
MAIN SCREENS
TARANIS has 4 main views showing the same basic information in the top part and different inputs/outputs on the lower part. On the main views a long press of the ENTER key brings up a menu where you can reset the timers, telemetry data (min/max), all of those, or bring up a statistics view (throttle graph, timers). As mentioned above, a short press of the PAGE key switches views. The new title bar includes radio battery voltage, receiver signal strength (for FrSky receivers), main onboard voltage (can be receiver battery, flight battery, or anything else depending on sensors the "Voltage" parameter in the telemetry settings), status icons (micro SD present, USB connected, trainer port mode, logging in progress), audio volume and time. The other "always present" items are model name, flight mode, and trim/pot positions. The logo is of course customisable - if you have a micro SD card in your radio, you'll be able to load your model's photo there!
The first view lists the physical switch states in the bottom left zone, and the 2 timers (when enabled) on the right.

The second shows the gimbal and switches positions, and is handy to check that all the physical controls respond as intended.

The third shows again the physical switches on the left, and the states of the 32 custom (logic) switches on the right.

The last view is a channel monitor showing the servo outputs for all 32 channels (+/- change page). If channel names are defined on the SERVOS page, they will show up here instead of the numbers for convenience.

TELEMETRY VIEW
A long press of the PAGE key from any of the main views brings up the telemetry views. The PAGE and +/- keys will then cycle between the power status screen (voltage, current, power or A1/A2 if not set, cell voltages from an FLVS-01 sensor if connected), the min/max and GPS coordinates screen, and if defined from one to three customs screens that can hold up to 12 items each, configured in the telemetry setup menu.

RADIO GENERAL SETTING MENU
RADIO SETUP
A long press of the MENU key from any of the main views brings up the mostly self-explanatory radio setup menu:

- Date/Time: To be set, they serve as info but also to give a correct time stamp to files and logs saved by the radio.
- Battery range: range of the graphical radio battery meter on the main views. To be set accordingly with the battery type you use.
- Sound: set the mode, length, pitch, volume of the system beep.
- Alarms: set the alarm values for battery low, inactivity and memory low. Sound off: if "Sound Mode" is "Quiet", the radio will not even sound warnings like a low battery. This alarm will remind you of that when turning the radio on.
- Backlight -> Mode: If set to Stks, Keys or Both, the backlight will turn on when a stick is moved and/or a key is pressed, for the duration set below.
- Backlight -> Duration: set the duration for each lighting.
- Backlight -> Alarm: Backlight will flash when an alarm sounds if it's not already on at that time.
- Splash screen: On TARANIS the splash will always be shown as the EEPROM takes some time to load. Setting this on will just show it for longer.
- GPS Time Zone: set the time zone of your area.
- Country code: Must match your geographical location to keep RF transmission parameters within regulatory requirements.
- Default channel order: Defines the order of the 4 default mixers that are inserted on channels 1-4 when creating a new model. Set this to your preference. They can of course always be moved later, this is just a time-saving option.
- Mode: This is your stick mode, e.g. Mode 1 for throttle and aileron on the right stick, Mode 2 for throttle and rudder on the left stick.
SD CARD
By short pressing the PAGE key from RADIO SETUP view it will bring up the micro SD browser where you can copy/rename/delete files and preview sounds.

TRAINER

Pressing the PAGE again, TARANIS will show the trainer function menu. This menu allows the PPMin (trainer) inputs to be configured. It enables the RAW PPM inputs to be selected to replace the sticks for training purposes. The student transmitter does not need to have the same model setup as the instructor. All the mixes on the instructors Tx will be applied to the student inputs. If, for example, you have expo on your sticks, this will be applied to the raw trainer inputs when they are selected.
The mode entry selects how the PPMin value is used:
| off | unused |
| += | add to instructor stick value |
| := | replace instructor stick value |
- The % entry applies a weighting to the PPMin value -100 to 100, Use -100 to reverse the input. Use values closer to 0 to reduce the students control sensitivity.
- Multiplier 0.0 to 5.0 scale for PPMin values. The multiplier does as it's name suggests. It multiplies the ppm Input by a set amount. Great for dealing with different tx's whose makers don't know how to encode PPM.
- CAL: Center calibration for first 4 PPMin values. This entry allows you to calibrate the mid point for the first 4 input PPM channels. Highlighting "Cal" and pressing [MENU] will calibrate the mid point for all PPM IN channels.
VERSION
This screen shows the version information for the current firmware version.

- VER: The version of the current firmware.
- DATE: Compile date for the current firmware.
- EEPR: The eeprom space has been used
SWITCH TEST

This menu will help you to visualize the current state of the trims and navigation keys.
ANALOG INPUTS

- Here you can see the analog inputs in hexadecimal format to save space and annoy you at the same time.
- A1..A4 are the gimbals (sticks).
- A5..A8 are the pots and slides.
- Battery Calibration: you can calibrate the voltage value of the tx's battery here.
Do not change it if you have not measure the battery voltage by voltmeter.
CALIBRATION

This screen allows you to calibrate the analog channels (A1..A8). If you want to do this, just follow the word displayed on the screen.
MODEL SETTING MENU
MODEL SELECTION
A short press of the MENU key from the main views brings up the model selection screen. There models can be selected, deleted, backed up and restored to/form SD card using the menu brought up by a long press on the ENTER key. They can also be copied or moved (one short press on ENTER key highlights the line, +/- create and place a copy of the model on the desired slot, while two short presses create a dotted outline where +/- simply move the current model to another slot.)

MODEL SETUP
- A short press of the PAGE key brings up the basic model setup page:

- Model image: There you can select a 64x32px, 4-grayscale.bmp file located in the BMP folder of the micro SD as your model logo.
- Timers: Persistent, if ticked, means the value is stored in memory when the radio is powered off or model is changed, and will be reloaded next time the model is used. Minute call will beep / say the time every full minute, while countdown will also give announcements several more times during the last minute. ABS counts up all the time, THs runs whenever the throttle stick isn't at idle, THt starts the timer the first time throttle is advanced, TH% counts up as a percentage of the full stick range.
- Extended limits allow setting servo movement limits up to 125% instead of 100%.
- Extended trims allows trims to cover the full stick range instead of +/-25%. The "Reset" item will reset all trims (for all flight modes).
- Trim step sets the precision of trim clicks. Exponential means very fine steps close to the trim center, but larger one the farther you get from center.
- Throttle reverse: Ensures correct operation of throttle-based timers and functions for people who like having full throttle with the stick down.
- Throttle source defines what triggers the THx functions of the timers. It's common to set it to the throttle channel instead of the stick, so that throttle cut or other modifiers are taken into account.
- Throttle Warning: TARANIS would give you a warning if the throttle is not idle when power on.
- Throttle trim: IC engine mode, where trim only affects the idle part of the throw without touching the full throttle point.
- Switch warning: Defines whether the radio requests the switches to be in predefined positions on power on/model change. To set them, arrange your switches the way you like, and long press ENTER.
- Center beep: Makes a beep when the active control(s) pass the center point. To set them, press ENTER and move the cursor, then press ENTER to confirm.
- Internal RF:
- Mode: Transmission mode of the internal RF module (OFF, D16, D8, LR12). o Channel range: Choice of which of the radio's internal channels are actually transmitted over the air.
- Receiver no. defines the behavior of the receiver match function. This number is sent to the receiver, which will only respond to the number it was bound to. By default this is the number of the model's slot when it is created. It can however be changed manually, and will not change if a model is moved or copied. If manual setting, a move or copy operation results in 2 or more models on the radio having the same number, a warning popup will show up. It is then up to the user to determine if this is the desired behavior or not.
- Bind and range check fields get activated by a press of the ENTER key. The internal module will beep every few seconds to confirm. Range check will display a popup with the RSSI value to evaluate how reception quality is behaving.
- Failsafe mode allows choosing between simply holding the last received positions, turning off pulses (like old PPM MHz receivers), or moving the servos to custom predefined positions.

- For custom positions a SET field will call the failsafe settings page, where the position can be defined separately for each channel. Select the desired channel, press ENTER to get in edit mode, move the control to the desired position, and long press ENTER to save.


HELI SETUP
A short press of the PAGE key will bring up the helicopter CCPM head mixer page. This page allows setting a swashplate type, and limiting the control authority through the Swash Ring setting.

The inputs of this mixer are the Ail and Ele sticks, plus the virtual channel selected in "Collective source". This channel would see entries added on the MIXER page for one or more pitch curves. The outputs of the CCPM mixer are CYC1, CYC2 and CYC3, which need to be assigned on the MIXER page to the channels you will connect your servos to.
Note that the settings made here have no effect unless you are using those CYC1, CYC2 and CYC3 sources. A multirotor or flybarless helicopter which uses onboard computers/mixers will not use them.
FLIGHT MODES
Next up is the flight modes screen.

8 flight modes plus the default one are available for use. Each of them can be named, has a selectable activation switch (physical or logical), a trim selection array (R, E, T, A when shown mean the mode has its own trim setting for that control, but each can be changed to a number from 0 to 9 and thus use the same value as the specified mode), and slow up/down parameters for smooth transitions between modes. The priority of the flight modes is such as the first FM of 1-8 that has its switch ON is the active one. When none has its switch ON, the default FM0 is active. The two values in the right zone represent "fade in" and "fade out", you can set the fade time (unit: second) when you enter or exit the flight mode.
STICKS
The next screen allows setting one or more input formatting rules to each stick axis. This is the first step of the control chain - where you define the amount of control authority you want on each stick.


As many lines as required can be assigned to each stick (long press ENTER brings up a popup menu), and again the first one that has its switch on (starting from the top) will be the active one. This is commonly used to create dual, triple,... rates. A name can be defined for each entry, as well as the rate and exponential ratio. A curve (built-in or custom) can also be used instead of the "simple" exponential function. The Modes line allows to choose in which mode(s) (highlighted numbers) that line can be active. If the current mode is not selected, turning on the switch will not activate that formatting line. The Side parameter limits the effect of that formatting line to only one side of the stick.
MIXER
The next page is where the actions on the controls will be mapped to servos. TARANIS does not have any predefined mixing functions that relate only to a particular model type or situation, it rather gives you a blank canvas you can build upon. The key to configuring a model on TARANIS is not to think about "activating the delta mix" like on certain radios, but rather to think about what you want your control on the model to do in response to an input on the radio's controls. The mixer is where all that "logic" gets entered.


The various channels are outputs, for example CH1 being the servo plug #1 on your receiver (with the default protocol settings). A channel without a mixer line will just center a servo that would be connected to it. Each mixer line connects one input to the channel it's on. Inputs can be:
- The 4 stick axes
- The 4 pots and sliders
- The heli mixer outputs (CYC1-3)
- A fixed value (MAX)
- The 8 physical switches
- The 32 custom (logical) switches
- The trainer port input channels (PPM1-8)
- Each of the radio's 32 channels, which allows using channels as a virtual functions for clarity (mix several inputs into one reuseable function, that can then be assigned to one or more channels). Note that the settings of the SERVOS page are not taken into account there.
All inputs work on a -100% to +100% basis. Sticks, pots, channels, CYC sources, trainer inputs will vary proportionally within this range. 3-position switches will return -100%, 0% or +100%. 2-position switches (and logic ones) will return 100% or +100%. MAX is always +100%.
If you want the servo connected to the #2 plug of your receiver to be controlled by the elevator stick, you will simply create a mixer entry on CH2 with Ele as source.
There can be as many lines as needed on each channel, and the operation between each line can be selected. To create a new line, you would long press the ENTER key, and select insert before/after. By default all the lines on a same channel are added together, but a line can also multiply those before it, or replace them. For clarity, each line that is currently active and contributing to the channel's output will have its source displayed in bold. This can be very handy when many are present and to check switch functions.

For each mixer line, several parameters are available:
- A name can be entered for convenience
- The weight (in %) of the input can be set. This sets how much of the input control has to be mixed in. A negative value inverts the response.
- An offset on the input value can be added.
- A trim can be used, for sticks this is by default the trim assiciated to the stick, but can be chosen to be one of the other trims (for crosstrimming for example) or disabled altogether. For other inputs the trim defaults to OFF, but can of course be set to one if required.
- Either a differential setting can be set (resuces response by the specified percentage on one side of the throw) or a curve (built-in or custom) can be assigned. When a custom curve is selected, a press of the MENU key will bring you to the curve editor.
- The modes the mixer line is active in can be selected (see D/Rs).
- A switch (physical or virtual) can be used to activate the mixer line.
- A sound warning (1, 2 or 3 beeps) can be set to play when the line is active.
- The Multpx setting defines how the current mixer line interacts with the others on the same channels. "Add" will simply add its output to them, "Multip" will multiply the result of the lines above it, and "Replac" will replace anything that was done before it with its output. The combination of these operation allows creating complex mathematical operations.
- Response of the output can be delayed and/or slowed down compared to the input change. Slow could for example be used to slow retracts that are actuated by a normal proportional servo. The time is how many seconds the output will take to cover the -100 to +100% range.
As a little example, if you wanted to add some compensation on the elevator channel when you increase throttle, you would go through a simple path:
- What's the control surface I want this to act on? Elevator, which is connected to CH2.
- When do I want it to move? When I move the throttle stick.
So you would simply go on CH2, and insert a new line with Thr as source. As the required compensation is likely small, you will dial in a small weight, maybe 5%. On the ground with motor disconnected, you will check the elevator compensates in the correct direction. If not, you'll invert the weight to -5%. You could then assign a switch, in order to be able to activate/deactivate it in flight to see if the amount of compensation is actually appropriate. If the correction is more complicated, you might want to assign and create a curve that matches what's required.
SERVOS
The SERVOS page is the interface between the setup "logic" and the real world with servos, linkages and control surfaces. Up to now, we have set up what we want our different controls to do, now is the time to adapt that to the mechanical characteristics of the model.

For each channel, we can define:
- A name, that will be shown on the mixer screen when the cursor is on a line belonging to that channel, on the channel monitor and on the failsafe settings page.
- An offset or subtrim.
- Low and high limits. These are "hard" limits, i.e. they will never be overridden, so as long as they are set so that your servo never forces, it really never will. They also serve as gain or "end point settings", so reducing limit will reduce throw rather than induce clipping.
- Servo reverse.
- Center adjustment. This is similar to subtrim, with the difference that an adjustement done here will shift the entire servo throw (including limits), and won't be visible on the channel monitor.
- Subtrim behavior: When set to default, adjusting subtrim will only shift the center of the servo throw. Given a -100% to +100% order from the mixer, the servo will still move exactly between the lower and upper limits, without clipping or dead band. This introduces a different stick to servo movement relation for both sides of the stick. Depending on the situation it can be either convenient or probematic, so the = setting changes subtrim effect to rather shift the servo throw "symmetrically". A full throw order from the mixer can now be clipped by the limit that is on the same side as the subtrim, while on the other side the servo will not reach the limit anymore. That way on both sides of the stick a given stick movement always results in the same servo movement. Typically using the default mode allows for faster setup of servos that are driven by a single control input, while = is required to keep correct response of control surfaces using differential and/or mixing several inputs together. The = mode typically requires reducing D/R so that a margin is left between full "control" throw and the defined limits.
- The last line after CH32 is the "Trims to Offsets" function. It is used to take the trims of the currently selected flight mode, transfer their content to the subtrims, reset them, and adjust all other flight modes' trims. If you're close to running out of trim, instead of having to adjust every value one after the other, all it takes is to long press ENTER on this line and everything is done magically. Beware that you should still check if it would not be wiser to correct the problem mechanically, especially with large values, as depending on the subtrim behavior setting it might lead to either unsufficient and assymetric throws, or clipping/dead band.
CURVES
Custom curves can be used either in input formatting or mixers. There are 16 of them available, and they can be of several types (3, 5, 9, 17pt, both with fixed or user-definable x coordinates). 3pt would be a 3-point curve with fixed x, 9pt' is a 9-point curve with user-defined x coordinates. These curves are available in addition to the "built-in" curves:
- x>0, x<0: If input is positive resp. negative, return input, otherwise 0.
- |x|: Return the absolute value of the input.
- f>0, f<0: If input is positive resp. negative, return 100%, otherwise 0.
- |f|: If input is negative, return -100%. If input is positive, return +100%.

GLOBAL VARIABLES
Global variables are values that can be substituted to the usual number on every Weight, Offset, Differential or Expo setting. Their main use is to group the adjustment of several parameters that should have the same value. For example, aileron differential on a glider with 4 surfaces responding to the aileron function. When trying to find the sweet spot for the differential value, instead of having to repeatedly edit the differential value in 4 mixers, all 4 can be set to use a global variable (e.g. GV1 resp. -GV1, selected by a long press of the ENTER key on the differential field). Then adjusting GV1 on this page is all it takes for all differentials to be updated. Global variables are also flight mode specific, so instead of having to create separate mixer lines with different values depending on the flight mode one can simply use a global variable with different values for each flight mode. This can significantly help simplifying the mixer screen by avoiding many duplicate entries. Global variables can also be adjusted in flight thanks to the Adjust GVx Custom Function that will be described later, and help adjusting those parameters that are easier to tweak in flight like D/R ratios, expos or again differential. The Global variables screen allows setting a name for each of the 5 available variables for conveniency, and seeing/setting the value each of them will have in each of the 9 flight modes.

CUSTOM SWITCHES
These are logic switches that are used to compare values and combine various conditions.
The first "operation" column lists a few arithmetical, logical and differential operations. In arithmetical ones a and b represent variables, x represents a constant. Variables can be every source, i.e. all those available in mixers, plus the 5 global variables and all telemetry values. In logical operations the available sources are all physical and other custom switches. Differential functions compare the variation of a variable since last match to another value.

- a~x: active when variable a is approximately equal to constant x (hysteresis added, as comapring a stick's value for example would pretty much never trigger an exact match)
- a<x, a>x: Active when variable a is smaller resp. greater than constant x
- |a|<x, |a|>x: Active when the absolute value of variable a is smaller resp. greater than constant x
- a<b, a>b, a=b: See above, but with 2 variables
- AND, OR, XOR: Logical and, or, exclusive or between 2 binary inputs
- d>x, |d|>x: Active when the selected variable, repectively its absolute value has changed by more than x since last time. For example, d>x
Alt 10 would trigger once every time Altitude goes up by 10m. |d|>x Alt 10 would trigger once everytime Altitude goes up OR down by 10m
Custom switches offer 3 more parameters: An extra AND condition (if selected, must be on for the custom switch to become active), a Duration parameter (the minimum time a custom switch will be active for even if its conditions become false instantly), and a delay parameter (that affects both activation and deactivation).
CUSTOM FUNCTIONS
This is the place where switches can be used to trigger special functions such as trainer mode, soundtrack playback, speech of variables etc.

The first column selects the trigger, which can be any switch (physical or custom) or ON (always on). A long press of the ENTER key will switch to "toggle" mode (ending with TIM), i.e. the selected input will be turned on when the selected switch is activated, and will remain on until it is deactivated and reactivated again. Scrolling through the list you will also find a few more options: One (triggers just once when loading a model or turning the radio on), SHdownS (short press of the momentary switch), SHdownL (long press of the momentary switch).
The available functions are:
- Safety CHx: When active, the output of CHx is forced to the selected value. A checkbox is there to enable the function, which you would typically do after ensuring the value is set correctly and the switch is off if your model is powered.
- Trainer, TrainerXXX: Enables trainer mode globally, and for individual functions. Unless a custom function is set for an individual function, turning the one set for Trainer automatically activates all 4 sticks.
- Instant trim: When activating the selected switch the current stick positions will be added to their respective trims.
- Play Sound: Play a simple tone from the available list.
- Reset: Resets the selected items (Timer 1, Timer 2, telemetry values, or all of those).
- Vario: Turns on variometer sounds (see Telemetry setup).
- Play track: Plays a sound file from the micro SD, with repeats at the specified interval.
- Play value: Speaks the current value of the selected parameter, with repeats at the specified interval.
- SD Logs: Logs the telemetry values to micro SD at the specified interval.
- Volume: Adjusts sound volume using the selected source.
- Backlight: Turns backlight on
- BgMusic, BgMusic || (pause): Plays a selected soundtrack from the micro SD. The BgMusic Pause item pauses the track and resumes it once inactive again, while switching BgMusic off stops the track completely.
- Adjust GVx: When active, sets the relevant global variable to the value of the specified source. The adjustment source can be one of 4 groups cycled through using a long press of the MENU key:
A fixed value
A proportional control, or a channel with for example specified curve/weight/offset to limit the adjustment range
Another GVAR
+1/-1, to increment/decrement the GVAR with each activation.
TELEMETRY
This page groups all the basic telemetry-related settings.

- A1 and A2 are the 2 analog ports available on D8R receivers. X8R receivers only have A1, which measures the receiver's power supply. Range sets the maximum measureable voltage, i.e. 3.3V / (divider ratio). For example with the receivers' internal sensor (1:4), this would be 13.2V. For the FBVS-01 sensor with the default ratio of 1:6, this would be 19.8V. The number next to "Ax channel" will show the currently measured value, and can be used to confirm or correct the Range setting. Offset and custom units (A, m/s, m, %...) can be used in addition to help scaling the input to accommodate 3rdparty analog sensors.
- Blades: Number of blades for the RPM sensor.
- Voltage/current: Allows choosing the input for the power calculation and mAh count features. These should match the input you've connected the corresponding sensors to.
- Variometer source: sensor type that is installed in your model. Limit sets low and high dead band (no sound), and maximum climb rate.
Following those basic parameters are the selection lists for the 3 custom telemetry screens that can be seen by long pressing the PAGE key on the main views. Each screen can either show numerical parameters (9 in the main screen area and 3 in the bottom bar), or 4 bargraphs with configurable upper/lower limits.


Each field can be one of the various available parameters, of course the corresponding sensors and/or hub must be installed in the model:
- Tmr1,2: Both timers
- Tx, RX: RSSI of the radio and receiver in D8 mode. In X16 mode, they are both identical and return the RSSI of the receiver
- A1,2: Analog ports on D8 receivers (only A1 available on X8 receivers, with receiver voltage)
- Alt: Barometric altitude sensor
- Rpm: Engine speed, number of blades is adjusted in the settings above
- Fuel: Fuel level
- T1,T2: Temperature sensors 1 and 2
- Spd, Dist, GAlt: GPS speed, distance from starting point and GPS altitude
- Cell: Lowest cell on FLVS-01
- Cels: Sum of all cells on FLVS-01
- Vfas: FAS-40/100 voltage measurement
- Curr: Current, source configured in the settings above (FAS or analog)
- Cnsp: mAh used totalizer (needs current source configured correctly)
- Powr: Power, voltage and current sources configured above
- AccX,Y,Z: Acceleration values from TAS-01
- Hdg: GPS heading
- Vspd: Vertical speed (either calculated by the radio or reported by the sensor, depending on the sensor type chosen above)
- xxx+/xxx-: Min and max values of the available parameters
TEMPLATES
The templates are currently "starting points" for model setups. When selected with ENTER long they will replace the current model's mixers and settings with the usual ones for the usage scenario they correspond to (best used on a newly created model). This can be used to build upon or tweak to achieve the desired result, or simply to get an idea of what's required for that model type.

- Clear Mixes: If this function is executed, the mixing settings in the model will be removed, please be cautious.
- 01 to 04: Four common mixing ways of airplane.
- eCCPM: Helicopter's swashplate mixing.
GET START!
FIRST STEPS
Now that you've seen the basics and that your battery has some charge, what about a little bit of practice? The first thing to do with your radio would be to configure the general settings. Get to the relevant page with MENU LONG, set time, date, sound volume to your preference (the lower end of the volume slider is typically needed when using headphones, while the upper end is good for using with the internal speaker), play with the backlight setting, set the RF country code to your location, the default channel order to your preference, and the stick mode to match your flying style. Battery gauge and alarm are factory set for the supplied battery. It's important to center the throttle stick when asked to set stick midpoints, but no need to do so for the pots.
The radio will have created an empty model for you, so after having gone back to the main view you'll be able to go to the model setup screen by pressing MENU SHORT and PAGE SHORT. There you'll want to make sure you've set the RF mode that matches the receiver you want to use. When using the internal module, to bind your receiver select the "Bind" field and press the ENTER key. The module will sound a beep every few seconds.
Now follow your receiver's instructions for binding (press and hold the F/S button then apply power for D and X receivers, connect jumper to S pins of channels 1 and 2 and apply power for V8x-II receivers). The receiver LED will flash fast to confirm binding. Press exit on the radio, Remove the jumper on the receiver if applicable, and cycle receiver power. You should now have servo control of channels 1-4 with the sticks.
SETTING UP A MODEL
TARANIS BASICS
Now that everything works, it's time to stop a moment for some theory about the basic operation of the TARANIS firmware. As briefly described above, TARANIS differs from the majority of mainstream radio by its programming philosophy. As opposed to common radios that offer a choice between a limited set of predefined usage scenarios (airplane, glider, helicopter), a number of functions that are commonly used with such models (delta, flaperon, camber, butterfly...), and have fixed assignations (sticks always control their respective channels), TARANIS offers a blank canvas on which you will build your setup: the mixer screen. This approach ensures maximum flexibility because whatever you do you will never have to work around what the radio expects you to do, which is a blessing for anybody having to work with "new" model types or configurations which still "don't exist" for mainstream radio manufacturers, and as such for which the built-in functions are usually useless. So you can see it that way: For some model types, usual predefined functions can allow setting up a model in seconds (just enable a function), but for others you'll spend hours trying to get around their limitations. On TARANIS everybody is more or less at the same level - it might take a little longer at the beginning to set up a seemingly simple model, but a complicated one won't take much more. As there is no existing function you can just turn on, it will require basic understanding of how your model is supposed to work, and what you want each control surface to do. This means that you might even learn something about your model in the process of setting it up!
The control order path starts from the sticks, goes through the STICKS screen (anything affecting control response like dual rates and exponential), continues to the mixer, and ends up being adapted to the mechanical characteristics of the model in the SERVOS screen.
EVERYTHING ABOUTTHE MIXER SCREEN
We'll start with this as it is the center of the radio. The mixer screen lists the 32 output channels to which you can link one or more inputs from a long list of physical controls (sticks, pots, trims, switches), logic sources, other channels and trainer inputs. Each assignation is done with a mixer line. A new model will have 4 predefined mixer lines on channels 1,2,3 and 4 that link the 4 sticks to them according to the channel order preference you have set. These are there purely for convenience, and can of course be edited or deleted. Let's delete them all by highlighting them, pressing ENTER LONG and choosing "Delete". Your mixer screen is now empty, which means the radio does nothing at all. Well it does, it sends out the number of channels that are defined on the model setup page to the receiver (channels 1-8 by default), but as those channels are empty in the mixer screen no servo will respond, they'll all be centered. You won't go very far with that, so you'll want to add control inputs to those channels. You'll create a mixer line on CH1 by highlighting it and pressing ENTER LONG, and will end up in the INSERT MIX page. Scroll to the "Source" field, press ENTER, and select the control you want to act on CH1. You can do it by browsing the list with the + and - keys, or take the easy route and just move the desired control (if it's a physical one, of course). Move the aileron stick, and the field will change to Ail (it might have already been there if your channel order preference set in the general settings had A for the first channel, as that's taken into account). You can leave the other parameters at their default settings, which mean:
- The mix ratio of this input is 100%, so the scaling of the mixer line's output will be equal to its input. A value of -50% would mean the output would be half of the input, and inverted.
- There is no offset, so with an input of 0 the output of the mixer line will also be 0. A value here would shift the response by that much percentage of (input x weight).
- Trim is ON, it could instead be excluded from the calculation (OFF), or one of the other trims could be used (for cross-trimming for example). D/R and expo (the entries on the STICKS screen for that channel) are used. Unticking the box would mean the mix receives the raw stick input even if a D/R is active.
- Differential is 0, so the mixer output will be symmetrical on both sides. A value of 20% would mean the line's output would be 20% less on the negative side than on the positive one. The "Diff" field is editable, and by using the +/- keys on it you'll be able to select a curve instead (predefined or custom).
- The mixer line is active for all flight modes. By "unticking" some of the numbers, you would disable that line whenever the corresponding flight mode is selected.
- No switch is assigned to the line, so it's always active (as long as the modes setting above allows it). Selecting a switch (physical or logical) would allow activating or deactivating the line whenever needed.
- Warning is off. If set to 1,2 or 3 the radio would emit 1,2 or 3 short beeps every few seconds to let you know that line is active.
- Multiplex is Add, so this line is just added to the previous ones on the same channel. If set to multiply it would multiply the calculated result of the lines above it, and if set to replace it would replace anything that's above it whenever it's active.
- Delays are 0, so if that line had a switch assigned it would be activated/deactivated instantly when the switch is toggled. Time is in seconds.
- There is no slowing down, so the line's output reacts instantly to input changes. Times set here are expressed in seconds to cover the entire range (-100 to +100). If 2 seconds are selected, the line's output will take 0.5 second to gradually sweep from 0 to +50% if the input was moved by that much. Note that slow up/down are not applicable to mix activation and deactivation, only for changes of the input. One would use a flight mode for that instead.
- You can also name the mixer line. This name is shown on the main mixer screen, so setting names is a good idea to help maintain complex setups where you might have many lines on each channel.
Note that at any time in the Mixer screen and the EDIT/INSERT MIX dialogs you can press MENU LONG to bring up the channel monitor. This makes it easy to try the different parameters and see their effect on the channel's output. In addition to this, you will see that on the mixer screen each active line has its name and source displayed in bold, so it's always clear at any given time as to which lines are actively contributing to the channel output.
The description is long, but in practice if we now do it again to control CH2 with the elevator stick it will only take a couple of seconds to select CH2, press ENTER LONG, scroll to Source, pres ENTER, mode the Elevator stick, and press EXIT twice. Setting up the mixer for a vast number of basic models is as simple as that. In addition to the 4 basic channels, if you have a model with flaps that have their own servo and that you want to control with switch SB you'll just find a free channel to connect your servo to (let's say CH6), you'll scroll to CH6 on the mixer screen, insert a mixer line, flip the SB switch when in edit mode on the source field, and EXIT twice. If you want to adjust the up/mid/full positions, a good idea would be to set up a 3-point custom curve. In the Curve setting, select c1, exit edit mode, and still on the curve field press MENU. You will be brought to the curve editor. Press Exit, and select "3pt". Press ENTER, select the first point with +/-, press ENTER, and adjust its position. Do the same for the other 2 points, and exit.
Now something more "complicated", if your model has retracts that you want to control with switch SA (which has 3 positions) but want only 2 possible output values (in and out) this won't work (choosing SA would give -100%, 0%, +100%). You'll then use the very convenient MAX source, that represents a fixed value. Create a mixer line on a channel (e.g. CH5) with MAX as source and +100% weight, you could name it "Gear Up". Now create a 2nd mixer line under the first one by pressing ENTER LONG on on it and selecting "Insert After". Choose MAX again as source, then set weight to 100%, for which it's time to remember the handy shortcut - enter edit mode, and press the + and - keys together. There, -100%. Scroll to the "Multpx" setting, and select "Replace". Now go to the switch setting, enter edit mode, flip SA in the UP position (flick it out of it first if it's already there), and press the + and - keys together. This will turn the "SAup" entry into "!SAup". This means the line is active when SA is NOT in the UP position. Name the line as "Gear Down" and you're done. What happens is: CH5 will be at 100% by default (the first mixer line is in effect), BUT when SA is either in the middle or in the DOWN position the 2nd line will activate and replace the first one, turning the output to -100%. If you go back to the mixer screen and play with SA you'll see that when not in the UP position the 2nd line will turn in bold as it becomes active, while the first one fades back to normal as it's been deactivated by the Replace type of the second line. Again that seems long, but takes as much as about 30 seconds when you're used to it. Of course if you've followed you'll certainly understood that we could have set the second line to use switch "SAup", and that subsequently the role of the 2 lines would be swapped (second active when switch is up, first in the other 2 positions). But then I wouldn't have had the opportunity to explain the!, and also as a personal preference I like my switch default positions to be UP, and the first mixer line on a channel to be the default value.
A little simple one next: You have 2 ailerons with separate servos. Using a Y-cable to link them is too old-school nowadays, so let's use another channel. We already have the first aileron on CH1, CH5 and 6 are taken by gear and flaps, so let's use CH7. We have an aileron that must move with the aileron stick, which is actually just like the first one. So let's just copy the first mixer by highlighting it and pressing ENTER LONG, and selecting copy. Move it to CH7 and press ENTER. This would work just fine, but I'll throw in a personal preference again, and change its weight to -100% because "logically" that aileron is supposed to move in the opposite direction. We'll see later why this makes sense.
Next up: a little mix. I'm going to be lazy and just tell you to go back up and check the mixer screen description a bit further up for the throttle -> elevator compensation. I'm sure it will seem much more clear now!
Let's do a delta mix. Again, what kind of control surfaces do we have, and what do we want them to do? We have 2 elevons. They must move in the same direction when the elevator stick is moved, but they must move in opposite directions when the aileron stick is moved. So, let's pick 2 channels to connect our servos to. CH3 and 7, because... why not. Trying to make you forget about old school fixed channel assignments here;) CH3 must move with the elevator stick, so we create a mixer line with Ele as source on it. CH3 must also move with the aileron stick, so we create a 2nd mixer line with Ail as source. We leave multiplexing set to "Add", as that's exactly what we want to do - the 2 inputs must be added together. Now let's discuss the weights a little. They are now set to 100%. This means that a full deflection of the aileron stick will create a full deflection of CH3, same for the elevator stick. But now as we add the 2 together, if we put the stick in the upper right corner (assuming mode 2) we have 100% + 100% = 200% output on CH3. Now, the limits defined on the SERVOS screen are set to 100% - which means that the output will be clipped. When the mixer's output for a channel goes beyond 100%, the servo won't move further. This is not different from other radios - predefined delta mixes will usually give you ratios to enter for elevator and aileron authority, which is just the same. If you enter too high ratios some of the stick throw will be ineffective. Now the discussion as to what to set the ratios to is probably endless - some are happy with 100% and clipping, some will like 50% so that there is never any clipping, and some like myself will like something a bit in the middle - I use 70%. So, let's say we now have 2 mixer lines on CH3, 70% Ail and 70% Ele. As we said, CH7 must respond the same way to the elevator input, so we add a 70% Ele mixer too. It must respond to the aileron stick by the same amount, but in the opposite direction, so we'll set... -70%. This is the reason for which I set -100% in the previous dual aileron example. Forcing yourself to enforce that logic thinking even when not really necessary will help you to get it right when it's needed. For example in the dual aileron scenario we could have set both ailerons to 100%, then used servo reverse to invert one aileron to achieve the same result on the model. BUT in the delta scenario this wouldn't work.
SERVOS SCREEN
Now that the mixer is configured and the controls' behaviors are defined, the next step is to set up the way these orders will be translated to the servos. At this point you'll want to actually connect your servos to your receiver, remove the control horns from the servos, the props from the motors (safety first), and connect a receiver battery. Bind the receiver if not done yet. Center all controls (you can look at the channel monitor and aim for 0), and for each servo start by mounting the horns so that they're as close to perpendicular to the control linkage they're going to drive as possible. Murphy's law ensures that it's always right between 2 of the steps, so use the PPM center adjustment to make them perfectly perpendicular. Using this setting instead of subtrim avoids losing throw, and makes sure the outputs seen in the channel monitor are real "control" inputs. Connect your linkages so that the control surfaces are at neutral (or middle of their expected throw for things such as flaps). Now move the radio's controls carefully to exercise the servos but being aware of possible mechanical binding. Set servo reverse where needed. Adjust the linkages in order to have a little more throw than what you'll ever need in both directions. If there is a little binding on one side to reach the appropriate side on the other and/or the throws are not symmetrical it's not a problem. Then adjust the min and max limits. These should be set so that:
- You have a little bit more throw than what you'll ever need
- There is no mechanical binding
- Throws are the same on both sides with full control input deflection
We're done for this screen. You've already named your channels of course;)
STICKS SCREEN
You've probably noticed there's one thing we haven't done yet - adjust throws. That's what we'll do now. For each stick, create a rate line. Set the weight to achieve the desired throws. Add expo if desired. This is your default rate, so don't choose a switch. If you want multiple rates, create a new line Before the default one, enter the new rate/expo, choose a switch. Repeat as many times as desired. What's important to know is that the first line that has its switch on (starting from the top) will be the active one. So if you create rates below one with no switch - it will never be active. Think about the priority if you choose switch combinations that can lead to 2 rates having their switch on - the top one will override the other. Ideally you should choose your switches so that never happens.
There, we can go and fly!
MODEL SETUP GUIDELINES
Time for a little summary. As we've seen, there's literally an infinite number of ways to do the same thing in the firmware, so let's mention a few good practices when setting up models. If you stick to them they will help you set up your model quicker, keep your setup clean, and understand what you did 6 months later. With a simple 4channel model where each servo is controlled by only one control input, if you want to reduce aileron throw you could do it either with the aileron D/R, in the weight of the mixer line linking the Aileron stick to the aileron channel, and with the Limits for that channel. For such a simple model it won't matter much where you do it, but as soon as you'll get to more complicated models with flaperons, butterfly mixes etc, doing it in the limits for example would simply make it impossible to set up the model properly.
- Start with the mixer setup. As we did above, think about what controls you have on your model and what they should do, and choose which receiver channel you want to use for each of them. On each of those channels, create one mixer line for each of the transmitter controls that should act on it. Figure out the relative amount of movement each of those must lead to, based on 100%. Forget about throws for now, if one control must have half the authority of the other set one to 100% and one to 50%. Keep the mixer dedicated ONLY to the "logical" part of the setup. If for example for complex gliders you have more than one control surface that needs to receive the same group of mixers, isolate those as a "Function" on a free "virtual" channel you know you won't use it for a servo, e.g. CH10. Then reference it in the required output channels with a 100% CH10 mixer line. This will save mixer lines and add to clarity. Name your channels and mixes that aren't self-explanatory.
- Set the servo parameters. Take good care of the mechanical setup, the better it is the easier the radio setup and the more precise your controls will be. If you need to use subtrim to artificially shift a control (for example in case of flaperons that need a far greater throw on the low side than on the high side), remember to use the "=" output mode to keep symmetry.
- Always define control throws using the Sticks screen.
Now the throws are adjusted, the mixer is set for good logic and the outputs are set for good mechanical fit. As every part of the setup is clearly separated, should you need to change something any adjustment will only require intervention on one of the screens. If you crash or change something mechanically, it will be the SERVOS screen. If your throws are too big, Sticks screen. If a compensation amount or mixing ratio is wrong, mixer screen.
Remember that there are custom switches that can be set to combine various functions, for example allow activation of some mixers only if another one is active, etc. It is also good practice to make use of the "Safety CHx" custom function to define a safety switch for the throttle channel of electric models. Select your throttle lock switch, select the correct function for your throttle channel, set the value to -100, then tick the box. While you should always set up your model without it being powered, or at least without a prop mounted, the safety box is there to avoid forcing the channel to the default value of 0 (mid throttle) while browsing the function list if your switch is active.
The "Instant Trim" custom function allows adding the current stick positions to their respective trims. It's useful for example on a new model that might be badly out of trim. Instead of having to press and hold the trim tab until the effect is sufficient, just hold the stick where required to keep level flight, and flick the selected Instant Trim switch (it should be momentary). This custom Function should be disabled once the model is trimmed, as hitting it by mistake can have the opposite effect. Once the flight is over, the "Trims -> Offsets" function at the bottom of the SERVOS page can be used to transfer the trim contents into the subtrim settings. Be aware that unless the servo mode is set to "=" an excessive subtrim amount can lead to dissymmetric throws and affect settings like differential.
ADVANCED FEATURES
FLIGHT MODES
Flight modes in TARANIS are relatively simple compared to most radios. The settings are simple: A name (displayed on the main views), a switch to activate them, a trim setting and 2 fade in/out settings. Yet they are very powerful, because the main settings are actually just located somewhere else: in the D/Rs and mixers. Each of these has a flight mode selection list, that will determine in which one(s) they are active. So (nearly) everything is done through dedicated mixers. The mixers that are controlled by a flight mode will see their activation fade in/out according to the mode's settings. This can be used to create interesting functions: For example, in our example earlier we had flaps controlled by a 3-position switch. If we wanted to slow them down, we could just use the Slow setting in the mixer. With the gear example though, as we use the MAX source and activate/deactivate a mixer line, the Slow parameter would not do anything. One solution is to leave the Switch for our second line empty, and instead assign that switch to a flight mode. The mixer line would now see its flight mode selector set to only the flight mode in question. Slow up/down is set in the flight mode parameters, and we get our nice slow gear operation. A "side effect" is that we can now also use the separate set of trims that comes with the flight mode, and take advantage of it to counter the extra drag from the gear that often causes a pitch down action.
TELEMETRY
This subject in itself has actually mostly been covered already. The telemetry settings page allows you to configure the different parameters that have been explained in the menu overviews. The telemetry views will show the data as configured. If you have a micro SD card in your radio, you can use the "SD Logs" custom function to record the telemetry data while in flight. It can then be played back in companion9x.
AUDIO
One of the major features of the radio is the speech output function. Providing a micro SD card (FAT12/16/32 format) loaded with the sound pack available for download from within companion9x is inserted in the slot in the battery compartment, the radio will be able to play audio files in response to various events like reaching trim center/ends and activation of a switch (physical or custom), to play a background music file, and last but not least to announce every available value (telemetry, parameter, stick position) in clear voice. Custom sounds can be placed in the SOUNDS folder of the card and will be available for use. Audio operation is relatively simple as it only consists of 5 "and a half" Custom Functions:
- Play Track: Just play an audio file from the micro SD when the associated switch is active. A repeat option is available, when set the sound will repeat at the set interval as long as the switch is active. This can be used to announce flight modes, gear position, flap position etc when the associated switch is activated or on request.
- Play Value: Say the value of the selected parameter when the switch is active. The repeat parameter is available too.
- BgMusic: Starts playback of a background music track (that can of course also be a timed flight program announcement). The switch must stay on in order to continue playback.
- BgMusic ||: This pauses the background track while active, and resumes playback when deactivated. The BgMusic switch must stay active the whole time or the track will start from the beginning again.
- Vario: Reproduces the sound of a glider variometer using the altitude or Vertical speed telemetry data.
- Volume: Adjusts the audio volume for the entire radio to the value of an input, e.g. a pot.
GLOBAL VARIABLES
We have already mentioned how global variables could be used to group multiple adjustments in one place, and to make that adjustment flight mode specific. It was also noted that these could be adjusted in flight - this is done using the Adjust GVx custom functions. Any time the custom function's switch is ON, the value of the global variable will follow the selected input. As a reminder, there are 4 groups of inputs that can be switched between by pressing ENTER LONG on the input field, and don't forget to tick the safety box once you're done configuring and you've made sure the switch is off - again to avoid overwriting your GVAR by mistake while scrolling the source list. This is the way to adjust values in flight. The custom function's switch serves as a "lock" to freeze the value or allow adjustment. When a variable is being updated, a popup with the variable name and new value will show up on the main views. One of the available sources for adjusting global vars is the list of channels. This is probably the main way you'll use to adjust GVARs for a simple reason: Let's say you want to adjust a D/R ratio with the S1 pot. If you select GV1 as the weight parameter of that rate line and just use the Adjust GV1 custom function with S1 as source, you will now be adjusting your rate between -100% and +100%. Being able to disable and even reverse your rate doesn't sound terribly fun, so you'll want to limit the adjustment range. The easiest way is to use a free channel for that. Create a mixer line on say CH12, and use the weight/offset/curve parameters to make that channel's output cover a range of say +50 to +80% over the pot's throw. Then, set the Adjust GV1 source to CH12.
A FEW INTERACTION EXAMPLES
The per of the system now comes from the combination of the different features. Custom switches can be used to create conditions that will trigger audio playback, for example using custom switch "CS1|d|>x Alt 10" as trigger for "Play Value Alt" would result in the altitude being announced every-time it has changed by 10m/ft. "CS2 a<x Spd 35" triggering "Play Track lowspd" would play the lowspd.wav file on the micro SD, that would be recorded to say "Low Speed" when GPS speed got under 35km/h. If you have several parameters you want to have announced sequentially on request, you could set several Play Value Custom Functions all triggered by the SHdown momentary switch. A press of this switch will then trigger playback of all the parameters one after the other.
But as we know that custom switches can be used anywhere a switch is definable, nothing prevents you from reusing that same CS2 to trigger automatic flaps deployment once speed got below 35km/h. That's right, anything can be used to affect anything.
MORE INFO
FrSky Website:
www.frsky-rc.com
Project Information:
http://code.google.com/p/opentaranis/
Companion9x:
http://code.google.com/p/companion9x/
OpenTX forums:
http://openrcforums.com
FrSky Electronic Co., Ltd
Tel: (86) 0510-85187718
Fax: (86) 0510-85187728
E-mail: frsky@frsky-rc.com
Technical Support: sales4tech@gmail.com

VideosFrSky Taranis X9D Firmware Upgrade Tutorial Video
Documents / Resources
References
![www.frsky-rc.com]() FrSky Top Rated RC Hobby Radio, Receiver and RC Model - Lets you set the limits
FrSky Top Rated RC Hobby Radio, Receiver and RC Model - Lets you set the limitsGoogle Code Archive - Long-term storage for Google Code Project Hosting.
Google Code Archive - Long-term storage for Google Code Project Hosting.
openrcforums - Index page
Download manual
Here you can download full pdf version of manual, it may contain additional safety instructions, warranty information, FCC rules, etc.
Advertisement


Need help?
Do you have a question about the TARANIS X9D and is the answer not in the manual?
Questions and answers