Advertisement
Table of Contents
- 1 Table of Contents
- 2 Section 1 Safety Instructions
- 3 Section 2 Parts Identification
- 4 Section 3 Controls
- 5 Section 4 Fuel and Engine Oil
- 6 Section 5 Running-In Your Motorcycle
- 7 Section 6 Inspection before Riding
- 8 Section 7 Riding Tips
- 9 Section 8 Inspection, Service and Maintenance
- 10 Section 9 Efi System
- 11 Section 10 Troubleshooting
- 12 Section 11 Cleaning and Maintenance
- 13 Section 12 Technical Specification
- Download this manual
Advertisement
Table of Contents

Summary of Contents for HERALD Classic 125 2018
- Page 1 CLASSIC 125 MANUAL PLEASE STUDY THIS MANUAL BEFORE USING YOUR MOTORCYCLE FOR THE FIRST TIME...
-
Page 2: Table Of Contents
To ensure you have a fun and safe ride, please read this manual carefully before riding SAFETY INSTRUCTIONS page 4 SECTION your bike. It explains how to use and maintain your Herald Classic 125cc correctly. If you SECTION PARTS IDENTIFICATION page 6... -
Page 3: Section 1 Safety Instructions
If you are unsure please visit the and understand their meanings thoroughly. Herald website which stocks a wide range of safety apparel. Do not speed! No matter what the circumstance may be, WARNING - warning information to protect you and other... -
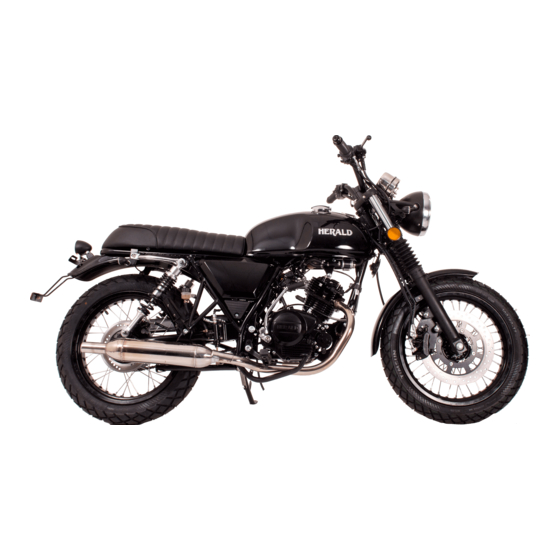
Page 4: Section 2 Parts Identification
2: PARTS IDENTIFICATION SECTION Rear indicator light Front light Seat Rear view mirror Side cover Front brake reservoir Front indicator light Fuel filter Oxygen sensor Fuel tank In-take tube Passenger grab handle Kick start Real wheel adjuster Brake reservoir Centre stand Passenger grab handle Side stand Exhaust... -
Page 5: Section 3 Controls
3: CONTROLS SECTION This motorcycle comes with two keys, please ensure the spare key is kept in a safe place. Ignition switch Clutch lever The ignition switch has three positions: Left handlebar switch OFF POSITION STEERING LOCK Instruments To engage steering lock turn handlebars In this state the ignition circuit is turned off Fuel tank lock all the way left, push key inwards and turn... - Page 6 INSTRUMENT PANEL Neutral indicator light Speedometer When this light is illuminated the transmission is in neutral, The speedometer indicates the current speed. The black which means not in gear. digits show miles per hour (mph) and the red digits show kilometres per hour (km/h).
- Page 7 LEFT HANDLEBAR CONTROL SYSTEM RIGHT HANDLEBAR CONTROL SYSTEM Clutch lever Engine kill switch To start the engine or to change gear, pull in the lever to If you press the switch at position, the engine cannot release the drive system and cut off the clutch. be started.
- Page 8 GEAR LEVER WARNING The side stand should only be used for temporary This model is equipped with 5 gear recycle transmission. parking. Never ride the motorcycle before lifting up the The gear lever is connected to the ratchet wheel. The gear side stand.
-
Page 9: Section 4 Fuel And Engine Oil
ENGINE OIL 4: FUEL AND ENGINE OIL SECTION The oil in the motorcycle engine operation helps with cooling and lubrication. Use a premium quality 4-stroke engine oil to ensure longer service life of your motorcycle. The oil should be replaced periodically. The recommended viscosity is SAE10W-40. -
Page 10: Section 5 Running-In Your Motorcycle
5: RUNNING IN YOUR MOTORCYCLE 6: INSPECTION BEFORE RIDING SECTION SECTION As mentioned previously, running in your motorcycle Allow the engine oil to circulate before riding. Allow Before riding your motorcycle, make sure to check the following items. Never underestimate the importance of these checks. correctly can extend its service life and ensure it runs to its sufficient idling time after warm or cold engine start up Perform all of them before riding the machine. -
Page 11: Section 7 Riding Tips
Using the transmission Stopping and parking 7: RIDING TIPS SECTION The transmission is provided to keep the engine operating 1. Turn the throttle grip away from yourself to close the smoothly in its normal operating range. The gear ratios throttle completely. have been carefully chosen to meet the characteristics of 2. -
Page 12: Section 8 Inspection, Service And Maintenance
MAINTENANCE CHART 8: INSPECTION, SERVICE AND MAINTENANCE SECTION 4000 8000 12000 4000 8000 12000 Regularly checking, adjusting and lubricating your bike, months months ensures the highest levels of safety. CAUTION Periodic maintenance may require you to change one Battery Brake Each check should follow the recommended method and or two parts. - Page 13 LUBRICATION CHART BATTERY The battery is located behind the side panel. Initial 4000km or Every 8000km or 6 months 12 months Installation 1. When connecting the battery using the battery lead, Throttle handle (Sliding parts) Lubricating grease connect the positive and negative poles correctly: red lead to positive (+) and black lead to negative (-).
- Page 14 FUSE AIR FILTER 1. Take off the side cover to reveal air filter. 2. Open the air filter cover screws, remove the outer cover, Your motorcycle is installed with a fuse to protect the main The motorcycle air filter is the respiratory system. Its role remove air filter.
- Page 15 SPARK PLUG ENGINE OIL CHANGE The spark plug is an important engine component, it is A lot depends on the selection of a good quality oil and the easy to check. Please remove the spark plug for inspection periodic changing of the engine oil. Daily engine oil level according to the regular maintenance and lubrication list.
- Page 16 ADJUSTING THE THROTTLE CABLE CLUTCH 1. Loosen the lock nut 1. The way to adjust the clutch is to change the tension of the clutch cable the gap of the clutch lever should be about 2. Move the adjuster to adjust the throttle free play. 4mm as measured at the clutch lever end.
- Page 17 DRIVE CHAIN Damage or wear to the drive chain means that the DRIVE CHAIN ADJUSTMENT sprockets may also be damaged. Inspect the sprockets for The drive chain is one of the main components of the the following: The motorcycle drive chain should be adjusted periodically motorcycle.
- Page 18 BRAKE SYSTEM BRAKE FLUID CAUTION This motorcycle has front and rear discs. The correct brake Check the front and rear brake fluid. If the fluid level has When changing the chain, you should use the original operation is very important for driving safely. Please pay reduced, add the recommended brake fluid.
- Page 19 BRAKE PAD REAR WHEEL BRAKE FRONT BRAKE LIGHT SWITCH Adjustment of the rear brake pedal. Inspect the front and rear brake pads by noting whether The front brake light switch is located under the brake lever or not the friction pads are worn down to the grooved limit When adjusting the rear wheel brake system, you should 2.
- Page 20 TYRES TYRE TREAD Basic parameter Front tyre Rear tyre Each time before riding, make sure to check your tyres. If Using excessively worn tyres will reduce the stability and Tyre pressure (P.S.I.) JUST DRIVER the tread pattern depth has reached its limit, you find a you may lose control.
-
Page 21: Section 9 Efi System
LIGHT BULB REPLACEMENT 9: EFI SYSTEM SECTION The light bulbs are all LED and cannot be removed. Front lamp The ECU is located in the rear below the seat by the Rear lamp/Braking lamp air filter. The ECU controls the running and fueling of the motorcycle. - Page 22 THROTTLE BODY ASSEMBLY OXYGEN SENSOR The throttle body assembly includes the idle speed control CAUTION The oxygen sensor is installed on the front end of the valve, throttle position sensor and intake temperature/ The oxygen sensor should always be checked by your exhaust pipe and is used to detect the concentration pressure sensor.
-
Page 23: Section 10 Troubleshooting
ENGINE STALLING 10: TROUBLESHOOTING SECTION 1. Check the fuel and fuel supply in the fuel tank. 2. Check the ignition system for intermittent spark. 6. If you determine there is no problem with the fuel supply Although we have carried out a comprehensive inspection 3. - Page 24 TROUBLESHOOTING EXAMPLE TROUBLESHOOTING EXAMPLE MALFUNCTION CAUSE REMEDY Remove the spark plug and check the electrode The engine turns over but will 1. Spark plug is wet 1. Using a dry cloth to wipe, calibrate the spark 1. Engine stop switch turned off 1.
-
Page 25: Section 11 Cleaning And Maintenance
IF NOT USING FOR LONG PERIODS OF TIME 11: CLEANING AND MAINTENANCE SECTION 1. Remove the spark plug and pour a spoonful of engine oil into the cylinder. Turn over the engine several times. Replace the spark plug so that the engine oil is distributed Raise up on the centre stand before cleaning the 5. -
Page 26: Section 12 Technical Specification
12: TECHNICAL SPECIFICATION SECTION ENGINE TRANSMISSION GEAR RATIO MODEL Air cooled, four-stroke FIRST GEAR 28.882 CYLINDER Single SECOND GEAR 19.429 MOTORCYCLE SPECIFICATION WHEEL AND BRAKE BORE×STROKE 54.0mm×54.0mm THIRD GEAR 14.381 OVERALL LENGTH 1900mm FRONT FORKS Hydraulically telescoping DISPLACEMENT 124cc FOURTH GEAR 11.419 OVERALL WIDTH 800 or 760mm... - Page 27 HERALD CLASSIC 125 MANUAL ALL PICTURES AND INFORMATION ARE FOR REFERENCE ONLY AND MAY BE CHANGED WITHOUT NOTICE 05/22...
Need help?
Do you have a question about the Classic 125 2018 and is the answer not in the manual?
Questions and answers