
Related Manuals for Oracle ZFS Storage DE3-24P


Summary of Contents for Oracle ZFS Storage DE3-24P
- Page 1 Oracle ZFS Storage Appliance Installation Guide, Release OS8.8.x F13767-09 August 2022...
- Page 2 Oracle Corporation and its affiliates disclaim any liability for any damages caused by use of this software or hardware in dangerous applications.
-
Page 3: Table Of Contents
Oracle Storage Drive Enclosure DE2-24C Disk Shelf 2-22 Sun Disk Shelf 2-24 Disk Shelf Components 2-27 Overview of the Oracle ZFS Storage ZS9-2 Controller 2-27 Oracle ZFS Storage ZS9-2 Physical Specifications 2-27 Oracle ZFS Storage ZS9-2 Electrical Specifications 2-28 Oracle ZFS Storage ZS9-2 Acoustic Noise Emissions... - Page 4 2-31 Oracle ZFS Storage ZS7-2 Front Panel Components 2-32 Oracle ZFS Storage ZS7-2 Rear Panel Components 2-33 Overview of the Oracle ZFS Storage ZS5-4 Controller 2-34 Oracle ZFS Storage ZS5-4 Physical Specifications 2-34 Oracle ZFS Storage ZS5-4 Electrical Specifications 2-34...
- Page 5 Installing an Oracle ZFS Storage ZS9-2 Controller Installing the Slide Rails onto an Oracle ZFS Storage ZS9-2 Controller Installing the Slide Rails into the Rack for an Oracle ZFS Storage ZS9-2 Controller Installing an Oracle ZFS Storage ZS9-2 Controller onto the Rack Slide Rails...
- Page 6 Installing the Slide Rails onto an Oracle ZFS Storage ZS4-4 or Oracle ZFS Storage ZS3-4 Controller Installing the Slide Rails into the Rack for an Oracle ZFS Storage ZS4-4 or Oracle ZFS Storage ZS3-4 Controller Installing an Oracle ZFS Storage ZS4-4 or Oracle ZFS Storage ZS3-4 Controller onto the...
- Page 7 Connecting Cluster Cables for Oracle ZFS Storage ZS7-2, ZS5-x, ZS4-4, ZS3-x, and Sun ZFS Storage 7x20 Controllers 11-3 Controller Cluster I/O Ports 11-5 Connecting Disk Shelf Cables 11-7 Powering On the Appliance Powering On an Oracle Storage Drive Enclosure DE3-24 or DE2-24 Disk Shelf...
- Page 8 Installing an Oracle ZFS Storage ZS5-4 Controller • Installing an Oracle ZFS Storage ZS5-2 Controller • Installing an Oracle ZFS Storage ZS4-4 or Oracle ZFS Storage ZS3-4 Controller • Installing an Oracle ZFS Storage ZS3-2 Controller • Installing a Sun ZFS Storage 7x20 Controller...
-
Page 9: Installation Prerequisites And Hardware Overviews
Installation Prerequisites and Hardware Overviews This section gives an overview of the Oracle ZFS Storage Appliance disk shelves and controllers, as well as the prerequisites for installation. For safety information and configuration guidelines, see: • Prerequisites for Installation • Cabinet Configuration Guidelines •... -
Page 10: Safety Information
Do not lift a disk shelf by the handles on the power supply with fan modules; they are not designed to take the weight. Cabinet and Tool Requirements Use one of the following racks for an Oracle Storage Drive Enclosure DEx-24 disk shelf: Note: Position the rack where the shelf is to be installed adjacent to the rack where the controller is installed, if separate. - Page 11 A Phillips-head No. 2 screwdriver that is a minimum of 4 inches long. • A T20 Torx driver, if using a threaded cabinet (Oracle Storage Drive Enclosure DE2-24P). • A mechanical lift is highly recommended because the chassis can be too heavy to lift otherwise.
-
Page 12: Disconnecting An Rj-45 Cable
Cabinet Configuration • For safety reasons, mount the heaviest equipment, typically disk shelves, at the bottom of the cabinet. Refer to the appropriate Oracle Safety and Compliance Guide for rack-mounting guidelines. • To best prepare for cabling controllers to disk shelves, now and in the future, mount controllers in the middle of the cabinet. -
Page 13: Cable Lengths
DE2-24C, DE2-24P, or DE3-24C disk shelves to a single chain, and do not attach more than three Oracle Storage Drive Enclosure DE3-24P disk shelves to a single chain. This only applies to systems that are performance critical. The maximum of six disk shelves per chain is available for cases where capacity is preferred over performance. -
Page 14: Supported Disk Shelf Combinations And Hbas
ZS7-2 controllers is supported in software release OS8.8.4 and later. Cabinet and Cabling Guidelines in Oracle ZFS Storage Appliance Cabling Guide, Release OS8.8.x for disk shelf intermixing guidelines and all-flash disk shelf usage. To understand which controllers support which HBA types, see... - Page 15 All DE2 Disk DE3 and DE2 DE2 and Sun Configuration All-Flash Shelves (except Shelves Disk Shelves Disk Shelves All-Flash) Oracle ZFS Storage ZS7-2 with SAS-3 4x4 port HBAs Oracle ZFS Storage ZS5-4 with SAS-3 4x4 port HBAs Oracle ZFS Storage ZS5-4...
-
Page 16: Maximum Disk Shelves Per Controller Configuration
Chapter 2 Maximum Disk Shelves per Controller Configuration Table 2-2 (Cont.) Supported Disk Shelf Combinations per Controller Configuration Controller DE3-24P All DE3 Disk All DE2 Disk DE3 and DE2 DE2 and Sun Configuration All-Flash Shelves (except Shelves Disk Shelves Disk Shelves All-Flash) Sun ZFS Storage 7320 with SAS-2... - Page 17 Max. Shelves Max. 2x4 Port Max. 4x4 Port Max. 4x4 Port Guidelines SAS-2 HBA SAS-2 HBA SAS-3 HBA Oracle ZFS Disk shelves can Storage ZS9-2 include 24x HDD/ high-end model SSD, or combine 20x HDD/SSD plus 4x write- optimized and/or...
- Page 18 Max. Shelves Max. 2x4 Port Max. 4x4 Port Max. 4x4 Port Guidelines SAS-2 HBA SAS-2 HBA SAS-3 HBA Oracle ZFS Disk shelves can Storage ZS7-2 include 24x HDD/ high-end model SSD, or combine 20x HDD/SSD plus 4x write- optimized and/or...
- Page 19 Controller Max. Shelves Max. 2x4 Port Max. 4x4 Port Max. 4x4 Port Guidelines SAS-2 HBA SAS-2 HBA SAS-3 HBA Oracle ZFS Disk shelves can Storage ZS5-4 include 24x HDD/ SSD, or combine 20x HDD/SSD plus 4x write- optimized and/or read-optimized flash accelerators (SSDs).
- Page 20 Controller Max. Shelves Max. 2x4 Port Max. 4x4 Port Max. 4x4 Port Guidelines SAS-2 HBA SAS-2 HBA SAS-3 HBA Oracle ZFS Disk shelves can Storage ZS4-4 include 24x HDD/ SSD, or combine 20x HDD/SSD plus 4x write- optimized and/or read-optimized flash accelerators (SSDs).
- Page 21 Controller Max. Shelves Max. 2x4 Port Max. 4x4 Port Max. 4x4 Port Guidelines SAS-2 HBA SAS-2 HBA SAS-3 HBA Oracle ZFS Disk shelves can Storage ZS3-2 include 24x HDD, or combine 20x HDD plus 4x write-optimized flash accelerators (SSDs). Total number of chains is four.
- Page 22 You can also connect mixed disk shelf types (Oracle Storage Drive Enclosure DE2 and legacy Sun Disk Shelves) to the same controllers, but each chain must...
-
Page 23: Overview Of Disk Shelves
Sun Disk Shelves) to the same controllers. Overview of Disk Shelves This section provides an overview of the Oracle ZFS Storage Appliance disk shelves. For installation instructions, refer to Installing Disk Shelves. For service instructions, refer to Servicing the Disk Shelves in Oracle ZFS Storage Appliance Customer Service Manual, Release OS8.8.x. -
Page 24: Oracle Storage Drive Enclosure De3-24
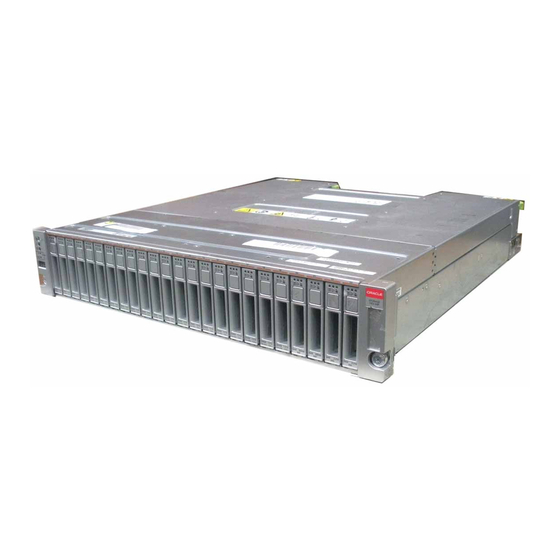
Drive Enclosure DE3-24P and DE3-24C disk shelves. Oracle Storage Drive Enclosure DE3-24P Disk Shelf Oracle Storage Drive Enclosure DE3-24P is a 2U chassis that supports 24 2.5'' SAS-3 drives. The high-performance HDDs provide reliable storage. The SSDs provide accelerated write operations, and for some controllers, read-optimized cache operations. -
Page 25: Oracle Storage Drive Enclosure De3-24C Disk Shelf
4 Power supply with fan module 1 Oracle Storage Drive Enclosure DE3-24C Disk Shelf Oracle Storage Drive Enclosure DE3-24C is a 4U chassis that supports 24 3.5" SAS-3 drives. The high-performance HDDs provide reliable storage. The SSDs provide accelerated write operations, and for some controllers, read-optimized cache operations. - Page 26 Up to four write-optimized log SSDs are supported per disk shelf. Log devices should be populated in order of slots 20, 21, 22, and 23. Read-optimized cache SSDs can also be installed in the Oracle Storage Drive Enclosure DE3-24C disk shelf, for some controllers. For slot configuration details and...
- Page 27 5 Power supply filler panel, slot 2 6 I/O Module filler panel 7 I/O Module 0 8 Power supply with fan module Note: It is especially important that power supplies and their filler panels are in the correct slots. Oracle Storage Drive Enclosure DE3 I/O Module Indicators 2-19...
-
Page 28: Oracle Storage Drive Enclosure De2-24
Drive Enclosure DE2-24P and DE2-24C disk shelves. Oracle Storage Drive Enclosure DE2-24P Disk Shelf Oracle Storage Drive Enclosure DE2-24P is a 2U chassis that supports 24 2.5" SAS-2 drives. The high-capacity HDDs provide reliable storage. The SSDs provide accelerated write operations, and for some controllers, read-optimized cache operations. - Page 29 Read-optimized cache SSDs can also be installed in the DE2-24P disk shelf, for some controllers. For slot configuration details and minimum software requirements, see Disk Shelf Configurations in Oracle ZFS Storage Appliance Customer Service Manual, Release OS8.8.x. Oracle Storage Drive Enclosure DE2-24P Status Indicators (Front View) 1 System power indicator...
-
Page 30: Oracle Storage Drive Enclosure De2-24C Disk Shelf
Overview of Disk Shelves Oracle Storage Drive Enclosure DE2-24C Disk Shelf Oracle Storage Drive Enclosure DE2-24C is a 4U chassis that supports 24 3.5" SAS-2 drives. The high-capacity HDDs provide reliable storage. The SSDs provide accelerated write operations, and for some controllers, read-optimized cache operations. - Page 31 3 SAS-2 Port 0 4 SAS-2 Port 1 5 SAS-2 Port 2 6 Host port activity indicators 7 For Oracle service only 8 For Oracle service only The Oracle Storage Drive Enclosure DE2-24C and DE2-24P disk shelves use the same I/O Module. 2-23...
-
Page 32: Sun Disk Shelf
7 Power cord tie wrap The Oracle Storage Drive Enclosure DE2-24C and DE2-24P disk shelves use the same power supply. Sun Disk Shelf The Sun Disk Shelf is a 4U chassis that supports 24 3.5" SAS-2 drives. The SSDs provide accelerated write operations, and the high-capacity HDDs provide reliable storage. - Page 33 Chapter 2 Overview of Disk Shelves 1 Locate button and indicator 2 System fault indicator 3 System power indicator 4 Disk ready to be removed 5 Disk fault indicator 6 Disk activity indicator indicator 7 Over temperature warning 8 SIM board fault indicator 9 Power supply fault indicator indicator Sun Disk Shelf Rear Panel...
- Page 34 Chapter 2 Overview of Disk Shelves 1 AC power indicator 2 DC power indicator 3 Fan fault indicator 4 Power supply fault indicator 5 Universal power connector 6 Power switch 7 Port fault indicator 8 Port OK indicator 9 SIM board OK indicator (green)/SIM board fault indicator (amber) 10 SIM locator indicator...
-
Page 35: Disk Shelf Components
• Up to 24 3.5" SAS-2 HDDs, SSDs Overview of the Oracle ZFS Storage ZS9-2 Controller This section provides an overview of the Oracle ZFS Storage ZS9-2 controller. For installation instructions, refer to Installing an Oracle ZFS Storage ZS9-2 Controller. For service... -
Page 36: Oracle Zfs Storage Zs9-2 Electrical Specifications
8.0 Bels A-weighted Idling (measured Sound Power). Oracle ZFS Storage ZS9-2 Configuration Options The Oracle ZFS Storage ZS9-2 high-end model incorporates one or two controllers and one to forty-eight disk shelves. Each controller has 10 PCle Gen3 slots in the rear, and 12 3.5"... -
Page 37: Oracle Zfs Storage Zs9-2 Front Panel Components
The most recent component specification is located at https://www.oracle.com/storage/nas/ index.html Oracle ZFS Storage ZS9-2 Front Panel Components The Oracle ZFS Storage ZS9-2 controller drive slots and front panel components are shown in the following figure. 1 RFID tag 2 System status LED: Locator... -
Page 38: Oracle Zfs Storage Zs9-2 Rear Panel Components
Chapter 2 Overview of the Oracle ZFS Storage ZS9-2 Controller Oracle ZFS Storage ZS9-2 Rear Panel Components The Oracle ZFS Storage ZS9-2 controller PCIe slots and rear panel components are shown in the following figure. 1 Power Supply Unit (PSU) 1... -
Page 39: Overview Of The Oracle Zfs Storage Zs7-2 Controller
Chapter 2 Overview of the Oracle ZFS Storage ZS7-2 Controller Overview of the Oracle ZFS Storage ZS7-2 Controller This section provides an overview of the Oracle ZFS Storage ZS7-2 controller. For installation instructions, refer to Installing an Oracle ZFS Storage ZS7-2 Controller. -
Page 40: Oracle Zfs Storage Zs7-2 Front Panel Components
(permanent filler panels) The most recent component specification is located at https://www.oracle.com/ storage/nas/index.html Oracle ZFS Storage ZS7-2 Front Panel Components The Oracle ZFS Storage ZS7-2 controller drive slots and front panel components are shown in the following figure. 2-32... -
Page 41: Oracle Zfs Storage Zs7-2 Rear Panel Components
21 Filler panel 22 Filler panel Oracle ZFS Storage ZS7-2 Rear Panel Components The Oracle ZFS Storage ZS7-2 controller PCIe slots and rear panel components are shown in the following figure. 1 Power Supply Unit (PSU) 1 2 PSU 1 status indicators (top to... -
Page 42: Overview Of The Oracle Zfs Storage Zs5-4 Controller
For information about how to connect cables to form a cluster, see Connecting Cluster Cables. Overview of the Oracle ZFS Storage ZS5-4 Controller This section provides an overview of the Oracle ZFS Storage ZS5-4 controller. For installation instructions, refer to Installing an Oracle ZFS Storage ZS5-4 Controller. For... -
Page 43: Oracle Zfs Storage Zs5-4 Acoustic Noise Emissions
75 dBA (bystander position, max. ambient). Oracle ZFS Storage ZS5-4 Configuration Options Oracle ZFS Storage ZS5-4 incorporates one or two controllers and one to forty-eight disk shelves. Each controller has eleven PCle Gen3 slots. Each controller includes six 2.5'' disk slots that accommodate two system disks. -
Page 44: Oracle Zfs Storage Zs5-4 Rear Panel Components
9 Two USB 2.0 ports 10 RFID tag Oracle ZFS Storage ZS5-4 Rear Panel Components The Oracle ZFS Storage ZS5-4 controller PCIe slots and rear panel components are shown in the following figure. 1 Power Supply Unit (PSU) 0 2 PSU 1... -
Page 45: Overview Of The Oracle Zfs Storage Zs5-2 Controller
Chapter 2 Overview of the Oracle ZFS Storage ZS5-2 Controller Overview of the Oracle ZFS Storage ZS5-2 Controller This section provides an overview of the Oracle ZFS Storage ZS5-2 controller. For installation instructions, refer to Installing an Oracle ZFS Storage ZS5-2 Controller. -
Page 46: Oracle Zfs Storage Zs5-2 Front Panel Components
Oracle ZFS Storage ZS5-2 Front Panel Components The Oracle ZFS Storage ZS5-2 controller drive slots and front panel components are shown in the following figure. 1 LEDs: Locator, Service, 2 System disk 1... -
Page 47: Cable Management Arm
11 First 4x4 SAS HBA (slot 2) 12 Power Supply Unit (PSU) 0 Cluster Interface Card Compatibility - The Oracle ZFS Storage ZS5-2 controller contains a Version 3 cluster interface card, which is incompatible with Version 2. For information about how to connect cables to form a cluster, see Connecting Cluster Cables. -
Page 48: Overview Of The Oracle Zfs Storage Zs4-4 Controller
16 Solid state drive 5 (optional) The Oracle ZFS Storage ZS4-4 controller has two 2.5-inch SAS system boot drives in slots 0 and 1, configured as a mirrored pair. Up to four SAS read cache SSDs can fill slots 2 through 5, in that order. A filler panel must be installed in empty drive slots. -
Page 49: Oracle Zfs Storage Zs4-4 Rear Panel Components
(amber) Oracle ZFS Storage ZS4-4 Rear Panel Components The Oracle ZFS Storage ZS4-4 rear panel is shown in the following figure. Base configuration PCIe cards are not depicted in this illustration. For more information about PCIe cards, see ZS4-4 PCIe I/O Cards in Oracle ZFS Storage Appliance Customer Service Manual, Release OS8.8.x. - Page 50 RJ-45 port and provides a terminal connection to the SP console. • HBA Ports - The 4x4 SAS HBA provides connectivity to external Oracle Storage Drive Enclosure DEx-24 disk shelves. The HBA logical ports are numbered 0-3, bottom to top.
-
Page 51: Overview Of The Oracle Zfs Storage Zs3-4 Controller
Volt-Ampere rating: 1837 VA @ 240 VAC, 0.98 P.F. Oracle ZFS Storage ZS3-4 Configuration Options The Oracle ZFS Storage ZS3-4 controller can be configured as a single controller or two controllers to create a high-availability cluster configuration. The following table describes the... -
Page 52: Oracle Zfs Storage Zs3-4 Front Panel Components
16 Solid state drive 5 (optional) The Oracle ZFS Storage ZS3-4 controller has two SAS-2 system boot drives in slots 0 and 1, configured as a mirrored pair. Up to four SAS-2 read cache SSDs can fill slots 2 through 5, in order. - Page 53 13 DB-15 video connector • Ethernet Ports - Oracle ZFS Storage ZS3-4 has four RJ-45 Gigabit Ethernet connectors (NET 0, NET 1, NET 2, NET 3) located on the motherboard that operate at 10/100/1000 Mbit/sec. These network interfaces must be configured before use.
-
Page 54: Overview Of The Oracle Zfs Storage Zs3-2 Controller
Overview of the Oracle ZFS Storage ZS3-2 Controller • HBA Ports - The 4x4 SAS-2 HBA, installed in Oracle ZFS Storage ZS3-4, provides connectivity to external Oracle Storage Drive Enclosure DE2 and Sun Disk Shelves. The HBA logical ports are numbered 3-0, top to bottom: Overview of the Oracle ZFS Storage ZS3-2 Controller This section provides an overview of the Oracle ZFS Storage ZS3-2 controller. -
Page 55: Oracle Zfs Storage Zs3-2 Acoustic Noise Emissions
4-port (4x4) SAS-2 6Gb/s external Refer to https://oracle.com/zfsstorage for the most recent component specification. Oracle ZFS Storage ZS3-2 Front Panel Components The Oracle ZFS Storage ZS3-2 controller drive slots and front panel components are shown in the following figure. 2-47... -
Page 56: Oracle Zfs Storage Zs3-2 Rear Panel Components
The LEDs below the Fan/CPU/Memory Service Required LED are not currently used. Oracle ZFS Storage ZS3-2 Rear Panel Components The Oracle ZFS Storage ZS3-2 controller PCIe slots and rear panel components are shown in the following figure. For more information about PCIe cards, see... - Page 57 The Oracle ZFS Storage ZS3-2 controller has the following ports: • Ethernet Ports - Oracle ZFS Storage ZS3-2 has four RJ-45 10-Gigabit Ethernet (10GbE) network connectors, labeled NET 3, NET 2, NET 1, and NET 0 (left to right) on the rear panel.
-
Page 58: Optional Cable Management Arm
This section provides an overview of the Sun ZFS Storage 7420 controller. For installation instructions, refer to Installing a Sun ZFS Storage 7x20 Controller. For service instructions, refer to Servicing the 7x20 Controller in Oracle ZFS Storage Appliance Customer Service Manual, Release OS8.8.x. 2-50... -
Page 59: Sun Zfs Storage 7420 Physical Specifications
Chapter 2 Overview of the Sun ZFS Storage 7420 Controller Sun ZFS Storage 7420 Physical Specifications The Sun ZFS Storage 7420 controller 3U chassis dimensions are as follows: Dimension Measurement Dimension Measurement Height 13.3 cm/5.25 in Depth 70.6 cm/27.8 in Width 43.7 cm/17.19 in Weight... -
Page 60: Sun Zfs Storage 7420 Front Panel Components
Maintenance or by using the CLI command configuration version show. You can also check the physical label on the boot drive. Refer to https://oracle.com/zfsstorage for the most recent component specification. Sun ZFS Storage 7420 Front Panel Components 1 Locator LED and button... -
Page 61: Sun Zfs Storage 7420 Rear Panel Components
The following graphic shows the rear panel of the controller. Base configuration HBAs are not depicted in this illustration. For information about PCIe cards, see 7420 PCIe I/O Cards in Oracle ZFS Storage Appliance Customer Service Manual, Release OS8.8.x. 2-53... -
Page 62: Overview Of The Sun Zfs Storage 7320 Controller
Installing a Sun ZFS Storage 7x20 Controller. For service instructions, refer to Servicing the 7x20 Controller in Oracle ZFS Storage Appliance Customer Service Manual, Release OS8.8.x. Sun ZFS Storage 7320 Electrical Specifications The following list shows the electrical specifications for the Sun ZFS Storage 7320 controller. -
Page 63: Sun Zfs Storage 7320 Base Configurations
Chapter 2 Overview of the Sun ZFS Storage 7320 Controller • Max power consumption: 873 W • Max heat output: 2977 BTU/hr • Volt-Ampere rating: 891 VA @ 240 VAC, 0.98P.F. Sun ZFS Storage 7320 Base Configurations The Sun ZFS Storage 7320 controller base configuration options are: •... -
Page 64: Sun Zfs Storage 7320 Rear Panel Components
This section provides an overview of the Sun ZFS Storage 7120 controller. For installation instructions, refer to Installing a Sun ZFS Storage 7x20 Controller. For service instructions, refer to the Oracle ZFS Storage Appliance Customer Service Manual, Release OS8.8.x. 2-56... -
Page 65: Sun Zfs Storage 7120 Physical Specifications
Width 436.8 mm/17.2 in Weight 29.54 kg/65 lb Refer to https://www.oracle.com/storage/nas/index.html for the most recent component specification. Sun ZFS Storage 7120 Electrical Specifications The following list shows the electrical specifications for Sun ZFS Storage 7120. Note that the power dissipation numbers listed are the maximum rated power numbers for the power supply. -
Page 66: Sun Zfs Storage 7120 Rear Panel Components
10Gb network configurations. For more information about PCIe cards, see 7120 PCIe Options in Oracle ZFS Storage Appliance Customer Service Manual, Release OS8.8.x. 1 Power Supply Unit 1 2 Power Supply Unit 0... - Page 67 Chapter 2 Overview of the Sun ZFS Storage 7120 Controller 13 USB 2.0 ports (0, 1) 14 HD15 Video port The Sun ZFS Storage 7120 controller has the following ports: • Ethernet Ports - There are four RJ-45 Gigabit Ethernet ports (NET 0, NET 1, NET 2, NET 3) located on the motherboard that operate at 10/100/1000 Mbit/sec.
-
Page 68: Installing Disk Shelves
• Installing a Sun Disk Shelf Installing an Oracle Storage Drive Enclosure DE3-24P Disk Shelf Oracle Storage Drive Enclosure DE3-24P requires two rack units (RUs), or six rack holes, of vertical space in the cabinet. Before You Begin • Review... - Page 69 Installing an Oracle Storage Drive Enclosure DE3-24P Disk Shelf There are two cage nut packets, each containing square or round hole cage nuts. Although a template is also included in the packets, it is not used for the Oracle Storage Drive Enclosure DE3-24P disk shelf.
- Page 70 Chapter 3 Installing an Oracle Storage Drive Enclosure DE3-24P Disk Shelf Close the rail clamps over the rails by releasing the clamp lever [3]. You will hear an audible click as the clamps lock in place over the rack rails.
-
Page 71: Installing An Oracle Storage Drive Enclosure De3-24C Disk Shelf
If shipping the racked disk shelf, install screw [1] and [2] into each rear chassis ear [A]. Installing an Oracle Storage Drive Enclosure DE3-24C Disk Shelf Oracle Storage Drive Enclosure DE3-24C requires four rack units (RUs), or twelve rack holes, of vertical space in the cabinet. - Page 72 Chapter 3 Installing an Oracle Storage Drive Enclosure DE3-24C Disk Shelf Before You Begin • Review Prerequisites for Installation Overview of Disk Shelves. • To prevent the cabinet from tipping, always load the heaviest equipment, which are disk shelves, starting from the bottom of the cabinet.
- Page 73 Chapter 3 Installing an Oracle Storage Drive Enclosure DE3-24C Disk Shelf Orient the rail so that the stamped label (LEFT or RIGHT) is facing the inside of the rack. Adjust the rail length to fit the front and rear of the rack, [A] and [B].
- Page 74 Chapter 3 Installing an Oracle Storage Drive Enclosure DE3-24C Disk Shelf Caution: A mounted disk shelf is unstable if the front cage nuts are not installed. Always install the cage nuts before mounting the disk shelf. Use the template to determine cage nut placement [1].
- Page 75 Chapter 3 Installing an Oracle Storage Drive Enclosure DE3-24C Disk Shelf Carefully slide the disk shelf into the cabinet. Ensure that it is fully seated within the rails. If removing the disk shelf to reseat it, support it at all times.
-
Page 76: Installing An Oracle Storage Drive Enclosure De2-24P Disk Shelf
Installing an Oracle Storage Drive Enclosure DE2-24P Disk Shelf Use the following procedure to install an Oracle Storage Drive Enclosure DE2-24P disk shelf, which requires two standard mounting rack units (2RU), or six rack holes, of vertical space in the cabinet. - Page 77 Chapter 3 Installing an Oracle Storage Drive Enclosure DE2-24P Disk Shelf If your rack is a threaded universal 19-inch cabinet: Use the T20 Torx driver to remove the rail location pegs from the front and rear of the rails. Use the supplied wrench to insert two pins into each end of the rails, in the same location where the location pegs were removed.
- Page 78 Chapter 3 Installing an Oracle Storage Drive Enclosure DE2-24P Disk Shelf Using a mechanical lift or two people, one at each side of the disk shelf, carefully lift and rest the shelf on the bottom ledge of the left and right rails. Do not lift using the power supply with fan module handles.
-
Page 79: Installing An Oracle Storage Drive Enclosure De2-24C Disk Shelf
Installing an Oracle Storage Drive Enclosure DE2-24C Disk Shelf Use the following procedure to install an Oracle Storage Drive Enclosure DE2-24C disk shelf, which requires four standard mounting rack units (4RU), or twelve rack holes, of vertical space in the cabinet. - Page 80 Locate the appropriate rack unit (RU) height, which is eight rack holes, starting from the bottom on the cabinet. If using an unthreaded universal 19-inch, Sun Rack II, or Oracle Rack Cabinet 1242 cabinet, snap one supplied cage nut into the appropriate rack holes.
- Page 81 Chapter 3 Installing an Oracle Storage Drive Enclosure DE2-24C Disk Shelf Install one screw through the rack and into the rear of each rail. Tighten the two locking screws in the rails. 3-14...
- Page 82 Chapter 3 Installing an Oracle Storage Drive Enclosure DE2-24C Disk Shelf Using a mechanical lift or two people, one at each side of the disk shelf, carefully lift and rest the shelf on the bottom ledge of the left and right rails. Do not lift using the power supply handles.
-
Page 83: Installing A Sun Disk Shelf
Chapter 3 Installing a Sun Disk Shelf Installing a Sun Disk Shelf Use the following procedure to install a Sun Disk Shelf. Starting at the bottom of the cabinet, locate the appropriate rack unit (RU) height. Install Sun Disk Shelf units below controllers to prevent rack from tipping. The Sun Disk Shelf requires four standard mounting units (4RU) of vertical space in the cabinet. - Page 84 Chapter 3 Installing a Sun Disk Shelf Install appropriate rail plates in four locations on the rack (2 front and 2 back) by aligning the two pins on the rail plate with holes on the cabinet rails. Insert M6 screws in the top and bottom holes of each rail plate and tighten (8 total places).
- Page 85 Chapter 3 Installing a Sun Disk Shelf Install each rail by first aligning the front pins of the rack adapter plates with corresponding holes in the front of the rail, then adjust the rail to fit the rack and insert the pins from the rear rack adapter plates into the corresponding holes of the rail.
- Page 86 Chapter 3 Installing a Sun Disk Shelf Carefully slide the shelf into the cabinet until the front flanges of the shelf touch the vertical face of the rack. Tighten the captive screws on each side of the front of the shelf to secure the shelf to the rack.
-
Page 87: Installing An Oracle Zfs Storage Zs9-2 Controller
Verifying Operation of Oracle ZFS Storage ZS9-2 Slide-Rails and CMA Installing the Slide Rails onto an Oracle ZFS Storage ZS9-2 Controller Use the following procedure to install the slide rails onto an Oracle ZFS Storage ZS9-2 controller. Note: The slide rails can be used with either 9.5-mm square or M6 round mounting hole racks. -
Page 88: Installing The Slide Rails Into The Rack For An Oracle Zfs Storage Zs9-2 Controller
Installing the Slide Rails into the Rack for an Oracle ZFS Storage ZS9-2 Controller Use the following procedure to install the slide rails into the rack for an Oracle ZFS Storage ZS9-2 controller. If you plan to move the rack after the controller is installed, use mounting screws and cage nuts to secure the slide-rail assembly. -
Page 89: Installing An Oracle Zfs Storage Zs9-2 Controller Onto The Rack Slide Rails
Repeat steps 1 through 3 for the other slide-rail assembly. Installing an Oracle ZFS Storage ZS9-2 Controller onto the Rack Slide Rails Use the following procedure to install an Oracle ZFS Storage ZS9-2 controller onto the rack slide rails. Caution: This procedure requires a minimum of two people, or a mechanical lift, because of the weight of the chassis. - Page 90 Chapter 4 Installing an Oracle ZFS Storage ZS9-2 Controller onto the Rack Slide Rails Lower the rack stabilization feet if you have not already done so. Push the slide rails into the slide-rail assemblies in the rack as far as possible.
-
Page 91: Installing An Oracle Zfs Storage Zs9-2 Cable Management Arm
Installing an Oracle ZFS Storage ZS9-2 Cable Management Use the following procedure to install the cable management arm (CMA) for an Oracle ZFS Storage ZS9-2 controller. The CMA is an assembly that you can use to route the controller cables in the rack. - Page 92 Chapter 4 Installing an Oracle ZFS Storage ZS9-2 Cable Management Arm All excess cabling that cannot be fitted through the CMA should be attached to the side of the rack and properly dressed (Velcro straps, and so on). Allow enough slack (service loop) for serviceability.
- Page 93 Chapter 4 Installing an Oracle ZFS Storage ZS9-2 Cable Management Arm Callout Description Connector C Connector D Slide-rail latching bracket (used with connector D) Back slide bar Controller flat cable covers Controller round cable covers Ensure that you install the round, not flat, cable covers for your controller on the CMA. If flat covers are installed, replace them with round cable covers.
- Page 94 Chapter 4 Installing an Oracle ZFS Storage ZS9-2 Cable Management Arm Callout Description Connector A tab Left slide-rail front slot To install CMA connector B into the right slide-rail: Insert CMA connector B into the front slot on the right slide-rail until it locks into place with an audible click, frames [1] and [2].
- Page 95 Chapter 4 Installing an Oracle ZFS Storage ZS9-2 Cable Management Arm Callout Description Connector C locking spring Insert connector C into the right slide-rail until it locks into place with an audible click, frames [2] and [3]. Gently tug on the right side of the CMA back slide bar to verify that connector C is properly seated.
- Page 96 Chapter 4 Installing an Oracle ZFS Storage ZS9-2 Cable Management Arm To install CMA connector D into the left slide-rail: While holding the slide-rail latching bracket in place, insert connector D and its associated slide-rail latching bracket into the left slide-rail until connector D locks into place with an audible click, frames [1] and [2].
-
Page 97: Verifying Operation Of Oracle Zfs Storage Zs9-2 Slide-Rails And Cma
Chapter 4 Verifying Operation of Oracle ZFS Storage ZS9-2 Slide-Rails and CMA Gently tug on the four CMA connection points to ensure that the CMA connectors are fully seated before you allow the CMA to hang by its own weight. -
Page 98: Installing An Oracle Zfs Storage Zs7-2 Controller
Verifying Operation of the Oracle ZFS Storage ZS7-2 Slide-Rails and CMA Installing the Slide Rails onto an Oracle ZFS Storage ZS7-2 Controller Use the following procedure to install the slide rails onto an Oracle ZFS Storage ZS7-2 controller. Note: The slide rails can be used with either 9.5-mm square or M6 round mounting hole racks. -
Page 99: Installing The Slide Rails Into The Rack For An Oracle Zfs Storage Zs7-2 Controller
Installing the Slide Rails into the Rack for an Oracle ZFS Storage ZS7-2 Controller Use the following procedure to install the slide rails into the rack for an Oracle ZFS Storage ZS7-2 controller. If you plan to move the rack after the controller is installed, use mounting screws and cage nuts to secure the slide-rail assembly. -
Page 100: Installing An Oracle Zfs Storage Zs7-2 Controller Onto The Rack Slide Rails
Repeat step 1 to step 3 for the other slide-rail assembly. Installing an Oracle ZFS Storage ZS7-2 Controller onto the Rack Slide Rails Use the following procedure to install an Oracle ZFS Storage ZS7-2 controller onto the rack slide rails. Caution: This procedure requires a minimum of two people, or a mechanical lift, because of the weight of the chassis. - Page 101 Chapter 5 Installing an Oracle ZFS Storage ZS7-2 Controller onto the Rack Slide Rails Lower the rack stabilization feet if you have not already done so. Push the slide rails into the slide-rail assemblies in the rack as far as possible.
-
Page 102: Installing An Oracle Zfs Storage Zs7-2 Cable Management Arm
Installing an Oracle ZFS Storage ZS7-2 Cable Management Use the following procedure to install the cable management arm (CMA) for an Oracle ZFS Storage ZS7-2 controller. The CMA is an assembly that you can use to route the controller cables in the rack. - Page 103 Up to 16 AOC SAS cables can be routed through the CMA. • Oracle ZFS Storage ZS7-2 controllers that support a mix of AOC and copper SAS cables can route up to 12 AOC and 4 copper SAS cables through the CMA.
- Page 104 Chapter 5 Installing an Oracle ZFS Storage ZS7-2 Cable Management Arm Callout Description Connector C Connector D Slide-rail latching bracket (used with connector D) Back slide bar Controller flat cable covers Controller round cable covers Ensure that you install the round, not flat, cable covers for your controller on the CMA. If flat covers are installed, replace them with round cable covers.
- Page 105 Chapter 5 Installing an Oracle ZFS Storage ZS7-2 Cable Management Arm Callout Description Connector A tab Left slide-rail front slot To install CMA connector B into the right slide-rail: Insert CMA connector B into the front slot on the right slide-rail until it locks into place with an audible click, frames [1] and [2].
- Page 106 Chapter 5 Installing an Oracle ZFS Storage ZS7-2 Cable Management Arm Callout Description Connector C locking spring Insert connector C into the right slide-rail until it locks into place with an audible click, frames [2] and [3]. Gently tug on the right side of the CMA back slide bar to verify that connector C is properly seated.
- Page 107 Chapter 5 Installing an Oracle ZFS Storage ZS7-2 Cable Management Arm To install CMA connector D into the left slide-rail: While holding the slide-rail latching bracket in place, insert connector D and its associated slide-rail latching bracket into the left slide-rail until connector D locks into place with an audible click, frames [1] and [2].
-
Page 108: Verifying Operation Of The Oracle Zfs Storage Zs7-2 Slide-Rails And Cma
Chapter 5 Verifying Operation of the Oracle ZFS Storage ZS7-2 Slide-Rails and CMA Gently tug on the four CMA connection points to ensure that the CMA connectors are fully seated before you allow the CMA to hang by its own weight. -
Page 109: Installing An Oracle Zfs Storage Zs5-4 Controller
Verifying Operation of the Oracle ZFS Storage ZS5-4 Slide-Rails and CMA Installing the Slide Rails onto an Oracle ZFS Storage ZS5-4 Controller Use the following procedure to install the slide rails onto an Oracle ZFS Storage ZS5-4 controller. Note: The slide rails can be used with either 9.5-mm square or M6 round mounting hole racks. -
Page 110: Installing The Slide Rails Into The Rack For An Oracle Zfs Storage Zs5-4 Controller
Installing the Slide Rails into the Rack for an Oracle ZFS Storage ZS5-4 Controller Use the following procedure to install the slide rails into the rack for an Oracle ZFS Storage ZS5-4 controller. If you plan to move the rack after the controller is installed, use mounting screws and cage nuts to secure the slide-rail assembly. -
Page 111: Installing An Oracle Zfs Storage Zs5-4 Controller Onto The Rack Slide Rails
Repeat step 1 to step 3 for the other slide-rail assembly. Installing an Oracle ZFS Storage ZS5-4 Controller onto the Rack Slide Rails Use the following procedure to install an Oracle ZFS Storage ZS5-4 controller onto the rack slide rails. Caution: This procedure requires a minimum of two people, or a mechanical lift, because of the weight of the chassis. - Page 112 Chapter 6 Installing an Oracle ZFS Storage ZS5-4 Controller onto the Rack Slide Rails Lower the rack stabilization feet if you have not already done so. Push the slide rails into the slide-rail assemblies in the rack as far as possible.
-
Page 113: Installing An Oracle Zfs Storage Zs5-4 Cable Management Arm
Installing an Oracle ZFS Storage ZS5-4 Cable Management Use the following procedure to install the cable management arm (CMA) for an Oracle ZFS Storage ZS5-4 controller. The CMA is an optional assembly that you can use to route the controller cables in the rack. - Page 114 Chapter 6 Installing an Oracle ZFS Storage ZS5-4 Cable Management Arm Insert the right CMA slide-rail connector (1) into the right slide-rail assembly (2) until the connector locks into place with an audible click. Insert the left CMA slide-rail connector into the left slide-rail assembly until the connector locks into place with an audible click.
-
Page 115: Verifying Operation Of The Oracle Zfs Storage Zs5-4 Slide-Rails And Cma
Chapter 6 Verifying Operation of the Oracle ZFS Storage ZS5-4 Slide-Rails and CMA Verifying Operation of the Oracle ZFS Storage ZS5-4 Slide-Rails and CMA Use the following procedure to verify the operation of the cable management arm (CMA) and slide rails for an Oracle ZFS Storage ZS5-4 controller. -
Page 116: Installing An Oracle Zfs Storage Zs5-2 Controller
Overviews. Use the following procedures to install an Oracle ZFS Storage ZS5-2 controller: • Installing the Mounting Brackets and Slide Rail Assemblies for an Oracle ZFS Storage ZS5-2 Controller • Installing an Oracle ZFS Storage ZS5-2 Controller onto the Rack Slide Rails •... - Page 117 Chapter 7 Installing the Mounting Brackets and Slide Rail Assemblies for an Oracle ZFS Storage ZS5-2 Controller If you are using a universal 19-inch cabinet, snap an M6 square cage nut into the top and bottom holes of the location where you will be installing the rail plate as shown.
- Page 118 Chapter 7 Installing the Mounting Brackets and Slide Rail Assemblies for an Oracle ZFS Storage ZS5-2 Controller Attach each slide rail assembly to the rack posts, but do not tighten the screws completely. From the front of the rack, set the proper width of the rails with the width spacer...
-
Page 119: Installing An Oracle Zfs Storage Zs5-2 Controller Onto The Rack Slide Rails
See your rack documentation for detailed instructions. Installing an Oracle ZFS Storage ZS5-2 Controller onto the Rack Slide Rails Use the following procedure to install an Oracle ZFS Storage ZS5-2 controller onto the rack slide rails. Caution: This procedure requires a minimum of two people because of the weight of the chassis. -
Page 120: Installing An Oracle Zfs Storage Zs5-2 Cable Management Arm
The following graphic illustrates the chassis insertion and slide rail locks usage. Installing an Oracle ZFS Storage ZS5-2 Cable Management Use the following procedure to install the cable management arm (CMA) on an Oracle ZFS Storage ZS5-2 controller. The CMA is an optional assembly that you can use to route the controller cables in the rack. - Page 121 Chapter 7 Installing an Oracle ZFS Storage ZS5-2 Cable Management Arm • Route cluster cables, long-term host cables (including InfiniBand, Fibre Channel, and Ethernet Cables) and up to 12 disk shelf SAS cables through the CMA. • Do not route short SAS daisy chain cables through the CMA. Do not route an excess of cables such that the CMA clamps bow or appear structurally unfit to support the weight.
- Page 122 Chapter 7 Installing an Oracle ZFS Storage ZS5-2 Cable Management Arm To prevent the rack from tipping, ensure all anti-tilt devices on the rack are extended. Extend the storage controller approximately 13 cm (5 inches) out of the front of the rack.
- Page 123 Chapter 7 Installing an Oracle ZFS Storage ZS5-2 Cable Management Arm Insert connector C into the right side-rail until it locks into place with an audible click (frames 2 and 3). Ensure that the end latch of the center bar mount engages with the rail notch during server pullout;...
- Page 124 Chapter 7 Installing an Oracle ZFS Storage ZS5-2 Cable Management Arm When inserting connector D into the slide-rail, the preferred and easier method is to install connector D and the latching bracket as one assembly into the slide-rail. Gently tug on the left side of the CMA's rear slide bar to verify that connector D is properly seated.
- Page 125 Chapter 7 Installing an Oracle ZFS Storage ZS5-2 Cable Management Arm Return the storage controller to the rack. As you push the storage controller into the rack, verify that the CMA retracts without binding. Open the CMA cable covers, route controller cables through the CMA's cable troughs, close the cable covers, and secure the cables with the six Velcro straps.
-
Page 126: Verifying Operation Of The Oracle Zfs Storage Zs5-2 Slide-Rails And Cma
Chapter 7 Verifying Operation of the Oracle ZFS Storage ZS5-2 Slide-Rails and CMA When securing the cables with the Velcro straps located on the front slide bar, ensure that the Velcro straps do not wrap around the bottom of the slide bar. -
Page 127: Installing An Oracle Zfs Storage Zs4-4 Or Oracle Zfs Storage Zs3-4
Installing the Slide Rails onto an Oracle ZFS Storage ZS4-4 or Oracle ZFS Storage ZS3-4 Controller • Installing the Slide Rails into the Rack for an Oracle ZFS Storage ZS4-4 or Oracle ZFS Storage ZS3-4 Controller • Installing an Oracle ZFS Storage ZS4-4 or Oracle ZFS Storage ZS3-4 Controller onto the Rack Slide Rails •... -
Page 128: Installing The Slide Rails Into The Rack For An Oracle Zfs Storage Zs4-4 Or Oracle Zfs Storage Zs3-4 Controller
Chapter 8 Installing the Slide Rails into the Rack for an Oracle ZFS Storage ZS4-4 or Oracle ZFS Storage ZS3-4 Controller With the heads of the five chassis locating pins protruding through the five keyhole openings in the mounting bracket, pull the mounting bracket toward the front of the chassis until the mounting bracket clip locks into place with an audible click. -
Page 129: Installing An Oracle Zfs Storage Zs4-4 Or Oracle Zfs Storage Zs3-4 Controller Onto The Rack Slide Rails
Chapter 8 Installing an Oracle ZFS Storage ZS4-4 or Oracle ZFS Storage ZS3-4 Controller onto the Rack Slide Rails Note: The slide rails can be used with either 9.5-mm square or M6 round mounting hole racks. Optional: If installing the assembly with cage nuts and mounting screws, insert the cage nuts into the front and rear rack posts in the desired positions. - Page 130 Chapter 8 Installing an Oracle ZFS Storage ZS4-4 or Oracle ZFS Storage ZS3-4 Controller onto the Rack Slide Rails Lower the rack stabilization feet if you have not already done so. Push the slide rails into the slide-rail assemblies in the rack as far as possible.
-
Page 131: Installing An Oracle Zfs Storage Zs4-4 Or Oracle Zfs Storage Zs3-4 Cable Management Arm
Installing an Oracle ZFS Storage ZS4-4 or Oracle ZFS Storage ZS3-4 Cable Management Arm Use the following procedure to install the cable management arm (CMA) for an Oracle ZFS Storage ZS4-4 or Oracle ZFS Storage ZS3-4 controller. The CMA is an optional assembly that you can use to route the controller cables in the rack. - Page 132 Chapter 8 Installing an Oracle ZFS Storage ZS4-4 or Oracle ZFS Storage ZS3-4 Cable Management Arm Insert the right CMA slide-rail connector (1) into the right slide-rail assembly (2) until the connector locks into place with an audible click. Insert the left CMA slide-rail connector into the left slide-rail assembly until the connector locks into place with an audible click.
- Page 133 Chapter 8 Installing an Oracle ZFS Storage ZS4-4 or Oracle ZFS Storage ZS3-4 Cable Management Arm...
-
Page 134: Installing An Oracle Zfs Storage Zs3-2 Controller
Overviews. Use the following procedures to install an Oracle ZFS Storage ZS3-2 controller: • Installing the Mounting Brackets and Slide Rail Assemblies for an Oracle ZFS Storage ZS3-2 Controller • Installing an Oracle ZFS Storage ZS3-2 Controller onto the Rack Slide Rails •... - Page 135 Chapter 9 Installing the Mounting Brackets and Slide Rail Assemblies for an Oracle ZFS Storage ZS3-2 Controller If you are using a universal 19-inch cabinet, snap an M6 square cage nut into the top and bottom holes of the location where you will be installing the rail plate as shown.
- Page 136 Chapter 9 Installing the Mounting Brackets and Slide Rail Assemblies for an Oracle ZFS Storage ZS3-2 Controller Attach each slide rail assembly to the rack posts, but do not tighten the screws completely. From the front of the rack, set the proper width of the rails with the width spacer...
-
Page 137: Installing An Oracle Zfs Storage Zs3-2 Controller Onto The Rack Slide Rails
See your rack documentation for detailed instructions. Installing an Oracle ZFS Storage ZS3-2 Controller onto the Rack Slide Rails Use the following procedure to install an Oracle ZFS Storage ZS3-2 controller onto the rack slide rails. Caution: This procedure requires a minimum of two people because of the weight of the chassis. -
Page 138: Installing An Oracle Zfs Storage Zs3-2 Cable Management Arm
Chapter 9 Installing an Oracle ZFS Storage ZS3-2 Cable Management Arm Lower the rack stabilization feet if you have not already done so. Pull the slide rails (mounted in the slide-rail assembly) toward you until the slide rails stop (approximately 12 inches, (30 cm) out of the rack). - Page 139 Chapter 9 Installing an Oracle ZFS Storage ZS3-2 Cable Management Arm • Do not route short SAS daisy chain cables through the CMA. Do not route an excess of cables such that the CMA clamps bow or appear structurally unfit to support the weight.
- Page 140 Chapter 9 Installing an Oracle ZFS Storage ZS3-2 Cable Management Arm Extend the storage controller approximately 13 cm (5 inches) out of the front of the rack. At the back of the rack, insert the CMA's connector A into the front slot on the left slide- rail until it locks into place with an audible click (frames 1 and 2).
- Page 141 Chapter 9 Installing an Oracle ZFS Storage ZS3-2 Cable Management Arm Gently tug on the right side of the CMA's rear slide bar to verify that connector C is properly seated. To prepare the CMA's connector D for installation, remove the tape that secures the slide-rail latching bracket to connector D and ensure that the latching bracket is properly aligned with connector D (frames 1 and 2).
- Page 142 Chapter 9 Installing an Oracle ZFS Storage ZS3-2 Cable Management Arm Gently tug on the left side of the CMA's rear slide bar to verify that connector D is properly seated. Gently tug on the four CMA connection points to ensure that the CMA connectors are fully seated before you allow the CMA to hang by its own weight.
- Page 143 Chapter 9 Installing an Oracle ZFS Storage ZS3-2 Cable Management Arm Return the storage controller to the rack. As you push the storage controller into the rack, verify that the CMA retracts without binding. Open the CMA cable covers, route controller cables through the CMA's cable troughs, close the cable covers, and secure the cables with the six Velcro straps.
-
Page 144: Verifying Operation Of The Oracle Zfs Storage Zs3-2 Slide-Rails And Cma
Chapter 9 Verifying Operation of the Oracle ZFS Storage ZS3-2 Slide-Rails and CMA Verifying Operation of the Oracle ZFS Storage ZS3-2 Slide-Rails and CMA Use the following procedure to verify the operation of the optional cable management arm (CMA) and slide rails on an Oracle ZFS Storage ZS3-2 controller. -
Page 145: Installing A Sun Zfs Storage 7X20 Controller
Installing a Sun ZFS Storage 7x20 Controller This section contains installation procedures for the Sun ZFS Storage 7420, 7320, and 7120 controllers. Before beginning installation, see Installation Prerequisites and Hardware Overviews. Use the following procedures to install a Sun ZFS Storage 7x20 controller: •... -
Page 146: Installing The Mounting Brackets On A Sun Zfs Storage 7X20 Controller
Chapter 10 Installing the Mounting Brackets on a Sun ZFS Storage 7x20 Controller Example 10-2 Disassembling a Sun ZFS Storage 7420 Rail Kit The following graphic illustrates the procedure for disassembling the Sun ZFS Storage 7420 rail kit. Installing the Mounting Brackets on a Sun ZFS Storage 7x20 Controller Use the following procedure to install the mounting brackets on a Sun ZFS Storage 7420, 7320, or 7120 controller. - Page 147 Chapter 10 Installing the Mounting Brackets on a Sun ZFS Storage 7x20 Controller Note: If the mounting brackets are shipped inside the slide rails, you must remove them before beginning this procedure; see Removing the Sun ZFS Storage 7x20 Mounting Brackets from Inside the Slide Rails.
-
Page 148: Installing A Sun Zfs Storage 7X20 Controller Onto The Rack Slide Rails
Chapter 10 Installing a Sun ZFS Storage 7x20 Controller onto the Rack Slide Rails With the heads of the four chassis locating pins protruding through the four keyhole openings in the mounting bracket, pull the mounting-bracket toward the front of the chassis until the mounting-bracket clip locks into place with an audible click. - Page 149 Chapter 10 Installing a Sun ZFS Storage 7x20 Controller onto the Rack Slide Rails Position a slide rail assembly in your rack so that the brackets at each end of the slide rail assembly are on the outside of the front and back rack posts. The following graphic illustrates the rail assembly brackets.
- Page 150 Chapter 10 Installing a Sun ZFS Storage 7x20 Controller onto the Rack Slide Rails From the front of the rack, set the proper width of the rails with the rail-width spacer (1). Tighten the screws on the brackets. Remove the spacer and confirm that the rails are attached tightly to the rack. Lower the rack stabilization and anti-tilt devices if you have not already done so.
- Page 151 Chapter 10 Installing a Sun ZFS Storage 7x20 Controller onto the Rack Slide Rails Example 10-4 Installing a Sun ZFS Storage 7420 Controller onto the Rack Slide Rails The following graphic illustrates Sun ZFS Storage 7420 chassis insertion. 10-7...
-
Page 152: Installing A Sun Zfs Storage 7X20 Cable Management Arm
Chapter 10 Installing a Sun ZFS Storage 7x20 Cable Management Arm Installing a Sun ZFS Storage 7x20 Cable Management Arm Use the following procedure to install the optional cable management arm (CMA) for a Sun ZFS Storage 7x20 controller. This procedure is completed from the back of the equipment rack. Before You Begin Unpack the CMA and identify its components. - Page 153 Chapter 10 Installing a Sun ZFS Storage 7x20 Cable Management Arm Insert the CMA mounting bracket connector into the right slide rail until the connector locks into place. Insert the right CMA slide rail connector (1) into the right slide rail assembly (2) until the connector locks into place.
- Page 154 Chapter 10 Installing a Sun ZFS Storage 7x20 Cable Management Arm Insert the left CMA slide rail connector (1) into the rail extension on the left slide rail assembly (2) until the connector locks into place. 10-10...
- Page 155 Chapter 10 Installing a Sun ZFS Storage 7x20 Cable Management Arm After you install and route the cables through the assembly, attach the hook and loop straps (1) to secure the cables. Then attach the right and left outer latches to support the assembly.
-
Page 156: Cabling The Appliance
Appliance Cabling Guide, Release OS8.8.x. Connecting System Cables Use the following procedure to make a physical serial or network connection to Oracle Integrated Lights Out Manager (ILOM). It is strongly recommended that you use a serial SP connection for system configuration and initial configuration because you can monitor progress, especially during system reboots. -
Page 157: Connecting Cluster Cables
Ethernet cables for connecting clustered controllers are supplied. If you supply your own Ethernet cables, ensure the cables are straight-through and the correct length, Category 6A for Oracle ZFS Storage ZS9-2 controllers, and Category 5 or better for all other controllers. -
Page 158: Connecting Cluster Cables For Oracle Zfs Storage Zs7-2, Zs5-X, Zs4-4, Zs3-X, And Sun Zfs Storage 7X20 Controllers
Connecting Cluster Cables for Oracle ZFS Storage ZS7-2, ZS5-x, ZS4-4, ZS3-x, and Sun ZFS Storage 7x20 Controllers Oracle ZFS Storage ZS7-2, ZS5-x, ZS4-4, ZS3-x, and Sun ZFS Storage 7x20 controllers employ serial-based clustering using two serial cluster links, and provide Ethernet connectivity via one link. - Page 159 Oracle ZFS Storage ZS4-4 Cluster Cabling Three Category 5 Ethernet cables are provided. Each cable is 1 meter in length. Connect the cables in the same way as described for Oracle ZFS Storage ZS5-x controllers. The following figure shows cluster cabling between two Oracle ZFS Storage ZS4-4 controllers.
-
Page 160: Controller Cluster I/O Ports
Oracle ZFS Storage ZS5-x controllers. The cluster card for Oracle ZFS Storage ZS3-4 and Sun ZFS Storage 7420 is installed in the cluster slot, as described in the hardware overview for each controller in... - Page 161 3 Port 3 (Ethernet I/O) 4 Port 2 (Ethernet I/O) 5 Port 1 (Cluster Link) 6 Port 0 (Cluster Link) The following diagram illustrates the cluster serial and Ethernet ports for Oracle ZFS Storage ZS7-2, ZS5-4, ZS5-2, ZS4-4, ZS3-4, and Sun ZFS Storage 7x20 controllers.
-
Page 162: Connecting Disk Shelf Cables
3 Serial 0 4 Serial Link Status LED 5 Ethernet Link Status LED 6 Ethernet Activity LED The following diagram illustrates the cluster serial and Ethernet ports for Oracle ZFS Storage ZS3-2 controllers. 1 Serial Link Status LED 2 Ethernet... - Page 163 Example 11-1 Disk Shelf Cabling Example The following illustration shows the cable connections for two clustered Oracle ZFS Storage ZS4-4 controllers and eight Oracle Storage Drive Enclosure DE2-24C disk shelves. The controllers, as recommended, are located in the middle of the cabinet.
- Page 164 Chapter 11 Connecting Disk Shelf Cables Callout Description Callout Description Shelf 8 (RU 35-38) Controller 2 (RU 17-19) Shelf 7 (RU 31-34) Shelf 4 (RU 13-16) Shelf 6 (RU 27-30) Shelf 3 (RU 9-12) Shelf 5 (RU 23-26) Shelf 2 (RU 5-8) Controller 1 (RU 20-22) Shelf 1 (RU 1-4) 11-9...
-
Page 165: Powering On The Appliance
Powering Off a Disk Shelf Powering On an Oracle Storage Drive Enclosure DE3-24 or DE2-24 Disk Shelf Use the following procedure to power on an Oracle Storage Drive Enclosure DE3-24P, DE3-24C, DE2-24P or DE2-24C disk shelf. Before You Begin Ensure you have met the following electrical safety measures before applying power to the disk shelf: •... -
Page 166: Powering On A Sun Disk Shelf
If not, reseat the faulted module after powering off the disk shelf as described in Powering Off a Disk Shelf. If the module status indicator is not a steady green after module reinsertion and powering on, contact Oracle Customer Service. Related Topics •... -
Page 167: Powering On A Controller
Powering Off a Controller Powering On a Controller Use the following procedure to power on an Oracle ZFS Storage Appliance controller. Plug power cables into power supply 0 and power supply 1 on the storage controller(s). Connect cables to the external power source. -
Page 168: Powering Off A Disk Shelf
All power cords must be disconnected to completely remove power from the disk shelf. Related Topics • Powering Off a Controller • Powering On an Oracle Storage Drive Enclosure DE3-24 or DE2-24 Disk Shelf • Powering On a Sun Disk Shelf 12-4... -
Page 169: Configuring The Appliance For The First Time
This section contains first-time configuration procedures for Oracle ZFS Storage Appliance. Follow these steps to complete first-time configuration: Ensure you have completed cabling, including the serial or network cabling for Oracle Integrated Lights Out Manager (ILOM) connectivity, as described in Cabling the Appliance. - Page 170 After the cluster is initialized, you can administer the system from either storage controller. However, do not attempt initial configuration on both controllers independently. Open a terminal or terminal emulator window and log in to Oracle ILOM in one of the following ways: •...
- Page 171 Chapter 13 Configuring the System Note: This is the default password that provides initial access to Oracle ILOM. You can set a different password for the appliance in step 5. At the command prompt, enter start /SP/console. To confirm that you want to start the console, enter y.
-
Page 172: Performing Initial Configuration (Bui)
Use this procedure, which is a step-by-step utility, to complete initial configuration of network interfaces, the Domain Name Service (DNS), time settings, name services, directory services, storage, and remote support on Oracle ZFS Storage Appliance. This procedure is for standalone and clustered appliance configuration. - Page 173 BUI for initial configuration. For clustered controllers, configure only the primary controller. Do not attempt initial configuration on both controllers independently. For more information about clustering, see Appliance Cluster Configuration in Oracle ZFS Storage Appliance Administration Guide, Release OS8.8.x. Before You Begin •...
- Page 174 Optionally, click SKIP to configure this device as a standalone controller, and go to step 6. To configure clustered controllers later, see Upgrading a Standalone Appliance to a Clustered Configuration (BUI) in Oracle ZFS Storage Appliance Administration Guide, Release OS8.8.x. 13-6...
- Page 175 If you do not see solid lines, ensure that the cluster cables connecting the two controllers together are properly connected and secure in their connectors. The system automatically senses these cables in real-time. Oracle ZFS Storage ZS9-2 controllers use two redundant Ethernet links that do not cross over each other; all other controllers use two redundant serial links that form a crossover pattern, and one Ethernet link.
- Page 176 Configure the appliance networking interfaces. Note: You can create a management interface now, or at another time using a task in Configuring Management Interfaces in Oracle ZFS Storage Appliance Administration Guide, Release OS8.8.x. For detailed information, see Network Configuration in Oracle ZFS Storage Appliance Administration Guide, Release OS8.8.x.
- Page 177 For detailed information, see the following tasks: • Creating a VNIC Without a VLAN ID for Clustered Controllers (BUI) in Oracle ZFS Storage Appliance Administration Guide, Release OS8.8.x • Creating VNICs with the Same VLAN ID for Clustered Controllers (BUI) in Oracle ZFS Storage Appliance Administration Guide, Release OS8.8.x...
- Page 178 BUI and CLI. Without a route, the only means of communication with the appliance is through an Oracle ILOM connection to the SP. To configure additional routing, go to step 7. Otherwise, click COMMIT and skip to step 8.
- Page 179 Interface - Select the interface for which you want to configure routing. Click ADD. The new route appears in the routing table. Click COMMIT. Configure the Domain Name Service (DNS) and click COMMIT. For detailed information, see DNS Configuration in Oracle ZFS Storage Appliance Administration Guide, Release OS8.8.x. 13-11...
- Page 180 SMB clients to use the same NTP server. For detailed information, see NTP Configuration in Oracle ZFS Storage Appliance Administration Guide, Release OS8.8.x. Configure name services. For detailed information, see Configuring Services in Oracle ZFS Storage Appliance Administration Guide, Release OS8.8.x.
- Page 181 Perform one of the following steps: • To register your appliance for remote support, complete the fields and click REGISTER. If you do not have an Oracle support account, click LATER and see Phone Home Configuration in Oracle ZFS Storage Appliance Administration Guide, Release OS8.8.x.
- Page 182 Configuration: Services: Phone Home. For more information, see Phone Home Configuration in Oracle ZFS Storage Appliance Administration Guide, Release OS8.8.x. If you configured clustering, use following steps to failback the resources: For the second management interface, click the drop-down menu under OWNER and select the peer controller.
-
Page 183: Performing Initial Configuration (Cli)
Storage Appliance Administration Guide, Release OS8.8.x. • If you did not configure the management interface yet, see the tasks in Configuring Management Interfaces in Oracle ZFS Storage Appliance Administration Guide, Release OS8.8.x. Related Topics • For an overview of network interface configuration, see... - Page 184 Performing Initial Configuration (CLI) Configure the appliance network interfaces. For detailed information, see Network Configuration in Oracle ZFS Storage Appliance Administration Guide, Release OS8.8.x. Note: You can create a management interface now, or at another time using a task in...
- Page 185 Configure routing for the interface labeled Untitled Interface. Enter cd .. to return to the correct context for the next step. For detailed information, see Configuring Network Routing in Oracle ZFS Storage Appliance Administration Guide, Release OS8.8.x. routing hostname:maintenance system setup net>...
- Page 186 Configure the Domain Name Service (DNS). For detailed information, see DNS Configuration in Oracle ZFS Storage Appliance Administration Guide, Release OS8.8.x. Configure DNS. Configure the Domain Name Service. Subcommands that are valid in this context: help [topic] =>...
- Page 187 SMB clients to use the same NTP server. For detailed information, see NTP Configuration in Oracle ZFS Storage Appliance Administration Guide, Release OS8.8.x. Configure Time. Configure the Network Time Protocol. Subcommands that are valid in this context: help [topic] =>...
- Page 188 "directory", advancing configuration to "support" ... Configure storage pools. For detailed information, see Configuring Storage in Oracle ZFS Storage Appliance Administration Guide, Release OS8.8.x. 13-20...
- Page 189 Note: You can configure remote support now, or at another time. If you do not have an Oracle support account, enter done without configuring remote support and complete it later. For more information about configuring remote support later or obtaining an Oracle support account, see...
- Page 190 Manual, Release OS8.8.x. Related Topics • For an overview of network interface configuration, see Network Configuration Oracle ZFS Storage Appliance Administration Guide, Release OS8.8.x. • For further configuration, see Configuring the Appliance in Oracle ZFS Storage Appliance Administration Guide, Release OS8.8.x.
-
Page 191: Troubleshooting Hardware Faults
These faults will be preserved by and observable in Oracle Integrated Lights Out Manager (ILOM), located in the service processor (SP). Connect to Oracle ILOM on the server platform to diagnose hardware faults that do not appear in the BUI.
Need help?
Do you have a question about the ZFS Storage DE3-24P and is the answer not in the manual?
Questions and answers