Table of Contents
Advertisement
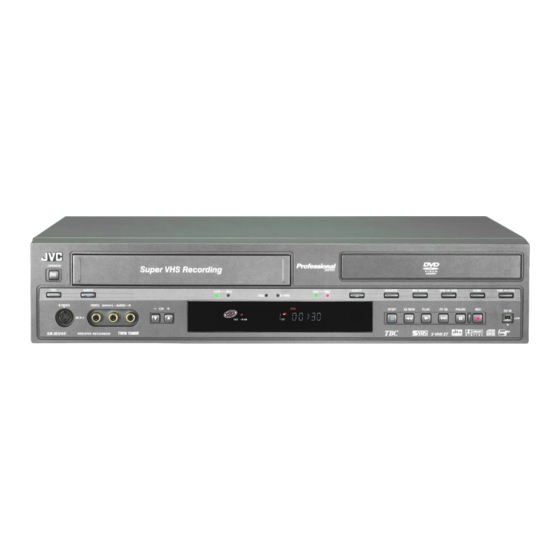
DVD VIDEO RECORDER &
VIDEO CASSETTE RECORDER
SR-MV40U
CABLE/DBS
TV
DVD
TV/CBL/DBS
VCR
DVD
VCR
/DVD
TIMER
TIMER
/DVD
NUMBER / TV CH / DVD CH
NUMBER / TV CH / DVD CH
1
2
3
ABC
DEF
4
5
6
GHI
JKL
MNO
7
8
9
PQRS
TUV
WXYZ
0
CANCEL
AUX
MEMO/MARK
PROG/CHECK DISPLAY ON SCREEN
VCR PLUS+
PROGRESSIVE
SCAN
ENTER
PREVIOUS
NEXT
SLOW
PLAY/SELECT
SLOW
STOP/
CLEAR
PAUSE
REMAIN
REC
OPERATE
REC MODE
ANGLE
SUBTITLE
LIVE CHECK
T V
CH
VOL.
TV/VCR
AUDIO
TBC
EJECT
TV/DVD
TV/CBL/DVD
TV
S-VIDEO
VIDEO (MONO)L - AUDIO - R
IN F-1
VCR
REC
TBC
DUBB
DVD
REC
EJECT
CH
+
–
INSTRUCTIONS
VCR/DVD
REC MODE
VCR
DVD
DUBB
VCR
DVD
STOP
REW
PLAY
FF
PAUSE
REC
DV IN
For Customer Use:
Enter below the Model No. and
Serial No. which are located on
the rear of cabinet. Retain this
information for future reference.
Model No.
Serial No.
LPT1098-001A
EN
Advertisement
Table of Contents

Related Manuals for JVC SR-MV40US


Summary of Contents for JVC SR-MV40US
-
Page 1: Dvd Video Recorder
DVD VIDEO RECORDER & VIDEO CASSETTE RECORDER SR-MV40U CABLE/DBS TV/CBL/DBS /DVD TIMER TIMER /DVD NUMBER / TV CH / DVD CH NUMBER / TV CH / DVD CH PQRS WXYZ CANCEL MEMO/MARK PROG/CHECK DISPLAY ON SCREEN VCR PLUS+ PROGRESSIVE SCAN ENTER PREVIOUS NEXT... - Page 2 CAUTION: Changes or modifications not approved by JVC could void user’s authority to operate the equipment. , 60Hz only.
- Page 3 IMPORTANT PRODUCT SAFETY INSTRUCTIONS Electrical energy can perform many useful functions. But improper use can result in potential electrical shock or fire hazards. This product has been engineered and manufactured to assure your personal safety. In order not to defeat the built-in safeguards, observe the following basic rules for its installation, use and servicing.
- Page 4 1. Accessories To avoid personal injury: Do not place this product on an unstable cart, stand, tripod, bracket, or table. It may fall, causing serious injury to a child or adult, and serious damage to the product. Use only with a cart, stand, tripod, bracket, or table recommended by the manufacturer or sold with the product.
- Page 5 Declaration of Conformity Model Number: SR-MV40U Trade Name: Responsible Party: JVC Americas Corp. Address: 1700 Valley Road Wayne, N.J. 07470 Telephone Number: 973-317-5000 This device complies with Part 15 of FCC Rules. Operation is subject to the following two conditions:...
-
Page 6: Features Of This Unit
This unit allows you various types of playback and recording because this unit has two tuners. Record programs on both DVD deck and VCR deck simultaneously Start recording on the DVD deck. ( Start recording on the VCR deck. ( NOTE: [DV IN] connector is available for DVD deck only. -
Page 7: Table Of Contents
DISC INFORMATION About Discs ...8 INDEX INSTALLING YOUR NEW UNIT Basic Connection ...17 INITIAL SETTINGS Plug & Play Set ...18 Language ...19 Clock Set...20 Tuner Set ...21 Monitor Set (DVD Deck Only) ...22 OPERATIONS ON DVD DECK Basic Playback...23 Playback Features ...24 Live Memory Playback ...27 Using The On-screen Bar ...31 Parental Lock ...35... -
Page 8: Disc Information
The above table is based on the information as of August 2005. Recording and playback may not be performed depending on the characteristics and condition of the disc used, leading to unsatisfactory results. Using discs manufactured by JVC is recommended since they have been tested to be compatible with this unit. - Page 9 Editing can be performed after recording, such as deleting unwanted parts. DVD-RW (Video mode) Can be played back on other DVD players. New recording can be performed by erasing all the data on a disc once played back. DVD-R Can be played back on other DVD players.
- Page 10 DISC INFORMATION Audio CD/Video CD Typically, Audio CD discs are divided into separate tracks each containing one song. Each track is assigned a number. For example, the third track is Track 3. The same is true for Video CD discs. However, some discs are not divided into tracks.
- Page 11 Placing A Disc Opening the disc tray Press x (EJECT) to open the disc tray. Pressing the button again closes the disc tray. Use the button to open and close the disc tray. Do not block the disc tray with your hand while it is opening or closing as this may result in hardware failure.
-
Page 12: Index
INDEX Front View OPERATE EJECT S-VIDEO VIDEO (MONO)L - AUDIO - R IN F-1 A Operate Button (OPERATE 1) B Eject Button (EJECT x)(VCR) C Cassette Loading Slot D VCR Lamp pg. 43 VCR Recording Lamp (REC) E TBC Lamp pg. - Page 13 Rear View A Region Number pg. 9 B AC Power Cord pg. 17 C Cooling Fan This prevents the temperature from rising inside the unit. Do not remove it. Install the unit so as not to block the area around the fan. The cooling fan on the rear of the unit may be activated even if the unit is turned off when “AUTO CLOCK”...
- Page 14 INDEX Front Display Panel LPCM XP SP LP EP S-VHS -RAM A VIDEO Indicator ( Lights when VIDEO mode is selected by pressing TV/VCR. Lights off when TV mode is selected. B Disc Type Indicator When a disc is loaded, the type of the disc is indicated. Disc Status Indicator When a disc is running, the disc marks rotate.
- Page 15 On-Screen Display (DVD deck) When “SUPERIMPOSE” is set to “AUTO” and ON SCREEN on the remote control is pressed, various operational indicators appear on the TV screen. To clear the operational indicators, press ON SCREEN twice. A Disc Display Displays the type of the disc loaded on the disc tray. B Title Number* Displays number of the title currently being played back.
- Page 16 The remote control can operate most of your unit’s functions, as well as basic functions of TV sets of JVC and other brands. Point the remote control toward the receiving window. The maximum operating distance of the remote control is about 8 m.
-
Page 17: Installing Your New Unit
Basic Connection Antenna or Cable Coaxial cable Flat feeder Matching transformer (not supplied) RF cable (not supplied) Antenna splitter AC outlet RF cable (not supplied) AC power cord To [VHF/UHF IN (DVD)] OPTICAL Back of unit [S VIDEO [COMPONENT OUTPUT] VIDEO OUT (Y/P S-Video cable... -
Page 18: Initial Settings
INITIAL SETTINGS Plug & Play Set Auto Clock Set/Auto Tuner Set This unit sets the clock and tuner channels automatically when AC power cord is first connected to an AC outlet. The antenna cable must be connected for the Plug & Play setting. The time and date can be set automatically by the clock setting data transmitted from one of the regular TV broadcast channels. -
Page 19: Language
Language Turn on the unit. Turn on the TV and select the video channel (or AV mode). Slide the TV/CABLE/DBS/DVD switch to DVD. VCR/DVD ENTER SET UP On-screen Language Set This unit offers you the choice to view on-screen messages in 3 different languages. -
Page 20: Clock Set
INITIAL SETTINGS Clock Set Perform clock setting only if the clock has not been set correctly by the Plug&Play setting. Turn on the unit. Turn on the TV and select the video channel (or AV mode). Slide the TV/CABLE/DBS/DVD switch to DVD. VCR/DVD ENTER SET UP... -
Page 21: Tuner Set
Tuner Set Turn on the unit. Turn on the TV and select the video channel (or AV mode). Slide the TV/CABLE/DBS/DVD switch to DVD. VCR/DVD ENTER SET UP INFORMATION The unit selects the correct band (TV or CATV) automatically during Auto Channel Set. The selected band will be displayed on the right side of “BAND”... -
Page 22: Monitor Set (Dvd Deck Only)
INITIAL SETTINGS Monitor Set (DVD Deck Only) You can select the monitor type depending on the TV used when you play back DVD VIDEO discs recorded for wide-screen TVs. Turn on the unit. Turn on the TV and select the video channel (or AV mode). Slide the TV/CABLE/DBS/DVD switch to DVD. -
Page 23: Operations On Dvd Deck
Basic Playback Turn on the unit. Turn on the TV and select the video channel (or AV mode). Slide the TV/CABLE/DBS/DVD switch to DVD. VCR/DVD ENTER ATTENTION: It takes approximately 30 seconds to read a disc depending on the type and condition of the disc since this unit is multi-disc compatible (DVD-RAM, DVD-RW, DVD-R). -
Page 24: Playback Features
OPERATIONS ON DVD DECK Playback Features Turn on the unit. Turn on the TV and select the video channel (or AV mode). Slide the TV/CABLE/DBS/DVD switch to DVD. Press VCR/DVD repeatedly so that the DVD lamp lights up on the unit. - Page 25 Still Picture/Frame-By-Frame Playback Press 9 to pause during playback. Press 9 or w e to activate frame-by-frame playback. Each press of 9 advances the still picture frame by frame. Each press of w e advances/reverses the still picture frame by frame.
- Page 26 OPERATIONS ON DVD DECK TOP MENU ENTER PREVIOUS (2) REMAIN ANGLE AUDIO Checking The Time Information You can check time information of a disc on the front display panel and the TV screen. Press DISPLAY once to display the lastly displayed information. To changes the display, press DISPLAY repeatedly.
-
Page 27: Live Memory Playback
Audio Channel Selection When playing discs on which you recorded stereo programs, you can choose the desired audio channel. When “SUPERIMPOSE” is set to “AUTO”, you can confirm on the TV screen the audio channel you have chosen. ( Each time you press AUDIO, the audio channel changes. - Page 28 OPERATIONS ON DVD DECK Overview Of Live Memory Playback You can play back a program you are recording from the beginning while continuing to record or timer record onto a DVD-RAM disc. This is called “Live Memory Playback”. (Recording screen) To stop recording, press 8 Recording stops...
- Page 29 Display During Live Memory Playback During recording, you can watch at your will what was previously recorded or is currently being recorded. It is possible to perform freely normal playback operations (forward/reverse high-speed search and variable-speed search) within the range of the red or blue bar on the TV screen.
- Page 30 OPERATIONS ON DVD DECK Buttons To Be Used During Live Memory Playback Turn on the unit. Turn on the TV and select the video channel (or AV mode). Slide the TV/CABLE/DBS/DVD switch to DVD. A NAVIGATION Displays Library Database DVD Navi menu. You can choose a program to play back.
-
Page 31: Using The On-Screen Bar
Using The On-screen Bar The on-screen bar allows you to control various playback functions. Some of the functions operated on Navigation Menu can be controlled on the On-screen bar. Be sure to clear Library Database DVD Navi screen by pressing NAVIGATION. - Page 32 OPERATIONS ON DVD DECK CANCEL ENTER CLEAR (8) Repeat Playback You can repeat playback as you like according to the type of disc. Press ON SCREEN twice to access the on-screen bar. Press w e to select “ ”, then press ENTER. The pop-up window appears under the selected item.
- Page 33 Press the number keys to enter the desired item number, then press ENTER. Playback starts from the selected section. Examples: A To select track 5, press the number key “5”. B To select track 15, press the number key “1” and “5”. C To select track 25, press the number key “2”, then “5”.
- Page 34 OPERATIONS ON DVD DECK CANCEL ENTER CLEAR (8) Setting The Progressive Mode You can obtain optimal picture quality by selecting whether the content on the disc is processed by field (video source) or by frame (film source). Set the unit to the progressive scan mode. Refer to “Scan Mode Set”...
-
Page 35: Parental Lock
Parental Lock This function restricts playback of DVD VIDEO discs which contain violent (and other) scenes according to the level set by the user. For example, if a movie which includes violent scenes supports the parental lock feature, such scenes which you do not want to let children view can be cut or replaced by other scenes. -
Page 36: Basic Recording
Video mode. ( Recordings made on DVD-R/RW disc must be finalized to play back on other DVD players. Perform “Finalize A Disc (DVD Deck Only)” You can record up to 99 programs and 99 play lists on each disc. -
Page 37: Recording Features
Recording Features Turn on the unit. Turn on the TV and select the video channel (or AV mode). Slide the TV/CABLE/DBS/DVD switch to DVD. Press VCR/DVD repeatedly so that the DVD lamp lights up on the unit. REMAIN TV/VCR Watch Another Program While Recording On The Unit While recording is going on, you can watch another program on the TV by using the TV’s tuner. -
Page 38: Vcr Plus+ Timer Programming
OPERATIONS ON DVD DECK VCR Plus+ Timer Programming You can program this unit to timer record as many as 8 programs. With the VCR Plus+ system, timer programming is greatly simplified because each TV program has a corresponding code number which your unit is able to recognize. You can use the remote control to enter the PlusCode number. -
Page 39: Manual Timer Programming
Manual Timer Programming You can program this unit to timer record as many as 8 programs. If you do not know the PlusCode number for the program you wish to record, use the following procedure to set your unit to timer record the program. -
Page 40: On-Disc Timer Programming
OPERATIONS ON DVD DECK On-Disc Timer Programming On-Disc Timer Programming is a function used with discs that are especially intended for a specific program. The disc is then programmed for a program you always watch every day or every week. Since older programs are automatically overwritten, a single DVD-RAM/RW (VR mode) disc can be used without worrying about how much recording capacity remains. - Page 41 How Discs Are Overwritten (Example 1) To record a 1-hour serial drama every Friday in SP mode Blank (Example 2) To record a 15-minute serial drama every morning in XP mode (Example 3) To record a 90-minute serial drama every Sunday in SP mode Blank NOTE: On-Disc Timer Programming may not always work as these examples.
- Page 42 OPERATIONS ON DVD DECK DVD TIMER (#) VCR/DVD CANCEL PROG/CHECK ENTER Check, Cancel And Change Programs When the DVD timer indicator lights on the front display panel Press DVD TIMER (#), then press 1. When “ ” and the DVD timer indicator light on the front display panel.
-
Page 43: Operations On Vcr Deck
Basic Playback Turn on the unit. Turn on the TV and select the video channel (or AV mode). Slide the TV/CABLE/DBS/DVD switch to DVD. VCR/DVD VCR/DVD Load a cassette. Make sure the window side is up, the rear label side is facing you and the arrow on the front of the cassette is pointed toward the unit. -
Page 44: Playback Features
OPERATIONS ON VCR DECK Playback Features Turn on the unit. Turn on the TV and select the video channel (or AV mode). Slide the TV/CABLE/DBS/DVD switch to DVD. Press VCR/DVD repeatedly so that the VCR lamp lights up on the unit. - Page 45 Next Function Memory The Next Function Memory “tells” the unit what to do after rewinding. Before continuing, make sure the unit is in the Stop mode. For Automatic Start Of Playback Press 3, then press 4 within 2 seconds. For Automatic Power Off Press 3, then press 1 within 2 seconds.
-
Page 46: Basic Recording
OPERATIONS ON VCR DECK Basic Recording Turn on the unit. Turn on the TV and select the video channel (or AV mode). Slide the TV/CABLE/DBS/DVD switch to DVD. CH +/– VCR/DVD REC MODE Load a cassette with the record safety tab intact. If not, set “REC SAFETY”... - Page 47 Repeat Recording You can record programs on one tape repeatedly. The tape is automatically rewound to the beginning to continue recording when the end of tape is reached during recording. The previously recorded programs will be overwritten. During recording, press and hold 4 and 7 on the remote control or 7 on the unit for more than 5 seconds.
-
Page 48: Vcr Plus+ Timer Programming
OPERATIONS ON VCR DECK VCR Plus+ Timer Programming You can program this unit to timer record as many as 8 programs. With the VCR Plus+ system, timer programming is greatly simplified because each TV program has a corresponding code number which your unit is able to recognize. You can use the remote control to enter the PlusCode number. -
Page 49: Manual Timer Programming
Manual Timer Programming You can program this unit to timer record as many as 8 programs. If you do not know the PlusCode number for the program you wish to record, use the following procedure to set your unit to timer record the program. - Page 50 OPERATIONS ON VCR DECK VCR TIMER (#) VCR/DVD CANCEL PROG/CHECK ENTER Check, cancel and change programs When the VCR timer indicator lights on the front display panel Press VCR TIMER (#), then press 1. When the VCR lamp does not light up on the unit Press VCR/DVD repeatedly so that the VCR lamp lights up on the unit.
-
Page 51: Navigation (Dvd Deck Only)
Library Database DVD Navi The Library Database DVD Navi enables you to search and select the desired programs recorded on a DVD-RAM/R/RW disc very easily. You can record up to 99 programs on a disc. Each time a program is recorded on the disc, the information of the program is registered for the Library Database DVD Navi automatically. -
Page 52: Edit Original Information
NAVIGATION (DVD DECK ONLY) Scan For Beginning(s) Of Program(s) Turn on the TV and select the video channel (or AV mode). Slide the TV/CABLE/DBS/DVD switch to DVD. NAVIGATION ENTER CLEAR You can scan the beginning of the program easily with the Library Database DVD Navi. - Page 53 Modify Program Name Perform steps 1 to 3 of “Modify Index” ( continuing. Press rt w e to select “MODIFY”, then press ENTER. Press w e to select “MODIFY NAME”. Press rt w e to select the desired letter or command, then press ENTER.
-
Page 54: Edit Play List Information
NAVIGATION (DVD DECK ONLY) Edit Play List Information Turn on the TV and select the video channel (or AV mode). Slide the TV/CABLE/DBS/DVD switch to DVD. NAVIGATION ENTER Play List It is a collection of the scenes. A play list can be freely edited and played back without ever changing any original recording data. -
Page 55: Modify Category
Find the point where you want the moved scene to begin, then press ENTER with the arrow on “IN”. The edit-in time is fixed and the elapsed playing time starts counting again. Find the point where you want the moved scene to end, then press ENTER with the arrow on “OUT”. -
Page 56: Edit Library Information
It is not possible to register discs used for On-Disc Timer Programming. ( It is not possible to register discs formatted on devices other than JVC’s DVD recorders. It is not possible to register discs recorded on devices other than JVC’s DVD recorders. -
Page 57: Playback With Mp3/Jpeg Navigation
Playback With MP3/JPEG Navigation This unit can play back discs that MP3 sound files and JPEG image files taken with digital still cameras or other devices are recorded. The MP3/JPEG Navigation enables you to search and select the desired files recorded on CD-R/RW or CD-ROM discs very easily. The following screen appears as the MP3/JPEG Navigation screen when you press NAVIGATION. -
Page 58: Editing
EDITING Tape Dubbing (From VCR To DVD) Because this unit includes both DVD deck and VCR deck, you can easily use this unit for dubbing without connecting any other equipment. Turn on the unit. Turn on the TV and select the video channel (or AV mode). Slide the TV/CABLE/DBS/DVD switch to DVD. -
Page 59: Manual Dubbing (From Vcr To Dvd)
Manual Dubbing (From VCR To DVD) Dubbing A Part Of A Cassette You can dub the selected scenes on a tape to the DVD disc, starting and stopping wherever you wish. Turn on the unit. Turn on the TV and select the video channel (or AV mode). Slide the TV/CABLE/DBS/DVD switch to DVD. -
Page 60: Disc Dubbing (From Dvd To Vcr)
EDITING Disc Dubbing (From DVD To VCR) Dubbing An Entire Disc Because this unit includes both DVD deck and VCR deck, you can easily use this unit for dubbing without connecting any other equipment. Turn on the unit. Turn on the TV and select the video channel (or AV mode). Slide the TV/CABLE/DBS/DVD switch to DVD. -
Page 61: Manual Dubbing (From Dvd To Vcr)
Manual Dubbing (From DVD To VCR) Dubbing A Part Of A Disc You can dub the selected scenes on a tape to the DVD disc, starting and stopping wherever you wish. Turn on the unit. Turn on the TV and select the video channel (or AV mode). Slide the TV/CABLE/DBS/DVD switch to DVD. -
Page 62: Dv Dubbing (Dvd Deck Only)
EDITING DV Dubbing (DVD Deck Only) You can dub programs from a camcorder or DV equipment connected to the unit with a DV cable. The unit’s remote control allows you the limited control of the connected camcorder or DV equipment functions during dubbing. NOTES: When connecting the unit to a device equipped with a DV input connector, be sure to use the optional DV cable (VC-VDV 204U). -
Page 63: Edit From A Camcorder
Edit From A Camcorder You can use a camcorder as the source player and your unit as the recording deck. A If the camcorder has no S-VIDEO output connector: To [AUDIO] input [VIDEO] input Video Audio cable (supplied) cable (not supplied) AUDIO OUT VIDEO OUT... -
Page 64: Edit To Or From Another Recorder
EDITING Edit To Or From Another Recorder You can use your unit as the source player or as the recording deck. NOTE: When using another recorder as the recording deck, refer to its instruction manual. Recorder TV receiver Another recorder Player Slide the TV/CABLE/DBS/DVD switch to DVD. -
Page 65: Digital Audio Dubbing
Digital Audio Dubbing You can dub selected audio from a DVD or Audio CD disc to a digital audio device. However, it is not possible to dub copy-protected discs. Turn on the TV and select the video channel (or AV mode). Slide the TV/CABLE/DBS/DVD switch to DVD. -
Page 66: Remote Control
Remote Control Functions Remote control 1/2/3/4 Code Switching The remote control is capable of controlling four JVC video units independently. Each of the units can respond to one of four codes (1, 2, 3 or 4). The remote control is preset to send 3 code signals because your unit is initially set to respond to 3 code signals. - Page 67 Your remote control can operate the basic functions of your cable box or DBS (Direct Broadcast Satellite) receiver set. In addition to JVC cable boxes or DBS receivers, other manufacturer’s cable boxes or DBS receiver can also be controlled. Slide the TV/CABLE/DBS/DVD switch to CABLE/DBS.
-
Page 68: System Connections
SYSTEM CONNECTIONS Connecting To A Dolby Digital Decoder Or An Amplifier With Built-in DTS These instructions enable you to connect your unit to a Dolby Digital decoder or an amplifier with built-in DTS. Dolby Digital Decoder or amplifier with built-in DTS To DIGITAL AUDIO input Optical cable (not supplied) -
Page 69: Subsidiary Settings
Mode Set (DVD Deck) Turn on the unit. Turn on the TV and select the video channel (or AV mode). Slide the TV/CABLE/DBS/DVD switch to DVD. VCR/DVD ENTER SET UP Various modes of this unit are categorized into menus nested in 2 levels shown in the following table. - Page 70 SUBSIDIARY SETTINGS VIDEO IN/OUT — MONITOR TYPE 4:3LB 4:3PS You can select the monitor type depending on the TV used when you play back DVD VIDEO discs recorded for wide-screen TVs. For details, refer to “Monitor Set (DVD Deck Only)” ( —...
-
Page 71: Mode Set (Vcr Deck)
Mode Set (VCR Deck) Turn on the unit. Turn on the TV and select the video channel (or AV mode). Slide the TV/CABLE/DBS/DVD switch to DVD. VCR/DVD ENTER SET UP You can change various mode settings on the Function Set screen. To change the settings of these modes, find the desired mode in the menu (for details on each menu, see pages 72 through 72), then follow the procedure below. - Page 72 SUBSIDIARY SETTINGS — PICTURE CONTROL AUTO EDIT This feature helps you to adjust the playback picture quality according to your preference. Normally select “AUTO”. AUTO : Picture quality is adjusted automatically. EDIT : Minimizes picture degradation during editing (recording and playback).
- Page 73 — S-VHS MODE Your unit can record in S-VHS (Super VHS), S-VHS ET or VHS. To record in S-VHS: Set “S-VHS MODE” to “ON”. Then, insert a cassette marked “S-VHS”. The S-VHS indicator lights up on the front display panel. The S-VHS recording mode is selected.
-
Page 74: Changing Vcr Plus+ Setting
SUBSIDIARY SETTINGS Changing VCR Plus+ Setting The VCR Plus+ programming system assigns a VCR Plus+ guide channel to the TV channels and the cable channels. These guide channel numbers are also called the VCR Plus+ channel codes. Most TV listings have a section, usually a chart, indicating the guide channel numbers assigned to each station. -
Page 75: Format A Disc (Dvd Deck Only)
( SUBSIDIARY SETTINGS To be chosen when you want to record, erase, or edit data on the disc repeatedly. on the disc once played back to record new data, or play back the disc on other DVD players. pg. 53) -
Page 76: Finalize A Disc (Dvd Deck Only)
Although DVD-R/RW discs finalized on this unit become playable on DVD players compatible with DVD-R/RW discs, some discs still may not play, for which JVC cannot take responsibility. Marked points marked before finalizing will be deleted, and programs will be divided automatically into “chapters” approximately every 5 minutes. -
Page 77: Scan Mode Set
Scan Mode Set If you connect the unit and TV with Component Video Connection pg. 17), you can select the scan mode from two modes: Interlaced scan mode which is used in the conventional TV system, and Progressive scan mode which enables reproduction of higher-quality images. -
Page 78: Troubleshooting
TROUBLESHOOTING Before requesting service for a problem, use this chart and see if you can solve the trouble yourself. Small problems are often easily solved, and this can save you the trouble of sending your unit off for repair. Initializing (DVD Deck Only) Malfunction occurs on the unit. - Page 79 “USE CLEANING CASSETTE” message appears on the screen. The video heads may be dirty. ]Use a dry cleaning cassette TCL-3F, or consult your JVC dealer. Breaks are noticeable in Hi-Fi soundtrack. The automatic tracking mode is engaged.
- Page 80 TROUBLESHOOTING Timer Recording (VCR Deck) Timer programming cannot be made. Date and time is not correct. ]Set date and time correctly. ( pg. 20) The timer is not engaged. ]Press VCR TIMER (#) and confirm that the VCR timer indicator lights up on the front display panel.
- Page 81 On-screen Message (DVD Deck Only) MEMORY IS FULL NOTHING MORE CAN BE REGISTERED IN THE LIBRARY IF YOU DELETE UNNECESSARY TITLE INFORMATION, YOU CAN THEN REGISTER ADDITIONAL INFORMATION The memory is full for registration for the Navigation system. The recording cannot be started even though the capacity for the recording is enough.
-
Page 82: Glossary
GLOSSARY 8 Aspect ratio The ratio of vertical and horizontal sizes of a displayed image. The horizontal vs. vertical ratio of conventional TVs is 4:3, and that of wide-screens is 16:9. 8 Chapter Refers to individual chapters included in a title. 8 Composite video signal Refers to video signal comprised of three kinds of signals combined: an image signal made up of luminance and... -
Page 83: Appendix
Language Code List Afar Abkhazian Afrikaans Ameharic Arabic Assamese Aymara Azerbaijani Bashkir Byelorussian Bulgarian Bihari Bislama Bengali, Bangla Tibetan Breton Catalan Corsican Czech Welsh Bhutani Greek Esperanto Estonian Basque Persian Fiji Faroese Frisian Irish Scots Gaelic Galician Guarani Gujarati Hausa Hindi Croatian Hungarian... - Page 84 APPENDIX Country/Area Code List for Parental Lock Andorra United Arab Emirates Afghanistan Antigua and Barbuda Anguilla Albania Armenia Netherlands Antilles Angola Antarctica Argentina American Samoa Austria Australia Aruba Azerbaijan Bosnia and Herzegovina Barbados Bangladesh Belgium Burkina Faso Bulgaria Bahrain Burundi Benin Bermuda Brunei Darussalam...
- Page 85 Saint Lucia Liechtenstein Sri Lanka Liberia Lesotho Lithuania Luxembourg Latvia Libyan Arab Jamahiriya Morocco Monaco Moldova, Republic of Madagascar Marshall Islands Mali Myanmar Mongolia Macau Northern Mariana Islands Martinique Mauritania Montserrat Malta Mauritius Maldives Malawi Mexico Malaysia Mozambique Namibia New Caledonia Niger Norfolk Island Nigeria...
-
Page 86: Specifications
SPECIFICATIONS GENERAL Power requirement AC 120 Vd, 60 Hz Power consumption Power on: 55 W Power off: 13.7 W Temperature Operating: 5°C to 35°C (41°F to 95°F) Storage: –20°C to 60°C (–4°F to140°F) Operating position Horizontal only Dimensions (WxHxD) 435 mm x 96 mm x 343 mm (17-3/16" x 3-13/16" x 13-1/2") Weight 6.2 kg (13.7 lbs) Input/Output... -
Page 87: List Of Terms
... 32 A-B Repeat Playback ... 46 Accidental erasure prevention ... 47 Active Video Calibration ... 33 Adjusting The Picture Quality ... 26 Angle Selection ... 27 Audio Channel Selection Audio Language/Sound Selection ... 21 Auto Channel Set ... 20 Auto Daylight Saving Time Check, Cancel And Change Programs ... - Page 88 Printed in China 0905MNH-SW-BJ © 2005 Victor Company of Japan, Limited...
Need help?
Do you have a question about the SR-MV40US and is the answer not in the manual?
Questions and answers