
Related Manuals for SANY SY155U


Summary of Contents for SANY SY155U
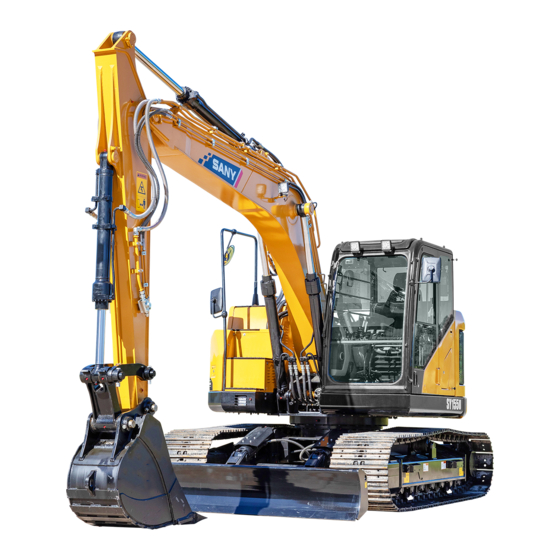
- Page 1 Operation and Maintenance Manual SY155U Excavator service@sanyamerica.com SANY Part Number SSY005079291...
- Page 2 Page Intentionally Blank...
- Page 3 Read and understand all safety precautions and instructions in this manual, and the machine labels before operating or maintaining it. Failure to follow safety messages could result in death or serious injury. Keep this manual with the machine for reference. SY155U Excavator OMM...
- Page 4 State of California to cause cancer, birth defects, or other reproductive harm. Wash hands after handling. © 2019 by SANY. All rights reserved. No part of this publication may be reproduced, used, distributed, or disclosed except for normal operation and maintenance of the machine as described herein. All information included within this publication was accurate at the time of publication.
-
Page 5: Table Of Contents
SANY Contact Information ........ - Page 6 Hydraulic Travel Motor Mode Switch ........3-12 SY155U Excavator OMM...
- Page 7 Fuse Panel ............. . . 3-22 SY155U Excavator OMM...
- Page 8 Fresh Air Filter Access Door ........... 4-7 SY155U Excavator OMM...
- Page 9 Boom Control – BHL Mode ..........4-25 SY155U Excavator OMM...
- Page 10 Loading the Machine ........... . 4-38 SY155U Excavator OMM...
- Page 11 SANY-Approved Lubricants ........
- Page 12 Relieve Hydraulic System Pressure ........5-40 SY155U Excavator OMM...
- Page 13 Replace the Bucket Teeth ..........5-65 SY155U Excavator OMM...
- Page 14 Remove Optional Equipment ............7-4 0-10 SY155U Excavator OMM...
- Page 15 SANY Contact Information ........
-
Page 16: Introduction
Continuing improvements in the design of this machine can lead to changes which may not be covered in this manual. Contact a SANY dealer for the latest available information on the machine or to answer any questions regarding information in this manual. -
Page 17: Organization Of This Manual
INTRODUCTION Organization of This Manual Machine Applications SANY excavators are designed for the following Table of Contents operations: This section provides a list of the general topics in each • Digging chapter, along with their page numbers. • Leveling Introduction •... -
Page 18: Serial Number Location
Serial Number Location Product identification plates are located in various places on the excavator. These list serial numbers that will be needed by a SANY dealer when ordering replacement parts or providing assistance for your machine. Product Identification Plate 0003544 Figure 1-2 The identification plate is on the lower front of the cab. -
Page 19: Engine Identification Plate
Figure 1-6 The identification plate is on the top of the hydraulic pump. Travel Motor Identification Plate 0003549 Figure 1-7 An identification plate is located on each travel motor. Remove the cover plates to access the travel motors. SY155U Excavator OMM... -
Page 20: Sany Contact Information
Use this table to record the product information related to this machine. Machine Serial No. Engine Serial No. Right Travel Motor Serial No. Left Travel Motor Serial No. Swinging Drive Motor Serial No. Hydraulic Pump Serial No. Dealer Name: Address: Email: Phone Numbers: SY155U Excavator OMM... -
Page 21: Correction Request Form
INTRODUCTION Correction Request Form If you find a problem with this manual, make a copy of this page, complete the form below, and send it to SANY. Correction Request Form Date of This Notification Your Name Company Name Department Street Address... -
Page 22: Glossary Of Acronyms
OSHA – Occupational Safety and Health Administration PPE – Personal Protective Equipment PQR – Procedure Qualification Report ROPS – Rollover Protective Structure SAE – Society of Automotive Engineers SCA – Supplemental Coolant Additive SDS – Safety Data Sheet WPS – Weld Procedure Specification SY155U Excavator OMM... -
Page 23: Safety
Precautions in High-Voltage Areas ..........2-8 SY155U Excavator OMM... -
Page 24: General Safety
Any faults found shall be reported to a injury, or even death. In this manual and on the machine SANY dealer. Stop all work immediately if any decals, signal words or illustrations are used to express operator aid is not working properly. -
Page 25: Mount And Dismount The Machine
Observe the following: • Check the wiring on the machine for damage when doing a prestart check. Contact a SANY dealer to repair or replace and damaged wiring. • Make sure the battery is operating in its recommended range. -
Page 26: Fire Extinguisher
4. If using a fire extinguisher, always aim the maintenance function. extinguisher nozzle at the base of the fire. Contact a SANY dealer for replacement decals if needed. Crushing Hazard NOTE: When replacing decals, make sure they are placed in the proper locations. Contact a SANY... -
Page 27: Maintenance Safety
When assembling or installing parts, always tighten them Maintenance Safety to the specified torque. When installing protective parts SANY cannot foresee every circumstance that might (such as guards) or parts that vibrate or rotate at high involve a hazard in operation or maintenance. Therefore, speed, make sure they are installed correctly. -
Page 28: Accumulator
Never strike the accumulator. unauthorized personnel. Shut down the engine before If the accumulator needs to be serviced, contact a SANY exiting the machine. dealer. Before starting any work operations, travel, or... -
Page 29: Travel And Operation Precautions
Avoid Backover Accidents Keep the windows, mirrors, and lights clean and in good condition. Before moving the machine, make sure all bystanders are clear of the intended path. SY155U Excavator OMM... -
Page 30: Precautions In High-Voltage Areas
Stay clear of overhead power lines; they are an electrical hazard. Treat all overhead power lines as being energized and not insulated. Be sure all underground utilities have been marked before excavating. SY155U Excavator OMM... -
Page 31: Machine Controls
Directional Arrow ............. . 3-18 SY155U Excavator OMM... - Page 32 System Setting Screen ..........3-35 SY155U Excavator OMM...
- Page 33 Tool Select Screen ........... . . 3-37 SY155U Excavator OMM...
-
Page 34: Machine Overview
18 Dozer blade cylinders Top engine compartment cover 19 Windshield wiper Left rear access door 20 Boom cylinders Fresh-air filter access door 21 Bucket 10 Sprocket 22 Arm 11 Track frame 23 Stop valve 12 Carrier roller 24 Bucket cylinder SY155U Excavator OMM... -
Page 35: Controls
Hydraulic lockout control lever (page 3-6) 11 Right console (page 3-7) Emergency stop switch (page 3-15) 12 Dozer blade control lever (page 3-7) Footrests 13 Right joystick (page 3-9) Travel control pedals (page 3-6) 14 Radio (page 3-21) SY155U Excavator OMM... -
Page 36: Hydraulic Lockout Control Lever
• Never place your feet on the travel control pedals, unless you are driving or steering the machine, to avoid causing unexpected movement. Failure to follow these warnings could result in death or serious injury. SY155U Excavator OMM... -
Page 37: Left Console
See “Home Screen” on page 3-24. 0003669 Figure 3-7 The right control console contains the right joystick (1), dozer blade control lever (2), throttle control dial (3), windshield washer switch (4), windshield wiper switch (5), and the key switch (6). SY155U Excavator OMM... -
Page 38: Windshield Washer Switch
The windshield wiper switch has two operating positions. In the center position, the windshield wiper operates at low speed. To the right, the windshield wiper operates at high speed. Press the switch to the left to turn the windshield wiper off. 0003645 Figure 3-12 SY155U Excavator OMM... -
Page 39: Right Joystick
Right Joystick Switches 0006346 Figure 3-13 WARNING Prevent unexpected movement of the machine. Know the positions and functions of the joysticks before performing any machine operations. Failure to follow this warning could result in death or serious injury. SY155U Excavator OMM... -
Page 40: Switches
Not equipped Not equipped Not equipped Automatic regeneration inhibited Flow rate of AUX (– –) Red – flashing AUX (+) valve error Red – flashing AUX (–) valve error Maximum (Max) pressure of AUX (– –) (optional) 3-10 SY155U Excavator OMM... - Page 41 LED indicator lights on = front work lights on Beacon light is on and the audible travel alarm will beep. Start-stop NOTE: No LED indicator lights illuminated = the system or component is disabled or off unless otherwise noted. SY155U Excavator OMM 3-11...
-
Page 42: Regeneration Inhibit Switch
Use the manual regeneration switch (9) • Switch (12) increases the hydraulic flow rate. to initiate a stationary regeneration. See “Manual Regeneration” on page 4-20. • Switch (6) decreases the hydraulic pressure. • Switch (11) increases the hydraulic pressure. 3-12 SY155U Excavator OMM... -
Page 43: Work Mode Switch
• If either of the joysticks or the travel controls are operated, or if the throttle control dial is adjusted while the engine is idling at the auto idle speed, the engine speed automatically returns to its higher, previously set level or the newly set level. SY155U Excavator OMM 3-13... -
Page 44: Front Work Lights Switch
The left and right LED switch status lights illuminate when the switch is on, and an audible travel alarm will beep. Turn on the travel alarm whenever the machine is being operated to increase jobsite safety. 3-14 SY155U Excavator OMM... -
Page 45: Emergency Stop Switch
OFF. Climate control vents (4) on the monitor console can be Failure to follow this notice could damage the opened, closed, and rotated as needed for operator machine or cause improper operation. comfort or window defrost. SY155U Excavator OMM 3-15... -
Page 46: Joystick Modes
• Swing the upper structure to the left (1) • Arm out (2) • Swing the upper structure to the right (3) • Arm in (4) • Neutral (N) 0003645 Figure 3-27 3-16 SY155U Excavator OMM... -
Page 47: Right Joystick-Bhl Mode
NOTE: To switch the pattern change valve from SAE to BHL, loosen or remove the fastener (2) from the threaded hole and rotate the valve handle (3) 90°. Install and tighten the fastener to lock the pattern change valve in the desired position. SY155U Excavator OMM 3-17... -
Page 48: Return Flow Selector Valve
The stop valve is shown in the closed position. To open a shear is an example of a two-way flow attachment. the valve, turn the valve knob (2) counterclockwise until the stop (4) makes contact with the stop pin (3). 3-18 SY155U Excavator OMM... -
Page 49: Sunlight Sensor
• The sunlight sensor (1) is on the front of the monitor console. The sunlight sensor adjusts the climate control system airflow to match the changes of temperature caused by direct sunlight. SY155U Excavator OMM 3-19... -
Page 50: Climate Control System
Contact a SANY dealer for further information. Air Conditioning (AC) Power AUTO Button Press the A/C power button (7) to switch the air conditioning system on and off. -
Page 51: Radio
Press and release the TIME button to leave the time set current time on the LCD screen (5). screen and return to time display for 5 seconds. After 5 seconds, the time display will return to the radio display. SY155U Excavator OMM 3-21... -
Page 52: Power Button
Contact a SANY dealer for repairs. 0003640 Figure 3-40 A 24V outlet (1) inside the right front access door compartment is used for powering an accessory light. -
Page 53: Escape Tool
The fire extinguisher must be at least a 2.5 lb. class ABC rated fire extinguisher (National Fire Protection Association [NFPA] 10 Standard for Portable Fire Extinguishers). The fire extinguisher (1) is behind the seat on the left side pillar. SY155U Excavator OMM 3-23... -
Page 54: Monitor
Home Screen Display Function Description Date (YY/MM/DD) and Date and time Displays the current date and time. Time (HH/MM/SS) Displays the total number of machine Operating hours operating hours. Function icons Displays information for machine systems. 3-24 SY155U Excavator OMM... - Page 55 Indicates the current work mode by letter Work mode indication designation. H = Heavy duty B = Breaker Indicates the current throttle dial position 1 = Lowest throttle Throttle dial indication number. 10 = Highest throttle SY155U Excavator OMM 3-25...
-
Page 56: Function Icons
High speed mode. and it will display a turtle icon in low speed mode. Not used. Park brake icon – (not equipped) Cruise control icon – (not equipped) 3-26 SY155U Excavator OMM... - Page 57 Engine oil pressure low. required. Manual regeneration icon. Yellow – flashing Manual regeneration requested. Yellow – steady Manual regeneration on. Diesel Particulate Filter (DPF) change required. High Exhaust System Temperature (HEST) Yellow Exhaust temperature is high. icon. SY155U Excavator OMM 3-27...
-
Page 58: Home Screen Functions
NOTE: On the home screen, the selected tool icon is displayed above the F2 button. NOTE: You can also access the Tool Select screen from the Main Menu. See “Main Menu Screen” on page 3-30. 3-28 SY155U Excavator OMM... -
Page 59: Quick Coupler Operation
5. Press the F3 button below the Lock quick coupler icon (3) to lock the quick coupler. 6. Press the F1 button below the Active quick coupler icon (1) to deactivate the quick coupler function. SY155U Excavator OMM 3-29... -
Page 60: Main Menu Screen
• Input switch signals • Tool Select • Output switch signals • Pilot pressure signals • Main pump signals 3. Press the F5 button below the return arrow icon (3) to return to the Main Menu screen. 3-30 SY155U Excavator OMM... -
Page 61: Engine And Throttle Signals Screen
Press the F1 button below the up/down arrow icon (1) to return arrow icon (2) to return to the Main Menu screen. scroll to the next screen, or press the F5 button below the return arrow icon (2) to return to the Main Menu screen. SY155U Excavator OMM 3-31... -
Page 62: Output Switch Signals Screen
Press the F1 button below the up/down arrow icon (1) to return arrow icon (2) to return to the Main Menu screen. scroll to the next screen, or press the F5 button below the return arrow icon (2) to return to the Main Menu screen. 3-32 SY155U Excavator OMM... -
Page 63: Main Pump Signals Screen
NOTE: The Maintenance Information Screen (Maint. Info. 0003709 Figure 3-55 screen) is for SANY technician use only and Press the F1 button below the up/down arrow icon (1) to requires a password. scroll to the next screen, or press the F5 button below the return arrow icon (2) to return to the Main Menu screen. -
Page 64: Fault Information Screen
0003703 Figure 3-57 return to the Main Menu screen. 1. Press the F1 button below the up/down arrow icon NOTE: Contact a SANY dealer for information about (1) from the Main Menu screen to highlight Error clearing fault codes. Codes. -
Page 65: System Setting Screen
4. Press the F3 button below the check mark icon to accept the values entered. 5. Press the F5 button below the return arrows icon (3) to return to the Main Menu screen. SY155U Excavator OMM 3-35... -
Page 66: Machine Configuration Screen
(1) from the Main Menu screen to highlight Machine Press the F5 button below the return arrow icon (3) to Config. return to the Main Menu screen. 2. Press the F3 button below the check mark icon (2) to open the Machine Configuration screen. 3-36 SY155U Excavator OMM... -
Page 67: Tool Select Screen
(1) from the Main Menu screen to highlight Tool Select. NOTE: The Tool Select screen can also be accessed from the Home screen. 2. Press the F3 button below the check mark icon (2) to open the Tool Select screen. SY155U Excavator OMM 3-37... - Page 68 MACHINE CONTROLS Page Intentionally Blank 3-38 SY155U Excavator OMM...
-
Page 69: Machine Operation
Lower Front Windshield ........... . . 4-15 SY155U Excavator OMM... - Page 70 Two Tracks Stuck ............4-31 SY155U Excavator OMM...
- Page 71 Lifting the Machine ............4-41 SY155U Excavator OMM...
-
Page 72: Work Area
• Mirrors (4) The seat belt is designed to protect the operator from danger, especially when the machine is traveling. Failure to wear a seat belt when operating the machine could result in death or serious injury. SY155U Excavator OMM... -
Page 73: Cleaning The Cab Interior
To release the door from the opened position, push down the handle (2). Swing the cab door open until the catch on the release lever (7). (4) engages the cab door latch (5), securing it in the opened position. SY155U Excavator OMM... -
Page 74: Emergency Escape Hatch
Move the support rod out of the slot in the support turning the fasteners (4) 1/4 turn. bracket to close the access door. See “Door Support Rod” on page 4-6. Close the access door until it is latched. SY155U Excavator OMM... -
Page 75: Right Rear Access Door
(1). Use the handle (2) to pull the door open. When fully open, place the access door support rod in the support bracket slot to prevent it from closing 0003624 Figure 4-10 unexpectedly. See “Door Support Rod” on page 4-6. SY155U Excavator OMM... -
Page 76: Closing The Engine Compartment Door
3. Turn the key from position (3) clockwise until the lock on page 3-23. points to position (4) and remove the filler cap. • Check the escape tool. See “Escape Tool” on • Position (3): Locked page 3-23. • Position (4): Open SY155U Excavator OMM... -
Page 77: Electrical Components Check
Contact a SANY dealer for more electrical load on the circuit. Contact a SANY information. Failure to follow this notice may dealer for electrical troubleshooting. - Page 78 Contact a SANY dealer for electrical troubleshooting. Failure to follow this notice could damage the machine or cause improper machine operation.
-
Page 79: Seat And Seat Belt
• Seat Base Forward/Backward Position Adjustment – Lift and hold the seat base adjustment lever (10) to slide the seat base (11) and control consoles forward or backward. Release the lever to lock the seat base in position. SY155U Excavator OMM 4-11... -
Page 80: Seat Belt
Turn the lumbar adjustment knob (1) clockwise to WARNING increase lumbar support, and counterclockwise to Contact a SANY dealer if the seat belt fails any of decrease it. these checks or fails to fasten or release. Failure Seat Belt to follow this warning could result in death or serious injury. -
Page 81: Cab Door Windows
If it is not secured properly, the windshield may slide down unexpectedly and result in personal injury or damage to the machine. 0003550 Figure 4-21 The windshield (1) can be opened and stored on the ceiling of the cab. SY155U Excavator OMM 4-13... -
Page 82: Closing The Windshield
5. When the windshield reaches the lowered position, firmly push the left and right handles forward at the top of the windshield to engage the latches. NOTE: The right side windshield latch is shown. The left side is similar. 4-14 SY155U Excavator OMM... -
Page 83: Lower Front Windshield
Level” on page 5-17. Figure 4-28 The cab light (1) is turned on and off by moving the • Windshield Washer Fluid – See “Check Windshield switch (2) up or down. Washer Fluid” on page 5-18. SY155U Excavator OMM 4-15... -
Page 84: Starting The Engine
(open) • Before starting the engine or leaving the operator position. If it does, contact a SANY dealer. Failure seat, make sure the hydraulic lockout control to correct this could result in death or serious lever is in the locked (closed) position. -
Page 85: Cold Weather Engine Starting
The machine should not start when the hydraulic lockout control lever is in the unlocked (open) Cold Weather Engine Starting position. If it does, contact a SANY dealer. Failure to correct this could result in death or serious WARNING injury. -
Page 86: Machine Warm-Up
Failure to follow this caution could damage start the engine again. the machine. If the engine fails to start after five attempts, contact a SANY dealer. NOTICE! 10. Turn the key switch to START. The starter motor will • In case of emergency, irregular engine operation, crank the engine. -
Page 87: Jump-Start The Engine
NOTICE! If the engine fails to start after five attempts, The starting system voltage and the battery contact a SANY dealer. voltage in the boosting machine should be no more than 24V. Never use a welder or equipment 7. Attempt to start the engine of the machine with the with a higher voltage system to jump-start the drained battery. -
Page 88: New Machine Break-In
SANY Failure to follow this warning could cause a fire or recommends a break-in period of 100 service explosion, resulting in death or serious injury. -
Page 89: Engine Shutdown
3. To prevent fires, clean the engine compartment of down. combustible debris. 4. Turn the key switch (2) to the OFF position and allow 4. Clean mud from the tracks and undercarriage. the engine to stop. SY155U Excavator OMM 4-21... -
Page 90: Travel Operations
When the cab faces backward, the machine moves levers/pedals. forward when the control levers are pulled and backward when pushed. SANY does not recommend traveling with the undercarriage reversed. 0003635 Figure 4-36 1. Adjust the throttle control dial (1) to MAX (high idle). -
Page 91: Stopping The Machine
Push both travel control levers equally or press the top of both foot pedals equally to move the machine forward. Backward Travel Pull both travel control levers equally or press the bottom of both foot pedals equally to move the machine backward. SY155U Excavator OMM 4-23... -
Page 92: Spot Turning
To change the operating mode, see “Pattern Change (SAE/BHL) Valve” on page 3-17. 0003610 and 0004010 Figure 4-45 To raise the boom pull the right joystick. To lower the boom push the right joystick. 4-24 SY155U Excavator OMM... -
Page 93: Boom Control - Bhl Mode
Swing Control – SAE/BHL Mode 0003609 and 0004008 Figure 4-48 To swing the machine to the right move the left joystick to the right. To swing the machine to the left move the left joystick to the left. SY155U Excavator OMM 4-25... -
Page 94: Restricted Operation
Excavating Hard or Rocky Ground Use alternate work equipment to break up hard ground 0002869 Figure 4-51 before excavation to prevent machine damage. To avoid hydraulic cylinder damage, do not use the bucket to strike or compact the ground. 4-26 SY155U Excavator OMM... -
Page 95: Never Operate Using Machine Weight
0002849 Figure 4-55 Avoid operating the machine with any cylinder fully retracted or extended. If the cylinder piston reaches its end of stroke, continued use of the work equipment could damage that cylinder. SY155U Excavator OMM 4-27... -
Page 96: Avoid Shifting Travel Directions Suddenly
The machine could tip over as of a result of being on through water. Check the depth of the water with uneven ground or a slope. To avoid such accidents, the bucket. follow these instructions when the machine is operated on uneven ground or on a slope: 4-28 SY155U Excavator OMM... - Page 97 • Do not swing a loaded bucket to the downhill direction. Build a platform (1) on an incline so the machine can be operated on a level surface. SY155U Excavator OMM 4-29...
-
Page 98: Engine Stalls On An Incline
(open) position, restart the engine. When the engine stalls on an incline, do not allow the upper structure to swing. 4-30 SY155U Excavator OMM... -
Page 99: Two Tracks Stuck
• Do not allow the boom or arm hydraulic cylinder’s hoses to come into contact with the ground. The machine can be used for the following operations. The scope of operation can also be expanded by using various optional attachments. SY155U Excavator OMM 4-31... -
Page 100: Trenching Work
0002924 Figure 4-1 • Never jerk the chain or wire rope. • Always wear appropriate personal protective Failure to follow these warnings could result in equipment (PPE) and clothing during operation. death or serious injury. 4-32 SY155U Excavator OMM... -
Page 101: Towing Point For A Light Load
Keep hands and feet clear of the underside of the bucket during removal. • Do not use hands or fingers to aid in bore alignment. Failure to follow this caution could result in injury. SY155U Excavator OMM 4-33... -
Page 102: Install The Bucket
Wipe off excess grease upon completion. 000229S Figure 4-73 4. Install the shims (1) as noted during the removal and install attachment pins (2) securing the bucket (3) to the arm (4) and link assembly (5). 4-34 SY155U Excavator OMM... -
Page 103: Cold Weather Operation
• Open the drain valve of the fuel water separator completely. Add new ethylene glycol engine coolant to daily and discharge the water in the fuel system. the cooling system. SY155U Excavator OMM 4-35... -
Page 104: Park The Machine
Figure 4-77T • Disconnect the negative battery cables or remove 5. Move the hydraulic lockout control lever (1) to the the batteries from the machine. See “Replace the locked (closed) position (2). Batteries” on page 5-37. 4-36 SY155U Excavator OMM... -
Page 105: During Storage
• Use a signalman to alert the operator to any potential hazards. Failure to follow these warnings could result in death or serious injury. • Deactivate the auto-idle mode before loading or unloading; otherwise, the machine may move suddenly. 0003635 Figure 4-79 SY155U Excavator OMM 4-37... -
Page 106: Loading The Machine
180°. Lower the dozer blade. When loading the excavator with work equipment installed, place the work equipment in the front and travel 5. Fully curl the bucket and arm. Slowly lower the forward. boom. 4-38 SY155U Excavator OMM... - Page 107 11. Turn the battery disconnect switch to OFF. See “Battery Disconnect Switch” on page 3-15. 12. Lock all doors and hoods. 13. Cover the exhaust opening to prevent contamination. SY155U Excavator OMM 4-39...
-
Page 108: Unloading The Machine
8. Stop the machine when it travels over the rear wheels of the trailer and toward the ramps. 9. Adjust the boom-arm angle between 90° and 110° and lower the bucket so that the flat surface is in contact with the ground. 4-40 SY155U Excavator OMM... -
Page 109: Lifting The Machine
6. Turn the battery disconnect switch to OFF. 7. Lock all doors and hoods. 8. Cover the exhaust opening to prevent contamination. 0002971 Figure 4-87 9. Use wire ropes and a container spreader bar (1) that have adequate length to prevent machine damage. SY155U Excavator OMM 4-41... - Page 110 MACHINE OPERATION Page Intentionally Blank 4-42 SY155U Excavator OMM...
- Page 111 SANY-Approved Lubricants ........
- Page 112 Relieve Hydraulic System Pressure ........5-40 SY155U Excavator OMM...
- Page 113 Replace the Bucket Teeth ..........5-65 SY155U Excavator OMM...
- Page 114 Check the Operation and Maintenance Manual ........5-66 SY155U Excavator OMM...
-
Page 115: Maintenance Information
Failure to inspect hydraulic oil for contamination you at all times. may damage the hydraulic system or cause the • Contact a SANY dealer if you are unable to perform machine to operate improperly. the procedures listed in this manual or if additional procedures are required. -
Page 116: Cleaning The Machine
If the machine will be operating under adverse NOTICE! conditions: • Check and clean electrical components to remove • Contact a SANY dealer before beginning any any accumulated corrosion. welding repairs. Any welding repairs on the machine must be performed by personnel who •... -
Page 117: Dusty Environments
Contact a SANY dealer for assistance if the machine will be operated in freezing temperatures where the aid of an auxiliary heating device is needed. -
Page 118: Recommended Lubricants, Fuel, And Engine Coolant
S<15 mg/kg for all normal operations. • Replace hydraulic oil that has been subjected to overheating or damaged components. • SANY does not recommend the use of any diesel fuel with a cetane level less than 40. • Change the hydraulic filter as recommended. -
Page 119: Engine Coolant
(hard water) contains large amounts of minerals (calcium, magnesium, etc.) which can form scale in the NOTE: See the engine manual or contact a SANY dealer for the recommended engine coolant. Engine Oil Viscosity/Temperature Data Temperature °F (°C) -
Page 120: Industrial Gear Oil/Temperature Data
• Use ISO VG 46 anti-wear hydraulic oil in general temperate climates. • Use ISO VG 32 low-temperature anti-wear hydraulic oil (pour point is -43.6°F [-42°C]) in general arctic areas where ambient temperatures can reach -22°F (-30°C) during operation. SY155U Excavator OMM 5-10... -
Page 121: Capacities
• Any anaerobic sealant (thread-locking compound) having properties that offer high temperature performance and oil tolerance to prevent the loosening of fasteners. • Any lithium grease-based spray lubricant. • Mineral spirits, Type II odorless and/or Class 1 (high flash point). SY155U Excavator OMM 5-11... -
Page 122: Maintenance Schedule
• Check the engine serpentine belt. (See page 5-22.) switches for proper operation. (See page 5-63.) • Check the air conditioner compressor belt. • Check the fuses. (See page 4-9.) (See page 5-28.) • Check the track assembly. (See page 5-48.) SY155U Excavator OMM 5-12... -
Page 123: Every 3 Months Or 500 Hours
Maintenance Log. If authorized, remove all • Check the fuel tank strainer. (See page 5-35.) lockout/tagout warnings and machine-securing elements • Inspect the fuel lines. (See page 5-33.) and fully activate the machine. Return the machine to operation. SY155U Excavator OMM 5-13... -
Page 124: Maintenance Procedures
2. Add more engine coolant if necessary. See “Add 7. Shut down the engine. Engine Coolant” on page 5-14. 8. Check the engine coolant level. Add more engine 3. Close the engine compartment cover. coolant if necessary. 9. Close the engine compartment cover. SY155U Excavator OMM 5-14... -
Page 125: Check The Engine Oil Level
Oil Level” on page 5-15. 6. Install the engine oil filler cap. 7. Close the engine compartment cover. 0003600 Figure 5-4 5. Install the dipstick. If engine oil is needed, see “Add Engine Oil” on page 5-15. SY155U Excavator OMM 5-15... -
Page 126: Check The Fuel Level
NOTE: See “Fuel” on page 5-8 for fuel specifications. 5. Install the DEF tank cap and close the compartment door. 5. Add fuel as needed until the tank is full. The fuel float gauge (3) will rise when the tank is nearly full. SY155U Excavator OMM 5-16... -
Page 127: Check The Primary Fuel Filter/Water Separator
NOTICE! NOTE: If an excessive amount of water or contaminant is found while draining the fuel filter, SANY Dispose of fuel and filter in accordance with all recommends draining the fuel tank completely. -
Page 128: Check Windshield Washer Fluid
• Shut off the engine before opening the engine cover. • Remove the key and turn the battery disconnect switch to OFF. See “Battery Disconnect Switch” on page 3-15. Failure to follow these warnings could result in death or serious injury. SY155U Excavator OMM 5-18... -
Page 129: Engine Inspection
3. Turn the battery disconnect switch to OFF. See “Battery Disconnect Switch” on page 3-15. 0003566 Figure 5-16 4. Squeeze the dust valve (1) mounted on the end cap (3) of the filter housing to release any dust or debris. SY155U Excavator OMM 5-19... -
Page 130: Change The Engine Oil And Filter
8. Inspect the air filter for damage, dampness, or dust. doors. See “Doors, Panels, Covers, and Filler Cap” Replace as necessary. on page 4-5. 3. Turn the battery disconnect switch to OFF. See “Battery Disconnect Switch” on page 3-15. SY155U Excavator OMM 5-20... - Page 131 NOTE: The drain tube must have a special connector that 0003650 opens the spring loaded engine oil drain valve. Figure 5-21 Contact a SANY dealer for more information. 6. Remove four fasteners (2) and the bottom access panel (3). 10. Open the drain valve by turning the valve counterclockwise until oil begins to flow through the drain tube.
-
Page 132: Inspect The Engine Serpentine Belt
Inspect the Engine Serpentine Belt NOTE: Contact a SANY dealer to replace a damaged belt. 1. Prepare the machine for checks and inspections. See “Maintenance Safety” on page 2-5. Adjust Engine Serpentine Belt Tension 1. -
Page 133: Check The Alternator
Check the Alternator • Burning smell or smoke coming from the starter. 1. Prepare the machine for checks and inspections. 4. If the starter is malfunctioning, contact a SANY See “Maintenance Safety” on page 2-5. dealer for additional information. 2. Open the appropriate access covers or compartment Engine Cooling System doors. - Page 134 16. Add new engine coolant to the engine coolant expansion tank until it is between the low and high marks on the sight glass (7). 17. Install the engine coolant expansion tank filler cap and close the engine cover. SY155U Excavator OMM 5-24...
-
Page 135: Inspect And Clean The Air Conditioner Condenser Fins
5. Pull up and remove the screen (2). Clean the screen with compressed air. 0003602 Figure 5-35 4. Remove the two wing nut fasteners (1). 5. Pull up and remove the screen (2). Clean the screen with compressed air. 0003603 Figure 5-34 SY155U Excavator OMM 5-25... -
Page 136: Drain The Charge Air Cooler
5. Pull up and remove the screen (2). Clean the screen with compressed air. 5. If the fan pulley has play, the bearings inside the engine coolant pump are worn. Contact a SANY dealer for replacement of an engine coolant pump. SY155U Excavator OMM... -
Page 137: Heating And Air Conditioning System
CAUTION This system is under pressure. Working on it could create a hazardous situation, which could result in injury. Contact a SANY dealer if repairs are required. 0003613 Figure 5-42 7. Check the air conditioner compressor (6) for: •... -
Page 138: Check The Air Conditioner Compressor Belt
4. Remove the two fasteners and washers (1) that secure the belt shroud (2). 5. Check for damaged pulleys and belt. 0003681 Figure 5-44 5. Check the belt (3) for signs of damage. 0003681 Figure 5-46 SY155U Excavator OMM 5-28... -
Page 139: Check Air Conditioner Fresh Air And Recirculation Filters
• Cuts or cracks are found in the belt. • The belt slips or squeals. NOTE: Contact a SANY dealer for belt replacement. 9. Tighten the pulley fastener (3). NOTE: Newly installed V-belts need to be checked and 0003632... -
Page 140: Exhaust System
6. Check the connection to the expansion pipe (6) for leaks or signs of damage. If any abnormality is found, contact a SANY dealer for repairs. 7. Check the exhaust system for loose, missing, or damaged fasteners (5). Tighten loose fasteners and replace missing or damaged components as needed. -
Page 141: Replace The Diesel Exhaust Fluid (Def) Pump Filter
6. Remove the filter cover (4). 2. Open the appropriate access covers or compartment doors. See “Doors, Panels, Covers, and Filler Cap” on page 4-5. 3. Turn the battery disconnect switch to OFF. See “Battery Disconnect Switch” on page 3-15. SY155U Excavator OMM 5-31... -
Page 142: Replace The Diesel Exhaust Fluid (Def) Tank Filter
11. Connect the DEF sending unit wiring harness “Battery Disconnect Switch” on page 3-15. connector. 0003576 Figure 5-59 4. Tag and disconnect the four DEF hoses (1). Cap and plug all openings. 5. Disconnect the DEF sending unit wiring harness connector (3). SY155U Excavator OMM 5-32... -
Page 143: Fuel System
Inspect all the steel, plastic, and rubber fuel lines, including those on the engine. • Replace any fuel lines that show signs of deterioration, wear, damage, or leaks. • Contact a SANY dealer for repairs on the fuel system. 0003583 Figure 5-61 Drain the Fuel Tank 4. -
Page 144: Replace The Primary Fuel Filter/Water Separator Element
“Battery Disconnect Switch” on page 3-15. 11. When the filter is full, close the fuel bleeder plug and wipe fuel from around the vent opening (2). 12. Push in and turn the primer knob clockwise to secure the primer plunger. SY155U Excavator OMM 5-34... -
Page 145: Check The Fuel Tank Strainer
7. Install the new (or cleaned) fuel tank strainer. 12. Install the filter housing. 8. Install and lock the fuel tank filler cap. 13. Turn the fuel shutoff valve (1) 1/4 turn clockwise to the ON position. SY155U Excavator OMM 5-35... -
Page 146: Electrical System
If a fuse is corroded, or if a white powder can be seen on 2. Open the appropriate access covers or compartment it, contact a SANY dealer for repair information regarding doors. See “Doors, Panels, Covers, and Filler Cap” the electrical system. -
Page 147: Replace The Batteries
6. Remove the jumper cable (6). 7. Loosen the fastener (7) until the hold-down bracket (8) can be removed from the batteries. 8. Remove the failed battery (or batteries). 9. Install the new battery (or batteries). SY155U Excavator OMM 5-37... -
Page 148: Hydraulic System
6. Use the joystick control to lower the boom. 7. The boom should lower. NOTE: If there is no movement, contact a SANY dealer. 8. Start the engine and run it at low idle for about 5 minutes to repressurize the accumulator. -
Page 149: Relieve Hydraulic System Pressure
3-6 for additional information. 11. Install the vent cap. 6. Fully cycle each joystick, and travel control lever/pedals two to three times within 15 seconds to release hydraulic pressure remaining in the hydraulic system. SY155U Excavator OMM 5-39... -
Page 150: Add Hydraulic Oil
11. Run the engine at low idle for 10 minutes to vent air from the hydraulic system. 12. Shut down the engine. 0003557 Figure 5-81 4. If it is necessary to add hydraulic oil, remove the vent cap (3). SY155U Excavator OMM 5-40... -
Page 151: Replace The Hydraulic System Breather Filter
6. Remove the filter housing (2). 0003585 Figure 5-85 6. Remove the breather filter element (4). 7. Install the new breather filter element. 8. Install the breather filter cover. 9. Install the vent cap. 0003674 Figure 5-87 SY155U Excavator OMM 5-41... -
Page 152: Replace The Hydraulic Tank Return Filter
7. Remove the four fasteners (3) and the plate (4). 2. Prepare the machine for checks and inspections. See “Maintenance Safety” on page 2-5. 3. Turn the battery disconnect switch to OFF. See “Battery Disconnect Switch” on page 3-15. SY155U Excavator OMM 5-42... -
Page 153: Clean And Replace The Hydraulic Oil Suction Strainer
10. Remove the filter element and O-ring from the filter 0003551 housing. Figure 5-95 1. Park the machine in a secure location and position 11. Remove all debris from inside the filter housing. the work equipment as shown. SY155U Excavator OMM 5-43... - Page 154 Press down on the cover while removing the 10. Remove the suction strainer cover. fasteners. • When the cover is removed, cover the filter opening to prevent dirt and debris from falling into the hydraulic tank. SY155U Excavator OMM 5-44...
-
Page 155: Check The Hydraulic Hoses
• Twisted, broken, flat, or distorted hose. • Blisters, leaks, or softness in the external hose layer. NOTICE! If any damage is found, contact a SANY dealer. Dispose of hydraulic oil and the strainer in accordance with all applicable environmental regulations. -
Page 156: Change The Hydraulic Oil
(4). 0003591 Figure 5-102 NOTE: See “Hydraulic Oil/Ambient Temperature Data” on 8. Remove four fasteners (1) and remove the panel (2) page 5-10. from under the hydraulic tank. 14. Start the engine. SY155U Excavator OMM 5-46... -
Page 157: Check The Hydraulic Pump
2. Open the appropriate access covers or compartment doors. See “Doors, Panels, Covers, and Filler Cap” on page 4-5. 3. Start the engine. NOTE: Contact a SANY dealer if any abnormality is found. 4. Inspect the hydraulic pump (1) for leaks, noise, and function. Repair as needed. -
Page 158: Track Frame
6. Check the sprocket (3) for wear and proper 0000498 Figure 5-108 operation. If damaged, contact a SANY dealer for 1. Prepare the machine for checks and inspections. repair/replacement. See “Maintenance Safety” on page 2-5. 7. Make sure the track groove is fully engaged over the 2. -
Page 159: Check The Carrier Roller
NOTE: The acceptable range is 0.4 in.–1.2 in. (10 mm–30 mm). 9. If the track sag is outside the acceptable range, adjust track tension as needed. 0004188 Figure 5-110 SY155U Excavator OMM 5-49... -
Page 160: Increase The Track Tension
7. Check the track tension. 8. Add grease until an acceptable range is reached. NOTE: If the tension is still loose, contact a SANY dealer to determine the cause and remedy. 9. Swing the access panel into place and install the lower fastener. -
Page 161: Final Drive
5. Inspect the final drive to make sure that all hydraulic hoses (3) are properly tightened to specification. NOTE: Replace any damaged or missing fasteners and tighten any loose fasteners. Use anaerobic thread-lock compound when reinstalling loose fasteners and installing new fasteners. SY155U Excavator OMM 5-51... -
Page 162: Check The Final Drive Mounting Fasteners
MAINTENANCE 6. Check for leaks. 6. Replace any damaged or defective fasteners and tighten any loose fasteners. Contact a SANY dealer if NOTE: Contact a SANY dealer if any abnormalities are any abnormalities are found. found. Check and Add Final Drive Oil Check the Final Drive Mounting Fasteners 1. -
Page 163: Change Final Drive Oil
If oil leaks are found during the oil level inspection, stop the inspection to locate and repair the cause of the oil leaks. Failure to do this could result in machine damage and improper machine operation. SY155U Excavator OMM 5-53... -
Page 164: Swing Drive
3. Locate the swing pinion gear grease fitting (1). 0003590 Figure 5-124 4. Inspect the swing drive (1) for leaks or damage. Contact a SANY dealer if any damage is found. 0003592 Figure 5-123 4. Remove the two fasteners (2) and remove the cover (3) to open the inspection/filler hole. -
Page 165: Check The Swing Drive Mounting Fasteners
0003590 Figure 5-127 3. Check the swing drive (1) for missing or broken mounting fasteners (2). If fasteners are missing or broken, contact a SANY dealer for repair information. 4. Tighten any loose fasteners. 0003650 Figure 5-129 8. Place an appropriately sized container beneath the swing drive drain plug (2) under the back of the machine. -
Page 166: Inspect The Swing Bearing Fasteners
• If oil leaks are found during the oil-level Collect Oil Samples inspection, stop the inspection. Locate and 1. Obtain an oil analysis sample kit from a SANY dealer. repair the cause of the oil leak. Failure to do so could damage the swing drive. -
Page 167: Collect A Hydraulic Oil Sample
8. Send the sample for testing in accordance with the instructions packaged with the sample kit. Collect a Hydraulic Oil Sample 1. Obtain an oil analysis sample kit from a SANY dealer. 2. Start the engine and operate the machine for the hydraulic oil system to reach normal operating temperatures. -
Page 168: Collect A Final Drive Oil Sample
0003587 Collect a Swing Drive Oil Sample Figure 5-136 1. Obtain an oil analysis sample kit from a SANY dealer. 9. Remove the four fasteners (6) and remove the hydraulic suction strainer cover (5). 2. Start the engine and operate the machine for the system to reach normal operating temperatures. -
Page 169: Lubrication
2. Turn the battery disconnect switch to OFF. See Safety When Lubricating “Battery Disconnect Switch” on page 3-15. Before lubricating any grease fittings: 1. Prepare the machine for checks and inspections. See “Maintenance Safety” on page 2-5. SY155U Excavator OMM 5-59... -
Page 170: Boom Cylinder Base Ends And Swing Bearing Fitting
At the grease manifold for the boom, grease the fittings 4. Check the seal condition. If it leaks, replace the seal for: immediately. Contact a SANY dealer. • Right-side boom cylinder rod end (1). 5. Start the engine. • Boom arm cylinder base end (2). -
Page 171: Bucket Arm
1. Grease the dozer blade cylinder rod end (1) and base end (2) grease fittings. 0000501 Figure 5-145 2. Grease the dozer linkage pivot pin grease fittings (3). 4. Grease the two arm to bucket pivot grease fittings (4). SY155U Excavator OMM 5-61... -
Page 172: Lubricate The Cab Door Hinges And Front Window Slide Rail
NOTE: Properly operating doors and access panels are important for the security of the machine. 5. Repair or replace any damaged doors, access panels, or locks immediately. SY155U Excavator OMM 5-62... -
Page 173: Inspect Windshield Wiper And Washer Nozzle
5. Lift the cover (3) and make sure the wiper arm nut (4) is tight. If the wiper arm nut is loose, tighten it to 26 lb-ft–33 lb-ft (35 N•m–40 N•m). SY155U Excavator OMM 5-63... -
Page 174: Check The Upper Structure And Undercarriage
• The undercarriage with its various components and assemblies. • The upper structure with its various components and assemblies. Check all identified structural components for cracks or distortion. Notify a SANY dealer if any cracks or distortion are found. Bucket Replace the Bucket Teeth 0002351 Figure 5-155 4. -
Page 175: Check The Operation And Maintenance Manual
A sample of the drained oil should be sent out for testing to verify. An excessive amount of metal particles or large debris may be an indication of internal damage to the system, consult your SANY dealer before operating the machine. SY155U Excavator OMM 5-65... - Page 176 MAINTENANCE Page Intentionally Blank SY155U Excavator OMM 5-66...
-
Page 177: Specifications
Lift Chart (Continued) ............6-8 SY155U Excavator OMM... -
Page 178: Machine Dimensions
SPECIFICATIONS Machine Dimensions 0003676 Figure 6-1 SY155U Excavator OMM... - Page 179 6 ft. 6 in. (1.99 m) Minimum ground clearance 1 ft. 5 in. (0.425 m) Cab height 9 ft. 3 in. (2.82 m) Boom length 15 ft. 1 in. (4.6 m) Arm length 8 ft. 2 in. (2.5 m) SY155U Excavator OMM...
-
Page 180: Working Range
SPECIFICATIONS Working Range 0003677 Figure 6-2 SY155U Excavator OMM... - Page 181 Maximum vertical wall digging depth 12 ft. 9 in. (3.888 m) Maximum digging depth 17 ft. 11 in. (5.469 m) Maximum dozer raising height 1 ft. 7.8 in. (504 mm) Maximum dozer lowering depth 1 ft. 1.8 in. (350 mm) SY155U Excavator OMM...
-
Page 182: Technical Specifications
102 in. x 18.89 in. (2590 mm x 480 mm) Travel speed (high/low) High speed 3.3 mph (5.3 km/h)/slow speed 1.9 mph (3.1 km/h) Grade ability 35° Swing speed 20.5–26.5 seconds Engine model ISUZU AR-4JJ1XASC Rated power (kW/rpm) 105.2 hp (78.5 kW) at 2000 rpm SY155U Excavator OMM... -
Page 183: Lift Chart
SPECIFICATIONS Lift Chart 0004398 Figure 6-3 SY155U Excavator OMM... -
Page 184: Lift Chart (Continued)
SPECIFICATIONS Lift Chart (Continued) 0004399 Figure 6-4 SY155U Excavator OMM... - Page 185 (16034 kg). Included in this weight are 600 mm triple grouser shoes, 15.09 ft. (4.6 m) boom, 8.2 ft. (2.5 m) arm, 8377.5 lb. (3800 kg) counterweight, all operating fluids and a 165.3 lb. (75 kg) operator. • Lift capacities are in compliance with ISO 10567:2007 SY155U Excavator OMM...
- Page 186 SPECIFICATIONS Page Intentionally Blank 6-10 SY155U Excavator OMM...
-
Page 187: Optional Equipment
Remove Optional Equipment ............7-4 SY155U Excavator OMM... -
Page 188: Optional Equipment Selection
OPTIONAL EQUIPMENT Optional Equipment Selection Operation Precautions Consult a SANY dealer before installing any optional NOTICE! equipment on the machine. Only install SANY-approved optional equipment. SANY The following precautions must be strictly assumes no responsibility for accidents, loss, or failures observed when selecting, installing, and caused by unapproved optional equipment. -
Page 189: Install Optional Equipment
Dispose of hydraulic oil in accordance with local environmental regulations. Failure to do so could damage the environment. 4. Place an appropriately sized container under the hydraulic connection to catch any residual hydraulic oil. 5. Remove the fitting plug (2), if installed. SY155U Excavator OMM... -
Page 190: Remove Optional Equipment
4. Place a suitably sized container under the hydraulic connection to catch any residual hydraulic oil. 5. Disconnect the optional equipment hydraulic lines in accordance with the manufacturer’s instructions. 6. Install both fitting plugs (2). SY155U Excavator OMM... - Page 191 Page Intentionally Blank...
- Page 192 318 Cooper Circle Peachtree City, Georgia 30269 Fax: 770 632 7820 Sales E-mail: sales@sanyamerica.com Service E-mail: service@sanyamerica.com Service Hotline: 470 552 SANY (7269) s anya m er i ca. com service@sanyamerica.com SANY Part Number SSY005079291...
Need help?
Do you have a question about the SY155U and is the answer not in the manual?
Questions and answers