
Summary of Contents for epiphan video Pearl Mini
- Page 1 User Guide Epiphan Pearl Mini Release 4.17 August 15, 2022 UG122-17 © and ™ 2022, Epiphan Systems, Inc...
- Page 2 Warranty All Epiphan Video systems have a 100% return to depot warranty for one year from the date of purchase. Technical support Epiphan’s products are backed by our professional support team. You can reach our team several ways: Email support@epiphan.com...
-
Page 3: Table Of Contents
SD card installation and file management Selecting an audio source for Pearl Mini Setup Vesa mounting the Pearl Mini and Pearl Nano Install the power button shield User interfaces and remote access The touch screen - Pearl-2 and Pearl Mini... - Page 4 Configure a time server Manually set the date, time, and time zone Configure device info, name, description, and location SD card storage Install and format an SD card for the Pearl Mini and Pearl Nano Format the SD card Audio input ports...
- Page 5 Selecting an audio source Enable or disable phantom power on Pearl Mini Configure audio ports for stereo or mono Assign audio sources to an input Adjust audio gain and delay Mute audio Video output ports About video output ports Video output port resolution...
- Page 6 Apply a configuration preset using the Admin panel Apply a configuration preset using the touch screen Export and import configuration presets Update a configuration preset Delete a configuration preset Status and monitoring Monitoring audio and VU sensitivity Channel monitoring using the touch screen View system information using the touch screen View system information using the Admin panel View device information using the touch screen...
- Page 7 Configure a custom layout for a channel Rename a layout Delete, move, or duplicate a layout Set the background color Add an image to a layout Upload or remove an image using the Media page Add a text overlay Custom system variables for text overlays Crop a video source Video and audio input sources About connecting video and audio sources...
- Page 8 Change UPnP device name Record About recording Pearl Mini and Pearl Nano recording storage information Record a channel Record using Single Touch control on Pearl-2 and Pearl Mini Configure recording settings, file size and type Restart recording to a new file Recorders Add a recorder...
- Page 9 Kaltura recording and webcasting setup About Kaltura recording and webcasting Kaltura settings Select channels for Kaltura VOD events on Pearl-2 and Pearl Mini Select a channel and URLs for Kaltura webcasting events Set Kaltura ad hoc event parameters Set the extend Kaltura CMS event interval...
- Page 10 Setup Panopto authentication for ad hoc events Set Panopto ad hoc event parameters Set the extend Panopto CMS event interval Enable mute and display image on pause Disable low disk space Panopto alerts YuJa setup YuJa known issues YuJa registration YuJa settings Creating, modifying, and deleting YuJa events Accessing YuJa recordings...
-
Page 11: Thank You For Choosing Epiphan
Troubleshooting Quick Reference Remove black bars (matte) from the video Use a specific EDID for the video input port Unstretch the output video Remove the combing effect on images External keyboard shortcuts Limitations and known issues Software license Thank you for choosing Epiphan! -
Page 12: Start Here
The rest of the guide shows you how to tweak the system exactly how you want it so you can take advantage of the many advanced features. For a product description of the Pearl Mini, see Pearl Mini overview. -
Page 13: Release Notes
Pearl Mini User Guide Release notes Release notes Release 4.17 Firmware version 4.17 is the last version to support connections to UPnP enabled devices. Support for Kuando BusyLight Alpha and Omega model 2. Support for starting and stopping scheduled YuJa events early using Pearl. - Page 14 Epiphan Cloud support replacing AV Studio Diagnostic tools added to the touch screen and Admin panel Scheduled Automatic File Upload (AFU) DHCP option 81 (FQDN) support Dynamic DNS (DDNS) support Configure Pearl Mini to not send low storage alerts to Panopto SHA hashing algorithm support...
- Page 15 MPEG-DASH streaming protocol support Additional HLS (pull) options to configure the segment size and playlist duration Mutliple multicast publishers support in the same Pearl Mini channel and the ability to start and stop the publishers Adding pre-existing recordings to an Automatic File Upload (AFU) queue Changed some status fields on the Admin Panel's Info page and changed the bitrate status to now show the total combined bitrate of the video plus audio.
- Page 16 Release 4.9.1 Kaltura ad hoc event details and configurable event schedule refresh interval Panopto support for ad hoc event authentication from Pearl Mini's touch screen using credentials for external identity providers Panopto ad hoc event folder selection from the Pearl Mini's touch screen...
- Page 17 Pearl Mini User Guide Release notes Release 4.8.0 USB input device (UVC/UAV) support RTSP inputs Hardware acceleration Live switching improvement Audio inputs as playback audio sources for HDMI outputs Product registration changes Pairing to AV Studio changes Original Livestream and Wowza Cloud streaming presets removed Switching performance improvement Release 4.7.1...
-
Page 18: Introduction
SD card installation and file management Pearl Mini overview Pearl Mini is a versatile live video production device that's a video encoder, video streamer, live switcher, and video recorder all in one. Pearl Mini is great for lecture capture applications. - Page 19 Download recordings using your web browser, or set Pearl Mini to automatically upload recorded files directly to a network server using FTP, RSYNC, CIFS, WebDav, and more. Pearl Mini is also fully integrated with Kaltura and Panopto Content Management Systems (CMSs) and can be registered as a video remote...
-
Page 20: Front And Back View Of Pearl Mini
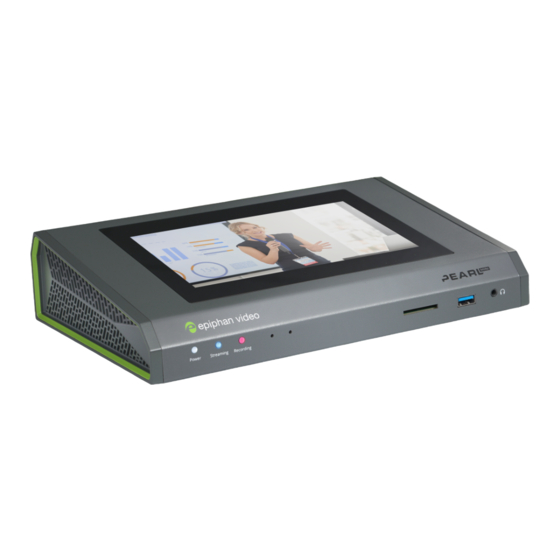
Network security compliance with 802.1x protocols, passwords, and certificate authentication means an easier setup for IT friendly live streaming over enterprise networks. Pearl Mini is HTTPS enabled for secure administration and control over the LAN, and supports secure live streaming protocols like SRT with AES encryption and RTMPS. - Page 21 Pearl Mini User Guide Front and back view of Pearl Mini Label Name Description Used for confidence monitoring and simple configuration, obtaining system information, and starting/stopping recordings Touch screen front panel and streams. Users can also authenticate with one of the...
- Page 22 Pearl Mini back panel descriptions Label Name Description Allows Pearl Mini to be locked to a desk or surface using a laptop Lock lock cable. Press to toggle Pearl Mini on and off. If a software shutdown is performed when the toggle...
-
Page 23: Monitoring Audio
The front panel includes a 3.5 mm headphones audio jack for monitoring audio. To monitor the audio for a channel, just select the channel using the device screen. The audio you hear depends on the audio source configured in the live channel layout.On Pearl Mini and Pearl-2, different layouts can have different audio sources configured. - Page 24 Pearl Mini User Guide Monitoring audio volume. volume. volume. volume. Audio VU meter A VU meter on the device screen shows the audio levels for the channel you are monitoring. The value is displayed in dBFS (decibels relative to full scale). Colored bars represent the audio level.
-
Page 25: Pearl Mini Av Inputs
Pearl Mini AV inputs For best performance, we recommend using two video sources in up to two full HD channels simultaneously. However, you can connect up to three video sources to the Pearl Mini in the following scenarios: 1. One 1920×1080@30 fps channel configured with three layouts, one for each full HD video source without any scaling and make the video image fill the whole frame. - Page 26 Pearl Mini User Guide Pearl Mini AV inputs Input port Details One RTSP source over Ethernet at 1920×1080@30 fps. RCA consumer line-level audio inputs function as a stereo pair (- 10 dBV). White = left Red = right Mic-level input to connect a passive or active stereo electret 3.5 mm...
-
Page 27: Pearl Mini Tech Specs
If you are using DVI2PCIe cards with your Pearl device, DVI2PCIe cards do not support audio over HDMI. Pearl Mini tech specs The input and output connectors are listed for Pearl Mini. For the most up-to-date product specifications and information, go to www.epiphan.com/pearl-mini. Table 5... - Page 28 Pearl Mini User Guide Pearl Mini tech specs (1) BNC (female) (2) USB-A (female) - rear panel (1) RJ-45 (female) Aspect ratios 3:2, 4:3, 16:9, 16:10, and custom aspect ratios Standard resolutions PAL, PAL wide, NTSC, NTSC wide Resolution range 640×480 to 1920×1200...
- Page 29 Pearl Mini User Guide Pearl Mini tech specs (2) USB (rear panel) (1) RTSP (embedded over Ethernet) (1) SRT (embedded over over Ethernet) (2) HDMI type A (female) (1) BNC (female) Connectors (2) USB-A (female) - rear panel (1) RJ-45 (female)
- Page 30 Pearl Mini User Guide Pearl Mini tech specs Compression MP3, AAC, and PCM MP3: 22 kHz, 44 kHz, 48 kHz Audio processing Sampling rate AAC: 16 kHz, 22 kHz, 44 kHz, 48 kHz PCM: 22 kHz, 44 kHz, 48 kHz...
- Page 31 Pearl Mini User Guide Pearl Mini tech specs Confidence monitoring: 480p to 1920×1200p Streamed: 480p to 1920×1200p Frame rate Up to 60 fps H.264/AVC (ITU H.264, ISO/IEC 14496-10) 4:2:0, 8 bit color Encoding profile: High, Main, Baseline Formats Profile levels: 3.0, 3.1,3.2,4.0,4.1...
- Page 32 Pearl Mini User Guide Pearl Mini tech specs Record formats AVI, MOV, MP4, and MPEG-TS File upload formats JPEG, PNG SD card Up to 512 GB File system for SD card EXT4 FTP, SFTP, SCP, AWS S3 client, and WebDAV client...
- Page 33 Local web-based UI to easily control streaming, Epiphan Live recording, and switching. Cloud-based platform to remotely manage and control Pearl Mini devices. Start and stop recording/streaming, monitor channels and alert Administration and Epiphan Cloud dashboard, remotely login to Admin panel for...
- Page 34 Pearl Mini User Guide Pearl Mini tech specs Cloud access and Epiphan Cloud management Model ADP 60KD BA Input power rating 90 to 240 VAC, 47 to 63 Hz Output power rating 12 VDC, 5.0 A, 60 W Active efficiency (average)
-
Page 35: Pearl Mini Power Adapter Specifications
NTP, TIME (RFC 868), PTP v1 (IEEE-1588-2002 V1) Country of origin Made in Taiwan Pearl Mini supports up to three HD video sources in a single channel with two picture in picture layouts under certain conditions, see Pearl Mini AV inputs. -
Page 36: Optimum Cpu Performance
Pearl Mini User Guide Optimum CPU performance Optimum CPU performance While Pearl Mini is powerful, there is a limit to the number of concurrent tasks the onboard CPU can perform efficiently. The number of concurrent tasks depends on many factors, such as:... -
Page 37: International Character Support
Disable the video output port (if unused). Remove unused channels or layouts. Reduce the number of channels created. Ensure video sources come in at the right resolution so that Pearl Mini doesn't have to up scale or down scale the video source. International character support You can include certain international characters in the channel name, layout name, video and audio input names, text overlays, and in the name of recorded files. -
Page 38: Quick Start
Ethernet cables to connect Pearl device and the admin computer to the network. To record video using Pearl Nano or Pearl Mini, you need to install a storage medium. Pearl Nano and Pearl Mini have a standard SD card slot on the front panel that you can use. -
Page 39: Next Steps
7. (Optional) Start recording: a. Pearl Mini or Pearl-2 - tap the red dot that appears in the top right corner of the screen to start and stop recording the channel. The dot flashes while recording. Recordings are saved to the SD card on Pearl Mini and Pearl Nano by default. When the SD card is full, new recordings overwrite the oldest recordings. -
Page 40: Sd Card Installation And File Management
SD card installation and file management Pearl Mini comes with a standard SD card slot on the front panel. An SD card is needed when recording video. If you're only switching video or live streaming, then you don't need to install an SD card. -
Page 41: Selecting An Audio Source For Pearl Mini
The audio that's coming from the connected HDMI video sources (HDMI-A and HDMI-B) is automatically used as the default audio source for the HDMI-A and HDMI-B channels on Pearl Mini. You can choose different audio sources for a channel using the Admin panel and do things like adjust the input gain, see Adjust audio gain and delay. - Page 42 LED before connecting devices to the XLR ports. To choose a different audio device for the channel: 1. Using a web browser on the admin computer, go to the IP address of your Pearl Mini and log in, see Connect to the Admin panel.
- Page 43 Pearl Mini User Guide Selecting an audio source for Pearl Mini 4. (Optional) Adjust the gain for an audio input source, select the input port from the Inputs menu and adjust the amount of gain on the configuration page for the audio input port. Click Save when you're done.
-
Page 44: Setup
Vesa mounting the Pearl Mini and Pearl Nano The rear panel of the Pearl Mini and Pearl Nano has vesa mounting holes to fit a standard, 75mm × 75mm vesa mount. Use four M4 screws with a maximum length of 5mm to mount the plate to the rear panel of... -
Page 45: Install The Power Button Shield
Pearl Mini User Guide Install the power button shield Do not insert screws longer than the recommended 5mm. Using longer screws can damage the device. Install the power button shield Install the power button shield over the power button to prevent accidentally turning the unit off. Once applied, you cannot reposition the power button shield without damaging the adhesive. -
Page 46: User Interfaces And Remote Access
User interfaces and remote access Pearl devices have several user interfaces: Touch screen: Easily accessible on the front panel of Pearl, Pearl-2, and Pearl Mini, the touch screen is primarily used for confidence monitoring, live switching, and Single Touch streaming and... -
Page 47: About The Touch Screen
Pearl Mini User Guide About the touch screen To select the video source for the output port using the touch screen when local console is enabled, see Select the video output source using the device screen. About the touch screen... - Page 48 The No Channels screen The No Channels screen appears if there are no channels configured on your Pearl Mini and the automatic channels Auto A and Auto B have been deleted. Tap anywhere on this screen to go to the system settings screen.
-
Page 49: The Touchscreen Channel View
Pearl Mini User Guide The touchscreen channel view When setting some features, a pop-up virtual keyboard appears. To enable using an external keyboard that you connect to one of the Pearl device's USB ports instead, see Connect an external keyboard. -
Page 50: Record A Channel Using The Touch Screen
Pearl Mini User Guide Record a channel using the touch screen Item Description Controls to switch between channels. Tap the arrow to view the next (or previous) channel. The arrow icons fade 6 and 7 when the touch screen is idle (i.e. untouched) for several seconds. -
Page 51: Stream A Channel Using The Touch Screen
Pearl Mini User Guide Stream a channel using the touch screen If the red Record icon doesn't appear in the top right corner of the screen, recording is disabled. See Configure recording, streaming and switching from the touch screen to enable recording. -
Page 52: Switching And Mixing Using The Touch Screen
Pearl Mini User Guide Switching and mixing using the touch screen If the gray (or blue) Stream icon doesn't appear in the top left corner of the screen, streaming is disabled. See Configure recording, streaming and switching from the touch screen to enable streaming. - Page 53 Pearl Mini User Guide Switching and mixing using the touch screen Performing live switching using one interface, like the touch screen, does not dynamically update the visuals in the other interfaces (e.g. the Admin panel and Epiphan Live). The other interfaces must be manually refreshed to accurately reflect the current live switching layout information.
- Page 54 Pearl Mini User Guide Switching and mixing using the touch screen 3. Tap any layout that appears in the carousel to load it in to the Preview panel. 4. Tap Apply or double tap inside the Preview panel to switch that layout to the Live panel. The layout that was in the Live panel moves to the Preview panel so that it's ready for the next time you switch.
-
Page 55: Single Touch Streaming And Recording Control
Specify which channels and recorders to include for Single Touch control using the Admin panel. To open the Single Touch control screen from the touch screen on the Pearl-2 or Pearl Mini, tap the Single Touch control icon. - Page 56 Pearl Mini User Guide Single Touch streaming and recording control Table 9 One Touch control screen components Label Description Start/stop button: Press the Single Touch control button to start or stop streaming and recording for all specified channels and recorders.
- Page 57 Pearl Mini User Guide Single Touch streaming and recording control In the example above, Single Touch control has been activated and both channels out of the two total channels and/or recorders are recording successfully. There is no streaming activity because there are no channels configured for Single Touch streaming.
- Page 58 Pearl Mini User Guide Single Touch streaming and recording control Start screen locked mode: The Single Touch control start screen is the only screen that displays on the touch screen. Operators cannot navigate to other screens from the Single Touch control screen.
- Page 59 Pearl Mini User Guide Single Touch streaming and recording control Enable or disable Single Touch control for a channel 1. Login to the Admin panel as admin, see Connect to the Admin panel. 2. From the Channels menu, select the channel you want and click Recording. The Recording page opens.
- Page 60 Pearl Mini User Guide Single Touch streaming and recording control 4. Select change, and then check Single touch control on the options page to enable the recorder for Single Touch control. Uncheck Single touch control if you don't want to include that recorder for Single Touch control.
-
Page 61: Cms Event Controls Using The Touch Screen
Pearl Mini User Guide CMS event controls using the touch screen Specify channels for Single Touch streaming using the Admin panel 1. Login to the Admin panel as admin, see Connect to the Admin panel. 2. From the Channels menu, select a channel and click Streaming. The Streaming page opens. - Page 62 Pearl Mini User Guide CMS event controls using the touch screen Table 10 Events screens for scheduled Kaltura, Panopto, and YuJa events Events screens Description The Calendar icon appears on the touch screen when CMS is setup using the Admin panel.
- Page 63 Pearl Mini User Guide CMS event controls using the touch screen Events screens Description This Events screen displays when a scheduled event is set to start within 30 minutes. To start the scheduled event early, tap Start event. To create an ad hoc recording or webcast, tap Create event and authenticate using your CMS credentials.
- Page 64 Unscheduled ad hoc event screens Description Panopto login screen: When Pearl Mini is registered with Panopto, this authentication screen appears when you tap Create event from the Events screen. Tap in a field and enter your credentials, then tap Sign in.
- Page 65 Pearl Mini User Guide CMS event controls using the touch screen Unscheduled ad hoc event screens Description This screen displays after a successful authentication. To create an ad hoc event, tap Next to go to the next screen and set the event title and details.
-
Page 66: Configure The Touch Screen
Configure the touch screen The touch screen on Pearl-2 and Pearl Mini is enabled by default and all its features are available. You can disable the entire screen or some of its features using the Admin panel. For information about how to... - Page 67 Pearl Mini User Guide Configure the touch screen Orientation - Rotate the image displayed on the touch screen of the Pearl Mini 180 degrees. Text will appear upside down and backwards on the touch screen unless you physically rotate the Pearl Mini device.
- Page 68 Pearl Mini User Guide Configure the touch screen Hide or show the channel previews on the touch screen using the Admin panel 1. Login to the Admin panel as admin, see Connect to the Admin panel. 2. From the Configuration menu, click Touch Screen. The touch screen configuration page opens.
- Page 69 Rotate the Pearl Mini's touch screen orientation Using the Admin panel, you can rotate the image displayed on the touch screen of Pearl Mini 180 degrees. Text will appear upside down and backwards on the touch screen unless you physically rotate the Pearl Mini device.
- Page 70 To re-enable the screen after it times out and shuts off: tap anywhere on the screen for Pearl-2 or Pearl Mini. If the start screen is not set to locked mode and a screen timeout occurs, tapping the touch screen returns you to the last screen you were on before the timeout occurred.
-
Page 71: The Admin Panel
Pearl device screen. The Admin panel The Admin panel is used primarily to set up Pearl Mini and perform administrative tasks. Most tasks in this user guide are performed using the Admin panel. This section contains what you need to get started using the Admin panel. -
Page 72: About The Admin Panel
Remote login to the Admin panel and Epiphan Live. For information about integrating Pearl Mini with Content Management Systems (CMSs) and related administrator tasks, see Integration. About the Admin panel The Admin panel is a web-based user interface that's used primarily to set up your Pearl device and... - Page 73 Pearl Mini User Guide About the Admin panel Table 12 The Admin panel Label Name Description The channels that are available for the current configuration of Channels menu your Pearl device are listed. Select a channel to access the drop...
- Page 74 Pearl Mini User Guide About the Admin panel Label Name Description The Pearl Nano has a single channel. Recorders you add to your Pearl device are listed. Select a Recorders menu(Pearl recorder to open the status page and list of related recordings for Mini and Pearl-2 only) that recorder.
-
Page 75: Connect To The Admin Panel
Get the IP address of Pearl Mini or Pearl 2 To get the IP address of Pearl Mini or Pearl 2, do one of the following: From a single channel view or grid view, tap the system settings (gears) icon, then tap System... -
Page 76: Enable Local Console Access To The Admin Panel
Pearl Mini User Guide Enable local console access to the Admin panel For a first-time log in as an administrator-level user, you're prompted to assign passwords to the admin, operator, and viewer accounts. Record the passwords for future reference. Optionally, you can connect to your Pearl device using the following methods:... - Page 77 Pearl Mini User Guide Enable local console access to the Admin panel Norwegian (Bokmal) Russian Important considerations Epiphan Live is not accessible from the local console. The live preview link is not accessible from the Channel Status page using the local console.
-
Page 78: Connect Using A Dns-Based Service Discovery
Pearl Mini User Guide Connect using a DNS-based service discovery 10. Click Apply. Enable local console using the touch screen 1. Tap the gear icon to open the System settings screen. If the control icons aren't showing, tap anywhere on the touch screen. - Page 79 1. Find the system’s serial number that's printed on a label attached to the device. To find the system serial number using the device screen, do the following: Pearl-2 and Pearl Mini: Tap the system information gear icon to display the System information screen. If needed, tap the screen once to display the control icons.
-
Page 80: Connect Using Persistent Static Ip Address
Pearl Mini User Guide Connect using persistent static IP address 4. (Optional) From the Configuration menu, click Network and note the IP address of the system from the network configuration page. Connect using persistent static IP address Your Pearl device has a default persistent static IP address, also known as the recovery IP address. To set up a Pearl device on a network that does not support DHCP, or to recover from a previous static IP address setting, use this procedure to connect directly to the device for configuration. -
Page 81: Switching / Mixing Using The Admin Panel
Pearl Mini User Guide Switching / mixing using the Admin panel For a first-time log in as an administrator-level user, you're prompted to assign passwords to the admin, operator, and viewer accounts. Record the passwords for future reference. 6. From the Configuration menu, click Networking. -
Page 82: Epiphan Live
Epiphan Live. About Epiphan Live The Epiphan Live interface lets you easily operate Pearl Mini using a computer or mobile device such as a tablet. You can: Control streaming and recording of channels and recorders. Do live switching between sources and layouts while streaming and recording. -
Page 83: The Dashboard Interface
Pearl Mini User Guide The Dashboard interface Operating system or Supported web browser(s) mobile device Google Chrome Windows Microsoft Edge Google Chrome Safari Linux Google Chrome Android phone or tablet Google Chrome Google Chrome iPhone or iPad Safari Most instructions assume that a touch screen device is used; however, you can tap or click, depending on your device. - Page 84 Pearl Mini User Guide The Dashboard interface Table 14 Elements in the Dashboard interface Number Title Description Warning – This icon displays only if there are any configuration errors in your channels, sources, streams or recordings. Clicking the icon displays more detail about the errors.
- Page 85 Pearl Mini User Guide The Dashboard interface Number Title Description see the latest Dashboard layout when they refresh their Epiphan Live page. The latest saved layout displays the next time you log in. Menu – Access links to the Switcher view, Recordings, and Admin panel.
-
Page 86: Access Epiphan Live Using A Web Browser Or Mobile Device
Firefox or update the version of your web browser, then add the security certificate for the website to the exceptions list. Access Epiphan Live from the Admin panel You need the IP address of Pearl Mini to log in to the Admin panel for this procedure, see Connect to the Admin panel. -
Page 87: Stream, Record, And Monitor Using The Dashboard Interface
Pearl Mini User Guide Stream, record, and monitor using the Dashboard interface To open the Admin panel from Epiphan Live, click the Menu icon in the upper-right corner of the Dashboard or Switcher interface, and then click Admin panel. Stream, record, and monitor using the Dashboard interface The dashboard in Epiphan Live is where you can do confidence monitoring, as well as start and stop streaming and recording for your channels. - Page 88 Automatic file upload status (enabled or disabled). see Automatic file transfers. Storage available on Pearl Mini. Other logged in operators and admins must refresh their web browsers to see the latest changes to the Dashboard. Up to 8 Epiphan Live preview panels can be open at the same time on Pearl devices. This...
- Page 89 Pearl Mini User Guide Stream, record, and monitor using the Dashboard interface 3. (Optional) To choose between displaying 2 or 4 panels, tap the 2x|4x icon that appears in the upper-right corner of the panels area. 4. Tap Save. You can navigate between separate sets of Dashboard panels by selecting the circle icons along the top of the first row of panels.
- Page 90 Pearl Mini User Guide Stream, record, and monitor using the Dashboard interface A grayed-out audio source means that the audio source is not used in any channels. A triangular warning icon means there is a source configuration issue that needs attention. Click the audio source name to display the warning message.
- Page 91 Pearl Mini User Guide Stream, record, and monitor using the Dashboard interface Monitor and select the video output source using Epiphan Live The Dashboard lists the output ports along with the resolution and frame rate. You can select a channel or a video source to display on the video output port using Epiphan Live.
- Page 92 Pearl Mini User Guide Stream, record, and monitor using the Dashboard interface 2. Tap the text field beside the output port and select a channel or source from the list. 3. To enable or disable audio for the output port, tap the speaker icon to toggle audio On and Off for the port.
- Page 93 Pearl Mini User Guide Stream, record, and monitor using the Dashboard interface gray and their respective timers are set to 00:00:00. If streaming isn't configured for a channel, the streaming button displays as Not set. The left-most button with the "signal" icon starts and stops streaming for the channel.
-
Page 94: Switching / Mixing Using Epiphan Live
Pearl Mini User Guide Switching / mixing using Epiphan Live If the stream fails to publish, the streaming button flashes blue and displays ERROR. Check the streaming settings for your channel using the Admin panel. Recording using multi-track recorders From the Admin panel, you can create... - Page 95 Title Description Channel The list of channels configured on Pearl Mini. Select a channel and switch selector between the different layouts that are configured for that channel. Menu icon Displays links to the Dashboard view and the Admin panel when clicked.
- Page 96 Pearl Mini User Guide Switching / mixing using Epiphan Live Number Title Description When you click the Switch button, this preview layout becomes the live panel layout. See Switching while live streaming and recording using Epiphan Live for more information.
- Page 97 Pearl Mini User Guide Switching / mixing using Epiphan Live 3. Tap the field beside the "Switcher" header and select a channel. The field is blank if this is your first time configuring the Switcher. Channels with only one layout are grayed-out and cannot be selected for switching.
-
Page 98: Your Recordings
Pearl Mini User Guide Your recordings 5. Tap the Switch button to switch the layout that is currently in the Preview panel to the Live panel. The layout that was in the Live panel moves to the Preview panel so that it's ready for the next time you switch. - Page 99 Pearl Mini User Guide Your recordings After recoding a file, you can manage it and any other files using the following tools on the page: Number Title Description Select a From and a To date from the pop-up calendar to create a date Date range.
-
Page 100: Cloud-Based Device Management
An Internet connection and a free Epiphan Cloud account is all you need to get started. When Pearl Mini is paired with your Epiphan Cloud account, you can start/stop video recording and streaming, monitor the health of Pearl Mini with status alerts and a diagnostics dashboard, monitor video feeds, update firmware remotely, and even remotely configure channel encoding. -
Page 101: Enable Or Disable Epiphan Cloud Access
Remotely login to cloud versions of the Admin panel for remote rescue troubleshooting, full administration access, and to control recording and streaming using the Admin panel. You can also control switching with Pearl-2 and Pearl Mini. For more information about Epiphan Cloud features and functions, see the online Epiphan Cloud User Guide. - Page 102 Pearl Mini User Guide Enable or disable Epiphan Cloud access Enable or disable Epiphan Cloud access using the Admin panel 1. Login as admin, see Connect to the Admin panel. 2. From the Configuration menu, click Maintenance. The Maintenance page opens.
-
Page 103: Pair And Unpair From Epiphan Cloud
Pearl Mini User Guide Pair and unpair from Epiphan Cloud 3. Tap Epiphan Cloud. The Epiphan Cloud settings page shows the status as enabled and displays a pairing code by default. 4. Uncheck Enable Epiphan Cloud to disable the feature or leave it checked to allow the Pearl device to access Epiphan Cloud. - Page 104 Pearl Mini User Guide Pair and unpair from Epiphan Cloud Important considerations The Pearl device's entry in Epiphan Cloud permanently goes offline when you unpair. You must pair the Pearl device again to use Epiphan Cloud to remotely manage or login to the Pearl device.
- Page 105 7. To unpair a Pearl device using the Admin panel, select Unpair on the Epiphan Cloud status page. Get the pairing code for Pearl-2 or Pearl Mini using the touch screen 1. Tap the gear icon to open the System settings screen. If the control icons aren't showing, tap anywhere on the touch screen.
-
Page 106: Remote Login To The Admin Panel And Epiphan Live
Pearl Mini User Guide Remote login to the Admin panel and Epiphan Live 3. Tap Epiphan Cloud to open the Epiphan Cloud screen. a. If a Pearl device is not currently paired to Epiphan Cloud, the pairing code displays on screen. - Page 107 Pearl Mini User Guide Remote login to the Admin panel and Epiphan Live The URL of the local web version of the Admin panel and Epiphan Live are not the same as the URL of the cloud version. An Epiphan Cloud Pro plan is only required to access the cloud version.
- Page 108 Pearl Mini User Guide Remote login to the Admin panel and Epiphan Live 5. Enter your Admin panel login credentials to login to the cloud version of the Admin panel for that device. The default administrator user name is admin.
-
Page 109: Configure Network Settings
Pearl Mini User Guide Configure network settings Configure network settings Pearl devices use DHCP to obtain an IP Address over an Ethernet-based network by default; however, you can easily change the network settings. Topics include: Network ports Verify IP address and MAC address... - Page 110 554+(x-1) RTSP/TCP, RTSP/HTTP or RTSP/UDP. Pearl Nano: 554 Port 554 (and port 555 for Pearl Mini and Pearl-2) is also used for internal communications. If streaming is disabled, these ports remain open but refuse all external connection requests. If the client video player chooses RTSP/UDP, it will negotiate 4 Random in range random UDP ports (two for audio and two for video).
-
Page 111: Verify Ip Address And Mac Address
Verify IP address and MAC address To view the current IP address and MAC address of the Pearl device: From the Network configuration page using the Admin panel. For Pearl-2 or Pearl Mini, open the Settings menu using the touch screen. Table 18 Network Information... -
Page 112: Configure A Static Ip Address
There are two ways you can set up a Pearl device to use a static IP address: From the Network configuration page using the Admin panel. Pearl-2 or Pearl Mini: From the Settings menu using the touch screen. TIP: Using the device screen, you can choose to apply a configuration preset that contains a static network IP. - Page 113 Pearl Mini User Guide Configure a static IP address Configure a static IP address using the Admin panel 1. Login to the Admin panel as admin, see Connect to the Admin panel. 2. From the Configuration menu, select Network . The Network configuration page opens.
- Page 114 Configure a static IP address using the touch screen on Pearl Mini and Pearl-2 1. Tap the gear icon to open the System settings screen. If the control icons aren't showing, tap anywhere on the touch screen.
-
Page 115: Configure Dhcp
5. Reboot the Pearl device to apply the network changes. Configure DHCP If you need to switch Pearl Mini from using static IP address allocation to using dynamic allocation with DHCP, you can do this three different ways: Restore factory settings, which clear all your custom settings. See Perform a factory reset. - Page 116 5. After the system has finished rebooting, log back in to the Admin panel as admin and verify that all changes were applied. Manually select DHCP as the network type using the touch screen on Pearl Mini and Pearl-2 1. Tap the gear icon to open the System settings screen. If the control icons aren't showing, tap...
-
Page 117: Configure Dhcp Option 81
Pearl Mini User Guide Configure DHCP Option 81 2. Tap Network. The Network settings page appears. The currently enabled network type (DHCP or static) is highlighted green. 3. Tap DHCP, and then tap OK to confirm. 4. Reboot the Pearl device to apply the network changes. -
Page 118: Configure Dynamic Dns
Pearl Mini User Guide Configure Dynamic DNS 2. From the Configuration menu, select Network. The Network configuration page opens. 3. Under Settings, check Send FQDN (DHCP Option 81). 4. In the DNS FQDN field, enter the FQDN of your Pearl device, for example: mypearl.mydomain.com 5. - Page 119 Pearl Mini User Guide Configure Dynamic DNS Table 21 DDNS Fields Label Description/Options Choose if the DDNS provider is dyndns.com, noip.com, or a custom DDNS Provider server of your choice. If you are using a custom DDNS provider, you must enter the DDNS DDNS server name server name.
- Page 120 Pearl Mini User Guide Configure Dynamic DNS 2. From the Configuration menu, select Network. The Network configuration page opens. 3. Under Dynamic DNS, check Enabled and in the Provider field, choose either Custom, dyndns.com, or noip.com in the drop-down menu.
-
Page 121: Change The Http/Https Port Values
Pearl Mini User Guide Change the HTTP/HTTPS port values 11. Reboot your Pearl device when prompted. 12. After the system has finished rebooting, log back in to the Admin panel as admin and verify that all changes were applied. Change the HTTP/HTTPS port values On the Pearl device, the default HTTP port is 80 and the default HTTPS port is 443. -
Page 122: Perform Network Diagnostics
Network diagnostic tools are available to help you troubleshoot your setup. Easily run diagnostics like traceroute, ping, and others from the touch screen on Pearl Mini or Pearl-2, or using the Admin panel. For quick troubleshooting, you can run the Connectivity status diagnostics using the front screen menu of the Pearl Nano. -
Page 123: Disable The Network Discovery Port
Pearl Mini User Guide Disable the network discovery port 3. Tap the Tools field and select the diagnostic tool from the drop-down menu. Some tests require you to enter additional information. 4. When you're ready to start the diagnostic test, tap Run. -
Page 124: Configure 802.1X Network Security And Manage User Certificates
Pearl Mini User Guide Configure 802.1x network security and manage user certificates Topics include: Configure 802.1x network security and manage user certificates Manage CA and self-signed certificates Configure HTTPS For higher security, we recommend setting admin, operator and viewer-level passwords on the Pearl... - Page 125 Pearl Mini User Guide Configure 802.1x network security and manage user certificates 4. (Optional) Check Verify server's identity. 5. Choose an Authentication method if you selected EAP-TTLS as the EAP method. The authentication method is automatically selected if PEAP or EAP-TLS is the EAP method.
-
Page 126: Manage Ca And Self-Signed Certificates
If you need to delete the user certificate or private key, click Delete certificate. Manage CA and self-signed certificates You can view the list of CA and self-signed certificates that come preloaded on Pearl Mini. CA and self- signed certificates are used for server authentication if Verify server's identity is selected when 802.1x network security is configured, see Configure 802.1x network security and manage user... -
Page 127: Configure Https
Configure HTTPS Configure HTTPS You can configure Pearl Mini to use HTTPS for secure, local network access to the Admin panel, as well as for viewing the live channel preview stream on the local network using the Live broadcast URL. -
Page 128: Configure System Settings
Pearl Mini User Guide Configure system settings 4. (Optional) Change the default HTTP and the HTTPS port numbers. Consult your network administrator. 5. (Optional) Upload a new certificate and private key as required. You can request those from your network administrator. - Page 129 Pearl Mini User Guide Configure system settings View the current date and time settings Configure a time server Manually set the date, time, and time zone Configure device info, name, description, and location...
-
Page 130: Configure Date And Time
Configure date and time Configure date and time Pearl Mini uses the current date and time in naming recorded files and when synchronizing and timestamping inputs from multiple sources (i.e. when synchronizing an audio and a video source). The Admin panel lets you specify date and time settings to ensure they are correctly configured for your time zone and your network. - Page 131 Pearl Mini User Guide View the current date and time settings Label Description/Options synchronization not selected, time is set manually. Protocol The time synchronization protocol. Service IP Address The time synchronization server address. Whether or not time is set manually. If time is not being set manually, a time Set time manually synchronization protocol is used.
-
Page 132: Configure A Time Server
Configure a time server Pearl Mini uses the Network Time Protocol (NTP) server from the National Research Council of Canada by default. You can change to a different time server using the Admin panel. Contact your system administrator for the time synchronization server settings you should use. -
Page 133: Manually Set The Date, Time, And Time Zone
5. Click Apply. Manually set the date, time, and time zone Pearl Mini uses NTP for time synchronization by default. You can manually set the date, time, and time zone. Pearl Mini uses the Eastern (Canada) time zone by default. -
Page 134: Configure Device Info, Name, Description, And Location
Pearl Mini User Guide Configure device info, name, description, and location Configure device info, name, description, and location You can assign a unique device name to the Pearl device using the Admin panel and add information such as a description and location. Alphanumeric characters and hyphens are supported. The serial number of Pearl device is the default device name. -
Page 135: Sd Card Storage
To record video on the Pearl Mini and Pearl Nano, you must install and format a storage medium, such as an SD card. The easiest way to do that is using the front screen menu of the Pearl device. Pearl Mini and Pearl Nano have a standard SD card slot on the front panel. - Page 136 SD card and if you select quick disk format or the full disk format. Format an SD card for Pearl Mini 1. From Pearl Mini's touch screen, tap the gear icon to open the System settings screen. If the control icons aren't showing, tap anywhere on the touch screen.
-
Page 137: Format The Sd Card
Pearl Mini User Guide Format the SD card 2. Tap the arrow icon in the lower-right corner of the screen several times to go to the third Settings page, and then tap SD card. 3. Select either quick disk format or the full disk format, then tap Format Card. A full disk format checks for bad blocks on the SD card and marks any that are found on the EXT4 partition. - Page 138 SD card and if you select quick disk format or the full disk format. You can check if the SD card is formatting using Pearl Mini's touch screen when you select the Settings gear icon and tap System Status.
-
Page 139: Audio Input Ports
Pearl Mini User Guide Audio input ports 1. From Pearl Mini's touch screen, tap the gear icon to open the System settings screen. If the control icons aren't showing, tap anywhere on the touch screen. 2. Tap the arrow icon in the lower-right corner of the screen several times to go to the third Settings page, and then tap SD card. -
Page 140: Selecting An Audio Source
One RCA stereo pair consumer line-level input (-10 dBV) The two XLR/TRS combo jacks on Pearl Mini are configured as a stereo pair by default. You can configure the two combo jacks as two separate mono audio inputs using the Admin panel . You can also enable or disable phantom power for the two XLR ports. - Page 141 Audio gain guidelines for different audio devices Audio source Input port Gain Pearl Mini: Add +50 to +60 dB gain to the audio input port. Dynamic microphone Pearl-2 and Pearl Nano: Not recommended. See note above table. Pearl Mini: Add +18 to +40 dB gain to the audio input port.
- Page 142 Pearl Mini User Guide Selecting an audio source Audio source Input port Gain Nominal TRS (Pearl Professional mixer Nominal Mini only) Not recommended. USB microphone Nominal To avoid unwanted signal noise on the RCA ports, we recommend adding no more than 12dB of gain to the...
-
Page 143: Enable Or Disable Phantom Power On Pearl Mini
Enable or disable phantom power on Pearl Mini Enable or disable phantom power on Pearl Mini Phantom power is not enabled on the XLR audio input ports by default on Pearl Mini. You can enable 48 V Phantom power for the two XLR ports using the Admin panel. -
Page 144: Configure Audio Ports For Stereo Or Mono
2. Open the configuration page from the Inputs menu: Pearl Mini: click XLR/TRS Audio. The XLR/TRS Audio configuration page opens. 3. Do one of the following. a. To make the ports function as a stereo pair, check Stereo pair and click Apply. -
Page 145: Assign Audio Sources To An Input
Both audio sources are assigned by default. To avoid unwanted signal noise on the RCA ports, we recommend adding no more than 12dB of gain when RCA, XLR+RCA (for Pearl-2 and Pearl Nano), or XLR+3.5mm (for Pearl Mini) is selected. - Page 146 This table offers some guidelines for adjusting the gain at the audio input port of Pearl Mini for common types of audio input devices. You should add the suggested gain to the audio input to get an average signal to register at a nominal level in the VU meter (i.e.
-
Page 147: Mute Audio
RCA/3.5 mm is used, see Assign audio sources to an input. Ensure the audio input source is connected to an analog audio input port on Pearl Mini before proceeding. Adjust the gain and delay for an audio source using the Admin panel 1. - Page 148 Pearl Mini User Guide Mute audio Table 28 Muting audio inputs that share resources Audio input Shared audio Device Results (Admin panel) input resources In stereo mode: Both XLR ports (left and right) are muted. Both TRS ports (left and right) are muted.
-
Page 149: Video Output Ports
Display and reposition the audio VU meter Rename a video output port Mirror the video output port display Pearl-2 and Pearl Mini - To select the video source displayed on the video output port using Epiphan Live, see Monitor and setup the output port source and... -
Page 150: About Video Output Ports
Pearl Mini An HDMI video output port is located on the rear panel of Pearl Mini. The output port is set to display HDMI A input port by default, but you can change this using the Admin panel . The video output port is configured to maintain aspect ratio, use the display's default resolution, and include audio at 100% volume. - Page 151 Pearl-2 and Pearl Mini - Using the video output ports adds to the overall system load on the Pearl device. If your system has a high system load and you're using the video outputs, monitor the frame rate of your channels on your Pearl device and adjust your setup if there's an unacceptable drop in the frame rate.
-
Page 152: Video Output Port Resolution
Pearl Mini User Guide Video output port resolution Related links Set up the video output port using the Admin panel Set up and enable MultiViewer Select the video output source using the device screen Monitor and select the video output source using Epiphan Live... - Page 153 (or height if displayed horizontally) of the display. Important considerations Pearl-2 and Pearl Mini - If an SDI or HDMI video input source that is selected to display at the HDMI output port also appears in a custom layout for a channel, then the channel's encoding settings are used at the HDMI output.
- Page 154 Pearl Mini User Guide Set up the video output port using the Admin panel 4. In the Resolution field, select the resolution for the video output port. Device Value Description Set the output to the same resolution as the channel or video source.
-
Page 155: Set Up And Enable Multiviewer
MultiViewer displays a custom mix of video sources including channels on the HDMI output port in a convenient grid for confidence monitoring with minimal impact to the system's processors. MultiViewer features differ by Pearl device: Pearl Mini - four video sources. Grid options include: 1x2 video sources, 2x2 video sources. - Page 156 1. Login to the Admin panel as admin, see Connect to the Admin panel. 2. From the Output ports menu, click the output port (HDMI for Pearl Mini). The video output port configuration page opens. 3. In the Source field, select MultiViewer.
-
Page 157: Multiviewer System Information
1360×768, 1400×1050, 1920×1080 Enable MultiViewer using the touch screen on Pearl Mini and Pearl-2 1. From the device's touch screen, tap the gear icon to open the System settings screen. If the control icons aren't showing, tap anywhere on the touch screen. -
Page 158: Select The Video Output Source Using The Device Screen
Pearl Mini User Guide Select the video output source using the device screen HDMI outputs page. Channels If Channels is selected, the following information is displayed on the MultiViewer: Channel - the status of the channel status - The are no errors or warnings, and the channel is ready to use. -
Page 159: Preview The Video Output Port
Video output ports. Select the video output source using touch screen on Pearl-2 or Pearl Mini 1. From the touch screen, tap the gear icon to open the System settings screen. If the control icons aren't showing, tap anywhere on the touch screen. -
Page 160: Disable The Video Output Port
If the video output port is showing a channel and that channel is unavailable or has no signal, a no signal message is shown for 2.5 seconds, then the display output is changed to a black screen. Pearl-2 and Pearl Mini - You can also preview video output ports using the Epiphan Live control interface. See Monitor and select the video output source using Epiphan Live more information. -
Page 161: Disable Or Enable Audio And Output Port Volume
Pearl Mini User Guide Disable or enable audio and output port volume 2. From the Output ports menu, click the output port (HDMI for Pearl Mini). The video output port configuration page opens. 3. In the Source field, select none to disable the video output port and then click Apply. - Page 162 Pearl Mini User Guide Disable or enable audio and output port volume 3. For a channel, do the following: a. Check Enable audio to include audio in the output. Leave this unchecked for no audio with the video. b. (Optional) For a channel with audio enabled, adjust the volume. Enter a value from 0 to 100 percent in the Audio volume field.
-
Page 163: Display And Reposition The Audio Vu Meter
Display and reposition the audio VU meter 5. Click Apply. Pearl-2 and Pearl Mini - You can also disable or enable audio on the video output port and adjust the volume using Epiphan Live, see Monitor and select the video output source using Epiphan Live. -
Page 164: Rename A Video Output Port
5. Click Apply. Rename a video output port Using the Admin panel (or Epiphan Live on Pearl-2 and Pearl Mini), you can easily change the video output port default name to something more suitable. For example, Projector Output or Confidence Monitor. -
Page 165: Mirror The Video Output Port Display
Pearl Mini User Guide Mirror the video output port display 4. Press Enter using your keyboard to save the changes. You must press Enter to save the new name. The Apply button does not save the source name change. Mirror the video output port display You can use the Admin panel to mirror the original video source on the output port so that it appears reversed on the connected display. -
Page 166: Connect External Devices
Pearl Mini User Guide Connect external devices 3. Check Mirrored to flip the video source's orientation on the display port. Uncheck Mirrored to display the video source in it's original orientation, then select Apply Connect external devices You can connect external devices to your Pearl device for control and monitoring. - Page 167 Pearl Mini User Guide Connect an external keyboard You can change the keyboard layout to any of the supported languages. When multiple languages are selected, you can use Ctrl+Shift or Ctrl+Alt to toggle between languages. American English (default) Dutch French...
-
Page 168: Connect A Usb Status Light
Slow flashing (approximately two blinks per second) indicates that an error occurred during recording or live streaming. User administration Pearl Mini has different types user accounts. Depending on the type of user, you will have different privileges. Topics include: User types and privileges... -
Page 169: User Types And Privileges
Pearl Mini User Guide User types and privileges Configure LDAP user authentication Restrict viewers by IP address User types and privileges There are different types of user accounts: Administrator Operator Viewer No password is assigned to the user accounts by default. The first time you login to the Admin panel using the administrator-level account, you're prompted to set passwords for all three user accounts. - Page 170 Pearl Mini User Guide User types and privileges Perform network diagnostics Switch layouts while live streaming If an operator does not have the privileges to apply a particular configuration in the Admin panel, the Apply button appears grayed-out in color and is not selectable. Administrators can grant operators...
- Page 171 ü Switch layouts while streaming/recording (Pearl-2 and Pearl ü ü Mini) Add, duplicate, configure and delete ü recorders (Pearl-2 and Pearl Mini) Start the stream recorder (Pearl-2 and ü ü Pearl Mini) Stop the stream recorder (Pearl-2 and ü ü...
- Page 172 ü ü View the Events page ü ü System Configuration Operations View system configuration ü ü Format the SD card (Pearl Mini and Pearl ü Nano) ü Configure Automatic File Upload (AFU) Select External USB drive behavior ü ü ü Cancel USB file transfers Configure UPnP sharing ü...
- Page 173 Pearl Mini User Guide User types and privileges Action or Menu Option viewer operator admin ü Set or change user passwords Configure the touch screen (Pearl-2 and ü Pearl Mini) Configure serial port flow control ü ü Upload and delete media Enable remote support ü...
-
Page 174: Change User Passwords
Pearl Mini User Guide Change user passwords Change user passwords The admin, operator and viewer-level user accounts have no assigned password by default. The first time you access the Admin panel using the administrator-level account you're prompted to set passwords for all the three user accounts. -
Page 175: Overcome Lost Passwords
Contact Epiphan support. Alternatively, you can regain access to the Pearl device if you apply the factory default configuration preset using the device screen menu, see: Pearl-2 and Pearl Mini - Apply a configuration preset using the touch screen... -
Page 176: Remove User Password
Pearl Mini User Guide Remove user password The factory default configuration will change the current settings on the Pearl device, see The Factory default configuration preset and Factory reset. . You can also perform a factory reset, see Perform a factory reset. -
Page 177: Assign Administrator Privileges To Operators
Configure, remove, rename, and publish a stream for a Channel configuration channel Configure channel metadata Pearl-2 and Pearl Mini - Add, duplicate, configure, and delete recorders Upload, download, and delete media files Input configuration Add and rename video and audio inputs Configure network address Configure 802.1x and manage CA certificates... - Page 178 Pearl Mini User Guide Assign administrator privileges to operators Option Operator admin functions Configure the video output settings Enable CMS and register Disable CMS or deregister Configure CMS settings and default event parameters Configure Automatic File Upload (AFU) Select external USB drive behavior...
-
Page 179: Configure Ldap User Authentication
Pearl Mini User Guide Configure LDAP user authentication Assign administrative privileges to operators using the Admin panel 1. Login to the Admin panel as admin, see Connect to the Admin panel. 2. From the Configuration menu, select Security. The Security configuration page opens. - Page 180 Pearl Mini User Guide Configure LDAP user authentication 4. In the Server address[:port] field, enter the server IP address and (optional) port for your LDAP server. For example, 192.168.1.101:389. 5. In the Connection encryption drop-down, choose the type of encryption used by your LDAP server (if any is used).
-
Page 181: Restrict Viewers By Ip Address
Pearl Mini User Guide Restrict viewers by IP address When a user of the LDAP server next visits the admin or viewer page for the system, the system prompts for use the username and password. For ActiveDirectory servers, the user needs to enter his fully qualified username (i.e. - Page 182 Pearl Mini User Guide Restrict viewers by IP address If a user attempts to connect to the stream from a disallowed IP address, access is denied. If there's an attempt to connect using a web browser, the message "IP address rejected" is displayed.
- Page 183 Pearl Mini User Guide Restrict viewers by IP address Example Description to the broadcast. For example if your system is accessible on your local area network (LAN) and you want to make sure only the CEO’s specific desktop, laptop and tablet computers (with IP Addresses 192.168.1.50, 192.168.1.51, and 192.165.1.75, respectively) can connect to the broadcast, construct the...
- Page 184 Pearl Mini User Guide Restrict viewers by IP address Example Description the CEO’s computers (192.168.1.50, 192.168.1.51, 192.168.75) and all boardroom computers (192.168.1.200-192.168.1.250) to access the broadcast, with the exception of the public boardroom computer (192.168.1.211). Use both allow and deny lists to create the rule as follows: IP addresses, distinct...
- Page 185 Pearl Mini User Guide Restrict viewers by IP address Example Description The deny list is an "exception" list for the allow list. So to craft the rule described above we need to allow all the computers in the local subnet, then deny specific sub-ranges including two groups of boardroom...
-
Page 186: Configuration Presets
Configuration presets are groups of settings that get applied to the system, leaving other important settings intact. They make it easy to manage multiple Pearl Mini setups in shared spaces, like a studio, and ensures a consistent setup each time you go to use Pearl Mini. You can even export a configuration preset and upload it to another Pearl Mini system. - Page 187 Example of presets in action You could upload custom background images to Pearl Mini in advance of a conference and create custom channel configuration presets for several different keynote speakers, each with a different setup, and then apply them later when you need them. ...
-
Page 188: Configuration Preset Considerations
Pearl Mini User Guide Configuration preset considerations Channel configuration includes any applied backgrounds and image files. If these files aren't present when the configuration preset is saved, the save function will fail. Be careful when deleting background images and logo files. - Page 189 Access to presets and privacy considerations Recorded files are not removed when you apply a configuration preset. Any user with access to Pearl Mini has access to all the saved recordings, custom channel layout, etc that are associated with an applied configuration preset.
-
Page 190: Recording And Streaming States
The channels configuration group includes recording and streaming states for channels (or recorders on Pearl-2 and Pearl Mini). This means that if a channel is streaming or a channel (or recorder) is recording at the time you create a configuration preset, the channel will immediately start recording (or streaming) whenever you apply that preset to the channel. -
Page 191: Recorded Files In A Channel Or Recorder
Pearl Mini User Guide Recorded files in a channel or recorder If channel 3 exists prior to applying the preset and is already recording, the file will continue recording uninterrupted unless the recording file type is different in the preset (in which case a new file is started). - Page 192 Pearl Mini User Guide Recorded files in a channel or recorder Deleting channels and recorders on Pearl-2 and Pearl Mini Recorded files are stored on the system based on their channel or recorder number. All files saved for channel index 1 are in one folder, and all files for recorder index 2 are in another. When you delete a channel (or recorder), you permanently delete all recordings for that channel (or recorder) even if those recordings were made while a different preset is applied.
-
Page 193: Configuration Groups
Pearl Mini User Guide Configuration groups Configuration groups The following table describes what settings are saved with each configuration group. Table 35 Configuration group definitions Touch screen Symbol (Pearl-2 Group Name Settings included in the configuration group and Pearl Mini... -
Page 194: The Factory Default Configuration Preset And Factory Reset
ü Deletes all created channels Deletes all recorded files in the ü channels (Pearl Nano has a single channel) Pearl-2 and Pearl Mini - Deletes all ü ü created recorders Pearl-2 and Pearl Mini - Deletes all ü recorded files in recorders ü... - Page 195 There are different ways you can apply the Factory default configuration preset to the Pearl device, you can: Apply a configuration preset using the Admin panel Pearl-2 and Pearl Mini - Apply a configuration preset using the touch screen A reboot is required to apply the factory default configuration preset.
-
Page 196: Create A Configuration Preset
Configuration groups for which settings are included in each group. After you finish configuring Pearl Mini, it's good practice to save a full backup with all groups selected so that you can restore your full configuration at a later date. -
Page 197: Apply A Configuration Preset Using The Admin Panel
Apply a configuration preset using the touch screen You can use the touch screen on Pearl Mini and Pearl-2 to apply configuration presets. Configuration presets that only contain the network configuration group can also be applied using an alternative... - Page 198 Pearl Mini User Guide Apply a configuration preset using the touch screen If you apply a preset that has the EDID configuration group, the system may appear unresponsive for a short time while it applies these EDIDs to the video grabbers.
-
Page 199: Export And Import Configuration Presets
You can download configuration presets to your local computer, then upload and apply the preset to another Pearl Mini or save the configuration preset as a backup of your current configuration. Either way, it's a simple two-step process to download the preset from one system and upload it to another. -
Page 200: Update A Configuration Preset
Click OK to overwrite the existing preset or Cancel to cancel the upload. What's next After you upload a configuration preset file, you must apply the configuration preset to Pearl Mini. To apply the configuration preset, see... -
Page 201: Delete A Configuration Preset
Pearl devices can delete all configuration presets at once by doing a factory reset. You cannot delete the Factory default configuration preset. Status and monitoring Pearl Mini lets you monitor audio and check the status of your channels, live streams, and recordings. Topics include: Monitoring audio... -
Page 202: Monitoring Audio And Vu Sensitivity
Monitoring audio and VU sensitivity You can connect headphones to the 3.5 mm audio jack on the front panel of Pearl Mini. To monitor audio for a specific channel, just select the channel using the touch screen. The audio you hear depends on which layout is currently live because different layouts can have different audio sources configured. - Page 203 Pearl Mini User Guide Channel monitoring using the touch screen Table 38 Grid view indicators Item Description Streaming (left) and recording (right) indicators appear in the top-right corner for each channel: (no dots) Streaming is disabled and recording is stopped.
- Page 204 Pearl Mini User Guide Channel monitoring using the touch screen You can do more monitoring for a specific channel when you select a channel from the grid view. Just tap the channel you want to monitor from the grid view and the channel view opens.
-
Page 205: View System Information Using The Touch Screen
To get back to the grid view, tap the grid icon View system information using the touch screen Find the serial number, check the installed firmware version of your Pearl Mini and more on the System Status screen using the touch screen. - Page 206 Pearl Mini User Guide View system information using the touch screen Label Description Device Information Serial number Video grabber number Firmware version Network Information IP Address MAC Address Device Status System date System time Uptime CPU load (%) and Temperature (°Celsius)
- Page 207 Pearl Mini User Guide View system information using the touch screen 3. Tap CPU load to toggle between the operating temperature (°Celsius) and CPU load (%). 4. Tap Back to return to the System Settings screen, or the Home icon to return to the channel view.
-
Page 208: View System Information Using The Admin Panel
View system information using the Admin panel View system information using the Admin panel Get useful information about Pearl Mini on the Info page from the Configuration menu. You can view your current firmware level, the system hardware version (if available), and currently configured settings for a channel. -
Page 209: View Network Status
See Configure the touch screen to enable system information. View network status Get useful status information about Pearl Mini network connection from the Network configuration page using the Admin panel, including: Current IP address Hostname Rated Ethernet link speed (Mbps) -
Page 210: View 802.1X Network Connection Status
View the 802.1x network connection status in the following locations: the Connectivity status diagnostic in the Admin panel the touch screen on Pearl-2 and Pearl Mini when you select Network > Connectivity Status. The status can display as either passed, failed, or disabled. -
Page 211: View Channel Status And Stream Information
View channel status and stream information If you attempt to connect to a network that isn't 802.1x enabled when 802.1x is configured on Pearl Mini, a consistent 802.1x status: failed status message appears on the Network Configuration page in the Admin panel. -
Page 212: View The Video Output Port Status
Pearl Mini User Guide View the video output port status Active unicast and multicast stream information displays under Connections. View the video output port status The current status of the video output port and attached video display appears at the top of the video... - Page 213 Pearl Mini User Guide View the video output port status View the video output port status using the Admin panel 1. Login to the Admin panel as admin, see Connect to the Admin panel. 2. From the Output port(s) menu, click the output port. The video output port configuration page opens.
-
Page 214: View Afu And File Transfer Progress
You can view Automatic File Upload (AFU) and file transfer information from the following places: the Admin panel. touch screen menu on Pearl-2 and Pearl Mini In this example, AFU is scheduled to occur at specified time intervals so the start of the next scheduled file transfer is shown. - Page 215 2. From the Configuration menu, click Automatic File Upload. If there are files to be uploaded, they appear in the queue. View file transfer status using the Pearl-2 and Pearl Mini touch screen 1. Tap the gear icon. If the control icons aren't showing, tap anywhere on the touch screen.
-
Page 216: View Scheduled Cms Events And History
Using the Admin panel, select the Events menu to see up to 90 days of upcoming scheduled events and up to 90 days of ongoing and completed events for Pearl Mini. Click the page arrows at the bottom of each list to navigate through multiple pages. - Page 217 Configure date and time. From the touch screen on Pearl Mini, you can tap the Scheduled events icon at any time to display the Events screen. The icon only appears when Kaltura or Panopto CMS is enabled on Pearl Mini.
- Page 218 Pearl Mini User Guide View scheduled CMS events and history The Events screen displays automatically on the touch screen of Pearl Mini about five minutes before a scheduled event starts. For events with more channels than can be previewed at the same time on the touch screen, an arrow...
-
Page 219: Capture
Pearl Mini User Guide Capture Capture Capturing is the process of taking the signals from your video and audio sources and encoding them so they're ready for streaming and recording. You add the captured video and audio to channels, which you customize for live streaming, switching, and recording. -
Page 220: What Is A Channel
Pearl Mini comes with two channels already preconfigured: HDMI-A and HDMI-B. The HDMI- A video input port on Pearl Mini is assigned to the HDMI-A channel and the HDMI-B video input port is assigned to the HDMI-B channel by default. But you can easily change that and add whichever video and audio sources you want to a channel. - Page 221 Pearl Mini User Guide Channel layout examples Epiphan Layout example Description products One video source with a logo (.png with transparency) in the bottom left corner. To get this look: Upload an image with transparency. Using the custom layout editor, add...
- Page 222 Pearl Mini User Guide Channel layout examples Epiphan Layout example Description products Two video sources (a slideshow and a presenter cropped to a new aspect ratio using the tool to Crop a video source), a background image, and a logo.
- Page 223 Pearl Mini User Guide Channel layout examples Pearl Layout example Description Devices One 4x3 video source at the full size of the channel. To get this look: Using the custom layout editor, add one Pearl-2 video source to the layout, select...
-
Page 224: Channel Configuration
You can control exactly how the video is presented and streamed to shared destinations and multiple viewers. If you create multiple layouts for a channel on Pearl-2 or Pearl Mini using the custom layout editor, you can switch live between the layouts. -
Page 225: Create A Channel
CPU processing, but we don't guarantee optimum performance from your Pearl Mini with three channels. To optimize the performance of your Pearl Mini if you have more than two channels configured, consider deleting unused layouts and avoiding up scaling or down scaling video sources. - Page 226 Pearl Mini User Guide Create a channel When you create a channel, it's convenient to add your video and audio sources at that time. Channels can have one or more video and audio sources. This procedure includes basic steps to add a single video and audio source.
-
Page 227: Add Video Sources Or A Channel As A Source
1. For Pearl Mini, set up HDMI-A as Channel 1 and HDMI-B as Channel 2. For Pearl-2, continue to step 2. Set up Channel 1 as your switched program channel. Add all your custom layouts to Channel 1 and stream this channel to YouTube at 1920×1080. - Page 228 2. From the Channel(s) menu, select the channel and click Layouts. The custom layout editor opens. 3. Pearl-2 and Pearl Mini - In the Layouts list that appears at the top of the page, click a layout's row to select that layout or click Add new layout.
- Page 229 Pearl Mini User Guide Add video sources or a channel as a source When adding an RTSP network source, a preview image may not display in the layout area until you Save the layout. The preview can also appear to have no signal if the RTSP source is not currently sending content.
- Page 230 Pearl Mini User Guide Add video sources or a channel as a source To layer video sources over top of each other, like for picture in picture, you can click and drag the video sources that appear in the item list beneath Add new item and change their order.
-
Page 231: Add An Audio Source To A Layout
Pearl-2 and Pearl Mini - Each layout can have the same audio sources in them or you can choose different audio sources. An audio source has the same gain no matter how may layouts the audio source is added to, or if you've added just the one audio source or several audio sources to the same layout. - Page 232 Pearl device, some residual noise may be detected in the layout. Remove the audio source from the layout. Pearl Mini supports many different audio devices, including dynamic and condenser microphones, passive and active electret microphones, professional line-level audio mixers, and consumer line level sources like mobile phones and audio players.
-
Page 233: Duplicate A Channel
Pearl Mini User Guide Duplicate a channel What's Next You can check the audio encoding settings for your channel and ensure that audio is enabled, see Configure encoding. To adjust the gain for an audio input source, see Adjust audio gain and delay. -
Page 234: Rename A Channel
Do not include any special currency, mathematical symbols, and other special characters such as slashes or spaces in the channel name. Pearl Mini replaces special characters with an underscore. Rename a channel using the Admin panel 1. Login to the Admin panel as admin, see Connect to the Admin panel. -
Page 235: Delete A Channel
Preview a channel from the Status page Pearl-2 and Pearl Mini - Preview all channels at the same time With Pearl-2 and Pearl Mini, you can also preview a channel using Epiphan Live. See Configure Dashboard panels for more information. - Page 236 PCM audio encoding with a sampling bitrate of 48 kHz. If HTTPS is configured for Pearl Mini, the live broadcast URL will start with https instead of http. The Info page has preview links for all the channels that are configured on Pearl-2 and Pearl Mini.
-
Page 237: Add Or Remove Channel Metadata
Pearl Mini User Guide Add or remove channel metadata Pearl-2 and Pearl Mini: Preview all channels at the same time using the Admin panel The resulting web page can be very large. You can use your keyboard's zoom keys or the zoom buttons for your web browser to adjust the screen view. -
Page 238: Configure Encoding
Use only alphanumeric and diacritic characters in metadata descriptions. The whole metadata string is refused if any special currency or mathematical symbol appears in the description. You must remove the offending characters before Pearl Mini will accept the description. Add or remove channel meta data using the Admin panel 1. -
Page 239: Codecs And File Format Compatibility
Description H.264 provides high quality video while using low bandwidth. This is H.264 the default and preferred codec for the Pearl-2 and Pearl Mini. This codec is suitable for streaming and recording video, however you Motion JPEG (Pearl-2 and Pearl get lower quality images and it requires a large amount of bandwidth. - Page 240 Pearl Mini User Guide Codecs and file format compatibility Value Description values are: 22 kHz, 44 kHz and 48 kHz. Setting the channel bitrate to match the audio source's bitrate provides the best sound quality and avoids audio resampling. Most digital signals (HDMI or SDI sources) use 48 kHz.
-
Page 241: Configure Video Encoding
Pearl Mini and Pearl-2 options are H.264 (default) and Motion JPEG. Hardware or software encoding: Hardware encoding is the default setting on Pearl Mini or Pearl- 2 and is the recommended encoding. Video encoding profile: This can be set to High, Main, or Baseline. - Page 242 Instead of using the same frame size as the original video source, you can configure a smaller frame size for the channel and let Pearl Mini downscale the video. For example, if the input video signal resolution is 1920×1080 (a 16:9 aspect ratio) and the channel's frame size is set to 1280×720, Pearl Mini downscales the video and streams/records the channel at the lower frame...
- Page 243 Setting Description H.264 provides high quality video while using low bandwidth. This is the default and H.264 preferred codec for the Pearl-2 and Pearl Mini. Motion JPEG (Pearl-2 This codec is suitable for streaming and recording video, however you get lower quality and Pearl images and it requires a large amount of bandwidth.
- Page 244 3. Select a video Codec and do one of the following: If H.264 is selected, select a Video encoding preset and a Video encoding profile. Pearl-2 and Pearl Mini - If Motion JPEG is selected, click Page refresh time and enter a time in seconds.
-
Page 245: Configure Audio Encoding
Pearl Mini User Guide Configure audio encoding 4. Configure the frame size, do the following: a. Uncheck Use current signal resolution as the frame size. Enabling Use current signal resolution as the frame size is not recommended if the video input resolution changes frequently. An unstable cable or other disturbance that causes the resolution of the video input signal to change during a live stream can cause the stream to drop. - Page 246 Pearl Mini User Guide Configure audio encoding Value Description audio resampling. For analog signals, 44 kHz provides higher sampling. The maximum bitrate for mono encoding of a 44 kHz signal is 264 kbps. For stereo, 320 kbps is supported. Note that lower bitrates (e.g. 32 kbps) with a 44 kHz signal may result in distorted audio.
- Page 247 Pearl Mini User Guide Configure audio encoding 3. In the Audio settings, ensure that Enable audio is checked to include audio in the channel. 4. From the Audio format drop down, select an audio codec. 5. From the Audio channels drop down, choose mono or stereo (default).
-
Page 248: Multi-Encoding And Channel As A Source
Multi-encoding and channel as a source Multi-encoding and channel as a source Pearl Mini lets you easily do multi-encoding so you can record and stream the same content at different encoding settings. This is useful when you want to: Record a video at a high bitrate and frame size and live stream the same content at lower encoding settings. -
Page 249: About The Custom Layout Editor
Each layout you add to your channel adds overhead to Pearl-2 and Pearl Mini, and more complex layouts consume more of the system's resources. So, it's a good idea to delete any layouts you're not using. - Page 250 Pearl Mini User Guide About the custom layout editor Layout editing The layout editing area is where you can add images, video sources, and text overlays to your layout. You can also choose a background matte color, crop images and video, and edit video sources.
- Page 251 Pearl Mini User Guide About the custom layout editor Move and size items in the layout editing area You can use the mouse to click and drag items into position, or you can type values into the fields along the side and bottom of the layout area and manually position the selected item. You can also enter values as a percentage of the full layout area (for example, enter 4%) or in pixels (for example, enter 16px).
-
Page 252: Resize And Position Items Using Percents Or Pixels
It's also where you'll find the Save button. Pearl-2, Pearl Mini, and Epiphan Unify - If a layout doesn't have an audio source selected, there will be silence when that layout is selected during live switching, recording, and confidence monitoring. - Page 253 Pearl Mini User Guide Resize and position items using percents or pixels Percent values are used in adjustment boxes by default, and can be converted to pixels by simply overwriting the percent value in a given adjustment box and replacing it with a pixel value.
- Page 254 Pearl Mini User Guide Resize and position items using percents or pixels Table 47 Adjustment boxes for item resizing and positioning Item Description The area of your layout item. The four red/white dots represent the boundaries of your layout item. There may be some black space between your item and its boundaries if Keep aspect...
- Page 255 Pearl Mini User Guide Resize and position items using percents or pixels Item Description If using percents, this is the items percentage of total height on the layout's vertical axis. (for example, the item takes up 80% of the layout's height – represented by a thin red bar to the left of the percent box).
- Page 256 Pearl Mini User Guide Resize and position items using percents or pixels In the example, the video source is resized to 60% of the layout's width and 70% of the layout's height (with aspect ratio maintained). (Alternatively, pixels could be used to resize the layout item in a similar fashion.)
- Page 257 Pearl Mini User Guide Resize and position items using percents or pixels Alternatively, you can position your layout items using the keyboard by selecting the item with your mouse cursor, and pressing the arrow keys to move the selected item by 5% in any direction.
- Page 258 Pearl Mini User Guide Resize and position items using percents or pixels For example, using pixels to move a layout item that is set to 756px in height to the top of the layout while leaving a small margin of background (say 25px), you could either enter "25px"...
-
Page 259: Open The Custom Layout Editor For A Channel
Pearl Mini User Guide Open the custom layout editor for a channel Open the custom layout editor for a channel 1. Login to the Admin panel as admin, see Connect to the Admin panel. 2. From the Channel(s) menu, select the channel and click Layout(s). The custom layout editor opens. - Page 260 2. From the Channels menu, select the channel and click Layouts. The custom layout editor opens. Pearl-2 and Pearl Mini - Select a layout from the layout list or click Add Layout to create a new layout. If this is a new channel or layout, the layout area is empty and you see a black background matte.
-
Page 261: Rename A Layout
Rename a layout You can rename a layout using the custom layout editor. Pearl-2 and Pearl Mini - If you're using the touch screen for live switching, consider using shortened names for layouts. Long names get truncated on the touch screen. -
Page 262: Delete, Move, Or Duplicate A Layout
Pearl Mini User Guide Delete, move, or duplicate a layout 4. Click the name of the layout so that the name turns red. Type a new name and then press the Enter key. Delete, move, or duplicate a layout It's simple to re-order, remove, and duplicate layouts using the custom layout editor. - Page 263 Pearl Mini User Guide Delete, move, or duplicate a layout 3. In the layouts list, click and drag the icon with the three horizontal bars at the left side of the row to rearrange the order of your layouts. Delete a layout using the Admin panel's custom layout editor You can delete any layout except the currently active layout.
-
Page 264: Set The Background Color
Pearl Mini supports .PNG and .JPEG images up to a maximum size of 4096×2160. For many applications like a background, you will want your image to have the same aspect ratio as the channel in which the... - Page 265 Pearl Mini User Guide Add an image to a layout recommended that you upload exactly the size you need and avoid scaling the image using the custom layout editor. Images can be uploaded in advance from the Media page, see...
-
Page 266: Upload Or Remove An Image Using The Media Page
Pearl Mini User Guide Upload or remove an image using the Media page 7. Re-order the items in your layout by clicking and dragging items in the item list. To layer items over top of each other, like for background images or a transparent logo, you can click and drag elements that appear in the item list beneath Add new item and change their order. -
Page 267: Add A Text Overlay
Pearl Mini User Guide Add a text overlay For best results always upload images that are already the correct size needed in your layout. Background images should match the frame size of your channel (frame size is set in the Encoding configuration page). - Page 268 Pearl Mini User Guide Add a text overlay Item Shortcut code Example date format: 01/26/19 mm/dd/yy year 2019 month (01) month (Jan) month (January) January day of the month weekday (Thu) weekday (Thursday) Thursday time 08:40:45 hour minute second millisecond channel name Camera Feed 1...
- Page 269 Pearl Mini User Guide Add a text overlay Add a text overlay using the custom layout editor 1. Login to the Admin panel as admin, see Connect to the Admin panel. 2. From the Channel(s) menu, select the channel and click Layout(s). The custom layout editor opens.
- Page 270 Pearl Mini User Guide Add a text overlay 4. In the Text field, type what you want to appear in the text overlay. Include Overlay text shortcut codes as needed. Press Tab or click outside the text field to refresh the preview in the custom layout editor.
-
Page 271: Custom System Variables For Text Overlays
Pearl Mini User Guide Custom system variables for text overlays 6. Resize the overlay text box using the padding settings. The handles on the corner of the overlay text box are not click-and-drag and do not resize the text box. To resize the text box, use the padding fields to add space above, below, and on either side of the text. -
Page 272: Crop A Video Source
You can crop a video source to change the size and shape of your video as it appears on screen using the custom layout editor. Cropping a source gives you a lot of advantages and can help to conserve the overall amount of processing CPU usage for Pearl Mini. Crop a source using the Admin panel's custom layout editor 1. - Page 273 Pearl Mini User Guide Crop a video source...
- Page 274 Pearl Mini User Guide Crop a video source 5. The Crop window has several tools for creating the best crop possible. Free form is the default crop mode. In this mode, you can change the size, aspect ratio, and position of the crop with minimal restrictions.
-
Page 275: Video And Audio Input Sources
Pearl Mini User Guide Video and audio input sources Video and audio input sources The Admin panel automatically discovers all video and audio sources that you connect to the input ports on the Pearl device and lists them in the Inputs menu of the Admin panel. You can also configure a video source's settings using the Admin panel. - Page 276 Professional microphones and other mic-level audio devices can be connected to the XLR and 3.5 mm (stereo) audio input ports on Pearl Mini. Audio mixers and other line-level audio devices can be connected to: Pearl Mini - the RCA and ¼" TRS audio input ports .
-
Page 277: Tested Rtsp-Based Ip Cameras
Pearl Mini User Guide Tested RTSP-based IP cameras Embedded audio from sources connected to the HDMI, SDI, and USB ports (only USB audio on Pearl Nano) is also supported. For guidance on connecting an audio source, see Selecting an audio source Tested RTSP-based IP cameras Pearl devices are compatible with all Ethernet-based IP cameras and other RTSP sources. -
Page 278: Supported Web Cameras
Pearl Mini User Guide Supported web cameras Default username Brand Model Image URL syntax Audio? and pass- word admin Sony SRG300SE /video1 admin /MediaInput/h264/stream_1 admin Panasonic (To add a second URL, use: ⁑ HE40HPK "/MediaInput/h264/stream_ 12345 2") root Axis P1428-E /axis-media/media.amp... -
Page 279: Connect An Rtsp Source
Configure a video input source Connect an RTSP source You can connect an RTSP source (such as an IP camera or another Pearl device) to Pearl Mini over a network using the Admin panel. For a list of tested cameras and their URL syntax, see Tested RTSP-based IP cameras RTSP video encoding is supported with H.264 video codec and MP3 or AAC audio formats. - Page 280 Pearl Mini User Guide Connect an RTSP source Connect an RTSP source using the Admin panel 1. Login to the Admin panel as admin, see Connect to the Admin panel. 2. From the Inputs menu, click Add input, and then click Add RTSP input The RTSP input page opens.
-
Page 281: Connect An Srt Stream As An Input
You can configure Pearl Mini as an SRT destination (decoder) and ingest SRT streams as video inputs that you can add to custom layouts for switching, recording, and streaming. Pearl Mini and Pearl Nano - One video input on Pearl Mini and Pearl Nano can be from an SRT source. - Page 282 If AES encryption and a passphrase is required, consult your IT administrator for this information. Pearl Mini supports 128 bits, 192 bits, and 256 bits AES encryption. Special characters are not supported in the passphrase. If AES encryption and a passphrase is configured, ensure this information is provided to the SRT source.
- Page 283 <encoder-ip-address> and <port> could be a Pearl device sending an SRT stream. Source port - enter the port number for Pearl Mini to use for SRT traffic. Stream ID - In the Stream ID field, enter a unique name for this stream.
- Page 284 Hardware encoding is the default setting for a channel and is the recommended encoding for use with Pearl Mini. However, if you are ingesting an SRT stream as a video input for a channel and Pearl Mini does not recognize the signal, switch to using software encoding for that...
-
Page 285: Connect An Av.io Video Grabber
You can preview the images captured from your video sources in the Admin panel. Pearl-2 and Pearl Mini - You can also preview your sources using the Epiphan Live control interface, see Monitor video and audio input sources using Epiphan Live. -
Page 286: Configure A Video Input Source
Pearl Mini User Guide Configure a video input source 3. Click on the input port name that appears at the top of the page. The text turns red. 4. Enter the new name using alphanumeric characters. We recommend using underscores to separate words rather than using spaces. -
Page 287: Add A Custom No Signal Image
Pearl Mini User Guide Add a custom No Signal image Value Input type Description how soon you wish the no-signal image to appear after the signal disappears. SDI video settings The following options are available for signals via the SDI port. - Page 288 Pearl Mini User Guide Add a custom No Signal image 4. In the Timeout field, enter the number of seconds before the No Signal image is displayed. If no manual value is entered, the default time to display is 5 seconds.
-
Page 289: Stream
Smart TVs, and Content Distribution Networks. Pearl Mini is flexible, easy to setup, and supports all the standard codecs, as well as the most common media players. Streaming options include: unicast, multicast, SRT, HLS, MPEG-DASH, RTMP, SAP, UPnP, and more. -
Page 290: What Is Streaming
A channel can support multiple streams. That means you can stream a channel to multiple destinations using different streaming protocols. Unicast and multicast streams are also supported. Pearl-2 and Pearl Mini - start and stop streaming by using One touch control from the touch screen, see Specify channels for Single Touch streaming or directly from the Admin panel . -
Page 291: Streaming To A Cdn, Multicasting, And Streaming To Multiple Destinations
Streaming to a CDN, multicasting, and streaming to Pearl Mini User Guide multiple destinations Additional considerations Are you streaming live video or recorded video? Do you need to stream the content to one client (peer-to-peer) or deliver a single stream to... - Page 292 Pearl Mini User Guide multiple destinations Pearl Mini can publish to multiple destinations at the same time. Do not use Motion JPEG (MJPEG) encoding when streaming a channel to CDNs and multicast streaming at the same time. For more information, see Configure video encoding.
-
Page 293: Directly Sharing Channel Stream Urls With Viewers
To stream to CDNs and multicast a channel at the same time, the channel must have H.264 configured as the channel encoding Another option is to set up multiple channels on Pearl Mini and stream those using the Admin panel. That way, you can configure each channel with different encoding settings. For example, you can configure one channel with the streaming specifications for YouTube and configure the second channel for streaming to Facebook. -
Page 294: About Streaming Using Srt
You can configure Pearl Mini as an SRT source encoder and stream video using SRT. You can also configure Pearl Mini as an SRT decoder and ingest SRT streams as video inputs. Up to one of the video inputs you configure for Pearl can be from an SRT source and Pearl Mini can stream up to three SRT... - Page 295 Pearl Mini User Guide About streaming using SRT Pearl Mini as SRT source encoders in a multiple-source setup. Before content is streamed between the SRT source and destination, a communication link must be established between them for SRT control and recovery packets. Any firewalls blocking the path must be traversed.
-
Page 296: Secure Streaming
SRT includes latency controls to adjust for poor network quality while maintaining an acceptable amount of delay. Pearl Mini provides statistics to determine the amount of packet loss. Using the Admin panel, you can increase or decrease the amount of latency applied to the stream to help mitigate any Quality of Service (QoS) issues. -
Page 297: Suggested Stream Settings
The following table provides suggested settings to maximize your video quality while minimizing system resource usage when streaming video content from Pearl Mini. Table 51 Suggested stream settings for video... - Page 298 Pearl Mini User Guide Suggested stream settings Table 52 Suggested stream settings for slides Option Setting Codec Pearl-2 and Pearl Mini - H.264 Video encoding preset Hardware accelerated Video encoding profile Pearl-2 and Pearl Mini - High Key frame interval 2 sec...
-
Page 299: Streaming A Channel Direct To Viewers
Publishing Options Use this option to... Viewers on the same local network as Pearl Mini can access the Live broadcast URL using a web browser on the local network and are instantly connected. Viewers can also choose to use their favorite media player to watch the stream on the local network. -
Page 300: Share A Live Broadcast Stream (Http, Https Or Rtsp)
If HTTPS is configured, the live broadcast URL will start with https instead of http. If Pearl Mini is behind a firewall and you want to share a stream with remote viewers, you need to set up port forwarding on your network. Consult with your network administrator. -
Page 301: Enable Hls (Pull)
Enable HLS (pull) Stream a live broadcast of a channel directly to viewers on the same local network as Pearl Mini using HTTP over port 80. This gives viewers with iOS devices convenient access to the channel's live broadcast. If HTTPS is configured for Pearl Mini, the traffic from port 80 is redirected to HTTPS port 443. - Page 302 HLS stream's video data without having to provide a viewer password or LDAP authentication as configured on Pearl Mini. A viewer password or LDAP authentication that is configured on Pearl Mini is still needed to access the HLS stream’s playlist.
-
Page 303: Restrict Viewer Access To Channel Streams
Pearl Mini User Guide Restrict viewer access to channel streams Restrict viewer access to channel streams Your Pearl device can restrict access to all viewer streams from the channel using global viewer passwords and IP allow/deny lists. see Change user passwords andRestrict viewers by IP address. -
Page 304: Restrict Viewers By Ip Address
Pearl Mini User Guide Restrict viewers by IP address If you have global allow/deny lists or a global user password, you can override the global settings and remove all access control for a channel by selecting Use these settings and leaving all the fields blank. - Page 305 Pearl Mini User Guide Restrict viewers by IP address If a user attempts to connect to the stream from a disallowed IP address, access is denied. If there's an attempt to connect using a web browser, the message "IP address rejected" is displayed.
- Page 306 Pearl Mini User Guide Restrict viewers by IP address Example Description to the broadcast. For example if your system is accessible on your local area network (LAN) and you want to make sure only the CEO’s specific desktop, laptop and tablet computers (with IP Addresses 192.168.1.50, 192.168.1.51, and 192.165.1.75, respectively) can connect to the broadcast, construct the...
- Page 307 Pearl Mini User Guide Restrict viewers by IP address Example Description the CEO’s computers (192.168.1.50, 192.168.1.51, 192.168.75) and all boardroom computers (192.168.1.200-192.168.1.250) to access the broadcast, with the exception of the public boardroom computer (192.168.1.211). Use both allow and deny lists to create the rule as follows: IP addresses, distinct...
-
Page 308: Change Http And Rtsp Streaming Port Values
Pearl Mini User Guide Change HTTP and RTSP streaming port values Example Description The deny list is an "exception" list for the allow list. So to craft the rule described above we need to allow all the computers in the local subnet,... -
Page 309: Disable And Enable Direct Channel Streaming
Pearl Mini User Guide Disable and enable direct channel streaming 3. Set the HTTP Streaming port to specify the port used to stream the HTTP broadcast. This value along with the URL is used by viewers to access the FLV and MPEG-TS streams. - Page 310 Pearl Mini User Guide Disable and enable direct channel streaming Streaming configuration page using the Admin panel. When you create a channel, the channel's streaming URLs are enabled by default. Disabling channel streaming for viewers using their web browser or media player does not disable live streaming to a CDN.
-
Page 311: Viewing A Channel's Live Broadcast Stream
You can share the channel's stream URLs with people on the same local network as Pearl Mini so they can watch a live broadcast of the channel. All you need to do is provide them the channel's stream URL and log in credentials if you've set one for viewers, see Change user passwords. -
Page 312: View The Live Broadcast Url Using A Web Browser
You can share a channel's live broadcast URL with viewers so they can watch your live stream using their favorite web browser. Your viewers must be on the same network as Pearl Mini to watch a live broadcast using the channel's live broadcast URL. - Page 313 To set a viewer password, see Change user passwords. If HTTPS is enabled on Pearl Mini, replace http with https in the URL of the stream. Share the live broadcast URL with viewers 1. Login to the Admin panel as admin or operator, see Connect to the Admin panel.
-
Page 314: View The Streaming Url Using A Media Player
You can share a channel's streaming URL with viewers so they can watch your live stream using their favorite media player, like VLC. Your viewers must be on the same network as Pearl Mini to watch a channel stream using a stream URL. - Page 315 Pearl Mini User Guide View the streaming URL using a media player 4. Press Play to watch the stream in the media player window.
-
Page 316: Streaming To Servers, Cdns, And Other Devices
Streaming to servers, CDNs, and other devices Pearl Mini can stream to CDNs, local media servers, and even to other Pearl Mini devices that are acting as a streaming ingestion point. Pearl Mini supports many streaming protocols. Use the Admin panel to set up individual channels for streaming. - Page 317 Pearl Mini User Guide Set up an RTMP or RTMPS (push) stream Set up an RTMP or RTMPS stream using the Admin panel 1. Login to the Admin panel as admin, see Connect to the Admin panel. 2. From the Channel(s) menu, select the channel and click Streaming. The Streaming configuration page opens.
-
Page 318: Set Up An Srt Stream Using Rendezvous Mode
IP address of the other device and both must be configured to use the same port for the SRT stream. In the following example, a Pearl Mini is set up as SRT Source A (192.168.1.10) with port 20000 and another Pearl Mini is set up as SRT Destination B (203.0.113.10) with port 20000. - Page 319 Pearl Mini User Guide Set up an SRT stream using rendezvous mode Source A streams through Firewall A and Firewall B to Destination B, which ingests the SRT stream as a video input with embedded audio. All traffic received at Firewall B that's addressed to 168.112.1.1 on port...
- Page 320 Configure SRT Destination B to use the same port value as Source A for the SRT stream (e.g. 20000). If the destination device is another Pearl Mini, you do this when adding the SRT stream as a video input source using the Admin panel, see Connect an SRT stream as an input.
-
Page 321: Set Up An Srt Stream Using Caller And Listener Modes
13. When your ready to start streaming, click Start What's next? If you also need to set up Pearl Mini as an SRT destination and ingest an SRT stream from a remote source, you must add the SRT stream as a input, see Connect an SRT stream as an input. - Page 322 SRT sources, then all your SRT source devices must be set as callers. In the following example, Pearl Mini is set up as SRT Source A (192.168.1.10) and another Pearl Mini is setup as SRT Destination B (203.0.113.10). Source A is streaming through a firewall/NAT to Destination B, which ingests the SRT stream as a video input with embedded audio.
- Page 323 (Optional) In the Source port field, enter the port number that this Pearl Mini should use for SRT traffic. b. If Listener is selected, enter the Port number that this Pearl Mini should use for SRT traffic. Network ports to determine available ports.
-
Page 324: Adjust Latency And View The Srt Stream Status
13. When your ready to start streaming, click Start What's next? If you also need to set up Pearl Mini as an SRT destination and ingest an SRT stream from a remote source, you must add the SRT stream as a input, see Connect an SRT stream as an input. - Page 325 Pearl Mini User Guide Adjust latency and view the SRT stream status You can add from 80 ms to 8000 ms of latency to the SRT stream. Increasing latency gives more time to buffer packets and resend any that got lost in transit to the destination. If the latency value set for the stream is too low and there is packet loss over the network, retransmission of lost packets will not be possible and the stream quality will suffer.
- Page 326 Pearl Mini User Guide Adjust latency and view the SRT stream status Table 58 Suggested SRT latency values Minimum Recovery Packet RTT mul- SRT latency bandwidth loss % tiplier (for RTT ≤ 20 overhead % is ≤ 1 % is ≤ 3 % is ≤...
- Page 327 Pearl Mini User Guide Adjust latency and view the SRT stream status Adjust latency and recovery bandwidth overhead for an SRT stream using the Admin panel 1. Log in to the Admin panel as admin, see Connect to the Admin panel.
-
Page 328: Set Aes Encryption And A Passphrase For Srt
Pearl Mini User Guide Set AES encryption and a passphrase for SRT Set AES encryption and a passphrase for SRT You can configure your Secure Reliable Transport (SRT) streams to use 128 bits, 192 bits, or 256 bits AES encryption using the Admin panel. You can also assign the SRT stream an alphanumeric passphrase if required. -
Page 329: Set Up An Hls (Push) Stream
As such, the content can easily traverse firewalls with little to no IT involvement. Pearl Mini can send a single resolution and bitrate HLS stream as an HTTP POST (or HTTP PUT) to HLS ingestion servers and CDNs such as Akamai and YouTube. The default is HTTP POST. Your channels on Pearl Mini must be configured for H.264 and AAC audio codec to stream using HLS. -
Page 330: Set Up An Mpeg-Dash (Push) Stream
10. (Optional) Under Advanced settings, you can set the following: a. Master manifest: Enter the URL (including the master playlist file name) of where Pearl Mini will upload the master manifest file. The master playlist also provides the bitrate, resolution, and codec. - Page 331 MPEG-DASH stream as an HTTP POST (or HTTP PUT) to HLS ingestion servers and CDNs such as Akamai and YouTube. The default is HTTP POST. Your channels on Pearl Mini must be configured for H.264 and AAC audio codec to stream using MPEG-DASH. Pearl Mini supports MD5, SHA- 256, and SHA-512 hashing algorithms to authenticate the stream.
- Page 332 Set up an MPEG-DASH (push) stream Item Description Use this field to specify the name of the media segment file that Pearl Mini sends to the Media segment template ingestion server. Check with the ingestion server provider for what value to use.
-
Page 333: Set Up An Rtsp Announce Stream
Pearl Mini User Guide Set up an RTSP announce stream 9. (Optional) Under Advanced settings, you can set the following: a. Check DASH Multiplex streams to enable multiplex streaming. b. Check Embedded initialization segment to add an optional initialization segment to the stream. - Page 334 Pearl Mini User Guide Set up an RTSP announce stream 4. Click the stream name to see the stream settings. 5. (Optional) To rename the stream, click the current name and type a different name, then press Enter. Refresh your browser if the new stream name doesn't immediately display.
-
Page 335: Set Up A Stream To The Cdn Using An Xml Profile
Set up a stream to the CDN using an XML profile Set up a stream to the CDN using an XML profile Some CDNs provide an XML file for easy configuration setup. Pearl Mini supports using XML profiles to set a stream. -
Page 336: Start And Stop Streaming To A Cdn
Pearl Mini User Guide Start and stop streaming to a CDN 5. Click Apply. 6. To start streaming, click Start or click Start all to simultaneously start this stream and any other streams you have configured for this channel. 7. Click Delete this stream at any time to delete the stream. - Page 337 Start and stop streaming using the touch screen You can tell if your channel is streaming from the touch screen on Pearl Mini when you look at the channel view or the Grid view. The following shows an example Grid view. The streaming LED on the front panel of Pearl Mini is solid on when streaming is in progress.
-
Page 338: Multicast Streaming
You can stream to several multicast networks and at the same time, stream to non-multicast CDNs. Pearl Mini supports multicast streaming to an IP TV or a set-top box playlist using SAP when the stream format is MPEG-TS. - Page 339 Pearl Mini User Guide MPEG-TS streams using RTP/UDP push 4. Enter the destination multicast IP address where the broadcast can be viewed. A IPv4 multicast address range is an address between 224.0.0.0 to 239.255.255.255. Contact your System Administrator for the specific address to use.
- Page 340 Pearl Mini User Guide MPEG-TS streams using RTP/UDP push 5. Enter the destination port number through which the media will stream. 6. (Optional) To advertise your stream to a media player over a local network, do the following: a. Check SAP announcement to enable advertising your stream over a local network. When this is enabled and a multicast IP address is configured, your stream is displayed in the playlist of the local media player.
-
Page 341: Mpeg-Ts Streams Using Udp Push
Pearl Mini User Guide MPEG-TS streams using UDP push MPEG-TS streams using UDP push When you configure an MPEG-TS stream using UDP push, you have the option to enable SAP and multicast over a local network at the same time. -
Page 342: Multicast Streaming Using Rtp/Udp
If you're streaming to 10/100 Mbps set-top boxes over Gigabit Ethernet and you notice frames are dropping, you can limit the bandwidth of the stream, see Set up traffic shaping. Multicast streaming using RTP/UDP You configure an RTP/UDP (push) stream on Pearl Mini using the Admin panel. -
Page 343: Set Up Traffic Shaping
If traffic shaping was previously setup using the API, we recommend switching to this method of setting traffic shaping using the Admin panel. If traffic shaping is currently setup using Pearl Mini's API, see the Technical Notes for your Pearl Mini model for instructions. They're available from the product resources page on the Epiphan.com... - Page 344 Mini API to clear or configure traffic shaping for that channel. If you currently use the API to configure traffic shaping, see the Technical Notes for your Pearl Mini model for instructions. They're available from the product resources page on the Epiphan.com...
-
Page 345: Viewing With Session Announcement Protocol (Sap)
Pearl Mini User Guide Viewing with Session Announcement Protocol (SAP) 5. Check Limit bandwidth. The default bitrate is set to auto. 6. (Optional) Set the Limit bandwidth rate and enter a bitrate value from 4,000 kbps to 95,000 kbps. 7. Click Apply. - Page 346 Pearl Mini User Guide Viewing with Session Announcement Protocol (SAP) View the Session Annoucement Protocol (SAP) stream 1. Ensure the stream has SAP announcement enabled; otherwise, it is not advertised in the media player's playlist. 2. Ensure the SAP announcement IP is a multicast IP address.
-
Page 347: Streaming To A Media Player Or Smart Tv
Streaming to a media player or smart TV Streaming to a media player or smart TV Your Pearl Mini can use UPnP and SAP to stream to set-top boxes, digital signs, smart TVs and other digital media players. The following table gives an overview of each option. -
Page 348: Enable Upnp
Enable UPnP For security reasons, UPnP is disabled for Pearl Mini at the device level and for each channel by default. You can enable UPnP to allow digital media players on the network to browse for recorded media files or live streams on Pearl Mini. - Page 349 Pearl Mini User Guide Enable UPnP Otherwise, the Play on service start section shows a drop-down list of what can be streamed. Enable UPnP for a channel using the Admin panel After you enable UPnP for the device to allow live stream and recorded file sharing, you need to enable sharing for each channel you want to share.
-
Page 350: Disable Upnp
Pearl Mini User Guide Disable UPnP Enable UPnP for a recorder using the Admin panel After you enable UPnP for the device to allow live stream and recorded file sharing, you need to enable sharing for each recorder you want to share. You should have already created recorders, see Add a recorder. -
Page 351: Viewing With Upnp
Remove user password to clear the viewer password. When browsing via UPnP your Pearl Mini is displayed by the server name you set, or it's product serial number. For example, when browsing from a Windows computer, you will see a list of media devices that includes... -
Page 352: Change Upnp Device Name
UPnP. Change UPnP device name You can configure the UPnP server name that appears for your Pearl Mini. By default, if you leave the server name field blank when enabling UPnP, the device's serial number is used as the server name. - Page 353 Pearl Mini User Guide Change UPnP device name Change the UPnP server name using the Admin panel 1. Log in to the Admin panel as admin, see Connect to the Admin panel. 3. From the Configuration menu, click UPnP. The UPnP configuration page opens.
-
Page 354: Record
Record Record Pearl Mini encodes the video and audio it captures. You can stream your content and record it at the same time. You can even stream your switched program using a lower quality stream (i.e. 1280×720 at 2Mbps) and at the same time make a high quality recording of the second channel (i.e. 1920×1080 at 4 Mbps). - Page 355 For information about recording to Content Management Systems (CMSs) like Kaltura and Panopto, CMS recording and webcasting control. Pearl-2 and Pearl Mini - You can also setup multi-track recorders on Pearl-2 and Pearl Mini, see Recorders. Pearl-2 and Pearl Mini - While actively recording a multiple-channel recorder, a new file is created if an additional video input source is added to the recorder.
-
Page 356: Pearl Mini And Pearl Nano Recording Storage Information
SD card storage. After an SD card is formatted using Pearl Nano or Pearl Mini, do not manually change the default file folder structure on the SD card. Ejecting the SD card while the recording is in progress may corrupt the SD card and cause loss of data. -
Page 357: Record A Channel
Pearl Mini - If you create multiple recorders and start recording them at the same time, the SD card will be corrupted if the total of the file size limits for each recorder exceeds the size of the SD card. -
Page 358: Record Using Single Touch Control On Pearl-2 And Pearl Mini
3. Select Start to start recording the channel and select Stop when you're done. If the Start button is not active, there are no active sources for the channel (or recorder on Pearl-2 and Pearl Mini). Check your inputs to ensure signals are working as expected. -
Page 359: Configure Recording Settings, File Size And Type
Pearl Mini User Guide Configure recording settings, file size and type 3. Tap the Single Touch control icon along the bottom of the touch screen to display the Single Touch control screen. If the Single Touch control icon is not visible on the touch screen, tap the screen once to activate the control icons. - Page 360 (assuming the time limit has not yet been reached). Size limit Pearl Mini and Pearl Nano - maximum storage depends on the size of the SD card (or SSD on Pearl Nano) installed Specifies the recording file type. Select from AVI, MP4, MP4-Fragmented, MPEG-TS, or MOV.
- Page 361 2. From the Channel(s) menu, select Recording. The recording page opens. Pearl-2 and Pearl Mini - Open the Recording page. Do one of the following: For a channel, select Recording from the Channels menu. For a recorder, select a recorder from the Recorders menu.
-
Page 362: Restart Recording To A New File
Time limit: Select a value from 5 minutes to unlimited. Size limit: Pearl Mini - Select a value from 50 MB to a maximum of one quarter the capacity of the SD card. File type: AVI, MPEG-TS, MOV, MP4, or MP4-Fragmented. - Page 363 Pearl Mini User Guide Restart recording to a new file 3. Select Reset to stop the current recording and start a new recording. 4. Refresh the page to see the updated list of recordings.
-
Page 364: Recorders
Pearl Mini User Guide Recorders Recorders Using recorders with Pearl-2 or Pearl Mini, you can record multiple channels together in a single multi- track file. Recording multiple channels at the same time ensures that all your recordings start and stop at the same time. -
Page 365: Select Channels To Record
Pearl Mini User Guide Select channels to record Add a recorder using the Admin panel 1. Login to the Admin panel as admin, see Connect to the Admin panel. 2. From the Recorders menu, click Add recorder. Select channels to record When you create a new recorder, it records all the channels configured on the Pearl device in the single multi-track file by default. -
Page 366: Modify A Recorder
Pearl Mini User Guide Modify a recorder You can also start and stop recorders using the One Touch control feature (see Record using Single Touch control on Pearl-2 and Pearl Mini) and using Epiphan Live (see Record a channel using the touch screen). - Page 367 Pearl Mini User Guide Modify a recorder Pearl-2 and Pearl Mini - To duplicate the recorder, click Duplicate this recorder . The duplicate recorder is created and assigned the next recorder number in your list of recorders.
-
Page 368: Manage Recorded Files
1. Login to the Admin panel as admin, see Connect to the Admin panel. 2. Pearl-2 and Pearl Mini - Open the Recording page. Do one of the following: For a channel, select Recording from the Channels menu. For a recorder, select a recorder from the Recorders menu. -
Page 369: Join Recorded Files Together
Join recorded files together After recording files on Pearl Mini, you can join two or more files together. This is useful when a recording exceeds the maximum recording time limit and the recording is split into multiple files. You can use the third-party tool called ffmpeg to join the files. - Page 370 Pearl Mini User Guide Join recorded files together ffmpeg -i C:\Users\JoesComputer\downloads\Program_A_May11_16-24-56.avi -i C:\Users\JoesComputer\downloads\Program_A_May11_12-26-14.avi -c copy C:\Users\JoesComputer\Desktop\Concatenated_File.avi 5. After completing the process, you will be able to access your new file in the location you specified. The file moves straight from the first video into the second without a pause.
-
Page 371: Automatic File Transfers
Automatic file transfers Automatic file transfers Pearl Mini can be configured to automatically upload recordings from local storage to a network storage location or an attached USB drive. This is called Automatic File Upload, or AFU for short. You can schedule automatic file uploads for a time and day that's most convenient for your workflow. -
Page 372: Set Channels And Recorders To Include In Afu
Automatically create a folder for your recorded files using the channel or recorder name. Save recordings to a folder that's labeled using Pearl Mini's serial number. Automatic File Upload (AFU) is not enabled by default. You must enable this feature for a channel or recorder that you want included in automatic file transfers. -
Page 373: Enable Afu, Schedule, And Set Options
2. Click Recording in the Channel(s) menu. Pearl-2 and Pearl Mini - For a recorder, select a recorder from the Recorders menu. 3. Under Recorder Setup, select change. The recorder settings open. 4. Check Automatic file upload and click Apply. - Page 374 If no remote path is specified, the files are copied to the root folder of Remote path the destination file system. Delete files from local storage on Pearl Mini when the upload Remove after upload completes. Change the color of the file in the recording list to show the files are Mark file as downloaded downloaded.
-
Page 375: Configure Afu To Ftp Server Parameters
Pearl Mini User Guide Configure AFU to FTP server parameters 3. Check Enable Automatic File Upload. 4. (Optional) Enter a remote path. If no path is specified, the files are copied to the root folder of the destination file system. -
Page 376: Configure Afu To Sftp Server Parameters
Pearl Mini User Guide Configure AFU to SFTP server parameters Prerequisites Channels and/or recorders are already added for AFU, see Set channels and recorders to include in AFU. AFU is enabled and the parameters configured, see Enable AFU, schedule, and set options. - Page 377 Pearl Mini User Guide Configure AFU to SFTP server parameters Table 64 SFTP Automatic Upload Configuration Parameters Name Description Server The IP address or fully qualified domain name of the SFTP server. address Server port The port used by the target SFTP server. Standard port is 22.
- Page 378 6. Select Use temp file to name files with a temporary filename extension (.part) on the server until upload is complete. For secure file transfer, you can upload an SSH identity for Pearl Mini. This key must be trusted by the destination server. Details for generating the key and setting up this trust...
-
Page 379: Configure Afu To Rsync Server Parameters
Pearl Mini User Guide Configure AFU to RSync server parameters 7. (Optional) Set up SSH identity for SCP and SFTP clients. If no identity is uploaded, or to upload a new identity (overwrites the old identity): a. Click Choose File and navigate to select the private key file from your hard drive, then click Open. - Page 380 Pearl Mini User Guide Configure AFU to RSync server parameters Name Description module Login Username for the RSync server. Password Password for the RSync user. Select to enable checksum checking during file transfer. This increases the time taken Checksum to transfer, but also increases reliability of the transfer.
-
Page 381: Configure Afu To Cifs Server Parameters
Pearl Mini User Guide Configure AFU to CIFS server parameters 5. Specify the password for the user in the Password field; the value is masked by dots. 6. (Optional) Select the Checksum check box to add a checksum validation to the transfer between the system and the recipient server. - Page 382 Pearl Mini User Guide Configure AFU to CIFS server parameters Configure AFU upload to a CIFS server using the Admin panel 1. From the Automatic File Upload configuration page, select CIFS Client as the protocol transfer type. 2. Specify the target Server address. If your system is configured with DHCP or has a valid DNS...
-
Page 383: Configure Afu To Scp Client Parameters
Pearl Mini User Guide Configure AFU to SCP client parameters Configure AFU to SCP client parameters You can automatically upload recordings to an SCP (secure copy) client when you select SCP as the AFU protocol transfer type using the Admin panel. - Page 384 (Alternatively you can choose to use a private key instead of a password for authentication.) For secure copy you can upload an SSH identity for your Pearl Mini. This key must be trusted by the destination server. Details for generating the key and setting up this trust are beyond the scope of this document.
-
Page 385: Configure Afu To Aws S3 Parameters
Pearl Mini User Guide Configure AFU to AWS S3 parameters Configure AFU to AWS S3 parameters You can automatically upload recordings to an Amazon Web Server (AWS) when you select AWS S3 as the AFU protocol transfer type using the Admin panel. -
Page 386: Configure Afu To Webdav Server Parameters
Pearl Mini User Guide Configure AFU to WebDav server parameters 2. Specify the AWS Region Code and the data storage Bucket where you want to upload the file. 3. Enter your AWS Access Key Id and Secret Access Key to authenticate access to the AWS S3 data storage bucket. - Page 387 Pearl Mini User Guide Configure AFU to WebDav server parameters Name Description / Options Login Username for the WebDav server. Password Password for the WebDav user. Enable HTTPS Select if you need to use a secured HTTPS link to the WebDav server.
-
Page 388: Afu To Usb
USB flash drives or hard drives. Use this to conveniently provide speakers with a copy of their presentation before they leave the presentation venue. A USB port is available on the back panel of the Pearl device. Pearl-2 and Pearl Mini have an additional USB port on the front. -
Page 389: One-Time Copy All Recordings To Usb Storage Device
Pearl Mini User Guide One-time copy all recordings to USB storage device Prerequisites A properly formatted USB device must be connected to a USB port on the Pearl device. Channels and/or recorders are already added for AFU, see Set channels and recorders to include in AFU. - Page 390 Prerequisites A properly formatted USB device not connected to a USB port on Pearl Mini. Configure a one-time copy of all recorded files to a USB storage device using the Admin panel 1.
-
Page 391: Manually Copy Recordings To Usb
Manually copy recordings to USB You can manually copy recordings to a USB storage device that is connected to Pearl Mini. This procedure is separate from automatic file upload and does not need any pre-configuration in the automatic file... - Page 392 Pearl Mini User Guide Manually copy recordings to USB The following table describes the options available when manually copying recordings to a USB storage device. Table 71 One-Time Move/Copy File Transfer Options Name Description If checked, the transfer process creates a sub-folder with the system’s serial create subfolder with number on the USB drive.
- Page 393 Automatic File Upload configuration page and disable automatic file upload or switch to a non-USB based upload type. 4. Insert your USB storage device into an available USB port on Pearl Mini and do one of the following: a. To download files for a specific channel, click Recording from the Channels menu.
- Page 394 Pearl Mini User Guide Manually copy recordings to USB 2. View the current file transfer status under the Status section. To cancel the current file transfer, select Cancel and confirm when prompted. The option to cancel only appears while the file transfer is in progress.
-
Page 395: Manage Usb File Transfer Queue
Information such as the file name and size, start time, duration, and progress are displayed. A history of file transfers displays until either Pearl Mini is restarted or the list is manually cleared. External USB storage must be configured for the USB file transfer status to display. -
Page 396: Add Recordings To An Afu Queue
Pearl Mini User Guide Add recordings to an AFU queue in the Admin panel. When you insert your USB storage device into an available USB port, an External storage usage information tab appears at the bottom of the menus panel in the Admin panel. -
Page 397: View The Afu Log
Pearl Mini User Guide View the AFU log View the AFU log A log is kept of automatic file uploads. You can view the AFU log using the Admin panel, If you want to view the AFU status, see View AFU and file transfer progress. - Page 398 Pearl Mini User Guide Manage the AFU queue View the AFU queue and remove files from the queue using the Admin panel 1. Login to the Admin panel as admin, see Connect to the Admin panel. 2. From the Configuration menu, click Automatic File Upload. If there are files to be uploaded, they appear in the queue.
-
Page 399: Integration
MediaSpace and can be selected for scheduled recordings and webcasts, as well as be used for unscheduled ad hoc events that you can create using the Admin panel (or from Pearl 2 and Pearl Mini's touch screen). Registering it as a resource with the Kaltura Content Management System (CMS) only needs to be done once. -
Page 400: Enable Cms And Register With Kaltura
When CMS is enabled, use the Admin panel to register Pearl Mini as an encoder resource for Kaltura. After Pearl Mini is registered, you can assign it a unique name that appears in the list of resources when creating an event in Kaltura's MediaSpace. The default name includes the serial number of Pearl Mini to ensure the name is unique. - Page 401 Pearl Mini User Guide Enable CMS and register with Kaltura There are two types of Kaltura application tokens you can use with Pearl Mini: an administrative session type and a user session type. With an administrative session token, Pearl Mini uploads event recordings to the respective event owner's account in Kaltura as expected.
- Page 402 Pearl Mini. 6. Click Register device. Pearl-2 and Pearl Mini - A calendar icon appears on the touch screen of Pearl Mini to show that Pearl is in CMS mode, see CMS event controls using the touch screen.
-
Page 403: Disable Or Deregister From Kaltura
MediaSpace. However, the events schedule won't synchronize on Pearl Mini and any events that are scheduled to start while CMS is disabled do not start on Pearl Mini. If CMS is re-enabled on Pearl Mini before the event is scheduled to end, that event will start automatically after the events schedule is... -
Page 404: Change The Resource Name Used For Kaltura
Using the Admin panel, you can change the resource name that's assigned to Pearl Mini while it's registered with Kaltura. Each Pearl Mini is assigned a unique resource name that includes the serial number of the device by default. You can transfer scheduled VOD and scheduled webcasting events from one resource to another by assigning Pearl Mini the same resource name as another resource. -
Page 405: Reassign A Registered Resource
Reassign a registered resource Reassign a registered resource Every encoder you register with Kaltura has a unique resource name. To swap out one Pearl Mini with another one, you can simply reassign the existing Pearl Mini resource name to the replacement Pearl Mini. -
Page 406: Kaltura Recording And Webcasting Setup
3. From the Choose CMS drop down, select Kaltura and then click Apply. 4. Enter your Partner ID and Administrator secret that you got from Kaltura. 5. Change the Resource name to the resource name of the Pearl Mini you are replacing and click Register device. -
Page 407: About Kaltura Recording And Webcasting
Back up recordings for each channel are also saved locally on the Pearl device. Pearl Mini and Pearl Nano - An SD card must be installed to record events. We recommend using large capacity SD cards such as 256 GB with a CMS. - Page 408 Do not use Single Touch recording control, AFU or configure recording file size, type and other channel recording settings when CMS is enabled on Pearl Mini. If you modify a particular recurring lecture capture plus live webcasting event (e.g. a VOD + Live Stream event in a recurring series), Kaltura excludes that event from the recurring series and the webcast doesn't stream.
- Page 409 Pearl Mini User Guide About Kaltura recording and webcasting Do not schedule recordings that are longer than the capacity of Pearl Mini to store the recording on the local drive. Default Kaltura encoding settings are applied automatically to the channel when Kaltura is enabled, which override the existing encoding settings.
-
Page 410: Kaltura Settings
Pearl Mini User Guide Kaltura settings Kaltura settings The following list of features is available once your Pearl device has been registered with Kaltura. VOD event channels Channel - Select a channel for VOD. Enabled - Select to enable the channel. - Page 411 Automatically logout - Automatically logs out the ad hoc event creator when the ad hoc event ends. This is disabled by default. For the Pearl 2 and Pearl Mini, automatic logout only works if the touch screen was used to create the ad hoc event.
-
Page 412: Select Channels For Kaltura Vod Events On Pearl-2 And Pearl Mini
You can select which Pearl Mini channels are included in scheduled and ad hoc recordings using the Admin panel. Each channel that is configure on Pearl Mini is treated as a separate video source for all VOD events. Using multiple channels is how you record multiple views for a scheduled or ad hoc VOD event. -
Page 413: Select A Channel And Urls For Kaltura Webcasting Events
Pearl Mini. When you create a Kaltura webcasting event on Pearl Mini, you have the option to use the primary and backup URLs supplied by Kaltura for the stream or to choose a stream destination that is created locally for the channel on Pearl Mini. -
Page 414: Set Kaltura Ad Hoc Event Parameters
However, you can modify the metadata at any time using the Kaltura Management Console (KMC) after the content is uploaded. Pearl-2 and Pearl Mini - The same channels that you select for scheduled VOD events using the Admin panel are the channels that are recorded for ad hoc events, see Select channels for Kaltura VOD events on Pearl-2 and Pearl Mini... - Page 415 The owner you enter here appears on the Login screen by default and can be overwritten when authenticating from Pearl-2 or Pearl Mini. Enter a suffix to be automatically applied to the Event owner field when users authenticate with Kaltura from...
-
Page 416: Set The Extend Kaltura Cms Event Interval
Pearl Mini User Guide Set the extend Kaltura CMS event interval Important considerations Before you start recording, we recommend that you enter the event parameters you want associated with ad hoc events using the Admin panel. However, users can modify or add this metadata later using the Kaltura Management Console. -
Page 417: Change The Events Schedule Refresh Interval
Pearl Mini User Guide Change the events schedule refresh interval Set the extend Kaltura CMS event interval using the Admin panel 1. Log in to the Admin panel as admin, see Connect to the Admin panel. 2. From the Configuration menu, click CMS. The Content management system configuration menu opens. -
Page 418: Use Rtmps For A Kaltura Webcasting Event
3. Under Live-stream event channel, check Secure streaming and click Apply. Panopto registration Pearl Mini is fully integrated with Panopto Content Management Systems (CMSs) for a seamless video recording and webcasting experience. After a simple registration process, Pearl Mini is available for your CMS users to select as a remote recorder resource or capture device for scheduled, recurring, and ad hoc events. -
Page 419: Enable Cms And Register With Panopto
When you register Pearl Mini, a default name is assigned that includes the serial number of Pearl Mini. This name appears in the list of remote recorders in Panopto. You can change the remote recorder name using the Admin panel. -
Page 420: Disable Cms And Disconnect From Panopto
When you use the Admin panel to disable CMS on Pearl Mini, the remote recorder disconnects from Panopto. As long as Pearl Mini is still registered, you can create new scheduled sessions in Panopto for this remote recorder, but the events schedule won't synchronize until CMS is re-enabled. -
Page 421: Panopto Recording And Webcasting Setup
3. To disconnect Pearl Mini, select none from the Choose CMS drop down and then click Apply. Panopto recording and webcasting setup Pearl Mini appears as an available resource as soon as the device is registered with Panopto. Next, set up authentication for ad hoc events to create ad hoc events from Pearl Mini. -
Page 422: About Panopto Recording And Webcasting
Pearl device continues to record locally and uploads the recording when network connectivity resumes. Pearl Mini and Pearl Nano - A large capacity (256 GB or more) SD card (or a large capacity SATA M.2 2280 SSD on Pearl Nano) must be installed to record events. Do not remove the SD card while files are uploading to Panopto. - Page 423 Do not use AFU or configure recording file size, type and other channel recording settings when CMS is enabled on Pearl Mini. For ad hoc events, Pearl Mini ignores a user's presets that are set in Panopto. As a result, ad hoc recordings automatically upload to the user's default folder as originally assigned by Panopto.
- Page 424 You can start and stop events earlier than the scheduled time, as well as pause an event using either the Admin panel or the touch screen on Pearl Mini, as well as create ad hoc events. Use multiple Pearl Mini channels to get multiple views for a Panopto event. Each channel is treated as a separate video source.
-
Page 425: Setup Panopto Authentication For Ad Hoc Events
Panopto users can create unscheduled ad hoc events directly from the touch screen on Pearl Mini or using the Admin panel. You can set up Pearl Mini to allow users to authenticate using their local Panopto login credentials, their credentials for a third-party LMS integrated with Panopto (like Canvas), and SAML 2.0 credentials if configured on Panopto. - Page 426 Pearl Mini device. Third-party application authentication for ad hoc events is only supported for Panopto. Enable ad hoc authentication on Pearl Mini 1. Login to Panopto as an administrator. 2. In the header bar, click the arrow beside your user name and select User Settings. The User...
- Page 427 Create API Client page opens. b. From the Create API Client page, enter a unique name for the Pearl Mini API client in the Client Name field. If a client already exists in Panopto with that name, choose a different name.
- Page 428 Connect to the Admin panel. 6. From the Configuration menu, click CMS. The Content management system configuration page opens. 7. In the Unscheduled ad hoc events section, enter the Pearl Mini API client id that was generated earlier, and then click Apply.
-
Page 429: Set Panopto Ad Hoc Event Parameters
Automatic logout: Automatically logs out the ad hoc event creator when the ad hoc event ends if the touch screen was used to create the ad hoc event. Pearl Mini must be connected to Panopto for this procedure to work. Enter Panopto ad hoc event parameters using the Admin panel 1. -
Page 430: Set The Extend Panopto Cms Event Interval
Pearl Mini User Guide Set the extend Panopto CMS event interval Set the extend Panopto CMS event interval A button on the front screen lets users extend the length of an event that is in progress. By default, the event is extended in 5 minute intervals each time the button is tapped. Using the Admin panel, you can set the amount of time the event is extended to 5, 10, or 15 minute intervals. -
Page 431: Enable Mute And Display Image On Pause
Enable mute and display image on pause Enable mute and display image on pause Using the Admin panel, you can set up Pearl Mini to automatically mute the audio and display an event paused image while a Panopto event is paused. - Page 432 Pearl Mini User Guide Enable mute and display image on pause Pearl Mini records and uploads the full event to Panopto for processing. After the event is uploaded, Panopto removes the paused segments from the final recording. However, Panopto does not remove paused segments from webcasts.
-
Page 433: Disable Low Disk Space Panopto Alerts
Disable low disk space Panopto alerts Pearl Mini sends a low disk space alert to Panopto when the amount of internal storage space on the device is low. You can disable the low disk space alerts that Pearl Mini sends to Panopto using the Admin... - Page 434 Pearl Mini User Guide Disable low disk space Panopto alerts panel and enable it again at any time. Disable low disk space Panopto alerts using the Admin panel 1. Log in to the Admin panel as admin, see Connect to the Admin panel.
- Page 435 Pearl Mini User Guide Disable low disk space Panopto alerts 4. To enable this feature again, simply check Low disk space alert and click Apply.
-
Page 436: Yuja Setup
YuJa setup YuJa setup Pearl-2, Pearl Mini, and Pearl Nano hardware encoders integrate directly with YuJa. Once paired, Pearl can access your YuJa calendar to automatically start and stop recordings or streams at scheduled times. Pearl automatically pushes event recordings to YuJa, minimizing administration time and ensuring your content makes it to the right place. -
Page 437: Yuja Registration
Pearl Mini User Guide YuJa registration If you start an event early in YuJa using any Pearl interface and then extend the event, the event appears to extend but ends at the originally scheduled ending time. YuJa registration Pearl devices are fully integrated with YuJa for a seamless video recording and webcasting experience. -
Page 438: Yuja Settings
Pearl Mini User Guide YuJa settings YuJa settings The following list of features is available once your Pearl device has been registered with YuJa. For more information on registering your Pearl device, see YuJa registration. If you select Motion JPEG encoding, it will be overridden. Contact your YuJa administrator to ensure your Pearl channels are correctly configured for YuJa. -
Page 439: Creating, Modifying, And Deleting Yuja Events
Pearl Mini User Guide Creating, modifying, and deleting YuJa events YuJa events must be scheduled in YuJa. To view YuJa events in the Pearl admin panel, click Events and look under Scheduled events. Creating, modifying, and deleting YuJa events Once a Pearl device is registered with YuJa, scheduled events can be created, modified, and deleted. -
Page 440: Set The Extend Yuja Cms Event Interval
3. Under Settings, select the Extend event time interval from the drop down list and click Apply. CMS recording and webcasting control Pearl Mini appears as an available resource as soon as the device is registered with your CMS and records scheduled events, recurring events, and unscheduled ad hoc events for Kaltura and Panopto CMSs. -
Page 441: Set Up A Cms Start Screen
Admin panel. Do not schedule recordings that are longer than the capacity of Pearl Mini to store the recording on it's local drive. We recommend using large capacity SD cards such as 256 GB or more when using Pearl Mini with a CMS. - Page 442 Default: The CMS Events screen appears automatically on the device screen when CMS is enabled and there's an upcoming scheduled event. On Pearl-2 or Pearl Mini you can also tap the calendar icon at the bottom of the touch screen.
-
Page 443: Start/Stop Scheduled Cms Events Using The Admin Panel
For multiple-source Panopto events that are manually stopped or have ended, if you use the Admin panel to delete a locally saved recording for any channel on Pearl 2 or Pearl Mini that hasn't yet uploaded to Panopto as part of the multiple-source event, that event remains in the In Progress state indefinitely in Panopto. -
Page 444: Stop/Start Scheduled Cms Events Using The Touch Screen
Stop/start scheduled CMS events using the touch screen You can use Pearl 2 or Pearl Mini's touch screen to manually start scheduled events up to thirty minutes before the scheduled start time. A calendar icon appears when CMS is set up on the Pearl device. - Page 445 Stop/start scheduled CMS events using the Pearl Mini User Guide touch screen From the touch screen, tap the calendar icon to display the Events screen or wait for the Events screen to appear automatically about five minutes before the event starts.
-
Page 446: Extend Or Pause Cms Recordings And Webcasts
The option to extend the event appears on the Events screen while the event is in progress. Events cannot be extended beyond the start of the next scheduled event. On the Pearl-2 and Pearl Mini, tap the button to add the specified amount of time to the current event. - Page 447 Pearl Mini User Guide Extend or pause CMS recordings and webcasts For Panopto and YuJa events, you can also pause active recordings and webcasts from the Pearl device screen or using the Admin panel. An extra pause button appears on the Events screen. For Panopto you...
- Page 448 2. If this is a Panopto, or YuJa, event, you can select Pause to pause the current event. When paused, the button changes to Resume. When you're ready to continue, select Resume. Extend or pause an event using the touch screen on Pearl-2 or Pearl Mini 1. From the touch screen, tap the calendar icon to display the Events screen.
-
Page 449: Create Ad Hoc Events Using The Admin Panel
Pearl Mini User Guide Create ad hoc events using the Admin panel the button changes to Resume. When you're ready to continue, select Resume. Create ad hoc events using the Admin panel You can create and start an ad hoc recording or webcast using the Admin panel. Your Pearl device must... - Page 450 Pearl Mini User Guide Create ad hoc events using the Admin panel Item Description Category Add a Kaltura category. Select the event duration in minutes from the drop down list or enter a value Duration using your keyboard. Select a value from 5 to 240 minutes or enter a value using your keyboard.
- Page 451 Pearl Mini User Guide Create ad hoc events using the Admin panel Item Description Event type Choose either VOD or Live-stream as the ad hoc event type. Create an ad hoc event using the Admin panel 1. Login to the Admin panel as admin, see Connect to the Admin panel.
-
Page 452: Create Ad Hoc Events Using The Touch Screen
Create ad hoc events using the touch screen You can create unscheduled ad hoc recordings and webcasts directly from Pearl-2 or Pearl Mini's touch screen using the Events screen. To manually display the Events screen, just tap the Calendar icon that appears along the bottom of the Channel view. - Page 453 Pearl Mini User Guide Create ad hoc events using the touch screen On the next screen, tap in any field to change the title and event details. The current date and time is the default session title. Depending on which CMS you use, different fields are visible. Swipe the screen to see more event details.
-
Page 454: Logout Of An Ad Hoc Session
Logout of an ad hoc session If you start an unscheduled ad hoc event from the touch screen of Pearl-2 or Pearl Mini, you're automatically logged out after the ad hoc event ends. If your Pearl administrator has not enabled the automatic logout feature, then your login session stays active for one hour after the event ends. -
Page 455: Schedule When Cms Event Recordings Upload
Pearl Mini User Guide Schedule when CMS event recordings upload 2. Click Logout beside your login user name. 3. To close the authentication session with the Panopto server, open a new tab in the same browser that you used to login and go to: https://<PanoptoServerURL>/Panopto/Pages/Auth/Logout.aspx... -
Page 456: Upload The Local Panopto Webcast Recording
You can disable this feature using the Admin panel. The Pearl Mini and the Pearl Nano need a storage solution to use this feature. The Pearl Mini can use an SD card and the Pearl Nano can use an SD card or SATA m.2 2280 SSD. - Page 457 Pearl Mini User Guide Recover channel backup recordings Your Pearl device saves a local backup of recordings automatically in a round-robin fashion. When the record drive is full, new recordings overwrite the oldest ones. Pearl administrators and operators can use the Admin panel to manually download and delete channel recordings.
- Page 458 Pearl Mini User Guide Recover channel backup recordings Delete recordings for a channel using the Admin panel To delete recordings for a channel, do one of the following: To delete a single recording, click the X icon to the right of a recording and click OK when prompted.
- Page 459 Pearl Mini User Guide Recover channel backup recordings The list may not update immediately. You can refresh the list by reloading the Recording page (for channels) or the recorder settings page (for recorders).
-
Page 460: Maintenance
Pearl Mini User Guide Maintenance Maintenance Keep your Pearl Mini running smoothly using the latest firmware updates and maintenance features. Topics include: Power down and system restart Backup your Pearl device setup Perform a factory reset Firmware upgrade Support Register your device... - Page 461 Power off the device using the Admin panel You can use the Admin panel to power off Pearl Mini. The power button on Pearl Mini is a toggle switch. If you power off the device using the Admin panel, the power switch remains in the on state. To power back on, you must double press the power button.
- Page 462 Power down and system restart Power off the device using the power button You can manually shut down Pearl Mini using the power button. The power button for the Pearl Mini is located on the rear panel beside the power input jack.
-
Page 463: Backup Your Pearl Device Setup
Pearl Mini User Guide Backup your Pearl device setup Backup your Pearl device setup Configuration presets are the perfect way to backup your Pearl device setup so that you can reapply it later without worrying if someone changes your settings or does a factory reset. -
Page 464: Perform A Factory Reset
Pearl Mini User Guide Perform a factory reset Perform a factory reset Administrators can use the Admin panel to perform a factory reset and restore the configuration of Pearl Mini to the manufacturer's original default settings. For a list of affected settings, see The Factory default... -
Page 465: Firmware Upgrade
Pearl Mini User Guide Firmware upgrade Firmware upgrade When you register your product with Epiphan, you can choose to receive email notifications whenever firmware updates are available. To take advantage of exciting new features and important fixes for your Pearl device, install new firmware whenever the system indicates that a firmware update is available. - Page 466 Update the firmware If your Pearl Mini has internet access, the easiest way to install a firmware update is to use the download link that's provided when you check for new firmware. If you have a Pearl Mini firmware file that was provided to you by Epiphan Video, you can install the new firmware using the web-based Admin panel.
- Page 467 Firmware upgrade Do not interrupt power to the system during the firmware upgrade. 5. When the firmware update is complete, a message lets you know that Pearl Mini is going to reboot. Wait for the system to restart. 6. After the system reinitializes, go to the settings for your web browser and clear your web browser's cache.
-
Page 468: Register Your Device
Pearl Mini User Guide Register your device Register your device When you register your product with Epiphan, you become eligible to download firmware updates when they become available. Take advantage of exciting new features and important fixes for your Pearl device. -
Page 469: Support
SupportPlan+ offers a 2-year support extension plus remote troubleshooting support Remote troubleshooting support allows the Epiphan support team to remotely access Pearl Mini to help troubleshoot issues and reset lost admin passwords. No private information is sent to the Epiphan maintenance server during a remote session. - Page 470 Remote support uses ports 22 and 30. Ensure that these ports are opened to allow remote communication. If your Pearl Mini is on a network that is protected from the Internet by a firewall, consult...
- Page 471 4. Check Enable connection to maintenance server to enable outgoing links to the Epiphan maintenance server epiphany.epiphan.com. 5. Click Apply. 6. Test that Pearl Mini can access the maintenance server: a. From the Configuration menu, select Network. b. In Network Diagnostics, enter epiphany.epiphan.com and click ping.
-
Page 472: Storage Capacity And Maintenance
Storage capacity and maintenance Pearl Mini has support for removable SD cards, which are formatted to use the ext4 file system and can only be read with a computer running Linux. Video recordings that you make are saved to the SD card. - Page 473 SD card configuration page. You can also check available storage capacity using the touch screen on Pearl Mini. The total amount of storage capacity depends on the size of storage device you install.
- Page 474 Check media storage capacity Pearl Mini has 2 GB of internal storage that's allocated for uploaded media, like image files that you add to a channel layout. You can see how much space you have for media files using the Admin panel.
- Page 475 Pearl Mini User Guide Storage capacity and maintenance...
-
Page 476: Troubleshooting
Diagnostic tools Diagnostic tools are available to help you troubleshoot your Pearl device setup and network connection. You can run them from the touch screen on Pearl Mini or using the Admin panel. Available diagnostic tools: Connectivity status: Display the status of critical network connections and features like 802.1x, Connectivity status results. - Page 477 The following table describes what the colored icons in the results indicate. Table 75 Diagnostic test result icons Icon Description The diagnostic test result is okay. This can also mean that a specific feature is enabled on Pearl Mini. The feature or option is disabled on Pearl Mini.
-
Page 478: Connectivity Status Results
Pearl Mini. Status results include: disabled, authenticated, in progress, and failed. Check if Pearl Mini can resolve host names with their associated IP address using the DNS server that is configured for Pearl Mini. For information about setting... -
Page 479: Run Diagnostic Tests Using The Admin Panel
Display the public IP address of this Pearl Mini. Knowing the public IP address is useful when configuring SRT on Public IP Pearl Mini, especially if Pearl Mini is behind a NAT on the network. An empty result means the IP address was not reported. - Page 480 Pearl Mini User Guide Run diagnostic tests using the Admin panel Trace route: Trace the route that packet traffic takes to get from the Pearl device to a specified destination server on the network. Not all networks support traceroute. Bandwidth test: Display the available upload and download bandwidth speed in Mbps up to a maximum bandwidth of 1000 Mbps.
-
Page 481: Run Diagnostic Tests Using The Device Screen
Run diagnostic tests using the device screen You can access useful diagnostic tools from the device screen when you select Settings > Network and select Connectivity Status. The Pearl-2 and Pearl Mini have additional diagnostic tools found on the second page under Network Tools. - Page 482 3. To run the connectivity status diagnostics, select Connectivity status and then select Start on the Connectivity status screen. Use Network Tools on Pearl-2 or Pearl Mini 1. To run other diagnostic tools, tap the chevron icon in the bottom right of the screen to go to the second page of network options, and then tap Network Tools.
- Page 483 Pearl Mini User Guide Run diagnostic tests using the device screen e. If Probe is selected, choose the transport protocol from the drop-down menu and then enter the destination server IP address or server name along with the port in the empty field. For example, enter: 10.100.10.1:1234 or domain.example.com:1234...
-
Page 484: Troubleshooting Quick Reference
Configure encoding. Check the touchscreen interface for audio monitoring or use No sound is coming from an audio the 3.5 mm headphone jack on the front panel of Pearl Mini source. to verify audio, see About the touch screen. - Page 485 My RTSP (or SRT) video source isn't However, if you are ingesting an RTSP (or SRT) stream as a detected. video input for a channel and Pearl Mini does not recognize the signal, switch to using software encoding for that channel, see Configure video encoding.
- Page 486 Pearl Mini User Guide Troubleshooting Quick Reference Problem Action(s) to Resolve a different web browser such as Firefox or update the version of your web browser, then add the security certificate for the website to the exceptions list. The following tips can help improve image quality: 1.
- Page 487 Manage recorded files. Pearl Mini supports Automatic File Transfer (AFU) to CIFS AFU to my CIFS server doesn't work. servers (also known as SMB or samba) with samba version 1. Reboot the system and try again. If the problem persists, Firmware upgrade fails.
- Page 488 HDMI cables connected to the output ports on Pearl Mini powered on. and try again. If you're still unable to power up Pearl Mini, contact Epiphan Support. Ensure there is no USB stick inserted into a USB port during System is not starting up correctly.
-
Page 489: Remove Black Bars (Matte) From The Video
Kaltura or Panopto has denied you access to create My login attempt to create an ad hoc unscheduled ad hoc recordings and webcasts using Pearl event from Pearl Mini was denied. Mini. Contact your CMS administrator to either activate your CMS account or enable the necessary access rights. - Page 490 Pearl Mini User Guide Remove black bars (matte) from the video For example: Input signal resolution is 720×480 (a 3:2 aspect ratio) encoded resolution is 640×480 (a 4:3 aspect ratio that is narrower than the input resolution) Borders are added to the top and bottom of the image to preserve the wider ratio of the input.
- Page 491 Pearl Mini User Guide Remove black bars (matte) from the video Match output frame size with aspect ratio of input signal The output frame size is automatically matched only for a layout that has one source. If you have layouts with different frame sizes, switching them while live streaming will cause an interruption and restart of the stream.
-
Page 492: Use A Specific Edid For The Video Input Port
Pearl Mini User Guide Use a specific EDID for the video input port TIP: Temporarily check Use current signal resolution as frame size to see the frame size listed in the Frame size fields, then uncheck that check box and manually enter the value in the Frame size fields. - Page 493 Pearl Mini User Guide Use a specific EDID for the video input port The video input ports on the Pearl device have a factory set EDID. When you connect a video source such as a laptop or camera to the Pearl device, the video source sees the Pearl device as if it were a monitor.
- Page 494 Pearl Mini User Guide Use a specific EDID for the video input port 4. Browse to the location where the custom EDID file was saved and select it, then click open. 5. Select upload. When the upload is complete, the page updates to reflect success or failure.
-
Page 495: Unstretch The Output Video
Unstretch the output video Pearl Mini preserves the aspect ratio of your input video signal by default when you add the source to a layout using the custom layout editor. If you've changed the default setting, the image is stretched to match the output frame size. -
Page 496: Remove The Combing Effect On Images
Pearl Mini User Guide Remove the combing effect on images Remove the combing effect on images When frames are interlaced, artifacts from one frame may appear on the next frame. This happens when a fast motion video is interlaced. Since each frame is captured from a different point in time, the action captured in one frame is carried over to the next frame. -
Page 497: External Keyboard Shortcuts
Pearl Mini User Guide External keyboard shortcuts External keyboard shortcuts You can use keyboard shortcuts with an external USB keyboard that is connected to Pearl Mini. For information about connecting a USB keyboard, see Connect an external keyboard. Table 78... - Page 498 Pearl Mini User Guide External keyboard shortcuts Item Description Open the Content Management System (CMS) events shift+E screen. shift+C Create a new ad hoc event. shift+P Open the settings. shift+I Open the system information screen. Events screen shift+C Create a new ad hoc event.
- Page 499 Pearl Mini User Guide External keyboard shortcuts Item Description Move to the next input field or control. shift+Tab Move to the previous input field or control. Initiate a button action, accept text entered into a text field, and toggle a switch or check box.
-
Page 500: Limitations And Known Issues
Affecting firmware upgrades to 4.8.1 (or later) with traffic shaping If traffic shaping is already configured using the Pearl Mini API, observe the following before upgrading to 4.8.1 (or later): Traffic shaping that's configured using the API will continue to work after you upgrade the firmware. You can clear traffic shaping for one or more channels using the API at any time. - Page 501 The GoPro camera model HERO7 and some Evertz video distribution systems can suddenly stop working with Pearl Mini. Workaround: Reset the EDID for the Pearl Mini input. You can also use a device such as an HDMI splitter to isolate and filter the video signal before the signal is sent to Pearl Mini.
- Page 502 Affecting video output ports When setting up the video output ports on Pearl Mini, the video input source's frame rate as set for the channel is used by default for the video at the output. The Frame rate field in the video output port settings does not change the frame rate of the video at the output port or change the frame rate of the connected display device.
- Page 503 If no Pearl Mini channels are selected when setting up the Pearl Mini remote recorder in Panopto, you can still create an ad hoc event using Pearl's Admin panel or touch screen; however, the ad hoc event isn't actually created on Pearl Mini or recorded.
- Page 504 Canadian copyright law, United States copyright law, trademark law, international conventions and other intellectual property laws. Epiphan, Epiphan Video, Epiphan Systems, Epiphan Systems Inc., and Epiphan logos are trademarks or registered trademarks of Epiphan Systems Inc., in certain countries. All Epiphan product names and logos are trademarks or registered trademarks of Epiphan.
-
Page 505: Software License
Software license ATTENTION: THE SOFTWARE AND DOCUMENTATION PROVIDED UNDER THIS AGREEMENT ARE BEING LICENSED TO YOU BY EPIPHAN SYSTEMS INC. ("LICENSOR") AND ARE NOT BEING SOLD. THIS AGREEMENT CONTAINS LIMITATIONS ON REPRESENTATIONS, WARRANTIES, CONDITIONS, REMEDIES, AND LIABILITIES THAT ARE APPLICABLE TO THE SOFTWARE AND DOCUMENTATION. - Page 506 "Your Order" means (i) the web forms provided by Epiphan or its applicable reseller or distributor for ordering Epiphan Hardware Products and related Software licenses, or (ii) written documents executed by Epiphan, or one of its resellers or distributors, and You in respect to Your purchases of Epiphan Hardware Products and/or related Software licenses.
- Page 507 feature-related information about the Software. You further agree not to disclose, transfer or otherwise provide to any third party any portion of the Software, except as expressly permitted herein. Some Epiphan Hardware Products and Software embed third-party APIs that integrate with third-party party services (“Third-Party Services”) to allow users of such Epiphan Hardware Products and Software to interact with such Third- Party Services for various capabilities offered by such Third-Party Services, such as, and without limitation, authentication, uploading and downloading of video content and other features made available by such Third-Party...
- Page 508 CUMULATIVE LIABILITY OF LICENSOR (INCLUDING ITS AFFILIATES AND ITS AND THEIR LICENSORS, SUPPLIERS, SUBCONTRACTORS, RESELLERS AND DISTRIBUTORS) TO YOU OR ANY OTHER PERSON OR ENTITY FOR ANY DAMAGES ARISING FROM THIS AGREEMENT, RELATING TO THE EPIPHAN HARDWARE PRODUCTS, SOFTWARE, DOCUMENTATION AND/OR RELATING TO ANY SERVICES PROVIDED TO YOU BY LICENSOR (INCLUDING ITS AFFILIATES AND ITS AND THEIR LICENSORS, SUPPLIERS, SUBCONTRACTORS, RESELLERS AND DISTRIBUTORS) IN RELATION TO THE EPIPHAN HARDWARE PRODUCTS, SOFTWARE AND/OR DOCUMENTATION, EXCEED THE LICENSE FEES PAID BY YOU FOR THE SOFTWARE.
- Page 509 (collectively the “Indemnified Parties”) harmless from and against any damages, losses, liabilities, expenses, costs, claims, demands, actions, suits and/or proceedings incurred by the Indemnified Parties as a result of (i) Your use of the Epiphan Hardware Products, Software and/or Documentation, (ii) any use of the Epiphan Hardware Products, Software and/or Documentation on Your behalf, (iii) the use of the Epiphan Hardware Products, Software and/or Documentation by anyone to whom You give the Epiphan Hardware Products, Software and/or Documentation, and/or (iv) the use of the Epiphan Hardware Products, Software and/or Documentation on behalf of anyone to whom...
- Page 510 Epiphan Hardware Products, Software, Documentation or related information. 14. Intellectual Property: Epiphan, Epiphan Systems and Epiphan Video are tradenames, trademarks or registered trademarks of Epiphan Systems Inc. in certain countries. All Licensor product names and logos are trademarks or registered trademarks of Epiphan Systems Inc.
- Page 511 Pour placer cet appareil hors tension, débrancher tous les cordons d'alimentation sans exception. FCC Compliance Statement 47 CFR Section 2.1077 Compliance Information Unique identifier: Pearl Mini This device complies with Part 15 of the FCC Rules. Operation is subject to the following two conditions: 1. This device may not cause harmful interference 2.
- Page 512 CE Compliance Statement Marking by the symbol indicates compliance of this device with the applicable directives of the European Community and meets or exceeds the following technical standards. Directive 2014/30/EU - Electromagnetic Compatibility Directive 2014/35/EU - Low Voltage Directive Directive 2011/65/EU - RoHS, restriction of the use of certain hazardous substances in electrical and electronic equipment Warning: Operation of this equipment is not intended for a residential environment and could cause radio interference.
- Page 513 These Terms and Conditions for use of this document and the associated Epiphan Product are governed and interpreted pursuant to the laws of the province of Ontario, Canada, notwithstanding any principles of conflicts of law. All disputes arising out of or relating to these Terms and Conditions shall be finally resolved by arbitration conducted in the English language in Ottawa, Ontario, Canada under the commercial arbitration rules of the Canada.
-
Page 514: Thank You For Choosing Epiphan
Warranty All Epiphan Video systems have a 100% return to depot warranty for one year from the date of purchase. Technical support Epiphan’s products are backed by our professional support team. You can reach our team several ways: Email support@epiphan.com...
Need help?
Do you have a question about the Pearl Mini and is the answer not in the manual?
Questions and answers