
Related Manuals for Samsung HT-C750W


Summary of Contents for Samsung HT-C750W
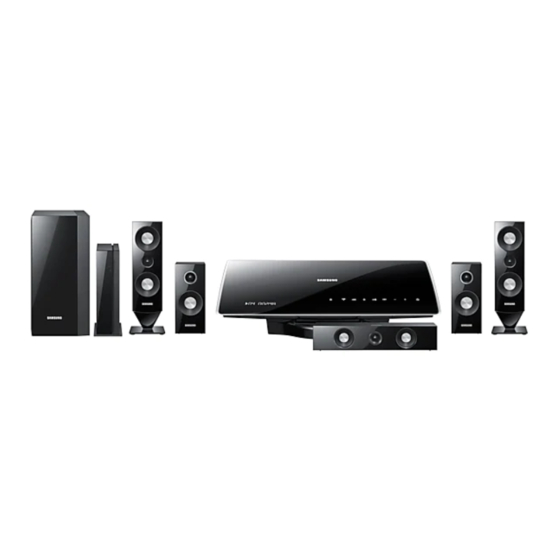
- Page 1 HT-C750W HT-C755W Digital Home Cinema System user manual Imagine the possibilities Thank you for purchasing this Samsung product. To receive more complete service, please register your product at www.samsung.com/register...
-
Page 2: Safety Information
Safety Information Safety Warnings TO REDUCE THE RISK OF ELECTRIC SHOCK, DO NOT REMOVE THE COVER(OR BACK). NO USER-SERVICEABLE PARTS ARE INSIDE. REFER SERVICING TO QUALIFIED SERVICE PERSONNEL. CAUTION RISK OF ELECTRIC SHOCK DO NOT OPEN This symbol indicates “dangerous voltage” CAUTION : TO PREVENT ELECTRIC This symbol indicates important inside the product that presents a risk of... -
Page 3: Precautions
Precautions • Ensure that the AC power supply in your house complies with the identifi cation sticker located on the back of your product. • Install your product horizontally, on a suitable base (furniture), with enough space around it for ventilation (7.5~10cm). •... -
Page 4: Cautions On Handling And Storing Discs
“Pat. 7,295,673; 7,460,688; 7,519,274” Store vertically. Copyright ✎ NOTE © 2010 Samsung Electronics Co., Ltd. All rights Do not allow the discs to become contaminated with dirt. reserved. Do not load cracked or scratched discs. Copy Protection Handling and Storing Discs •... -
Page 5: Table Of Contents
Contents SAFETY INFORMATION Safety Warnings Precautions Accessories Cautions on Handling and Storing Discs Licence Copyright Copy Protection GETTING STARTED Icons that will be used in manual Disc Types and Characteristics Description Front Panel Rear Panel Remote control CONNECTIONS Connecting the Speakers Attaching the Toroidal Ferrite Core to the Power Cord of the Main Unit Connecting the Video Out to your TV... - Page 6 Contents BASIC FUNCTIONS Disc Playback Audio CD(CD-DA)/MP3/WMA Playback JPEG File Playback Using the Playback Function Sound Mode Listening to Radio Connecting Microphone ADVANCED FUNCTIONS USB Function Using an iPod (Option) CD Ripping Troubleshooting OTHER INFORMATION Country code list Specifi cations •...
-
Page 7: Getting Started
Getting Started Icons that will be used in manual Disc Types and Characteristics Make sure to check the following terms before Region Code reading the user manual. The product and the discs are coded by region. These Icon Term Defi nition regional codes must match in order for the disc to play. - Page 8 Getting Started Disc types that can be played CD-R MP3 Discs • Only CD-R discs with MP3 fi les in ISO 9660 or Joliet format can be played. Disc Types & Recorded Disc Max. Playing Time • Mark (Logo) Signals Size MP3 fi...
- Page 9 • DVD±R/±RW, CD-R/RW Discs When you play a disc whose sampling frequency is higher than 48khz or 320kbps, you may experience • Software updates for incompatible formats are not shaking on the screen during playback. supported. • Sections with a high frame rate might not be played (Example : QPEL, GMC, resolution higher than while playing a DivX fi...
- Page 10 Getting Started USB Devices that can be used with the product • USB Storage Device, MP3 Player, Digital Camera • USB card Reader: One slot USB card reader and Multi slot USB card reader. - The USB card reader may not be supported, depending on the manufacturer.
-
Page 11: Description
Description Front Panel MIC 2 MIC 1 AUX IN1/ASC IN Ejects a disc. EJECT BUTTON ( The mode switches as follows : FUNCTION BUTTON ( DVD/CD ➞ D.IN ➞ AUX 1 ➞ AUX 2 ➞ USB ➞ IPOD (Option) ➞ FM. Goes back to the previous title/chapter/track. -
Page 12: Rear Panel
Getting Started Rear Panel Using an HDMI cable, connect this HDMI output jack to the HDMI input jack HDMI OUT JACK on your TV for the best quality picture. COMPONENT VIDEO OUTPUT JACKS Connect a TV with Component video inputs to these jacks. VIDEO OUT JACK Connect your TV's Video Input jack (VIDEO IN) to the VIDEO OUT jack. -
Page 13: Remote Control
Remote control Tour of the Remote Control This is mode selection button. FUNCTION POWER TV SOURCE Press to select TV's video mode. Turn the product on and off. To eject a disc. DVD RECEIVER/TV SLEEP Press to select DVD RECEIVER/TV ECHO SLEEP : Set the time to shut off mode. - Page 14 Teknika 03, 15, 18, 25 59, 61, 87, 88 18, 40 • Example : For a Samsung TV 03, 15, 40 Toshiba 19, 57, 63, 71 While holding down the POWER button, use the Vidtech number buttons to enter 00, 15, 16, 17 and 40.
-
Page 15: Connections 15 Connecting The Speakers
Connections This section involves various methods of connecting the product to other external components. Before moving or installing the product, be sure to turn off the power and disconnect the power cord. Connecting the Speakers Position of the product Place it on a stand or cabinet shelf, or under the TV stand. - Page 16 Connections Connecting the Speakers Speaker Components HT-C750W CENTRE FRONT REAR SUBWOOFER SPEAKER CABLE Speaker Components Assembled Speakers HT-C755W (L) (R) SPEAKER CABLE CENTRE CENTRE SPEAKER SUBWOOFER FRONT SCREW (Small): 8EA SCREW (Large): 24EA (L) (R) STAND NECK REAR STAND POLE...
- Page 17 Removing/Installing the speaker on the stand * HT-C750W * Front Speakers only How to remove the speaker If you attach the speaker on the wall, remove the stand before using it. Pull out the stand in the arrow direction as shown.
- Page 18 Connections Connecting the Speakers Installing the Speakers on the Tallboy Stand * HT-C755W * Front/Rear Speakers only Connect the Stand Pole to the Stand Bracket. Insert and tighten three large screws into the three holes on the Stand Bracket as shown in the Stand Bracket illustration.
- Page 19 Connect the left and right rear speakers to the wireless Receiver module. Plug the power cord of the wireless Receiver module in the wall outlet . TX card In case of HT-C750W Front Speaker (R) Rear Speaker (R) Rear Speaker (L)
-
Page 20: Attaching The Toroidal Ferrite Core To The Power Cord Of
Connections ✎ NOTE Place the wireless receiver module at the rear of the listening position. If the wireless receiver module is too close to the product, some sound interruption may be heard due to interference. If you use a device such as a microwave oven, wireless LAN Card, Bluetooth equipment, or any other device that uses the same frequency (2.4/5.8GHz) near the product, some sound interruption may be heard due to interference. -
Page 21: Connecting The Video Out To Your Tv
Connecting the Video Out to your TV Choose one of the three methods for connecting to a TV. METHOD 3 (supplied) METHOD 1(supplied) Green METHOD 2 Blue METHOD 1 : HDMI Connect an HDMI cable from the HDMI OUT jack on the back of the product to the HDMI IN jack on your METHOD 2 : Component Video If your television is equipped with Component Video inputs, connect a Component video cable(not supplied) from the COMPONENT OUT (Pr, Pb and Y) jacks on the back of the product to the Component Video Input... - Page 22 Anynet+ is a function that enables you to control other Samsung Devices with your Samsung TV's remote control. Anynet + can be used by connecting this product to a SAMSUNG TV using a HDMI Cable. This is only available with SAMSUNG TV's that support Anynet+.
-
Page 23: Connecting The Fm Antenna
Connecting the FM Antenna FM Antenna (supplied) Connect the FM antenna supplied to the FM Antenna jack. Slowly move the antenna wire around until you fi nd a location where reception is good, then fasten it to a wall or other rigid surface. ✎... - Page 24 Connections Connecting Audio from External Components Audio Cable (not supplied) If the external analogue AUX 2 component has only one Audio Out, connect either left or right. White Optical Cable Set-Top Box (not supplied) OPTICAL AUX2 : Connecting an External Analogue Component Analogue signal components such as a VCR.
-
Page 25: Setup 25 Before Starting (Initial Setting)
Setup Before Starting (Initial Setting) Setting the Setup menu The access step may differ depending on the selected Press the POWER button when it is plugged in menu. The GUI (Graphical User Interface) in this TV for the fi rst time. manual may differ, depending on the fi... -
Page 26: Display
Monitor : Select if connected to a Monitor via HDMI. (Samsung products only) BD Wise is Samsung's latest inter-connectivity feature. When you connect Samsung products with BD-Wise to each other via HDMI, the optimum resolution will be set automatically. English... -
Page 27: Audio
Adjusting Front/Rear Speaker Balance Audio You can select between 0 and -6. Speaker Setting The volume decreases as you move closer to –6. Adjusting Centre/Rear/Subwoofer Speaker Level Speaker Size The volume level can be adjusted in steps from +6dB to –6dB. -
Page 28: Asc (Auto Sound Calibration) Setting
Setup Test Tone Ideal Centre Speaker placement Settings Speaker Setting Speaker Size Sound Edit Delay Time Test Tone : On ► Ideal Rear Select Return Speaker placement Move Select Return It is desirable to place all speakers within this circle. Use the Test Tone feature to check the speaker Df: The distance from Front Speaker connections. -
Page 29: Drc (Dynamic Range Compression)
✎ ✎ NOTE NOTE ASC setup can be made when there is no disc in Setting the Auto Sound Calibration function the product. takes about 3 minutes. You cannot adjust the volume using the volume DRC (Dynamic Range Compression) control buttons, because the volume level is fi... -
Page 30: System
Setup System Security The Parental Lock function works in conjunction with Initial Setting DVDs that have been assigned a rating which helps you control the types of DVDs that your family watches. By using the Initial Setting, you can set language, There are up to 8 rating levels on a disc. -
Page 31: Basic Functions
Basic Functions Audio CD(CD-DA)/MP3/WMA Playback Disc Playback Load a disc into the disc slot with the disc's label facing up. ✎ NOTE Track01 Resume function: When you stop disc play, the 1/17 product remembers where you stopped, so when you press PLAY button again, it will pick up where you left off. - Page 32 Basic Functions JPEG File Playback Using the Playback Function Images captured with a digital camera or camcorder, or Forward/Reverse Search JPEG fi les on a PC can be stored on a CD and then played back with this product. Insert a JPEG disc on the disc slot. Press the ◄►...
- Page 33 Step Motion Play Using the Title Menu For DVDs containing multiple titles, you can view the Press the PAUSE button repeatly. title of each movie. MIC VOL- • The picture moves forward one frame each time TITLE MENU During playback, press the TITLE the button is pressed during playback.
- Page 34 Basic Functions Repeat Playback A-B Repeat Playback You can repeatedly play back a designated section of a DVD or CD. DVD/DivX Repeat During the DVD disc or CD playback, press the You can repeat the title, chapter or the section(A-B REPEAT button on the remote control.
- Page 35 Displaying Disc Information Audio( ): Refers to the fi lm's soundtrack language. A DVD Disc can contain up to 8 audio languages. Subtitle( ): Refers to the subtitle languages available in the disc. You will be able to choose the subtitle languages or, if you prefer, turn them off from the 03/04 screen.
- Page 36 Basic Functions Selecting the Subtitle Language Angle Function This function allows you to view the same scene in Press the TOOLS button. different angles. Press the ▲▼ buttons to select SUBTITLE ( display. Press the TOOLS button. Press the ◄► buttons or numeric buttons to Press the ▲▼...
- Page 37 DSP (Digital Signal Processor)/EQ Dolby Pro Logic II Mode • DSP (Digital Signal Processor) : DSP modes have You can select the desired Dolby Pro Logic II audio mode. been designed to simulate different acoustic environments. • EQ : You can select ROCK, POP, or JAZZ etc. to Press the PL II button.
- Page 38 Basic Functions Presetting Stations Listening to Radio Example : Presetting FM 89.10 in the memory Using buttons on the Remote Control Press the FUNCTION button to select FM. Press the FUNCTION button to select FM. Press the TUNING/CH ( ) button to select Tune in to the desired station.
-
Page 39: Advanced Functions
Advanced Functions USB Function Using an iPod (Option) * Some models do not support this function. Playing Media Files using the You can enjoy music, video fi les from an iPod USB Host Feature through the product. You can enjoy media fi les such as pictures, movies and music saved on an MP3 player, USB memory stick or digital camera in high quality video with 5.1 MIC 2... - Page 40 Advanced Functions ✎ NOTE Watching a Movie Adjust the volume to a moderate level before you You can play video fi les stored in the iPod player by connect your iPod and product. connecting it to the product. When the product is powered on and you Press the FUNCTION button to select IPOD.
- Page 41 CD Ripping Converts audio sound of the CD into a MP3 fi le format before sending to a USB storage device. Connect the USB device to your product. Insert the audio CD into the disc slot. Press the CD RIPPING button. •...
-
Page 42: Other Information
Refer to the chart below when this product does not function properly. If the problem you are experiencing is not listed below or if the instruction below does not help, turn off the product, disconnect the power cord, and contact the nearest authorized dealer or Samsung Electronics Service Centre. Symptom Check/Remedy I cannot eject the disc. -
Page 43: Country Code List
Symptom Check/Remedy • The product is not working. • Press and hold the STOP () button on the remote control for longer than (Example: The power goes out or 5 seconds with no disc (reset function). the front panel key doesn't work or a strange noise is heard.) Using the RESET function will erase all stored settings. -
Page 44: Specifi Cations
Input sensitivity (AUX)400mV *: Nominal specifi cation - Samsung Electronics Co., Ltd reserves the right to change the specifi cations without notice. - Weight and dimensions are approximate. - Design and specifi cations are subject to change without prior notice. - Page 45 HT-C750W 5.1ch speaker system Speaker system Front Rear Centre Subwoofer Impedance 3 — 3 — 3 — 3 — 140Hz~20KHz 140Hz~20KHz 140Hz~20KHz 40Hz~160Hz Frequency range 86dB/W/M 86dB/W/M 86dB/W/M 88dB/W/M Output sound pressure level 133W 133W 133W 135W Rated input 266W...
- Page 46 Contact SAMSUNG WORLD WIDE If you have any questions or comments relating to Samsung products, please contact the SAMSUNG customer care centre. Area Contact Center Web Site Area Contact Center Web Site ` North America www.samsung.com/ch 0848 - SAMSUNG (7267864, Switzerland www.samsung.com/...
- Page 47 Code No. AH68-02267K...