Table of Contents
Advertisement
Owner's manual & Installation manual
Mode d'emploi et manuel d'installation
Manual de instrucciones y de instalación
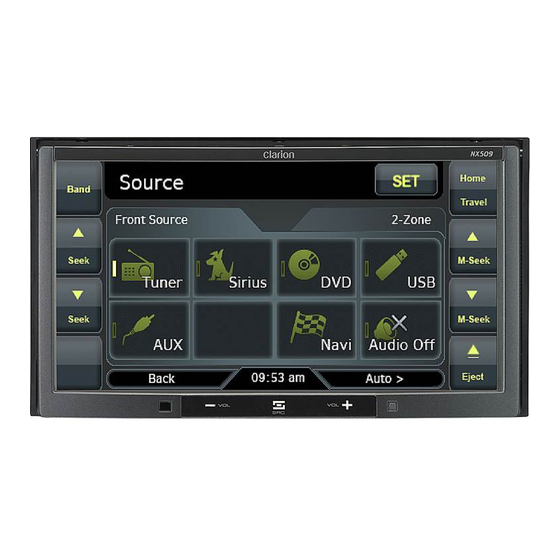
NX509
2-DIN MEMORY NAVIGATION & DVD MULTIMEDIA STATION
WITH 7-inch TOUCH PANEL CONTROL
SYSTEME DE NAVIGATION & STATION MULTIMEDIA DVD
2 DIN AVEC COMMANDE PAR ECRAN TACTILE 7 pouces
SISTEMA DE NAVEGACIÓN Y EQUIPO DVD MULTIMEDIA
2-DIN CON PANEL DE CONTROL TÁCTIL DE 7 pulgadas
Advertisement
Table of Contents

Subscribe to Our Youtube Channel
Related Manuals for Clarion NX509


Summary of Contents for Clarion NX509
- Page 1 Owner’s manual & Installation manual Mode d’emploi et manuel d’installation Manual de instrucciones y de instalación NX509 2-DIN MEMORY NAVIGATION & DVD MULTIMEDIA STATION WITH 7-inch TOUCH PANEL CONTROL SYSTEME DE NAVIGATION & STATION MULTIMEDIA DVD 2 DIN AVEC COMMANDE PAR ECRAN TACTILE 7 pouces SISTEMA DE NAVEGACIÓN Y EQUIPO DVD MULTIMEDIA...
-
Page 2: Clarion Product Registration Information
Once you’re registered, we can keep you informed of important product information. Register at www.clarion.com - it’s easy to keep your Clarion product up to date. INFORMATIONS DE L’ENREGISTREMENT DE PRODUITS CLARION Pour les Étas Unis et le Canada seulement Cher client: Nous vous remercions d’avoir acheté... -
Page 3: Table Of Contents
Thank you for purchasing the Clarion NX509. • Please read this owner’s manual thoroughly before operating this equipment. • After reading this manual, be sure to keep it in a handy place (e.g., glove compartment). • Check the contents of the enclosed warranty card and keep it carefully with this manual. -
Page 4: Features
4-Channel Amplifier iPod BLT370 ® Bluetooth cellular phone Note: The items listed outside of the frames are the commercial products generally sold. NX509 ® Expanding visual features Rear Vision Camera (CC2011/ CAA185) Rear Monitor VTR etc. USB Memory... -
Page 5: Playable Discs
DVD video. Note: • The functions described in this section differ depending on the DVD video disc. Refer to the instructions provided with the DVD video. • Some disc functions may operate differently from described in this manual. NX509... -
Page 6: Precautions
DVD menu DVD Menus can be called up during DVD video playback to perform menu setting. • Example showing DVD menu NX509 2. PRECAUTIONS WARNING For your safety, the driver should not watch the DVD video/movie data or operate the controls while driving. -
Page 7: Operation Panel/Generalities
• Cleaning the operation panel The operation panel tends to collect dust, so wipe it off occasionally with a soft cloth. The surface is easily scratched, so do not rub it with hard objects. NX509... -
Page 8: About The Registered Marks, Etc
• Manufactured under license from BBE Sound, Inc. • Licensed by BBE Sound, Inc. under one or more of the following US patents: 5510752, 5736897. BBE and BBE symbol are registered trademarks of BBE Sound, Inc. NX509 3. CONTROLS ●Operation Panel Sensor ® logo are [VOL –]... - Page 9 • SD memory card function is available in the Navi mode. For more information about the SD memory card function, see your User Manual (for the Navi mode). Note: • When you insert the SD memory card stored music files, they cannot be read in this unit. NX509...
-
Page 10: Outline Of Button And Touchkey Operation
* In addition to the above conditions, the system check function can be performed from the System tab menu on the General screen. Note: *1 These images indicate the buttons to press or keys to touch. NX509 Engine ON position You can change the media sources. - Page 11 Tuner mode operation (Source screen) Switches the radio band. Selects Home/Travel modes. Seek tuning Manual tuning Preset ch. • Select desired station after selecting radio band. NX509...
- Page 12 (DVD top menu) *2 Note: *2 If you do not touch the screen for about 7 seconds, all the keys on the screen will disappear. Touch the screen surface to redisplay them. NX509 (DVD Video mode screen) *2 (Options screen) (Setup screen)
-
Page 13: Adjusting The General Settings
Adjusting the General settings (Source or Mode screen) (Settings screen) (General screen) (Display tab screen) (System tab screen) NX509... -
Page 14: Adjusting The Audio Settings
Adjusting the Audio settings (Source or Mode screen) (Settings screen) (Audio screen) (Beat EQ tab screen) NX509 (Others tab screen) (BAL/FAD tab screen) -
Page 15: Remote Control Unit
❏ Functions of Remote Control Unit Buttons You can use the remote control unit to control the NX509. When the 2-Zone function is ON, the controls work upon the Sub zone only. Note: • The steering wheel remote control operations work upon the Main zone even when the 2-Zone function is ON. -
Page 16: Basic Operations
• Press to select the next lower or higher track. (in CDDA, MP3/WMA/AAC/DivX, and USB modes) • Keep pressing to perform fast backward or fast forward playback. (in DVD and USB modes) NX509 4. BASIC OPERATIONS Note: • Be sure to read this chapter referring to the chapter “3. -
Page 17: Adjusting The Volume
3. Touch the [Open/Close] key when the operation panel is open. The operation panel will be closed. • The operation panel will close automatically when leaving it open for a while. 4. Touch the [Back] key to return to the previous screen. NX509... -
Page 18: Turning The Audio Off
The operation panel will move and stop at 30q. 2. Touch and hold the [Tilt] key again. The operation panel will move and stop at 0q. NX509 Turning the Audio OFF You can turn off all of the AV features. -
Page 19: Turning The Monitor Off
• Do not use lens cleaning discs. These may damage the lens of this unit. • When there seems to be something wrong with reading discs, please consult your dealer or an authorized Clarion service center. NX509... -
Page 20: Connecting/Disconnecting An Usb Media Device
• This system will not operate or may operate improperly with unsupported versions. • For detailed information on the playable iPod models, see our home page: www.clarion.com • For the other limitations, see “iPod Operations” (page 39). About the USB memory... - Page 21 USB media device. Do not stop the engine when the USB media device is connected. Note: • When turning on the ACC power with no USB media device connected, “No Media” may be displayed on the screen if the USB mode is selected. NX509...
-
Page 22: Selecting A Media Source
Note: • When the USB mode is selected, video images input from the AUX1 terminal will be output to the rear monitor. This is normal. NX509 2-Zone Function About the 2-Zone function The 2-Zone function is a function that assigns... -
Page 23: Source Operations
• In Home mode: FM Home 1 ➜ FM Home 2 ➜ AM Home ➜ FM Home 1... • In Travel mode: FM Travel ➜ AM Travel ➜ FM Travel... 4. Touch the desired Preset key to tune in the corresponding preset station. NX509... -
Page 24: Manual Tuning
• Touching and holding the desired Preset key for more than 2 seconds will store the current station to the preset memory. NX509 Manual memory 1. Touch the [Home Travel] key to select the Home or Travel mode. -
Page 25: Dvd Video Operations
• The factory default setting is “Wide”. 4-1. Touch the [Wide], [PS], or [LB] key of the TV Display item to change the screen size to “Wide”, “Pan Scan” or “Letter Box”. NX509... - Page 26 • The factory default setting is “Off”. 4-1. Touch the [On] or [Off] key of the Angle item to turn the Angle function ON or OFF. NX509 Setting up the disc menu language • The factory default setting is “English”.
-
Page 27: Watching A Dvd Video
For general DVD Video discs, the DVD menu may appear. After the DVD menu is displayed, select an item in the operations described as follows. NC-17 (NO ONE 17 AND UNDER ADMITTED) (RESTRICTED) PG-13 (PARENTS STRONGLY CAUTIONED) (PARENTAL GUIDANCE SUGGESTED) (GENERAL AUDIENCES) NX509... -
Page 28: Dvd Menu Operations
3. Touch the [Hide] key to return to the playback screen. NX509 DVD menu operations ●Showing the DVD menu 1. Showing the DVD Video mode screen, touch the [Top Menu] or [Title Menu] key during playback. -
Page 29: Stopping Playback
• Touching the [} (Chapter)] key starts playback from the beginning of the current chapter. When touching this key again within about 4 seconds, playback starts from the beginning of the previous chapter. Chapter NX509... -
Page 30: Repeat Playback
3. Touch the [Back] key to return to the previous screen. 4. Perform the same operation to turn off the repeat playback. NX509 Switching among languages On discs in which two or more audios or audio languages have been recorded, you can switch among the audio languages during playback. -
Page 31: Audio Cd Operations
(CDDA mode), and starts playback from the previous position. ❏ Operating an audio CD Listening to an audio CD After disc loading, the play mode is automatically engaged. • When playback is not started, touch the [p] key. WARNING NX509... -
Page 32: Mp3/Wma/Aac Operations
3. To cancel the play, touch the [Track] key of the function to cancel. 4. Touch the [Back] key to return to the previous screen. NX509 Scrolling track titles When a title or name displayed on the screen is longer than the text area, you can confirm the entire text by scrolling it. - Page 33 DivX files (1 to 4 in illustration) are displayed on the list. Folders containing no MP3/WMA/ AAC/DivX file are not displayed. • Folder hierarchy (1 to 4 in illustration) is ignored, and unified into one level. • Folders are arranged in the order of the folder creation. NX509...
-
Page 34: Pausing Playback
Listening to MP3/WMA/AAC files After disc loading, the play mode is automatically engaged. • When playback is not started, touch the [p] key. NX509 Pausing playback 1. Touch the [p] key during playback. Playback pauses. 2. To resume playback, touch the [p] key. -
Page 35: Divx Operations
• Files other than DivX format (such as the Xvid files) cannot be played. In addition, some files may not be played because of the encoding format. When a file cannot be played, the next file is played instead. ® NX509... - Page 36 Please note that watching and operating the movie while driving are prohibited by law in some countries. NX509 Note: • For your safety, this system has a safety function which turns off the picture when the car is moving, so only the audio can be heard.
- Page 37 • The number of audios recorded and their audio formats may differ depending on the DivX file. • Depending on the DivX file, switching may be impossible. • It may take time to switch the audio data. 3. Touch the [Back] key. NX509...
-
Page 38: Source Operations (Accessories)
Note: • This setting is disabled when a Mixed Mode CD, which contains both data track and audio tracks, is set in the DVD player. NX509 6. SOURCE OPERATIONS (ACCESSORIES) Satellite Radio Operations This function is available when a Satellite Radio tuner and Translator adapter are connected. - Page 39 The channel name, category name, and other information are displayed. • When the information displayed is longer than 16 characters, touching the text scrolls the entire text. 2. To return to the Preset Key screen, touch the [Preset Info] key again. NX509...
-
Page 40: Recalling A Preset Station
• If you do not touch the screen for 7 seconds, the display will return to the previous screen. NX509 ❏ Category Scan function In a category scan, broadcast channels in the same category as the current channel are selected about every 10 seconds. -
Page 41: Ipod Operations
• This system will not operate or may operate improperly with unsupported versions. • For detailed information on the playable iPod models, see our home page: www.clarion.com ❏ Notes on using Apple iPod • Do not connect an iPod to this unit with a headphone connected to the iPod. - Page 42 Disables the iPod buttons. All controls are performed from this system. 3. Touch the [Back] key to return to the previous screen. NX509 Other various play functions 1. Touch the [Options] key. 2. Touch a touch key of the function you want to play.
- Page 43 2. Repeat touching the [A ]], [[ Z], or [0-9] key to specify the initial character of the list item you wish to display. 3. Touch the [Search] key. The list will scroll to display the first item started from the specified character (or a following character). NX509...
-
Page 44: Usb Memory Operations
The iPod may be frozen. If the iPod is frozen, reset the iPod by following the procedure described in the instruction manual of the iPod. NX509 Selecting the Output Signal This setting is used to select the audio signal of video tracks. -
Page 45: Navigation System Operations
Note: • The [Map] key may be disabled depending on the navigation system conditions. Navi operations Changes between the Navi display and the Audio/Visual (hereinafter, referred as “AV”) display. NX509... -
Page 46: Aux Operations
The AUX mode screen is displayed. If you do not touch the screen for 7 seconds, the display will return to the video screen. NX509 Switching to another AUX mode 1. Showing the AUX mode screen, touch the [AUX] key. -
Page 47: System Settings
In such cases, adjust the volume. Adjusting the custom tone 3-1. Touch the [Beat EQ] key to display the Beat EQ tab screen. 3-2. Touch the [Custom] key. 3-3. Perform the following settings to adjust the sound tone. NX509... -
Page 48: Adjusting The High Pass Filter
Emphasizes the sound from the right speakers. Adjustment range: left 12 to right 12 • The factory default setting is “0”. NX509 3-3. Touch the [{] or [}] key of the Fader item to adjust the fader level. [{]: Emphasizes the sound from the front speakers. -
Page 49: General Settings
See the following sections for details. • In the following sections, only the details regarding adjustments are described, procedures to select items are skipped. 4. When the adjustment completes, touch the [Back] key to return to the previous screen. NX509... -
Page 50: Setting The Beep
Display tab screen. 3-2. Touch the [Auto], [NTSC], or [PAL] key of the AUX input item to set the VTR system. NX509 ❏ Setting the Beep The sound heard when you make operations is called “beep”. The system can be set so that it does not produce this beep sound. - Page 51 3-1. Touch the [System] key to display the System tab screen. 3-2. Touch the [}] key to display the next screen. 3-3. Touch the []] key of the System Check item. 3-4. Touch the [Reset NAVI module.] key to reset the navigation system. NX509...
- Page 52 ❏ Setting the anti-theft function (CATS) “CATS” is the acronym of “Clarion Anti-Theft System”. When you set a PIN code (called as “Personal Code”), a theft is prevented by disabling the operation of the unit at the theft. In addition, set the Blink LED function to improve the effect of the CATS function (see page 48).
-
Page 53: Adjusting The Monitor
[–]: Press to make contrast lower. [Hue]: Adjust the tone of color (red or green is emphasized). [+]: Press to increase green. [–]: Press to increase red. 4. When the adjustment completes, touch the [Back] key to return to the previous screen. NX509... -
Page 54: Troubleshooting
8. TROUBLESHOOTING If you have a problem with this system, check the following items to resolve it. See also our homepage (www.clarion.com) for additional information. General Problem Power does not turn Fuse is blown. on. (No sound is produced.) Incorrect wiring. -
Page 55: Dvd Player
See the subsection “Setting up the parental level” (page 25). Use ISO9660 level 1/2, Romeo, Joliet, or Apple ISO file system for CD-R/RW, or UDF for DVD±R/ Check that the Bright, Color, Contrast, and Hue are adjusted properly. Measure NX509... -
Page 56: Usb Devices
WMA files protected by DRM are played. Not Support Files not supported by this unit are played. NX509 Cause Reversing the connection direction of the USB device, try it again. Replace with a new USB device. Disconnect the USB device and reconnect. If the device is still not recognized, try replacing with a different USB device. - Page 57 Disconnect the device, and reconnect directly to the USB connector of this unit without using the USB Hub. Perform the operation such as skipping a file. (Repeat and random playback mode may be canceled.) Measure NX509...
-
Page 58: Specifications
Mid: 1.3 V (at 2 V output) Low: 2.0 V (at 2 V output) (input impedance 10 k: or greater) Video input: 1.0 r0.2 Vp-p (input impedance 75 :) NX509 Video Output Video output: 1.0 r0.2 Vp-p (output impedance 75 :) LCD Monitor Screen Size: 7-inch wide type 6"... -
Page 59: Installation And Wire Connection Manual
• When you install the antenna, mount it in a place where the elements of the antenna do not protrude beyond the edge of the front, back, left and right of the vehicle. If it comes in contact with pedestrians, it may cause an accident. NX509... -
Page 60: Installation Notes
• Connect cables appropriately. If a wrong connection is made, this may cause a fire or accident. NX509 • When passing cables through the body of the vehicle, use non-conductive grommets. If the coatings of the cables are worn out by rubbing, this may cause an accident, fire or a short circuit. -
Page 61: General Cautions
• Do not open the case. There are no user- serviceable parts inside. If you drop anything into the unit during installation, consult your dealer or an authorized Clarion service center. 4. CAUTIONS ON INSTALLATION • Prepare all articles necessary for installing the main unit before starting. -
Page 62: Installing The Main Unit In A Nissan Vehicle
Note: *1 Position the face panel with its wide edge at the bottom. Fit the edge into the groove of the main unit. NX509 • Wire as shown in Section 9 (see page 64). • Reassemble and secure the unit in the dashboard and set the face panel and center panel. -
Page 63: Installing The Main Unit In A Toyota Vehicle
Typical Mounting Brackets Example 2 Affix the screws to the ● marks. 8-Hexagonal screw (M5 u 8) Mounting bracket (1 pair for the left and right sides) Example 3 NX509... -
Page 64: Removing The Main Unit
Fuse holder Figure 8 Note: • There are various types of fuse holder. Do not let the battery side touch other metal parts. NX509 caution CAUTION After the connection, fix the cord by a clamp or insulation tape for protection. - Page 65 Stick it surely on a flat plane of the passenger-side dashboard where GPS signal interruption is minimized. • Wire the GPS antenna cord. Fasten the cord using the cord holders. (Shows an example in case of the left-hand traffic.) WARNING Double-sided tape Bottom face of the GPS antenna GPS antenna Cord holder NX509...
-
Page 66: Wire Connection
Yellow Rear Vision Camera terminal Yellow Black AUX1 video input terminal Yellow Black AUX2 video input terminal Right Left White NX509 GPS antenna jack Steering wheel remote control terminal CeNET terminal Refer to the following page. Front audio output terminal... - Page 67 Rear right + Rear right - +12V accessory Front right + Front right - Front left + Front left - Phone mute Rear left + Rear left - Amplifier turn-on cord Illumination Auto antenna Parking brake cord Reverse gear cord NX509...
-
Page 68: Connecting The Accessories
Use the Telephone Adapter BLT370, and connect it to the AUX2 audio input terminal and the PHONE MUTE code. For detailed information, refer to the instruction manual of the BLT370. NX509 ●How to attach the electro-tap 1. Place the Parking brake cord at the stopper, and fold it back in the direction of the arrow. - Page 69 Clarion Co., Ltd. QY-5010B All Rights Reserved.Copyright © 2009: Clarion Co., Ltd. 280-8742-00 Printed in China / Imprimé en Chine / Impreso en China 2009/6...
Need help?
Do you have a question about the NX509 and is the answer not in the manual?
Questions and answers