
Related Manuals for Hitachi U-2910


Summary of Contents for Hitachi U-2910
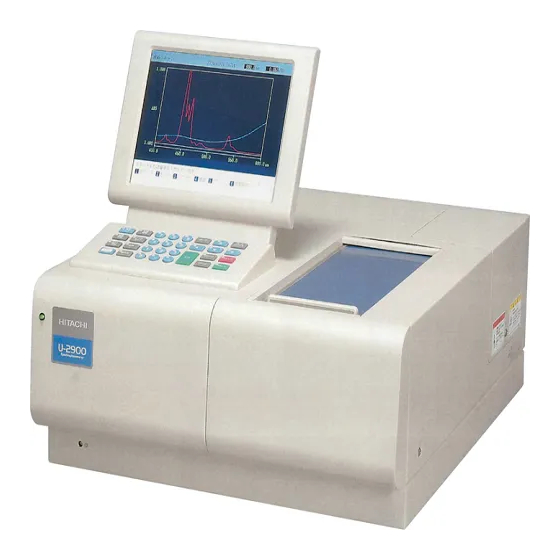
- Page 1 INSTRUCTION MANUAL 2J1-9006-009 Ver.10 October. 2020 Double Beam Spectrophotometer MODEL U-2910 UV-VIS SPECTROPHOTOMETER (MAINTENANCE)
- Page 2 Hitachi High-Tech Science Corporation. 3. Hitachi High-Tech Science Corporation assumes no liability for any direct, indirect, or consequential damages arising from use not described in this manual.
-
Page 3: Preface
Be sure to read instruction manual also to ensure correct use of the instrument. ABOUT THIS MANUAL This manual is prepared for users of Model U-2910 Double beam UV/VIS Spectrophotometer. This manual describes the operating instructions and maintenance/checkpoints. At first read “IMPORTANT” (IMPORTANT –1 to 8) and “SAFETY SUMMARY”... -
Page 4: Important
2. In other Countries outside the EU If you wish to discard this product, please contact your local authorities and ask for the correct method of disposal. Instruction Manual for U-2910 Cautions The following is a statement of notice about EMC for Korea. -
Page 5: Warranty On Product
Warranty on Product This product, inclusive of its accessories, is warranted to be free from defects in material or workmanship under normal use within the product specifications indicated in this manual and under conditions given below. This warranty is void if the instrument is not used according to the instruction manual. - Page 6 Limitations and Exclusions on Warranty Note that the following cases are excluded from the scope of this warranty, i.e., these cases are beyond the coverage of free-of-charge repair even during the warranty period indicated above. Failure due to operation at a place not meeting the installation requirements specified by the manufacturer.
- Page 7 Failure of the hardware, or damage to the system software, application software or data due to computer virus infection. After disposal of this instrument, after its resale without prior approval from the manufacturer, consumable parts, and failure of any part that have reached the end of its service life.
-
Page 8: Service Life Of This Instrument
(In use of the instrument under standard operating conditions (8 h/day, 20 days/month)) For using the instrument beyond the useful service life, it shall be checked for safety by Hitachi High-Tech Science Corporation sales representative or service office of Hitachi High-Tech Science Corporation sales representative. (This safety check will be available on a chargeable basis.) -
Page 9: Technical Seminars And Training Courses For Users
For service after the warranty period, consult our sales representative or service office of our sales representative with regard to a maintenance and inspection service contract. (Service will be available on a chargeable basis.) The maintenance and consumables of the instrument can be supplied within the useful service life of the instrument (7 years). -
Page 10: Other Precautions
Other Precautions Handling of Chemicals and Samples The user is responsible for following relevant legal standards and regulations in handling, storage and disposal of chemicals and samples used in analytical operations with this instrument. Reagents, standard solutions and accuracy-control samples shall be handled, stored and discarded as instructed by the respective suppliers. -
Page 11: Safety Summary
SAFETY SUMMARY Precautions on Safety Before using the Model U-2910 Double beam UV/VIS spectrophotometer, be sure to read through and understand the safety instructions given below. The hazard warnings that appear on the warning labels on the product or in the manual have one of the following alert headings... -
Page 12: Common Safety Precautions
Do not perform any operation or action other than described in this manual. When in doubt, please contact your nearest Hitachi High-Tech Science Corporation service office or representative. When using a chemical for analytical operation, be sure to provide proper ventilation in the laboratory room as per local requirements. -
Page 13: Cautions In Use
If any item is missing or damaged or if you have any question, notify the installation personnel at site or your nearest Hitachi High-Tech Science Corporation sales representative or service office of Hitachi High-Tech Science Corporation sales representative. -
Page 14: Cautions On Installation, Maintenance, Relocation
If any warning/caution label has become illegible due to deterioration with age or it has been damaged due to any cause, notify your nearest Hitachi High-Tech Science Corporation sales representative or service office of Hitachi High-Tech Science Corporation sales representative for replacement with a new one. -
Page 15: Safety Instructions In This Manual
SAFETY SUMMARY Safety Instructions in This Manual Shown below are the safety instructions contained in this manual and their relevant sections in it. DANGER Indications The indication” DANGER” does not apply to this instrument. WARNING Indications Electric Shock upon touching Hazardous Voltage (500 V) Touching the D lamp power supply voltage (500 V) may cause an electric shock, resulting in fatal or serious injury. -
Page 16: Caution Indications
SAFETY SUMMARY CAUTION Indications Fatigue due to Long Hours of Operation Operation while watching the display in the same posture for long hours will cause fatigue to accumulate in the eyes and body. To avoid this, one should take a break for 10 to 15 minutes at every hour in order to rest the eyes and body. - Page 17 SAFETY SUMMARY NOTICE Disposal of Waste Solution Be sure to collect waste solution and treat it for proper disposal in accordance with the relevant laws and regulations regarding water pollution control and sewage treatment. Improper treatment of waste solution may result in environmental pollution and could also lead to a penalty.
- Page 18 SAFETY SUMMARY NOTICE (Continued) Protection against Computer Viruses If any program/data is damaged suddenly or an unexpected operation/screen is encountered, the personal computer is suspected of being infected by a computer virus. Computer viruses are malicious programs that sneak into personal computers to cause misbehavior or damage to data.
- Page 19 SAFETY SUMMARY NOTICE (Continued) Power Interruption On occurrence of momentary power voltage drop due to power interruption or lightning, the personal computer may become faulty or the system software, application software or data may be damaged. For protection against momentary power voltage drop, it is advisable to use an AC uninterruptible power supply unit (stated according to the Japanese Electronic Industry Development Association guidelines for protection against momentary power...
- Page 20 SAFETY SUMMARY NOTICE (Continued) Burst of a lithium battery This spectrophotometer uses a lithium battery to backup the data in the memory. A lithium battery may burst should it be handled improperly. Be sure not to attempt to charge, disassemble, nor throw into the fire, under any circumstance.
-
Page 21: Warning Labels
If any one of the warning labels becomes illegible due to deterioration, contact your local Hitachi High-Tech Science Corporation sales representative or service office of Hitachi High-Tech Science Corporation sales representative for replacement with a new one. -
Page 22: Caution Label
SAFETY SUMMARY Caution Label (1) Burns due to Contact with Hot Part Light source compartment SAFETY - 12... -
Page 23: Table Of Contents
CONTENTS PREFACE ............PREFACE - 1 ABOUT THIS MANUAL ........PREFACE - 1 IMPORTANT ............ IMPORTANT - 1 Information for Users on WEEE (only for EU Countries) ........IMPORTANT - 1 Warranty on Product ........IMPORTANT - 2 Service Life of This Instrument ......IMPORTANT - 5 Installation, Relocation and After-sale Technical Service ...... - Page 24 1.8 CABLE CONNECTION ..........1 - 7 1.9 CONNECTION OF POWER CORD AND GROUNDING WIRE ........... 1 - 8 1.10 INSPECTION AFTER INSTALLATION/ASSEMBLY ... 1 - 9 1.11 POWER-ON ..............1 - 9 1.12 INSTALLATION OF UV-SOLUTIONS PROGRAM ..1 - 9 1.13 TERMINATING OPERATION ........
- Page 25 4.2.6 Baseline Flatness ............. 4 - 14 4.3 TROUBLESHOOTING ..........4 - 16 5. REPLACEMENT OF PARTS ......... 5 - 1 5.1 INTRODUCTION ............5 - 1 5.2 CONSUMABLE PARTS ..........5 - 1 5.3 REPLACEMENT OF LIGHT SOURCE LAMP ..... 5 - 2 5.3.1 Light Source Lamp Replacement Procedure .....
-
Page 26: Installation
CAUTION CAUTION on handling a heavy article U-2910 weighs about 29 kg. In moving the instrument, engage two persons for safe handling. Hold the instrument firmly at both sides thereof, and then move very carefully to prevent injury due to accidental dropping. -
Page 27: Installation Conditions
1.2 Installation Conditions 1.2 INSTALLATION CONDITIONS Check that the following conditions are satisfied for the installation of the spectrophotometer. 1.2.1 Power Requirements Power supply : AC 100, 115, 220, 230 or 240 V Fluctuation should be within 10% of rated voltage voltage. -
Page 28: Atmosphere, Gas
1.3.4 1.3.4 Atmosphere, Gas (1) Atmosphere should be free of acidic or alkaline gas or other gases that may corrode metal. (2) Atmosphere should also be free of vapor from organic solvents (such as benzene and thinner) that may dissolve paint. 1.3.5 Other General Conditions (1) Avoid direct sunlight (otherwise optical performance might deteriorate or the housing might be discolored). -
Page 29: Check Of Delivered Contents
1.4 CHECK OF DELIVERED CONTENTS After unpacking, check the contents of delivery against the packing list. If any part is missing or damaged, or if you have any question, contact your nearest Hitachi High-Tech Science Corporation sales representative. 1.5 ASSEMBLY... -
Page 30: Antiearthquake Measure
1.6 ANTIEARTHQUAKE MEASURE Two threaded screw holes for a clamp are provided on both the right and left sides of the body to secure the spectrophotometer with an anti-earthquake measure. Use these threaded screw holes to secure the photometer as needed. -
Page 31: Check Of Power Voltage And Fuse
1.7 Check of Power Voltage and Fuse .7 CHECK OF POWER VOLTAGE AND FUSE WARNING Contact with the power supply voltage may cause an electric shock, resulting in fatal or serious injury. Before checking the voltage and fuse, make sure the power cord is disconnected. -
Page 32: Cable Connection
1.8 CABLE CONNECTION Connect cables as indicated in Fig. 1-5. WARNING Contact with the power supply voltage may cause an electric shock, resulting in fatal or serious injury. Make sure the power switch is OFF before the cable connection, and connect the power cord last. -
Page 33: Connection Of Power Cord And Grounding Wire
1.9 Connection of Power Cord and Grounding Wire 1.9 CONNECTION OF POWER CORD AND GROUNDING WIRE Plug the power cord securely into the connector of the main unit. When using a plug adapter or an extension cord, make sure its grounding wire is connected securely to the grounding terminal. -
Page 34: Inspection After Installation/Assembly
1.10 1.10 INSPECTION AFTER INSTALLATION/ASSEMBLY The installation and assembly of the instrument are thus completed. Make a check again on the following items. (1) Is there any abnormality at the place of installation? (2) Has the sponge packing used for holding the light source switching lever during transport been removed? (3) Has the power voltage been set correctly? (4) Is the power cord connected correctly? -
Page 35: Terminating Operation
1.13 Terminating Operation 1.13 TERMINATING OPERATION On the end of the measuring, terminate the instrument according to the procedure given below. (1) Choose the termination or quitting command from the file menu. Fig. 1-7 Choose [Yes] to end UV Solution program. (2) Turn OFF the power switch on the spectrophotometer main unit. -
Page 36: Function
2. FUNCTION 2.1 OUTLINE The U-2910 spectrophotometer is an instrument for photometric analysis in the ultraviolet and visible regions. Described below are the functions of the instrument. NOTICE: Model U-2910 spectrophotometer shares parts with Model U-2900 spectrophotometer. Some switches or connectors on the instrument will not function. -
Page 37: Sample Compartment
(2) RS-232C communication port function) Fig. 2-3 Left Side Panel of Spectrophotometer (1) In Model U-2910, a computer controls this switching; the Local-Remote selector switch does not function (Selecting “Local” or “Remote” does not affect the instrument operation.) (2) Connection to RS-232C communication cable when UV Solutions control program is to be used. -
Page 38: Front Of Spectrophotometer
If such unstable lighting state repeats or still continues, take action for remedy according to the instructions described in “4.4 Trouble Shooting” (2) In Model U-2910, this knob does not function; the instrument is not provided with an LCD. 2 - 3... -
Page 39: Principle Of Operation
2.3 Principle of Operation 2.3 PRINCIPLE OF OPERATION 2.3.1 Optical System Fig. 2-5 shows the optical system of Model U-2910. The white light emitted from the light source is led to the monochromator of Seya-Namioka mount that utilizes a concave diffraction grating (with grating constant of 1/600 mm, blaze wavelength of 250 nm, and diffraction area of 20 mm ... -
Page 40: Signal Processing And Control System
2.3.2 2.3.2 Signal Processing and Control System Figure 2-6 shows the signal processing and control system. This system can be controlled either from keyboard or by an external personal computer. The optical signal converted to an electric signal by the detector is amplified and undergoes A/D conversion, after which it is log-converted by the software and becomes absorbance data. -
Page 41: Measuring Functions
2.4 Measuring Functions 2.4 MEASURING FUNCTIONS 2.4.1 Measuring Mode UV Solutions program offers measuring modes as listed below: ● Quantitative calculation ● Wavelength scan ● Time scan 2.4.2 Quantitative Calculation This spectrophotometer has a function for calculating sample concentration upon creating a calibration curve. Following are the features of this function. -
Page 42: Wavelength Scan
2.4.3 (2) Statistical calculation Calculation of mean value and standard deviation (SD) are available. (3) Determination of upper and lower limit The instrument determines upper and lower limits of data. 2.4.3 Wavelength Scan (1) The scan speed is available for setting at speeds of 10 to 3600 nm/min. -
Page 43: Baseline Correction
Data is retained even if the power is turned OFF. ● System baseline ● User baseline 2.4.7 Auto Calibration and Self-Diagnosis Functions Model U-2910 is equipped with the following auto calibration and self-diagnosis functions. (1) Memory (ROM/RAM) check (2) Wavelength drive system check... -
Page 44: Specifications
2.5 SPECIFICATIONS Table 2-1 Specifications of Model U-2910 Optical system Seya-Namioka mount, double beam Wavelength range 190 to 1100 nm Spectral bandwidth 1.5 nm Stray light Within 0.05% (220 nm NaI, 340 nm NaNO 0.3 nm (656.1 mm, 486.0 nm) Wavelength accuracy 0.1 nm... -
Page 45: Calibration Of Instrument
3. CALIBRATION OF INSTRUMENT 3.1 INTRODUCTION This chapter provides an explanatory description on the calibration of the instrument. The 0%T measurement needs a vertical axis calibration. The wavelength calibration requires a horizontal axis calibration. The 0%T measurement is essential when: ●... -
Page 46: 0%T Measurement
3.2 0%T Measurement 3.2 0%T MEASUREMENT This function corrects the 0%T. Procedure for the zero-measuring on the sample side is as follows: (1) Close the sample compartment lid tightly. (2) Click at the instrument calibration command then 0%T in the spectrophotometer menu on the measurement screen. - Page 47 (2) Choose “System” and click at [OK] button. Parameter Set at: Data mode Starting wavelength (nm) 1100 Ending wavelength (nm) Scan speed (nm/min) Response Standard WI Lamp Lamp 3 - 3...
-
Page 48: Maintenance
4.1.1 4. MAINTENANCE 4.1 MAINTENANCE AND CHECKUP 4.1.1 Purpose of Maintenance This spectrophotometer has been constructed precisely with extreme care to provide superlative accuracy in analytical operation. Only proper maintenance ensures this instrument a long-lasting high accuracy. 4.1.2 Cleaning Sample Compartment If a sample spills inside the sample compartment, immediately remove and clean the sample compartment base as shown in Fig. -
Page 49: Cleaning Spectrophotometer Cover
4.1 Maintenance and Checkup Fig. 4-2 (3) Clean the sample compartment base thus removed, and the inside of the sample compartment; otherwise, the optical performance of the instrument may be degraded. (4) After cleaning, replace the sample compartment base along the guide pins pushing the base to leave no gaps. -
Page 50: Cleaning And Storage Of Cell
This spectrophotometer has moving parts inside, which have been lubricated at the factory before shipment. If an abnormality is suspected in the internal mechanisms of the instrument, notify your local service office authorized by Hitachi High-Technologies Corporation. 4.1.6 Cleaning Transmission Window Plate of Sample Compartment If the transmission window plate of the sample compartment is contaminated, remove the plate in the following manner to clean. -
Page 51: Performance Check
4.2 Performance Check Adhesive cellophane tape Window frame (Black) (Pull out with tweezers or the like.) Optical axis Spring Window opening Transmission window plate Fig. 4-3 How to Disassemble Transmission Window Plate of Sample Compartment 4.2 PERFORMANCE CHECK Conduct following performance check after the instrument fully warms. -
Page 52: Wavelength Accuracy
4.2.1 4.2.1 Wavelength Accuracy [Summary] To conduct: measuring emission lines from the D lamp (656.1 nm, 486.0 nm), determining a wavelength having a maximum intensity, and checking the deviation between the indicated wavelength and the specified wavelength. [Procedure] ‹General tab› ... - Page 53 4.2 Performance Check 5. Choose [Edit] - [Property] - [Display tab]; and select the peak wavelength in the comment. Click OK button. (This brings, on the screen, the peak wavelength at the peak portion in the spectrum.) If needed, press the auto scaling button ( ) to change the scale.
-
Page 54: Wavelength Setting Repeatability
4.2.2 4.2.2 Wavelength Setting Repeatability [Summary] To find the dispersion of the wavelength readings over multiple measuring repeated on one emission line from the D lamp. [Procedure] 1. Choose [Edit] - [Condition setting], then, set conditions as follows: ‹General tab› ... - Page 55 4.2 Performance Check 5. Choose [Edit] - [Property] - [Display tab]; and select the peak wavelength in the comment. Click OK button. (This brings, on the screen, the peak wavelength at the peak portion in the spectrum.) If needed, press the auto scaling button ( ) to change the scale.
-
Page 56: Bandpass
4.2.3 4.2.3 Bandpass [Summary] To determine the spectral width of monochromatic light emitted from the exit slit of the monochromator in terms of the wavelength width (bandpass). [Procedure] 1. Set the measurement conditions as follows: ‹Measurement menu› Measurement mode Wavelength scan ‹Measuring condition›... -
Page 57: Noise Level
4.2 Performance Check 4.2.4 Noise Level [Summary] To determine a variation range of absorbance values measured within a short time under a predetermined measurement conditions with no sample in the sample compartment. [Procedure] 1. Choose [Edit] - [Condition setting], then, set the conditions as follows: ‹General tab›... - Page 58 4.2.4 [ Example ] Peak-to-peak value: 0.0003 Abs Noise level: ± 0.0015 Abs Peak to Peak 300 s 4 - 11...
-
Page 59: Baseline Stability
4.2 Performance Check 4.2.5 Baseline Stability [Summary] To determine a variation range of absorbance values measured in the vicinity of absorbance zero area under a predetermined fixed measurement conditions for a specified time length with no sample in the sample compartment. The variation range is determined based on the difference between maximum and minimum absorbance values excluding peaks due to single-shot noises. - Page 60 4.2.5 4. On completion of measurement, print the spectrum. If needed, click the auto-scale button ( ) before printing to print with the scale changed. Draw a line as shown below passing the center of noises, then, calculate difference between the maximum and minimum on the line.
-
Page 61: Baseline Flatness
4.2 Performance Check 4.2.6 Baseline Flatness [Summary] To determine a systematic variation range* of absorbance values measured in a specified wavelength region with no sample in the sample compartment. * The systematic variation means a variation having certain reproducibility, not including noises or other non-reproducible fluctuation. - Page 62 4.2.6 5. On completion of measurement, print the spectrum. If needed, click the auto-scale button ( ) before printing to print with the scale changed. Draw segmental lines as shown below connecting centers of noises, then, calculate difference between the maximum and minimum on the line segments. Calculate the breadth from the mid point of the difference.
-
Page 63: Troubleshooting
If the instrument does not work normally even after the remedy according to the above troubleshooting action table, contact your local sales representative or service office of Hitachi High-Technologies Corporation. WARNING This instrument has an electrical part inside that could cause a dangerous electric shock when touched. -
Page 64: Replacement Of Parts
5.2 CONSUMABLE PARTS Shown below are the consumable parts to be kept as spares. For purchasing these parts, contact your local sales representative or service office of Hitachi High-Tech Science Corporation. WI lamp Part No. 885-1200 D lamp Part No. -
Page 65: Replacement Of Light Source Lamp
5.3 Replacement of Light Source Lamp 5.3 REPLACEMENT OF LIGHT SOURCE LAMP 5.3.1 Light Source Lamp Replacement Procedure WARNING CAUTIONS in replacement of light source lamp If you touch the D lamp power supply (500 V), you may incur fatal or serious injury due to an electric shock. Before proceeding to lamp replacement, make sure that the power switch of the photometer is turned off and the power cord is unplugged. - Page 66 5.3.1 Screw P Fig. 5-2 When the cover is removed, the lamps appear as shown in Fig. 5-3. WI lamp lamp Fig. 5-3 5 - 3...
- Page 67 5.3 Replacement of Light Source Lamp (2) How to Replace the WI Lamp Loosen the retaining spring, and remove the WI lamp. When installing a new WI lamp, push the lamp deeply enough so that its root will be seated correctly. WI lamp Fig.
-
Page 68: Lamp Turn-On Time Resetting
5.3.2 (3) How to Replace the D Lamp (a) Detach the connector. lamp Connector Fig. 5-5 (b) Holding the metallic part of the D lamp, turn it counterclockwise to remove. (c) Install a new D lamp in the reverse order of removal. (4) Replace the light source cover. -
Page 69: Lamp Adjustment
5.3 Replacement of Light Source Lamp 5.3.3 Lamp Adjustment WARNING Adjustment of the light source position is usually not necessary. If however it becomes necessary to adjust the light source position, carry out the adjustment while observing the cautionary instructions given below. 1. - Page 70 If the lamp image deviates lengthwise, check the lamp mounting conditions for being in position. Make sure that the lamp is not inclined. If the lamp image deviates still, contact your local service office of Hitachi High-Tech Science Corporation. The slit is located behind this part.
- Page 71 5.3 Replacement of Light Source Lamp ③ Turn on the D lamp. Click the D lamp check box on the screen as shown in Fig. 5-6, then, a check mark appears causing the D lamp to be turned on. (2) Adjustment of D Lamp Position ①...
-
Page 72: Storage
5.4.1 Turn on the WI lamp. ③ Click the WI lamp check box on the screen as shown in Fig. 5-9, then, a check mark appears causing the WI lamp to be turned on. 5.4 STORAGE 5.4.1 After Measurement (1) Turn the power switch off, and unplug the power cord from power outlet. -
Page 73: Appendix 1. Absorption Spectrophotometry
APPENDIX 1. ABSORPTION SPECTROPHOTOMETRY The spectrophotometer is applicable to absorption analyses of liquid, solid, and gaseous samples in ultraviolet and visible spectral regions. Assuming that a monochromatic beam with intensity “ I ” travels through a liquid having concentration “ c ” across an optical path length “... -
Page 74: Appendix 2. For Proper Use Of
APPENDIX 2. FOR PROPER USE OF SPECTROPHOTOMETER 2.1 SOLVENT SELECTION For selecting a solvent in the sample preparation, make sure that the solvent satisfies following requirements: Little absorption within the measurement wavelength range. Not interactive with the solute. ... - Page 75 2.2 SPECIAL SAMPLES Note that Equations (1) and (2) indicated in APPENDIX 1 are not valid in analyzing the following samples: Fluorescing samples Samples having high turbidity In measurement of a solid sample such as glass plate, a loss (r) in optical energy occurs due to reflection on the sample surface.
-
Page 76: Index
INDEX ASCII text file ................2-8 Automatic calibration, self-diagnosis ..........2-8 Automatic readout of data ............2-7 Atmosphere, Gas ................. 1-3 Bandpass ..................4-9 Baseline correction ..............2-8 Cleaning spectrophotometer cover ..........4-2 Creation of calibration curve ............2-6 Cable connection ................. 1-7 Consumable parts ................ - Page 77 Light sources ................2-9 Light source switching ..............2-9 0%T measurement ............... 3-2 Maintenance and checkup ............4-1 Monitor tab ..........4-5, 4-7, 4-10, 4-12, 4-14 Noise level ................2-9, 4-10 Optical system ..............2-4, 2-9 Operating temperature range ............1-2 Operating humidity range .............
- Page 78 Seya-Namioka mount ............2-4, 2-9 Secondary processing of data ............2-7 Statistical calculation ..............2-7 Storage ..................5-9 Storage temperature ..............1-2 Stray light ..................2-9 Spare parts .................. 5-1 Troubleshooting action table ............4-16 Time scan ..................2-7 User baseline ................2-8 Work table strength ..............
Need help?
Do you have a question about the U-2910 and is the answer not in the manual?
Questions and answers