ICP DAS USA I-7530 Series User Manual
Uart to can bus
Hide thumbs
Also See for I-7530 Series:
- User manual (69 pages) ,
- Quick start manual (9 pages) ,
- Quick start user manual (7 pages)

Related Manuals for ICP DAS USA I-7530 Series


Summary of Contents for ICP DAS USA I-7530 Series
- Page 1 User Manual Version 1.6 Jun 2022 The UART to CAN Bus Converter (I-7530, I-7530A, I-7565, I-7530-FT, tM-7530, tM-7530A, tM-7565)
-
Page 2: Table Of Contents
Table of Contents Introduction ------------------------------------------------------------------------------------------ 5 1.1 Features and differences of CAN converter series -------------------------------------- 7 1.2 Communication Mode Description --------------------------------------------------------- 12 1.2.1 Normal mode ------------------------------------------------------------------------------ 12 1.2.2 Pair Connection mode ------------------------------------------------------------------ 14 1.2.3 Listen only mode ------------------------------------------------------------------------- 15 Hardware information of CAN converter -------------------------------------------------- 17 2.1 Specification Table ---------------------------------------------------------------------------- 17 2.2 Pin Assignment -------------------------------------------------------------------------------- 19 2.3 Block Diagram---------------------------------------------------------------------------------- 22... - Page 3 4.12 RA[CHK]<CR> --------------------------------------------------------------------------------- 70 4.13 Error Code -------------------------------------------------------------------------------------- 71 Appendix ------------------------------------------------------------------------------------------- 73 5.1 Cable selection -------------------------------------------------------------------------------- 74 5.2 I-7565 Driver Installation Instructions ---------------------------------------------------- 75 5.2.1 Verifying the installation ---------------------------------------------------------------- 79 5.2.2 Remove the driver ----------------------------------------------------------------------- 80 5.3 tM-7565 Driver Installation Instructions -------------------------------------------------- 81 5.3.1 Installing the hardware ----------------------------------------------------------------- 84 5.3.2 Verifying the installation ---------------------------------------------------------------- 87 5.3.3 Remove the driver ----------------------------------------------------------------------- 88...
- Page 4 Important Information Warranty All products manufactured by ICP DAS are under warranty regarding defective materials for a period of one year, beginning from the date of delivery to the original purchaser. Warning ICP DAS assumes no liability for any damage resulting from the use of this product.ICP DAS reserves the right to change this manual at any time without notice.
-
Page 5: Introduction
1. Introduction CAN (Controller Area Network) bus is a serial communication interface, which is highly fault-tolerant even in harsh environments with noise. Therefore, there is often a need in the industry to convert interfaces such as RS -232, RS-485, RS-422 or USB to CAN interface for communication, so CAN converters are developed. - Page 6 I-7530, I-7530A, I-7565, I-7530-FT, tM-7530, tM-7530A, tM-7565 User Manual Version 1.6 Page: Copyright © 2018 ICP DAS Co., Ltd. All Rights Reserved E-mail: service@icpdas.com...
-
Page 7: Features And Differences Of Can Converter Series
1.1 Features and differences of CAN converter series Common features: Support CAN 2.0A and CAN 2.0B specifications. According to the CAN bus specification, the maximum transmission distance is 1000 meters. Built-in Dual-Watchdog function in the module. Use software to set module parameters. ... - Page 8 Comparison table of differences between converters: I-7530-FT I-7530 I-7530A I-7565 tM-7530 tM-7530A tM-7565 CAN interface Microprocessor inside with 20 MHz Controller Microprocessor inside with 48 MHz Microprocessor inside with 48 MHz (*1) ISO- Specification ISO-11898-2 11898-3 Built-In 120Ω Built-In Built-In 120Ω...
- Page 9 I-7530-FT I-7530 I-7530A I-7565 tM-7530 tM-7530A tM-7565 UART interface 232/485/422 RS-232/485/422 RS-232 (can't be used (virtual RS-232 (can't be used (virtual COM) simultaneously COM) simultaneously) 110~115200 110~230400 Baud Rate (bps) 110~921600 110~230400 110~230400 (*1) 110~921600 (*2) 900 frames FIFO 256 bytes 256 bytes (*1) (*1) The module shell laser is marked V2, or the firmware version is after v3.90.
- Page 10 I-7530-FT I-7530 I-7530A I-7565 tM-7530 tM-7530A tM-7565 Extended function Listen only mode Don't support Support UART command string append Don't support Support timestamp (*1) User-defined CAN Don't Support baud rate (*2) support In pair connection mode, the UART command string Don't support Support append the...
- Page 11 Command timeout in pair connection Don't support Support mode (*3) (*1) Please refer to section 3.2 UART settings for the description in "Timestamp Response". (*2) Please refer to section 3.3 CAN settings for the description in "User Defined CAN Baud Rate". (*3) Please refer to Section 3.4 for the description of "Response with CAN ID", "End Characters of UART Commands", "Pair Connection Command Timeout"...
-
Page 12: Communication Mode Description
1.2 Communication Mode Description The CAN converter supports three communication modes with Normal mode, Pair connection mode and Listen only mode as below descripption. In addition, please refer to section 3.4 for the setting method of the communication mode. If you need to use the COM port software during the test, please refer to section 5.7. - Page 13 In addition, if the customer only needs to exchange CAN messages with the CAN device through the CAN converter (for example: I-7530), and does not need to know the UART command string on the UART side, the VxCAN Utility can be used to achieve this requirement.
-
Page 14: Pair Connection Mode
1.2.2 Pair Connection mode As the name suggests, this mode is designed to use two CAN converters for pair connection. The main purpose will transfer the interface from UART to CAN, and then transfer again the interface from CAN to UART, so that the interface conversion effect can be achieved without modifying the program of the field device as below figure . -
Page 15: Listen Only Mode
1.2.3 Listen only mode This mode only supports tM-7530, tM-7530A and tM-7565, and be used to monitor the messages of the CAN network without converting the message, so it will not send any CAN messages to the CAN network, such as Error Frame or ACK signal. For example, there are two CAN devices (such as I-7530 and I-7565-H2) in the communicating, and the user want to obtain CAN messages between CAN devices, the user can set the tM-7565 to listen only modee, and then connect the CAN side into the... - Page 16 Figure 1.2.3.2. Using VxCAN utility to monitor the CAN message I-7530, I-7530A, I-7565, I-7530-FT, tM-7530, tM-7530A, tM-7565 User Manual Version 1.6 Page: Copyright © 2018 ICP DAS Co., Ltd. All Rights Reserved E-mail: service@icpdas.com...
-
Page 17: Hardware Information Of Can Converter
2. Hardware information of CAN converter 2.1 Specification Table I-7530 I-7530A I-7565 tM-7530 tM-7530A tM-7565 I-7530-FT CAN interface Channels 9-pin 3-pin 7-pin screwed Connector 9-pin male D-Sub male D- spring type terminal block Baud Rate 10k ~ 10 k ~ 1 M (bps) 125k DC-DC: 3000 VDC... - Page 18 I-7530 I-7530A I-7565 tM-7530 tM-7530A tM-7565 I-7530-FT voltage brown-out protection protection protection , Over- voltage brown-out protection Power Consumpti Mechanism Installation DIN-Rail Dimension 52mm x 52mm x 52mm x 72mm x 72mm x 118mm x 33mm 86mm x 93mm x 87mm x 118mm x (W x L x H)
-
Page 19: Pin Assignment
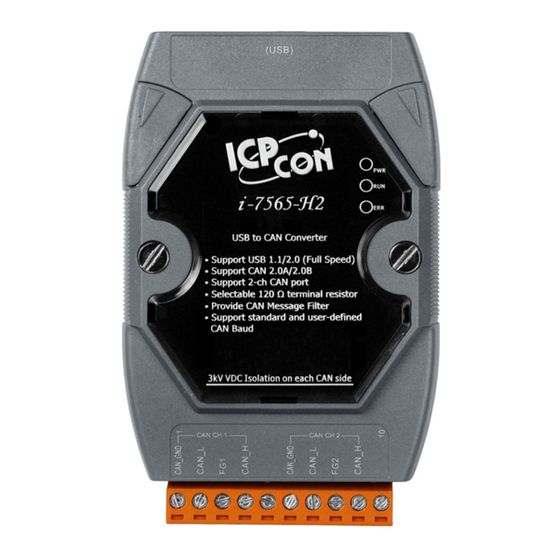
2.2 Pin Assignment RS-232 terminal of I-7530/tM-7530/I-7530-FT: Description RS-232/485/422 terminal of I-7530A: Description (Y)DATA+ (RS-485) (G)DATA- (RS-485) Tx+ (RS-422) Tx- (RS-422) Rx+ (RS-422) Rx- (RS-422) RXD (RS-232) TXD (RS-232) (B)GND (RS-232) +Vs (10 ~ 30 V Power) (B)GND (Power groud) I-7530, I-7530A, I-7565, I-7530-FT, tM-7530, tM-7530A, tM-7565 User Manual Version 1.6 Page: Copyright ©... - Page 20 CAN bus terminal (DB9 male) of I-7530 / I-7530A / I-7565 / I-7530-FT: Description CAN Low CAN GND CAN GND CAN High Power/CAN terminal of tM-7530: Description F.G. GND (Power groud) +Vs (10 ~ 30 VDC Power) Description CAN_GND CAN_H CAN_L I-7530, I-7530A, I-7565, I-7530-FT, tM-7530, tM-7530A, tM-7565 User Manual Version 1.6 Page:...
- Page 21 UART/CAN terminal of tM-7530A: CAN terminal of tM-7565: I-7530, I-7530A, I-7565, I-7530-FT, tM-7530, tM-7530A, tM-7565 User Manual Version 1.6 Page: Copyright © 2018 ICP DAS Co., Ltd. All Rights Reserved E-mail: service@icpdas.com...
-
Page 22: Block Diagram
2.3 Block Diagram I-7530 and tM-7530 provide the communication interface of CAN and RS -232, and the CAN side has isolator. Figure: Hardware block diagram of I-7530 and tM-7530 The hardware appearance of the I-7530-FT is same as the I-7530, and the main difference between the I-7530-FT and the I-7530 is compliance with different CAN specifications. - Page 23 I-7530A and tM-7530A provide four communication interfaces with CAN, RS -232, RS-485 and RS-422. Among them, RS-232, RS-485 and RS-422 are the same UART communication port, so they cannot be used at the same time. In addition, the I -7530A and tM-7530A have isolators on the CAN side.
-
Page 24: Wiring Method
2.4 Wiring method The I-7530, I-7530-FT and tM-7530 are RS-232 data communication modules, and the RS-232 interface uses a D-Sub 9-pin female terminal. The below picture will describe the wiring between the PC and the module. Figure: Connecting the I-7530, I-7530-FT or tM-7530 to a PC The UART communication port of the I-7530A has three interfaces with RS-232, RS-485 and RS-422, and the three interfaces cannot be used at the same time. - Page 25 I-7530, I-7530A, I-7565 and I-7530-FT in CAN communication port (DB9 male) pin assignment is based on CANopen DS102 introduction and the DeviceNet specification. The wiring method is as follows: Figure: I-7530 series CAN bus wiring method The CAN interface of the tM-7530 uses spring-loaded terminals, and the wiring methods as follows: Figure: tM-7530 CAN bus wiring method I-7530, I-7530A, I-7565, I-7530-FT, tM-7530, tM-7530A, tM-7565 User Manual Version 1.6...
- Page 26 tM-7530A has three interfaces, namely RS-232, RS-485 and RS-422, and the three interfaces cannot be used at the same time. The wiring method uses screw terminals as follows: Figure: tM-7530A power supply terminal and CAN bus terminal wiring Figure: tM-7530A UART terminal wiring I-7530, I-7530A, I-7565, I-7530-FT, tM-7530, tM-7530A, tM-7565 User Manual Version 1.6 Page: Copyright ©...
- Page 27 The tM-7565 uses screw terminals, which are wired as follows: Figure: tM-7565 CAN bus terminal wiring I-7530, I-7530A, I-7565, I-7530-FT, tM-7530, tM-7530A, tM-7565 User Manual Version 1.6 Page: Copyright © 2018 ICP DAS Co., Ltd. All Rights Reserved E-mail: service@icpdas.com...
-
Page 28: Terminal Resistor
2.5 Terminal resistor According to the ISO 11898 specification, in order to operate correctly the ISO 11898-2 CAN bus network, it is necessary to set terminal resistors at both ends, which is 120Ω as below figure. If there is no terminal resistor or only one terminal resistor exists on the CAN bus, it may affect the signal stability of the CAN network. - Page 29 Jumper position Status (JP4) Enable (Default) Disable Jumper position Status (JP4) Enable (Default) Disable I-7530, I-7530A, I-7565, I-7530-FT, tM-7530, tM-7530A, tM-7565 User Manual Version 1.6 Page: Copyright © 2018 ICP DAS Co., Ltd. All Rights Reserved E-mail: service@icpdas.com...
- Page 30 tM-7530 does not have a built-in terminal resistor. If the user needs to use a terminal resistor, please connect a 120 ohm terminal resistor in parallel between CAN_H and CAN_L of the CAN bus as below figure: tM-7530A has a built-in terminal resistor. If the user needs to enable the terminal resistor function, please short the CAN_H pin and the TR pin as below figure below: I-7530, I-7530A, I-7565, I-7530-FT, tM-7530, tM-7530A, tM-7565 User Manual Version 1.6 Page:...
- Page 31 The tM-7565 has built-in terminal resistors. If the user needs to enable the terminal resistor, please adjust the jumper to the 1 and 2 positions as below figure Jumper position Status (JP3) Enable (Default) Disable I-7530, I-7530A, I-7565, I-7530-FT, tM-7530, tM-7530A, tM-7565 User Manual Version 1.6 Page: Copyright ©...
-
Page 32: Init / Normal Dip Switch
2.6 Init / Normal DIP switch The Init / Normal DIP switch is used to determine the working mode of the module after it is turned on. The working mode can be divided into "Initialization Mode" or "Normal Operation Mode", which are used to set the module parameters or use it normally. - Page 33 tM-7530 tM-7530A tM-7565 I-7530, I-7530A, I-7565, I-7530-FT, tM-7530, tM-7530A, tM-7565 User Manual Version 1.6 Page: Copyright © 2018 ICP DAS Co., Ltd. All Rights Reserved E-mail: service@icpdas.com...
-
Page 34: Led Indicator
2.7 LED indicator The CAN converter provides two LED indicators to show the module in which working mode, and whether an error has occurred as below described. The I-7530, I-7530A, I-7565 and I-7530-FT provide ON LED and ERR LED, while tM-7530, tM-7530A and tM-7565 provide Run LED and Err LED. - Page 35 For the position and status display of the LED indicators in the I -7530, I-7530A, I- 7565 and I-7530-FT, please refer to the pictures and tables as below. Status of DIP switch Description Initialization mode (Init) Flashing once per second Turn on when no data needs to be send to CAN bus Normal operation mode (Normal)
- Page 36 For the position and status display of the tM-7530, tM-7530A and tM-7565 LED indicators, please refer to the pictures and tables as below. Status of DIP switch Description Initialization mode (Init) Flashing once per second Turn on when no data needs to be Normal operation mode send to CAN bus (Normal)
-
Page 37: Software For Setting And Testing (Vxcan Utility)
3. Software for setting and testing (VxCAN Utility) This chapter will describe how to use VxCAN Utility to set up CAN converters and test. The user can download VxCAN Utility from the download center in the product webpage of each CAN converter, or search and download VxCAN Utility on ICP DAS' homepage as below figure. -
Page 38: Search And Setting Interface
3.1 Search and setting interface Step 1. Before powering on the module, please switch the Init/Normal DIP switch of the module to Init, and then power on the module, and confirm that the ON LED or Run LED indicator is flashing every second once. ... - Page 39 Step 4. After the search is completed, the modules connected to the PC will be listed on the left screen of VxCAN Utility, such as I-7530, tM-7530. Among them, when the module in Init mode, and VxCAN Utility will add " -Init" information after the module name and display it in the list.
-
Page 40: Uart Setting
3.2 UART setting * Baud Rate: Set the UART baud rate. Different CAN converters have different upper baud rate limits. * Data Bit: Set the UART data bit, the CAN converters support four data bit settings. * Stop Bit: Set the UART stop bit, the CAN converters support two data bit settings. *... - Page 41 * Timestamp Response: Set the CAN converter to enable the timestamp pesponse for the UART command string which in chapter 4. The function only suppor ts modules such as tM-7530, tM-7530A and tM-7565, and only supports the communication modes are normal mode and listen only mode. If the function be set to enable, when the CAN converter converts the CAN message to a UART command string will add a timestamp of 9 ASCII characters (unit is 10us) after the string.
- Page 42 However, if the user only need to monitor CAN messages with time stamps can use VxCAN Utility to receive data from the UART, because VxCAN Utility will add timestamp regardless of whether the module supports timestamp response, which means that, in addition to tM-7530, tM-7530A and tM-7565, it can also be applied to modules such as I-7530, I-7530A, I-7565 and I-7565-FT as below Figure 3.1.2.2.
-
Page 43: Can Setting
3.3 CAN setting * CAN specification: Use the CAN specification CAN 2.0A (11-bit CAN ID) or CAN 2.0B (29-bit CAN ID). * CAN baud rate: Set the CAN baud rate, which can support 10K, 20K, 50K, 125K, 250K, 500K, 800K, 1000K and 83.3K bps. If these baud rates cannot meet the user's needs, and the special baud rates can be set th rough the "User-defined CAN baud rate"... - Page 44 * CAN ID Filter: Clicking this button will open the setting window of the CAN ID filter as below figure, the user can limited the CAN converter only receives which CAN ID messages. When the CAN converter receives the CAN message, the CAN ID filter will decide whether to check the bit value in the same position with the CAN ID according to the bit value in a certain position of acceptance mask (ACM).
- Page 45 In other words, if the ACM is set to 000, it means that all CAN ID messages are received without checking the CAN ID, and the content of the ACC can be ignored at this time. Please refer to section 5.5 for details on how the ACC and ACM are calculated.
-
Page 46: Communcation Mode Setting
3.4 Communcation mode setting This function is used to set the communication mode of the CAN converter. In normal mode, the UART interface of the CAN converter can only receive the command string as described in chapter 4. In the other word, when the CAN converter receives the CAN messages and convert to the UART interface will also displayed the command string. - Page 47 Pair Connection Mode: When the pair connection mode is selected, the setting fields on the right will expand as below figure, and the order will be explained as follows. * Fixed CAN ID: Set a fixed CAN ID. Because in the CAN network, each CAN converter must have a different CAN ID to avoid multiple converters with the same CAN ID to send CAN messages to the CAN network at the same time, and the messages of the same CAN ID to collide and cause errors.
- Page 48 * End Characters of UART Commands: The CAN converter will according to the end character to judge whether the data reception is completed. If the reception is completed, the CAN converter will add the end character to the received data and send it to the other side as below figure.
- Page 49 User-defined: This function allows the user to define the ending character, and only suppout tM-7530, tM-7530A and tM-7565. Among them, "User Defined1" and "User Defined2" can set 1 end character an d 2 end characters respectively as beolw figure, when "User Defined2" is selected and the end characters are set to 0x0D and 0x0A, when the CAN converter receive 0x0D and 0x0A, and the received data will be added to the end character and then sent to the other side.
-
Page 50: Saving And Default Value
3.5 Saving and default value After the user selects the parameters in the "setting screen", and click the "Save All Setting" button to write the parameters into the EEPROM of the CAN converter, but if the user wants to restore the parameters to the factory default values, please click the "Load Default Setting"... -
Page 51: Testing Interface
3.6 Testing interface Step 1. Set the Init/Normal of DIP switch in the CAN converter to Normal mode, and power on the CAN converter again. Step 2. Connect the COM port of the PC to the CAN converter and execute the VxCAN Utility. - Page 52 Step 6. Click the “Start” button to open the testing interface. Among them, the testing interface is divided into two areas, which are the transmission area and the reception area of CAN messages. If the user wants to send CAN messages, please fill in the data in the fields in the transmission area and click the "Send"...
-
Page 53: Uart Command String
4. UART command string When the DIP switch is in Normal and the communication mode is in normal mode, the module supports the following command strings in ASCII format that allow the user to send and receive CAN messages on the UART side through these command formats, or set module parameters. - Page 54 Set the parameter configuration of the UART P2BBDSPAE[CHK]<CR> side, but do not store it Set the parameter configuration of the CAN side, P3SBCCCCCCCCMMMMMMMM[CHK]<CR> but do not store it RA[CHK]<CR> Restart the CAN converter module I-7530, I-7530A, I-7565, I-7530-FT, tM-7530, tM-7530A, tM-7565 User Manual Version 1.6 Page: Copyright ©...
-
Page 55: Checksum Algorithm
4.1 Checksum algorithm The checksum algorithm is that convert all the characters of the command string (the first character to the characters before [CHK]) into ASCII hexadecimal values, and take out the lowest 2 digit value after adding up, and then convert this value back to an ASCII string, for example as below. -
Page 56: Tiiildd
4.2 tIIILDD…[CHK]<CR> Description: Transmit or receive standard data frame. Syntax: tIIILDD…[CHK]<CR> Represent a standard (2.0A) data frame. 11 bits Identifier (000~7FF) Data length (0~8) DD… Input data frame value according to the data length (00~FF) Response: Valid command: No response Invalid command: ?<Error Code><CR>... -
Page 57: Tiiil[Chk]
4.3 TIIIL[CHK]<CR> Description: Transmit or receive standard remote frame. Syntax: TIIIL[CHK]<CR> Represents a standard (2.0A) remote frame. 11 bits Identifier (000~7FF) Data length (0~8) Response: Valid command: No response Invalid command: ?<Error Code><CR> Note: In order to communicate with the computer to receive error information, the user must enable the "Error Response"... -
Page 58: Eiiiiiiiildd
4.4 eIIIIIIIILDD…[CHK]<CR> Description: Transmit or receive expanded data frame Syntax: eIIIIIIIILDD…[CHK]<CR> Stands for the extended (2.0B) data frame. IIIIIIII 29 bits Identifier (00000000~1FFFFFFF) Data length (0~8) DD… Input data frame value according to the data length (00~FF) Response: Valid command: No response Invalid command: ?<Error Code><CR>... -
Page 59: Eiiiiiiiil[Chk]
4.5 EIIIIIIIIL[CHK]<CR> Description: Transmit or receive expanded remote frame. Syntax: EIIIIIIIIL[CHK]<CR> Stands for the extended (2.0B) CAN remote frame. IIIIIIII 29 bits Identifier (00000000~1FFFFFFF) Data length (0~8) Response: Valid command: No response Invalid command: ?<Error Code><CR> Note: In order to communicate with the computer to receive error information, the user must enable the "Error Response"... -
Page 60: S[Chk]
4.6 S[CHK]<CR> Description: Read the CAN baud rate and error message of the CAN converter. Syntax: S[CHK]<CR> Command character. Response: Valid Command: !CFFTTRRO[CHK]<CR> Invalid command: ?<Error Code>[CHK]<CR> Delimiter for valid command current baud rate setting of CAN CAN control register, expressed as bits. - Page 61 baud rate, I-7530-FT not supported 1000K CAN baud rate, I-7530-FT not supported 83.3K CAN , I-7530-FT not supported User-defined CAN baud rate Table: CAN control register AsciiToHex(FF) Description Bit 7 Bus Off Mode Bit 6 Error Passive Mode Bit 5 Reserved Bit 4 I-7530, I-7530A, I-7565 and I-7530-FT: Overrun Buffer...
-
Page 62: C[Chk]
4.7 C[CHK]<CR> Description: Clear error flag or overload in register of CAN converter. Syntax: C[CHK]<CR> Command character Response: Valid Command: No response, and will turn the ERR LED off after the ERR LED was turned on as a result of the CAN Converter FIFO overflow error flag. Invalid command: ?<Error Code>[CHK]<CR>... -
Page 63: P0Bbdspae[Chk]
4.8 P0BBDSPAE[CHK]<CR> Description: Set the parameter configuration and storage of the UART side. Syntax: P0BBDSPCE[CHK]<CR> Command character RS-232/RS-485/RS-422/USB Baud rate Data bit 0 = 5 bits Data formation 1 = 6 bits Data formation 2 = 7 bits Data formation 3 = 8 bits Data formation Stop bit (0=1 stop bit, 1=2 stop bits) Parity (0=None, 1=Odd, 2=Even) - Page 64 Code BB Description (Only supports I-7565, tM-7530, tM-7530A and tM-7565) UART baud rate 460800 bps (Only supports I-7565 and tM-7565 after firmware version v3.9) UART baud rate 921600 (Only supports I-7565 and tM-7565 after firmware version v3.9) Response: Valid command: No response, and will automatically restart after writing the configuration parameters of the UART Invalid command: ?<Error Code><CR>...
-
Page 65: P1B [Chk]
4.9 P1B [CHK]<CR> Description: Change the CAN configuration of CAN Converter module. Module will be rebooted after saving these parameters into EEPROM successfully. Syntax: P1B[CHK]<CR> Command character CAN Baud rate Code B Description baud rate baud rate baud rate 100K baud rate 125K... -
Page 66: P2Bbdspae[Chk]
4.10 P2BBDSPAE[CHK]<CR> Description: Set the parameter configuration of the UART side such as RS - 232/RS-485/RS-422/USB, and these parameters will not be saved. When the module is restarted, these parameters will be restored to the previous settings. Syntax: P2BBDSPCE[CHK]<CR> Command character RS-232/RS-485/RS-422/USB Baud rate Data bit... - Page 67 Code BB Description UART baud rate 115200 bps UART baud rate 230400 bps (Only supports I-7565, tM-7530, tM-7530A and tM-7565) UART baud rate 460800 bps (Only supports I-7565 and tM-7565 after firmware version v3.9) UART baud rate 921600 (Only supports I-7565 and tM-7565 after firmware version v3.9) ...
-
Page 68: P3Sbccccccccmmmmmmmm [Chk]
4.11 P3SBCCCCCCCCMMMMMMMM [CHK]<CR> Description: Set the parameter configuration of the CAN side, but do not store it Syntax: P3SBCCCCCCCCMMMMMMMM[CHK]<CR> Command character CAN Specification 2.0A/2.0B CAN Baud rate CCCCCCCC CAN ID filter acceptance code (ACC) MMMMMMM CAN ID filter acceptance mask (ACM) Table: CAN baud rate Code B Description... - Page 69 Example: Command: P3040000000000000000<CR> Change CAN baud rate=125K, accept code=0x00000000, accept mask=0x00000000. When the module is rebooted, the parameters are restored to previous settings. I-7530, I-7530A, I-7565, I-7530-FT, tM-7530, tM-7530A, tM-7565 User Manual Version 1.6 Page: Copyright © 2018 ICP DAS Co., Ltd. All Rights Reserved E-mail: service@icpdas.com...
-
Page 70: Ra[Chk]
4.12 RA[CHK]<CR> Description: Restart the CAN converter module. Syntax: RA[CHK]<CR> Command character Response: Valid command: No response, and will reboot the CAN converter module. Invalid command: ?<Error Code><CR> Note: In order to communicate with the computer to receive error information, the user must enable the "Error Response"... -
Page 71: Error Code
4.13 Error Code If the CAN converter has enabled the "Error Response" function of the UART setting in section 3.2, the CAN converter will reply error messages to the device or computer via RS-232/RS-485/RS-422/USB. The meaning of the error code message as below table: Table: Error code Error... - Page 72 are as follows: CAN connection problems. terminal resistance problems. problems with different CAN baud rates. I-7530, I-7530A, I-7565, I-7530-FT, tM-7530, tM-7530A, tM-7565 User Manual Version 1.6 Page: Copyright © 2018 ICP DAS Co., Ltd. All Rights Reserved E-mail: service@icpdas.com...
-
Page 73: Appendix
5. Appendix This chapter attaches common problems and solutions to help users quickly to check problems. I-7530, I-7530A, I-7565, I-7530-FT, tM-7530, tM-7530A, tM-7565 User Manual Version 1.6 Page: Copyright © 2018 ICP DAS Co., Ltd. All Rights Reserved E-mail: service@icpdas.com... -
Page 74: Cable Selection
5.1 Cable selection The CAN bus is a balanced (differential) 2-wire interface running over either a Shielded Twisted Pair (STP), Un-shielded Twisted Pair (UTP), or Ribbon cable. The CAN-L and CAN-H wire start on one end of the total CAN network that a terminator resistor of 120 Ohm is connected between CAN-L and CAN-H. -
Page 75: I-7565 Driver Installation Instructions
5.2 I-7565 Driver Installation Instructions This chapter will describe how to install the driver for the I -7565 converter on Windows XP, 2000, ME, 98 (NT not yet supported) operating platforms. Among them, the driver can be downloaded from the Download Center of the I -7565 product webpage. - Page 76 4. The "Install Hardware Device Drivers" window will appear on the screen. After selecting "Search for a suitable driver for my device [recommended]", click "Next" to search for the most suitable driver for the new device. 5. After selecting the "Specify a location" option, click "Next" to start to search. I-7530, I-7530A, I-7565, I-7530-FT, tM-7530, tM-7530A, tM-7565 User Manual Version 1.6 Page: Copyright ©...
- Page 77 6. For the file path, please select this folder win2k_xp, and this folder will be in the folder of the driver you downloaded, and then click "OK" to start to search. 7. After Windows has found the correct driver, click "Next" to start to install the driver. I-7530, I-7530A, I-7565, I-7530-FT, tM-7530, tM-7530A, tM-7565 User Manual Version 1.6 Page: Copyright ©...
- Page 78 8. Windows will install the USB-to-Serial driver, and notify that the installation is complete after the installation is complete. At this time, please click "F inish" and re- plug the USB cable. I-7530, I-7530A, I-7565, I-7530-FT, tM-7530, tM-7530A, tM-7565 User Manual Version 1.6 Page: Copyright ©...
-
Page 79: Verifying The Installation
5.2.1 Verifying the installation This chapter explains how to verify whether the I-7565 has been installed and confirm the virtual COM port number assigned to the I-7565 by Windows. Please connect the USB port of the I-7565 to the USB port of the computer, and then perform the following steps: 1. -
Page 80: Remove The Driver
5.2.2 Remove the driver The steps to remove the driver for the I-7565 as below: 1. Execute the removal program dremover98_2K.exe in the driver folder. 2. When you want to remove the utility, and the Uninstaller will prompt you click "OK" to continue. -
Page 81: Tm-7565 Driver Installation Instructions
5.3 tM-7565 Driver Installation Instructions This chapter will describe how to install the driver (x32, x64) of tM -7565 on Windows XP, Windows 7, Windows 10 operating system. Among them, the driver can be downloaded from the Download Center of the tM-7565 product webpage. The product webpage as below: https://www.icpdas.com/en/product/tM-7565 Next will explain how to install the driver in Windows XP. - Page 82 4. In this step, you can choose whether to create a desktop shortcut. If you need to create a desktop shortcut, please check the "Create a desktop shortcut" option, and then click the "Next" button, if you do not need to create a desktop shortcut, please click the "Next"...
- Page 83 6. After the driver installation is complete, please click the "finish" button. I-7530, I-7530A, I-7565, I-7530-FT, tM-7530, tM-7530A, tM-7565 User Manual Version 1.6 Page: Copyright © 2018 ICP DAS Co., Ltd. All Rights Reserved E-mail: service@icpdas.com...
-
Page 84: Installing The Hardware
5.3.1 Installing the hardware The hardware installation will install twice, once for the hardware driver and once for the virtual COM port driver. The detailed steps as below: 1. Connect the USB port of the tM-7565 to the USB port of the computer. 2. - Page 85 4. Select “Don’t search. I will choose the driver to install” and click the “Next” button. 5. Select "ICPDAS tM-7565 USB-To-CAN Converter" and click the "Next" button. I-7530, I-7530A, I-7565, I-7530-FT, tM-7530, tM-7530A, tM-7565 User Manual Version 1.6 Page: Copyright © 2018 ICP DAS Co., Ltd. All Rights Reserved E-mail: service@icpdas.com...
- Page 86 6. During the installation process will appear the following warning message, please click the "Continue Anyway" button. 7. After the installation is complete, please click the "finish" button. I-7530, I-7530A, I-7565, I-7530-FT, tM-7530, tM-7530A, tM-7565 User Manual Version 1.6 Page: Copyright ©...
-
Page 87: Verifying The Installation
5.3.2 Verifying the installation This chapter explains how to verify whether the tM-7565 has been installed and confirm the virtual COM port number assigned to the tM-7565 by Windows. Please connect the USB port of the tM-7565 directly to the USB port of the computer, and then perform the following steps: 1. -
Page 88: Remove The Driver
Remove the driver 5.3.3 The steps to remove the driver for the tM-7565 as below: 1. "Control Panel" "Add Remover", and then click the "Remove" button. 2. After uninstalling the installer will appear a prompt window, and please click the "Yes" and "Yes to All"... -
Page 89: Calculation Of User-Defined Can Baud Rate
5.4 Calculation of user-defined CAN baud rate This chapter explains how to calculate the "user-defined CAN baud rate" when the user uses an old version of the tool software (CAN Converter Utility) for setting, and the calculation only support I-7530, 7530A and I-7565, but not for I-7530 (v2 version), I- 7530A (v2 version), I-7565 (v2 version), tM-7530, tM-7530A, tM-7565, I -7530-FT and I- 7530-FT (v2 version). -
Page 90: Parameter Description
5.4.2 Parameter description The Bit Timing register of MCU contains 6 kinds of parameters, namely BPR, SJW, PRS, PHS2, PHS1 and SMP as below table: Table: Bit Timing Register Bit 7 Bit 6 Bit 5 Bit 4 Bit 3 Bit 2 Bit 1 Bit 0 register... - Page 91 The formula as below: Number of Time Slices (TQ) = System Clock (Hz) / CAN Baud Rate (bps) For example: when the system clock is 20MHz and the CAN baud rate is 40K bps, the number of time slices (TQ) is 20(MHz) / 40(Kbps) = 500, that is to say that one bit of the time width Tbit is divided into 500 time slices in the CAN converter, and these time slices are allocated to Tsyns, Tprs, Tphs1 and Tphs2.
- Page 92 In addition, when Tbit is fixed at 500, the maximum value of (4 + PRS + PHS1 + PHS2) is limited to 25, and the maximum value of BRP in the register Bit Timing 1 i s 63, so (4 + PRS + PHS1 + PHS2) will be in the range of 8~25, and (BRP + 1) will be in the range of 20~62, that is to say, the range of BRP will be in the range of 19~61.
- Page 93 Therefore, if PHS1 is 7, then PRS will be 2. Next, if PHS1 and PRS are brought into the formula of (4 + PRS + PHS1 + PHS2) = 20, then PHS2 = 20 - 4 - 2 - 7 = 7. That is to say, the user can calculate the value of BRP from the number of time slices included in the time width of one bit, and calculate the values of PRS, PHS1 and PHS2 from the sampling point.
-
Page 94: Example Description
5.4.3 Example description If the user want to use the user-defined CAN baud rate is 40K bps and the sampling point is 60%, because the CAN baud rate is greater than 12Kbps, the clock mode needs to be set to 1. However, when Clock Mode is set to 1, the MCU will use X2 mode, which means the system clock is 20MHz. - Page 95 If we fix (4 + PRS + PHS1 + PHS2) to 20, the BRP value is: / (BRP + 1) = (4 + PRS + PHS1 + PHS2) * TQ 500 / (BRP + 1) = 20 500 / 20 = (BRP + 1) = 25 ...
- Page 96 4. Generally, both SJW and SMP are set to 0. Among them, when SMP is 0, it will be sampled once, and when SMP is 1, it will be sampled three times, and the sampling time interval must be greater than 1/2 Tscl period, and the final result is determined by a majority of three values.
-
Page 97: Can Id Filter Setting
5.5 CAN ID filter setting The CAN converter can be set to filter the CAN messages of some CAN IDs, so that these CAN messages will not be transmitted to the RS -232/485/422/USB port. If the user want to enable this function need to adjust parameters such as acceptance code (ACC) and acceptance mask (ACM). -
Page 98: Application Of Pair Connection Mode
5.6 Application of Pair Connection mode The pair connection mode usually requires two identical sets of CAN converter modules. For example, when two sets of I-7530s are set to pair connection mode, one set of I-7530s will convert RS-232 commands into CAN messages and transmit them, while the other set of I-7530s will transmit CAN messages to RS-232, and the setting of each application will be explained as below. - Page 99 Communication description: For example, if device 1 sends 7 bytes of data ""1234567"" to I-7530 module #1, I- 7530 module #1 then forwards it to I-7530 module #2, and finally I-7530 Module #2 will send to the COM port of Device 2, and Device 2 will receive the data ""1234567"". The CAN ID in the above picture needs the user to set a fixed CAN ID, and the "Fixed CAN ID"...
- Page 100 Application 2: The structure of this application is same with Application 1, as shown below figure, the difference is that "CR" is selected for the End Characters of UART Commands. Setting: In this application, the user needs to set up 2 sets of CAN converters, as sh own in the above I-7530 module #1 and module #2, and select "CR"...
-
Page 101: Com Port Software
5.7 COM port software Users can use the common communication port (COM port) software to transmit and receive the data of the CAN converter on the UART side, or use VxComm Utility of ICP DAS to test. The information of VxComm Utility as below. I-7530, I-7530A, I-7565, I-7530-FT, tM-7530, tM-7530A, tM-7565 User Manual Version 1.6 Page: Copyright ©...
Need help?
Do you have a question about the I-7530 Series and is the answer not in the manual?
Questions and answers