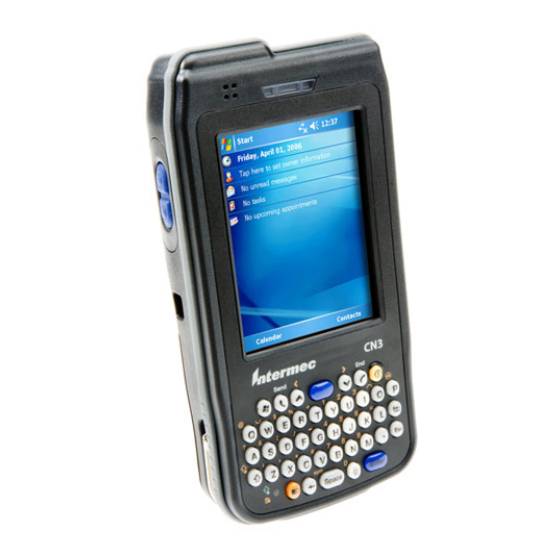
Intermec CN3 Series User Manual
Intermec cn3: user guide
Hide thumbs
Also See for CN3 Series:
- User manual (216 pages) ,
- Instructions manual (32 pages) ,
- Quick start manual (20 pages)
Table of Contents
Advertisement
Quick Links
Advertisement
Table of Contents
Troubleshooting

Related Manuals for Intermec CN3 Series


Summary of Contents for Intermec CN3 Series
- Page 1 User’s Manual CN3 Series Mobile Computer...
- Page 3 User’s Manual CN3 Series Mobile Computer...
- Page 4 Intermec Technologies Corporation. Information and specifications contained in this document are subject to change without prior notice and do not represent a commitment on the part of Intermec Technologies Corporation. © 2008 by Intermec Technologies Corporation. All rights reserved.
- Page 5 Document Change Record This page records changes to this document. The document was originally released as Revision 001. Version Number Date CN3 Series Mobile Computer User’s Manual Description of Change 01/2007 Added information about the InstallSelect application, the clean boot method, the color camera, and the CDMA radios.
- Page 6 CN3 Series Mobile Computer User’s Manual...
-
Page 7: Table Of Contents
Introducing the CN3 Mobile Computer........2... - Page 8 Setting Up GPS on Your CN3 ......... 27 Using the GPSID Installed on the CN3 ......28 Learning About Additional GPS Options for the CN3 .
- Page 9 Configuring the Computer Parameters ........48 Configuring the Computer With Intermec Settings ....48 Remotely Configuring the Computer Using SmartSystems Foundation .
- Page 10 Warm Booting the CN3 ........
-
Page 11: Before You Begin
Global Services and Support Warranty Information To understand the warranty for your Intermec product, visit the Intermec web site at Returns and Repairs > Warranty. Disclaimer of warranties: The sample code included in this document is presented for reference only. -
Page 12: Web Support
Before You Begin Web Support Visit the Intermec web site at our current manuals (in PDF). To order printed versions of the Intermec manuals, contact your local Intermec representative or distributor. Visit the Intermec technical knowledge base (Knowledge Central) at Central to review technical information or to request technical support for your Intermec product. -
Page 13: Service Location Support
This manual provides you with information about the features of the CN3 and CN3e, and how to install, configure, operate, maintain, and troubleshoot it. Before you work with the CN3 or CN3e, you should be familiar with your network and general networking terms, such as IP address. -
Page 14: Related Documents
Before You Begin Related Documents This table contains a list of related Intermec documents and their part numbers. Document Title Intermec Computer Command Reference Manual TE 2000 Terminal Emulation Programmer’s Guide 235-099-001 The Intermec web site at documents (as PDF files) that you can download for free. - Page 15 6375075; 6375076; 6375344; 6431451; 6435411; 6484944; 6488209; 6497368; 6532152; 6538413; 6539422; 6621942; 6641046; 6681994; 6687403; 6688523; 6732930 Docking Station/Device 5052943; 5195183; 5317691; 5331580; 5544010; 5644471 There may be other U.S. and foreign patents pending. CN3 Series Mobile Computer User’s Manual xiii...
- Page 16 Before You Begin CN3 Series Mobile Computer User’s Manual...
-
Page 17: Using The Computer
Using the Computer This chapter introduces the CN3 and CN3e Mobile Computers with Windows® Mobile® 5.0. It also contains hardware and software configuration information to assist you in getting the most out of your computer. CN3 Series Mobile Computer User’s Manual... -
Page 18: Introducing The Cn3 Mobile Computer
The CN3 Series of mobile computers includes both the CN3 and CN3e computers. Throughout this manual, both versions of the computer are referred to as CN3 or CN3 Series. CN3 and the CN3e Mobile Computer The CN3 Mobile Computer with an IEEE 802.11b/g radio... -
Page 19: What's New
• Wireless Wide Area Network Options: • GSM/GPRS/EDGE • CDMA/1xRTT/EV-DO Use this manual to understand how to use the features and options available on the CN3 and CN3e. What’s New? This version of the manual contains these changes: • Addition of the CN3e alphanumeric keypad. -
Page 20: Using The Battery
If you fail to replace the low battery immediately, you may lose important data or applications. Note: If the CN3 is not on external power and you remove the battery pack, it goes into Suspend mode. Dispose of used batteries promptly. Keep away from children. -
Page 21: Removing And Installing The Battery
CN3 Single Dock Removing and Installing the Battery To maximize the time allowed to replace the main battery pack, put the CN3 in a suspend mode before removing the battery pack. To remove and install the battery 1 Press and hold the Power button for about 2 seconds until the CN3 turns off. -
Page 22: Maximizing Battery Life
Maximizing Battery Life Batteries are chemical devices. If the batteries are left sitting on a shelf for long periods of time outside the CN3, the batteries slowly discharge, eventually to zero if left uncharged. The battery chemistry resists normal degradation if you store the battery in a charger as opposed to leaving the battery in a discharged state. -
Page 23: Checking The Battery Status
Store the battery outside the CN3. Checking the Battery Status The Battery Status LED above your CN3 display, as shown in the following illustration, indicates the status of your battery. See the following table to understand the meanings of the lights emitted from the LED. - Page 24 The software is not working properly. The battery is missing or is unable to charge because the temperature is outside of the charging range. The CN3 is not on external power and the battery is operating normally. CN3 Series Mobile Computer User’s Manual...
-
Page 25: Using The Keypad
Using the Keypad The CN3 can have a QWERTY keypad or numeric keypad. The CN3e supports larger numeric keypads with either a 10-key (7-8-9 on top) or phone style (1-2-3 on top) layout. CN3 Qwerty Keypad Send CN3e Numeric 10-Key Keypad CN3 Series Mobile Computer User’s Manual... -
Page 26: Using The Color-Coded Keys
The CN3e provides larger input keys better suited for blind entry or glove usage. Using the Color-Coded Keys Each keypad available for the CN3 provides color-coded keys to let you access additional characters, symbols, and functions printed on the keypad overlay. Once you understand how to use the color-coded keys and key sequences, you can access all of the additional features printed on the keypad overlay. -
Page 27: Capitalizing Characters
• On the CN3 numeric keypad, press C 1. • On the CN3e keypads, press C C 1. The Caps Lock LED lights up green to show that the CN3 is in the Caps Lock mode. To exit Caps Lock •... -
Page 28: Entering Characters On The Qwerty Keypad
Using the Power Button When you press the Power ( lower power mode. In this lower power mode, the CN3 continues to supply power to all memory, but turns off power to most hardware such as the display. This power-saving feature is designed to prolong battery life. -
Page 29: Configuring The Backlight Settings
Configuring the Backlight Settings By default, the CN3 goes into Screen Off mode when there is no activity on the computer. Screen Off mode turns off the backlight and display. Press a key or tap the screen to resume activity. -
Page 30: Managing Power On The Cn3
Chapter 1 — Using the Computer Managing Power on the CN3 By default, the CN3 goes into a lower power mode or turns off after two minutes of inactivity. You can press the Power button to resume activity at any time. If you would like to manage power... - Page 31 Use the Windows Mobile Phone profile when you have a system that requires network wakeup or you need the CN3 to always be connected to the network. Although the connections are maintained at a low power mode, this setting typically consumes the most power.
-
Page 32: Understanding The Audio Features
Using the CN3 as a Cell Phone If your version of the CN3 has a phone, you can use the microphone and a front speaker for talking on the phone. To adjust the volume of the front speaker 1 Tap the Volume ( 2 In the Volume adjust box, tap On. -
Page 33: Adjusting The Volume Of The Rear Speaker
(default). Use the following table to understand the different ways to adjust the volume. Volume up Location of the Rear Speaker and Volume Control CN3 Series Mobile Computer User’s Manual Chapter 1 — Using the Computer Phone volume slider Volume down... - Page 34 Intermec Settings, see the Intermec Computer Command Reference Manual (P/N 073529) available from the Intermec web site. The CN3 has a built-in vibrate feature that enables you to receive scanner feedback despite the noise level. When enabled, the CN3 vibrates when the scanner performs a good read or when the phone receives a call.
-
Page 35: Using The Screen
CN3 ( mode. Using the Screen The CN3 has a 3.5" diagonal, 240x320 pixel (QVGA) transflective TFT-LCD 64K color display. • The Navigation bar displays the Start flag, the Connectivity icon, the Volume icon, and the time and next appointment. -
Page 36: Using The Stylus
The 802.11b/g radio is connected to the wireless network. The computer is connected through the USB port to your desktop PC. The iConnect application icon. Tap it to set up Ethernet or Wireless settings. CN3 Series Mobile Computer User’s Manual... -
Page 37: Aligning The Touch Screen
Chapter 1 — Using the Computer 125. Good Read LED and Intermec Ready-to-Work indicator Battery status LED Color Description Orange The CN3 is notifying you of a pending alarm or message. Green The CN3 has successfully decoded a bar code. “Clean... -
Page 38: Scanning Bar Codes
Note: The blue light may stay on for up to 30 seconds, but will usually turn off after less than 10 seconds. During this time, do not toggle the CN3 on or off and do not remove the battery, or you may corrupt the CN3. -
Page 39: Scanning With The Area Imager
Scanning with the Area Imager The CN3 has an area imager that can scan 1D and 2D bar code symbologies, composite, and postal codes. It also supports omni- directional (360°) scanning where you can position the CN3 in any orientation to scan a bar code label. Using the 2D imager is like taking a picture with a digital camera. -
Page 40: Using The Color Camera
Tap Data Collection > Internal Scanner > Imager Using the Color Camera The color camera with flash is an optional feature that is factory- installed into the upper back of the CN3, as shown in the following illustration. Color camera Color Camera and Flash Settings >... - Page 41 You can use the Pictures & Videos application on the CN3 to take, view, and edit pictures or record and launch video clips stored on the CN3 or a storage card. You can also send pictures and video clips to others or save an image as the background on the Today screen.
-
Page 42: Using The Storage Card
3 Tap ok. Using the Storage Card The CN3 uses a miniSD card to increase file storage and install software. The miniSD card slot is located under a door that is beneath the battery pack. Remove the two screws holding the door to reach the miniSD card. -
Page 43: Setting Up Gps On Your Cn3
5 Replace the battery pack and then press the Power button. Once the door to the miniSD is opened and closed (for changing, installing, or removing the SIM or miniSD card), the CN3 performs a cold boot. Setting Up GPS on Your CN3... -
Page 44: Using The Gpsid Installed On The Cn3
• Provides access to GPS data without requiring applications to recognize and parse NMEA syntax. Using the GPSID Installed on the CN3 To use the GPSID installed on your CN3, you need to configure the GPSID settings. To configure your GPSID settings 1 Tap Start >... - Page 45 5 Tap the Access tab and select the Manage GPS automatically check box. 6 Tap ok. To enable extended ephemeris 1 Tap Start > Settings > the System tab. 2 Tap iGPS settings. The iGPS Settings screen appears. 3 Tap the Advanced tab. CN3 Series Mobile Computer User’s Manual...
-
Page 46: Learning About Additional Gps Options For The Cn3
Intermec provides enhanced feature support for the Extended Ephemeris data capability. For the latest Extended Ephemeris data files and other CN3 downloads, visit the CN3 downloads page on the Intermec web site at www.intermec.com. For more information about programming for Extended Ephemeris GPS, visit the Intermec Developer Library at www.intermec.com/idl. -
Page 47: Windows Mobile
Pocket PC. In this chapter you will find these sections: • Understanding Windows Mobile 5.0 • Finding Information on Windows Mobile • Learning the Basic Skills • Using Microsoft ActiveSync • Using Internet Explorer Mobile CN3 Series Mobile Computer User’s Manual... -
Page 48: Understanding Windows Mobile 5.0
Understanding Windows Mobile 5.0 This chapter introduces Microsoft Windows Mobile 5.0. While using the CN3, keep these key points in mind: • Tap Start on the navigation bar, located at the top of the screen, to quickly move to programs, files, and settings. Use the command bar at the bottom of the screen to perform tasks in programs. -
Page 49: Learning The Basic Skills
CN3. Today Screen When you turn on your CN3 for the first time each day (or after four hours of inactivity), you see the Today screen. You can also display it by tapping Start > Today. On the Today screen, you can see important information for the day. -
Page 50: Accessing Programs
The command bar is located at the bottom of the screen. Use the command bar to perform tasks in programs. The command bar includes menu names, functions, and the Input Panel icon when needed. Windows Mobile Command Bar “Adjusting Settings” on page CN3 Series Mobile Computer User’s Manual... -
Page 51: Using Pop-Up Menus
1 Tap the Input Panel icon ( 2 Tap the arrow next to the Input Panel icon to see your choices. CN3 Series Mobile Computer User’s Manual Chapter 2 — Windows Mobile Use Microsoft ActiveSync to synchronize or copy information between your desktop PC and the computer. -
Page 52: Typing With The Onscreen Keyboard
To tap multiple uppercase letter or symbols, tap the CAP key. To use larger keys 1 Tap the input panel arrow and then tap Options. 2 On the Input Method tab, select Large keys. CN3 Series Mobile Computer User’s Manual... -
Page 53: Using Block Recognizer
Unlike Letter Recognizer and Clock Recognizer, you can write an entire sentence of information. To use Transcriber 1 Tap the input panel arrow and then tap Transcriber. 2 Tap ok. CN3 Series Mobile Computer User’s Manual Chapter 2 — Windows Mobile... -
Page 54: Selecting Typed Text
You can edit and format what you have written and convert the information to text in the future. To convert the writing to text 1 Write your information on the screen with the stylus. menu and select a command. bar. CN3 Series Mobile Computer User’s Manual... -
Page 55: Notifications
For example, if you have set up an appointment in Calendar, you can be notified in any of the following ways: CN3 Series Mobile Computer User’s Manual Chapter 2 — Windows Mobile... -
Page 56: Finding And Organizing Information
2 Choose your settings and then click ok. Finding and Organizing Information You can use File Explorer to find files on your computer and organize these files into folders. To open File Explorer • Tap Start > Programs > File Explorer. CN3 Series Mobile Computer User’s Manual... -
Page 57: Customizing The Computer
To view the Settings options • Tap Start > Settings > either the Personal tab or the System tab. You might want to adjust settings on the following screens. CN3 Series Mobile Computer User’s Manual Chapter 2 — Windows Mobile... - Page 58 Chapter 2 — Windows Mobile Personal Tab System Tab Adjustable Settings on the Computer Setting Menus Owner Information To enter your contact information. Why Adjust It? To customize what appears on the Start menu. CN3 Series Mobile Computer User’s Manual...
-
Page 59: Adding Or Removing Programs
Flash ROM. See Computer” on page 104 Store. You can install any program created for the CN3 mobile computer, as long as there is enough memory. A popular place to find software for your computer is on the Windows Mobile Web site (www.microsoft.com/windowsmobile/resources/... - Page 60 Once you have set up ActiveSync and completed the first synchronization process, you can initiate synchronization from your computer. To open ActiveSync on your computer • Tap Start > Programs > ActiveSync. ActiveSync opens and shows you the synchronization status. CN3 Series Mobile Computer User’s Manual...
-
Page 61: Using Internet Explorer Mobile
2 Tap Start > Internet Explorer. The default page that appears when you open Internet Explorer contains links to Intermec- specific information and to the Windows Mobile web site. - Page 62 Chapter 2 — Windows Mobile Default Internet Explorer Web Page CN3 Series Mobile Computer User’s Manual...
-
Page 63: Configuring The Computer
Configuring the Computer Use this chapter to understand how to configure the CN3 to communicate in your network. In this chapter, you will find these sections: • Configuring the Computer Operating Parameters • Configuring Personal Area Networks • Configuring Local Area Networks •... -
Page 64: Configuring The Computer Parameters
You can access Intermec Settings while running any application. To open Intermec Settings • Tap Start > Settings > the System tab > Intermec Settings. For detailed information on most of the commands available in Intermec Settings, see the Intermec Computer Command Reference Manual (P/N 073529) on the Intermec web site. -
Page 65: Remotely Configuring The Computer Using Smartsystems Foundation
Network time servers acquire Coordinated Universal Time (UTC) from an outside source such as the U.S. Naval Observatory (USNO). The CN3 uses Simple Network Time Protocol (SNTP) to synchronize with a network time server. - Page 66 Bluetooth Resource Kit and the Bluetooth Resource Kit User’s Guide which is part of the Intermec Developer Library (IDL). The IDL is available as a download from the Intermec web site at www.intermec.com/idl. You can send and receive information to a Bluetooth device wirelessly using the Bluetooth radio in the computer.
- Page 67 However, you must reactivate connections because they are not done automatically. You can also use Intermec Settings to turn on the radio and enable Bluetooth settings. Use this table to understand the settings you see in the Bluetooth menu in Intermec Settings.
-
Page 68: Configuring The Computer To Communicate With A Wireless Scanner
To connect to the wireless scanner using the association label 1 Using your wireless scanner, scan the Bluetooth association label on the side of the CN3. 2 The CN3 prompts you to enter the passcode for your scanner. The default passcode for Intermec Bluetooth scanners is 0000. - Page 69 7 Tap Next. The computer connects to the scanner and displays the remote device information. 8 Tap Finish. 9 Refresh Intermec Settings to see the Bluetooth scanner under Data Collection. You can now view and modify any symbology settings. To remove a wireless scanner from the computer 1 Select Start >...
-
Page 70: Configuring Bluetooth Communications For Wireless Printing
• Helps you select the current wireless printer • Stores the current wireless printer in the registry • Registers/deregisters the wireless printing COM port “Configuring Personal Area Networks” on page “Selecting the Current Wireless Printer on the CN3 Series Mobile Computer User’s Manual... -
Page 71: Selecting The Current Wireless Printer On The Computer
• Choosing the printer from a list of previously discovered printers To discover the printer with Bluetooth device discovery 1 Select Start > Settings > the Systems tab > Wireless Printing. The Wireless Printing wizard appears. CN3 Series Mobile Computer User’s Manual Chapter 3 — Configuring the Computer... - Page 72 4 Tap Print Test Page. The printer prints out the test page. To choose the printer from a list of previously discovered printers 1 Make sure you have already performed a Bluetooth device discovery. CN3 Series Mobile Computer User’s Manual...
-
Page 73: Connecting To A Bluetooth Audio Device
To connect to a Bluetooth headset 1 Select Start > Settings > Control Panel > Bluetooth Audio. 2 Tap Search for Devices. The CN3 searches for audio devices. 3 When searching for a device, select Yes when you are prompted to add a device to your list. -
Page 74: Configuring Local Area Networks
Chapter 3 — Configuring the Computer Configuring Local Area Networks Your CN3 is a versatile mobile computer that easily adds to your wired or wireless data collection network. You can connect your computer to a network using: • USB communications. -
Page 75: Configuring 802.11 Radio Communications
Configuring 802.11 Radio Communications The CN3 Mobile Computer may have an internal 802.11 b/g radio to transfer data using wireless communications. This section of the manual assumes that you have already set up your wireless communications network including your access points. -
Page 76: Configuring The Network Parameters For A Udp Plus Network
• Network name (SSID) • IP settings (if not using DHCP) 3 Make sure the CN3 is talking to the network and that the network can see the CN3. 4 Configure security. For help, see the Wireless Network” on page The easiest way to configure the network parameters on the CN3 is to use Intermec Settings. -
Page 77: Checking The Status Of Your Wireless Connection
ISpyWiFi to scan for access points in your network and ping for detailed information. The ISpyWiFi utility is installed in your CN3 as an executable. You can either start the utility using File Explorer or create a shortcut to start the utility from the CN3 desktop. - Page 78 2 Navigate to the Windows folder and scroll down to find ISpyWiFi. 3 Double-tap ISpyWifi. To add an ISpyWiFi shortcut to the CN3 Programs folder 1 Press and hold your stylus on the ISpyWiFi executable until the pop-up menu appears.
- Page 79 8 Tap Shortcut to ISpyWiFi to open the utility. To view the ISpyWiFi tab • Tap the ISpyWiFi tab. The ISpyWiFi tab contains network interface, configuration, access point, and radio frequency information. The ISpyWiFi Tab CN3 Series Mobile Computer User’s Manual Chapter 3 — Configuring the Computer...
- Page 80 Diversity (multiple antennas, Primary (one antenna) Transmit power level in milliwatts (mW). The Received Signal Strength Indicator. The closer to zero, the better for this indicator. The data rate at which the radios are communicating. CN3 Series Mobile Computer User’s Manual...
- Page 81 Use the Supplicant tab to view information on security and authentication settings that you have configured on the CN3. The Supplicant Tab To use the Supplicant tab • Click Configure Profile to launch the Profile Wizard and configure 802.11 options.
- Page 82 • Tap Graph to toggle to the graphical view of 25 of the most recent pings and their response results, like in the following sample graph: CN3 Series Mobile Computer User’s Manual...
-
Page 83: Configuring The Phone
The CN3 supports two types of cellular phone technology: • CDMA EV-DO Rev 0 • GSM/EDGE With a radio module installed in the CN3, you can send and receive telephone calls as well as transmit data through wide-area (WAN) cellular networks. -
Page 84: Activating The Cdma Phone
Activating the CDMA Phone The CDMA WAN radio module is installed at the factory. To activate your CDMA CN3 device, you need to contact the carrier you have chosen and set up accounts for each device. Use the following table to view the carriers that Intermec currently supports. - Page 85 Activation Wizard Zealand Telus Dial *22803 Verizon Dial *22899 CN3 Series Mobile Computer User’s Manual Chapter 3 — Configuring the Computer Activation Values You Need None - all parameters are automatically transferred wirelessl.y The Activation Wizard is disabled for Alltel.
-
Page 86: Activating The Gsm/Edge Phone
CN3. For more information, please contact your local Intermec representative. To insert the SIM card 1 Press the Power button to suspend the CN3, and then remove the battery pack from the back of the CN3. 2 Remove the two screws from the miniSD/SIM door. -
Page 87: Connecting To An Isp
2 Under My ISP, tap Add a new modem connection. 3 Enter a name for the connection, such as “ISP Connection.” 4 If using an external modem connected to your CN3 with a cable, select Hayes Compatible on COM1 from the Select a modem drop-down list. -
Page 88: Connecting To A Private Network With A Ras Account
Connecting to a Private Network With a RAS Account If you have access to a network at work, you can send e-mail messages, view intranet pages, synchronize your CN3, and possibly access the Internet. Create a modem connection through a RAS (Remote Access Server) account. Before you can create this modem connection, your network administrator needs to set up a RAS account for you. - Page 89 3 Enter a name for the connection, such as “Company Connection.” 4 Select your modem type. • If using an external modem connected to your CN3 with a • If using any type of external modem, select the modem by 5 Tap Next.
-
Page 90: Connecting To A Private Network With A Vpn Server
1 Tap Start > Settings > Connections. 2 Under My Work Network, tap Add a new VPN connection. 3 In the Name field, enter a name for the connection, such as your company name. information. CN3 Series Mobile Computer User’s Manual... - Page 91 4 In the Host name / IP field, enter the VPN server name or IP address. 5 Select the VPN type of authentication to use with your CN3. If you are not sure which option to choose, check with your network administrator.
-
Page 92: Configuring Security On The Wireless Network
Each wireless network is assigned a name (or SSID) to allow multiple networks to coexist in the same area without infringement. Intermec recommends using security measures with wireless networks to prevent unauthorized access to your network and to ensure the privacy of transmitted data. These elements are required for secure networks: •... - Page 93 WEP keys also authenticate the CN3 to the access point - unless the CN3 can prove it knows the WEP key, it is not allowed onto the network. WEP keys are only needed if they are expected by your clients. There are...
- Page 94 This requires both the user and authentication server have certificates for mutual authentication. While cryptically strong, this requires corporations that deploy this to maintain a certificate infrastructure for all users. CN3 Series Mobile Computer User’s Manual 802.11b/g uses...
-
Page 95: Choosing Between Microsoft And Funk Security
WPA and WPA2 would be the Pre-Shared Key (PSK). Choosing Between Microsoft and Funk Security Before you can implement a security solution on the CN3, you need to choose between Microsoft and Funk security: • By default, Funk security is enabled. It provides everything you get with Microsoft security plus the addition of Cisco Compatible Extensions features. -
Page 96: Configuring Funk Security Using Intermec Settings
By default, the active profile is Profile_1. To select a profile for Funk security 1 Select Start > Settings > the Systems tab > Intermec Settings. 2 Select Communications > 802.11 Radio > Funk Security. - Page 97 Select User name and type your user name. c Select User Password and type a user password. d For Validate Server Certificate, choose Yes. Note: You must have the date on the CN3 set correctly when you enable Validate Server Certificate. If you choose TLS: a Load a user and root certificate on your CN3.
- Page 98 0x for a total of 66 characters. The value must match the key value on the access point. The passphrase must be from 8 to 63 characters. After you enter a passphrase, the CN3 internally converts it to a pre-shared key.
- Page 99 For Validate Server Certificate, choose Enabled. If you choose TLS: a Load a user and root certificate on your CN3. For help, b For Validate Server Certificate, choose Yes. c You must enter a User Name and Subject Name. You can 8 Exit Intermec Settings.
-
Page 100: Configuring Funk Security Using The Profile Wizard
10 Exit Intermec Settings. Configuring Funk Security Using the Profile Wizard You can start 802.11 b/g communications on the CN3 using the Profile Wizard. A profile contains all the information necessary to authenticate you to the network, such as login name, password or certificate, and protocols by which the CN3 is authenticated. - Page 101 7 (Optional) Check the Enable Power Management box to conserve battery power. 8 Click OK. Configuring WEP Security With Profile Wizard 1 In the Profile Wizard, select the Security page. 2 For 8021x Security, choose None. CN3 Series Mobile Computer User’s Manual Chapter 3 — Configuring the Computer...
- Page 102 WEP. Hex keys must be preceded by 0x and contain 5 or 13 hex pairs. 7 Tap OK. Configuring WPA-PSK Security With Profile Wizard 1 In the Profile Wizard, select the Security page. 2 For 8021x Security, choose None. CN3 Series Mobile Computer User’s Manual...
- Page 103 5 Tap OK. Configuring WPA2-PSK Security With Profile Wizard 1 In the Profile Wizard, select the Security page. 2 For 8021x Security, choose None. 3 For Association, choose WPA2. CN3 Series Mobile Computer User’s Manual Chapter 3 — Configuring the Computer...
- Page 104 Protected EAP (PEAP) performs secure authentication against Windows domains and directory services. It is comparable to EAP-TTLS, though not as flexible. To configure PEAP security 1 In the Profile Wizard, select the Security page. CN3 Series Mobile Computer User’s Manual...
- Page 105 Use following password to use the protocol without entering a password each time you use the CN3. 8 Tap Get Certificates to obtain or import server certificates. For help with certificates, see...
- Page 106 4 For Encryption, choose TKIP or AES if you selected WPA2 for association, or WEP or CKIP if you selected Network EAP for association. 5 For Subject Name, type a unique subject name for this protocol. CN3 Series Mobile Computer User’s Manual...
- Page 107 “tunnel” established using server certificates. To configure TTLS security 1 In the Profile Wizard, select the Security page. 2 For 8021x Security, choose TTLS. CN3 Series Mobile Computer User’s Manual Chapter 3 — Configuring the Computer “Loading a Certificate” on...
- Page 108 Use following password to use the protocol without entering a password each time you use the CN3. 8 (Optional) Tap Get Certificates to obtain or import server certificates. For help with certificates, see Certificate”...
- Page 109 7 Select Prompt for password to have the user enter this password each time to access the protocol, or select Use following password to use the protocol without entering a password each time you use the CN3. 8 Tap OK. CN3 Series Mobile Computer User’s Manual...
- Page 110 4 For Encryption, choose WEP or CKIP if you selected Network EAP for association. 5 For Username, type a unique username for this protocol. 6 In the Password field, type a unique password for this protocol. CN3 Series Mobile Computer User’s Manual...
- Page 111 9 Tap PAC Manager to view the PAC files currently installed on the CN3. Tap ok to return to the Additional Settings screen. 10 If you already have a PAC on the CN3, clear Allow Automatic PAC provisioning to avoid receiving more PACs from the server.
-
Page 112: Creating A Debug Log For Funk Security
3 From the Security Choice list, select Microsoft Security and save your settings. An alert box appears telling you that you must save your settings and warm boot the CN3 for the new security choice to take effect. 4 Tap Yes. The CN3 resets and starts with Microsoft Security as the Security Choice. - Page 113 6 Follow these steps to disable authentication: a Set Authentication to Open if WEP keys are not required b Set Data Encryption to Disabled. CN3 Series Mobile Computer User’s Manual Chapter 3 — Configuring the Computer use proxy servers. internet.
- Page 114 9 From the Networks to access list, select All Available, Only access points, or Only computer-to-computer. or to Shared when WEP keys are required for association. automatically provided check box, enter the new Network key, and then select the appropriate Key index. CN3 Series Mobile Computer User’s Manual...
-
Page 115: Loading A Certificate
10 Tap ok to close the screen. Note: If you select to automatically connect to non-preferred networks, the CN3 detects any new networks and provides you with the opportunity to configure them. Loading a Certificate If you choose to use transport layer security (TLS) with WPA or 802.1x security, you need to have a unique client certificate on... - Page 116 3 Tap OK. A dialog box appears asking if you want to load the root certificate. 4 Tap OK for yes. The Enrollment Tool message box appears telling you that the certificate has been added. 5 Tap OK to close the message box. CN3 Series Mobile Computer User’s Manual...
-
Page 117: Disabling Security
Disabling Security If you choose not to use security with your wireless network, you can disable it on the CN3. Intermec recommends that you always set security in your network. To disable security 1 Open Intermec Settings. 2 Choose Communications > 802.11 Radio > Microsoft Security. - Page 118 Chapter 3 — Configuring the Computer CN3 Series Mobile Computer User’s Manual...
-
Page 119: Developing And Installing Applications
Use this chapter to understand the guidelines for developing applications for use on the CN3. This chapter contains these sections: • Developing Applications for the Computer • Installing Applications on the Computer • Freeing Up Virtual Memory for Applications • Launching an Application Automatically •... -
Page 120: Developing Applications For The Computer
Use the Intermec resource kits to develop new applications to run on the CN3. The Intermec resource kits are a library of C++ and .NET components grouped by functionality that you can use to create applications for the computer. - Page 121 • You can copy a directory structure that contains the application, supporting files, DLLs, images, and data files. Intermec recommends using .cab files to install your applications. The mobile computer uses standard Windows Mobile .cab files and will install third-party .cab files. You can have your .cab files...
-
Page 122: Installing Applications Using Smartsystems Console
PC and is up and running. To install an application on the computer using ActiveSync 1 Connect the CN3 to a PC using a USB cable. You may have to disconnect and then connect the cable to “wake” the connection. - Page 123 3 Click Explore to open the Mobile Device window that shows the files and folders on the CN3. 4 On your desktop PC, locate the .cab file you want to download to the mobile computer and copy it.
-
Page 124: Installing Applications Using A Storage Card
Chapter 4 — Developing and Installing Applications Installing Applications Using a Storage Card If you have a miniSD card for your CN3, it is the best place for you to install applications. To install applications using the storage card 1 Suspend the CN3 and remove the miniSD card. -
Page 125: Installing Applications Using Wavelink Avalanche
Note: If you manually activate the Avalanche Enabler on the CN3, you may be prompted for a password when you exit the Avalanche Enabler. The default password is To use Avalanche to remotely manage the CN3 1 Install software packages and updates for the CN3 using the Avalanche Administrative console. - Page 126 5 Clear the check box of any components you do not want installed after a clean boot. “Understanding the InstallSelect Software or contact your Intermec service “Upgrading the System 113. ). The InstallSelect application appears on the display CN3 Series Mobile Computer User’s Manual...
-
Page 127: Launching An Application Automatically
Enables the client to the Wavelink Device Management solution. You will see other components available from the InstallSelect application based on the options you selected for your CN3. Launching An Application Automatically There are two ways to automatically launch your application when you perform a reset on the computer: •... - Page 128 3 Write commands for AutoRun.dat using the supported AutoRun script commands. 4 Save the Notepad file as AutoRun.dat. 5 Copy the AutoRun.dat file to the System folder on the CN3. During every boot, the system scans for AutoRun.dat in the System folder.
-
Page 129: Upgrading The System Software
You need to download the latest upgrade files from the Intermec web site to your desktop PC. To download the upgrade files 1 Start your web browser and go to the Intermec web site at www.intermec.com. 2 Go to Support > Downloads. -
Page 130: Upgrading The Cn3 Using A Minisd Card
3 Remove the miniSD card from the adapter card and insert it into the CN3. 4 Place the CN3 in a dock connected to external power and press the Reset button (using a stylus) located in the battery cavity on the back of the CN3. For help, see the CN3”... -
Page 131: Upgrading The Cn3 Using The Smartsystems Console
When the progress is complete, the CN3 warm boots to reset the configuration. 9 Remove the miniSD card and delete the files. 10 Set the date, time, and network communication parameters to reestablish communications with the other devices in the wireless network. - Page 132 Progress messages appear on the computer screen. Note: The SmartSystems console will show your computer as offline (note the red stop sign) until the computer reboots and reconnects to the system. CN3 Series Mobile Computer User’s Manual...
-
Page 133: Troubleshooting And Maintaining The Cn3
You will also find information on routine maintenance. This chapter contains these sections: • Calling Product Support • Troubleshooting the CN3 • Resetting the CN3 • Cleaning the CN3 CN3 Series Mobile Computer User’s Manual Troubleshooting and Maintaining the CN3... -
Page 134: Calling Product Support
• If you are not using TE, know the language your custom application was written in and the tools you used to create it You can find most of the information listed above in Intermec Settings. Consult your application developer for information on your custom application. -
Page 135: Troubleshooting Your Cn3
2 Tap the Intermec logo. The Intermec page appears and displays the software build information. Troubleshooting Your CN3 If you send the CN3 in for service, it is your responsibility to save the computer data and configuration. Intermec is responsible only for ensuring that the hardware matches the original configuration when repairing or replacing the computer. - Page 136 Chapter 5 — Troubleshooting and Maintaining the CN3 Problems While Operating the CN3 Problem You press the Power button and nothing happens. The Battery status LED is on. The computer appears to be locked up and you cannot enter data.
- Page 137 Check with network administrator or use your access point user’s manual. Solution Make sure the CN3 IP address, host IP address, subnet mask, default router are configured for network. The CN3 may not be communicating with the access point. Make sure the CN3 network name matches the access point network name (SSID).
- Page 138 Solution The CN3 does not save WEP key values when changing the SSID. Reenter the WEP key value after changing the SSID and save your changes. You should now be able to connect to the different access points.
-
Page 139: Resetting The Cn3
You rarely need to reset the computer. If the computer does not resume after pressing the Power button, or if the computer or an application lock up, you may need to reset the CN3. The CN3 uses the configuration currently saved in flash memory during the boot process. -
Page 140: Warm Booting The Cn3
Note: Cold booting the CN3 does not guarantee that cached disk data will be saved, so transactional data may be lost during the reset. All other data is preserved. -
Page 141: Clean Booting The Computer
When you clean boot the CN3, it loads only those files and programs that are absolutely required by the operating system. Use the clean boot to troubleshoot the CN3 by getting it up and running so that you can perform diagnostic tests to determine which elements of the normal boot process are causing problems. -
Page 142: Cleaning The Cn3
Cleaning the CN3 To keep the CN3 in good working order, you may need to clean the imager window, color camera window, and the touch screen. Clean the windows and the touch screen as often as needed for the environment in which you are using the CN3. -
Page 143: Specifications
Specifications CN3 Series Mobile Computer User’s Manual... -
Page 144: Physical And Environmental Specifications
Intel XScale PXA270 520 MHz RAM 128 MB RAM 128 MB NAND flash, provides onboard non-volatile storage miniSD card slot, user-accessible numeric, QWERTY, CN3e 10-key, CN3e numeric EA11, EA11HD scan engine, color camera B013037 CN3 Series Mobile Computer User’s Manual... - Page 145 Regulatory Approvals UL and cUL Listed, UL60950 and UL 1604 and CSA 22.2 No. 157, FCC Part 15, TUV, CE mark CN3 Series Mobile Computer User’s Manual Appendix A — Specifications -20° to 70°C (-13° to 158°F) 5% to 95% non-condensing Multiple 1.5 m (5 ft) drops to steel or...
- Page 146 (0 lux). Both reading distances are provided in respective scan engine integration guides. Contact your local Intermec representative for more information. Below are minimum standard reading distances for the CN3 and CN3e built with integrated scan engines. When correctly mounted, and exit window reduces reading distances by about 4% for all scan engines.
-
Page 147: Accessories
10" EA11 Standard Minimum Reading Distances With 0.04 Inch Setbacks Accessories All of the accessories listed below work for both the CN3 and CN3e models unless otherwise noted. AC14 Quad Battery Charger (P/N 852-065-001) Use the quad battery charger to charge up to four CN3 battery packs. - Page 148 Use the charge-only multidock to hold up to four CN3s with batteries installed, charge batteries, and provide power to CN3s. AV6 Vehicle Dock (P/N 871-027-001) Use the vehicle dock to hold and charge the CN3 while using it on a vehicle. AV9 Vehicle Dock (P/N 871-027-101) Use the vehicle dock to hold and charge the CN3e while using it on a vehicle.
-
Page 149: Index
Index CN3 Series Mobile Computer User’s Manual... - Page 150 CN3, communications, configuring on the CN3, device addres, InstallSelect component, QD ID, Radio Hardware version, Resource Kit, downloading, Scanner Wizard, using to connect to scanner, selecting wireless printer, CN3 Series Mobile Computer User’s Manual...
- Page 151 CN3 features, cold boot, performing, color-coded keys locking and unlocking, using, command bar, using, CN3 Series Mobile Computer User’s Manual communications 802.11 radio, configuring, configuring Bluetooth scanner, Ethernet, configuring, standard, USB, configuring, configuration commands,...
- Page 152 ISpyWiFi utility, troubleshoot 802.11 connection, IVA functionality, description, keypads illustrated, troubleshooting keys, using color-coded keys, Knowledge Central web site, launching applications automatically, LEAP definition, security, configuring with Funk, security, configuring with Profile Wizard, CN3 Series Mobile Computer User’s Manual 61–67...
- Page 153 Object Store, storing applications, operating system finding version, 3, how to upgrade, specification, operating temperature, CN3 Series Mobile Computer User’s Manual orange key, using, orange LED, understanding, PACs (Protected Access Credentials), parameters, configuring, PEAP choosing with WPA security, configuring with Profile Wizard,...
- Page 154 System ID (SID), TCP/IP, configuring network parameters, terminal emulation, troubleshooting connection, terminology, encryption, test page, printing wireless, time, synchronizing with time server, CN3 Series Mobile Computer User’s Manual...
- Page 155 VPN connection, creating, warm boot, performing, Wavelink Avalanche, using to install applications, CN3 Series Mobile Computer User’s Manual definition, security configuring, configuring with Profile Wizard, troubleshooting, Windows Mobile basic usage, command bar, using,...
- Page 156 Index CN3 Series Mobile Computer User’s Manual...
- Page 158 Worldwide Headquarters 6001 36th Avenue West Everett, Washington 98203 U.S.A. tel 425.348.2600 fax 425.355.9551 www.intermec.com CN3 Series Mobile Computer User’s Manual *935-003-006* P/N 935-003-006...
Need help?
Do you have a question about the CN3 Series and is the answer not in the manual?
Questions and answers