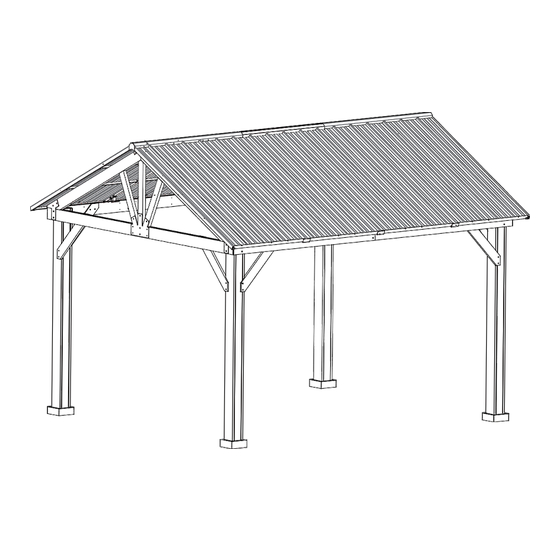
Summary of Contents for Joyside A03 Series
- Page 2 Warning! To reduce the risk of serious injury, read the following safety instructions before assembling and using the gazebo. Please check with your local governing authority/local municipal codes regarding 4 pcs installation of structures before assembly. 4 pcs Caution! Proper placement of your gazebo is essential. Do not place the product underneath electrical lines.
- Page 3 IMPORTANT: · Please read and understand this manual before any assembly. Before beginning assembly of product, make sure all parts are present. Compare parts with packaging contents list. · If any part is missing, or if you have any questions, contact the service center at 1-(844)-805-0378 (toll free).
- Page 4 PARTS LIST Description Sketch 4 pcs Base Cover 4 pcs Base Triangular 2 pcs Connector 1 Triangular 2 pcs Connector 2 Triangular 2 pcs Connector 1 pc Big Roof Beam 1 1 pc Big Roof Beam 2 Roof Beam 1 pc Connector 1 Big Roof Middle 6 pcs...
- Page 5 PARTS LIST Sketch Description Big Roof Small 16 pcs Beam 8 pcs Small Beam Presser 6 pcs Press Panel 2 pcs Big Roof Cover 1 1 pc Big Roof Cover 2 12 pcs Steel Pin 2 pcs Catch 4 pcs Roof Side Cover 10 pcs Big Roof Cover...
- Page 6 PARTS LIST Sketch Description Outer Long Left 2 pcs Beam(Short) Outer Long Right 2 pcs Beam(Short) 2 pcs Inner Middle Beam Inner Short Beam 4 pcs (Short) 2 pcs Post 4 pcs Arc Support 1 Arc Support 2 4 pcs Triangular Middle 2 pcs Support Beam...
- Page 7 PARTS LIST Description Sketch 16 pcs Bolt M8*35 12 pcs Bolt M6*55 24 pcs Bolt M8*20 Non-slip Nuts 8 pcs Flat Washer 84 pcs Flat Washer 24 pcs Screw 8 pcs M10*80 8 pcs Stake Φ8*180 8 pcs Bolt M6*35 2 pcs M3 Drill Non-slip nuts...
- Page 8 Step 1 08 x 4pcs C x 4pcs B x 4pcs EE x 16 pcs...
- Page 9 Step 2 MMx 16pcs KK x 16pcs 07 x 4pcs 05 x 4pcs 06 x 4pcs...
- Page 10 Step 3 KK x 4pcs 03 x 2pcs MM x 4pcs 04 x 2pcs T x 2pcs CC x 8pcs...
- Page 11 Step 4 KK x 4pcs 01 x 2pcs MM x 4pcs 02 x 2pcs...
- Page 12 Step 5 CC x 64pcs...
- Page 13 Step 6 OO x 4pcs LL x 4pcs NN x 12pcs AA x 4pcs...
- Page 14 Step 7 C2 x 2pcs C1 x 2pcs OO x 4pcs LL x 4pcs NN x 12pcs AA x 4pcs...
- Page 15 Step 8 d1=d2 Assembly Tip on Step 8: Please measure to make sure the length of d1 is equal to d2 before moving to next step to ensure a square frame and best results. Keep the beam at right angles to the post, the post at right angles to the ground, and keep the beam horizontal.
- Page 16 Step 9 UU x 6pcs 13 x 4pcs MM x 12pcs 14 x 2pcs EE x 16pcs 15 x 4pcs WW x 6pcs S x 12pcs C4 x 2pcs...
- Page 17 Step 10 UU x 8pcs WW x 8pcs MM x 16pcs...
- Page 18 Step 11 F2 x 1pcs BB x 4pcs F1 x 1pcs FF x 4pcs G1 x 1pc...
- Page 19 Step 12 F1、F2 x 1pcs BB x 2pcs FF x 2pcs...
- Page 20 Step 13 H x 6pcs BB x 36pcs FF x 12pcs I x 6pcs DD x 12pcs JJ x 12pcs...
- Page 21 Step 14 BB x 6pcs J1 x 3pcs FF x 6pcs P x 1pc...
- Page 22 Step 15 BB x 16pcs N x 8pcs FF x 16pcs...
- Page 23 Step 16 M1 x 2pcs BB x 20pcs FF x 20pcs M2 x 2pcs N x 8pcs...
- Page 24 Step 17 L1 x 2pcs BB x 16pcs FF x 16pcs L2 x 2pcs L4 x 2pcs L3 x 2pcs...
- Page 25 Step 18 EE x 40pcs O x 8pcs...
- Page 26 Step 19 BB x 3pcs P1 x 4pcs QQ x 3pcs R1 x 1pc P2 x 2pcs...
- Page 27 Step 20 BB x 2pcs P1 x 2pcs QQ x 2pcs R2 x 1pc...
- Page 28 Step 21 BB x 3pcs P1 x 4pcs QQ x 3pcs R1 x 1pc P2 x 2pcs...
- Page 29 Step 22 BB x 24pcs Q x 6pcs FF x 24pcs...
- Page 30 Step 23 BB x 8pcs U x 4pcs FF x 8pcs...
- Page 31 Step 24 Noting: Please purchase the anchors from local hardware store if anchor the gazebo to concrete or wood. (Pls use expansion bolts to fix on the concrete ground or wooden deck.) PP x 8pcs...


Need help?
Do you have a question about the A03 Series and is the answer not in the manual?
Questions and answers
Need to connect parts # F-1 and F-2 with G-1 holes are not allowing the connection
To connect parts F1 and F2 to the G1 holes on the Joyside A03 Series, follow these steps:
1. Gather Required Parts: Ensure you have F1 (Big Roof Beam 1), F2 (Big Roof Beam 2), and G1 (Roof Beam G1) ready for assembly.
2. Align the Beams: Position F1 and F2 so that their connection points align with the holes on G1.
3. Secure the Connection: Use the appropriate fasteners (such as screws, bolts, or pins) as specified in the parts list.
4. Tighten Firmly: Ensure all connections are secure to maintain structural stability.
5. Double-Check Alignment: Verify that all beams are properly positioned before proceeding to the next assembly step.
Following these steps will ensure a stable and secure connection between F1, F2, and G1.
This answer is automatically generated