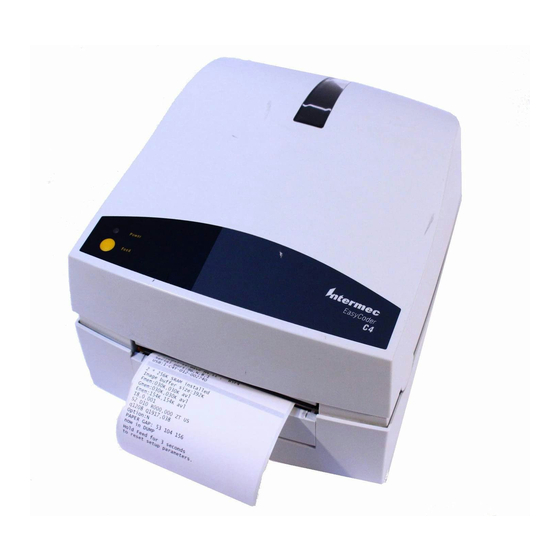
Intermec EasyCoder C4 User Manual
Bar code label printer
Hide thumbs
Also See for EasyCoder C4:
- Supplementary manual (167 pages) ,
- Reference manual (152 pages) ,
- Programmer's manual (115 pages)
Table of Contents
Advertisement
Quick Links
Advertisement
Table of Contents

Related Manuals for Intermec EasyCoder C4


Summary of Contents for Intermec EasyCoder C4
- Page 1 User’s Guide EasyCoder C4 Bar Code Label Printer...
- Page 2 Service support: +46 31 869500 The information contained herein is proprietary and is provided solely for the purpose of allowing customers to operate and/or service Intermec manufactured equipment and is not to be released, reproduced, or used for any other purpose without written permission of Intermec.
-
Page 3: Table Of Contents
Media Load... 13 Introduction ... 13 Tear-Off ... 13 Peel-Off ... 13 Cut-Off ... 13 Label Taken Sensor ... 14 Tear-Off Operation... 15 Peel-Off Operation ... 17 Cut-Off Operation... 19 External Supply... 21 Ribbon Load... 22 Intermec EasyCoder C4 User’s Guide Preface... - Page 4 Tags and Strip with Slots... 41 Tags and Strip with Black Marks ... 42 Plain Continuous Stock ... 43 Interfaces Parallel Interface... 46 RS-232 Serial Interface ... 47 USB Interface ... 48 Firmware Upgrading Requirements...50 Instructions... 51 Intermec EasyCoder C4 User’s Guide...
-
Page 5: Fcc Notice
EU Standard EN 55022 (The European Union) WARNING This is a Class A ITE product. In a domestic environment this product may cause radio interference in which case the user may be required to take adequate measures. Intermec EasyCoder C4 User’s Guide... -
Page 6: Wichtige Sicherheitshinweise
Sie mit Hilfe dieser Anleitung keine Verbesserung erzielen. d. Das Gerät ist gefallen und/oder das Gehäuse ist beschädigt. e. Wenn das Gerät deutliche Anzeichen eines Defektes aufweist. Nur mit dem Schaltnetzteil Intermec/SPN-470-24 benutzen. Intermec EasyCoder C4 User’s Guide... -
Page 7: Safety Instructions
The equipment does not work well or you can not get it work according to the User’s Guide. d. The equipment has dropped and been damaged. e. If the equipment has obvious signs of breakage. For use only with power supply Intermec/SPN-470-24. Intermec EasyCoder C4 User’s Guide Preface... -
Page 8: Declaration Of Conformity (Ce)
Based upon EN 50081-2 Generic Emissions Standard Based upon EN 50 082-1 Generic Immunity Standard following the provisions of Directives /. Intermec assumes no responsibility regarding the CE Directive if the printer is handled, modifi ed, or installed in other manners than those described viii Intermec Printer AB Idrottsvägen 10... -
Page 9: Introduction
The EasyCoder C4 printers are fi tted with both a parallel Centronics port and serial RS-232 and USB ports. As an option, the EasyCoder C4 can be fi tted with a paper cutter that cuts continuous strip or liner between labels. - Page 10 Preface Intermec EasyCoder C4 User’s Guide...
-
Page 11: Installation
Installation This chapter how an EasyCoder C4 is unpacked, connected to a power source, and connected to a computer. It also explains how to install the software and how to expand the memory using a memory cartridge. Intermec EasyCoder C4—User’s Guide... -
Page 12: Unpacking
Open the box and lift up the power supply unit, cables, and other parts. Remove the upper foam-plastic shock absorber and lift up the printer. Check that no visible damage has occurred during the transportation. Keep the packing material in case you need to move or reship the printer. -
Page 13: Power Connection
The printer and power supply unit must never be operated in a location where they can get wet. Personal injury could result! Only use with power supply Intermec SPN-470-24 P/N 1-092515-XX Mfg by PROTON. Place the power supply in a suitable location between the printer and an electrical outlet, for example on the fl... -
Page 14: Memory Cartridge
Chapter 1— Installation Memory Cartridge The EasyCoder C4 is fi tted with a built-in fl ash memory where 214K is available to the user for storing forms, graphics, and fonts (see Appendix 1 for details). The built-in memory can be expanded using an exchangeable memory cartridge with 1MB fl... -
Page 15: Computer Connection
Chapter 1— Installation Computer Connection All EasyCoder C4 models are fi tted with a 36pin female Centronics connector for the parallel interface port, a DB-9pin female connector for the RS-232 serial interface port, and a USB connector. You can have cables connected to all these ports simultaneously, but only one can be used at a time. -
Page 16: Serial Rs-232 Interface
USB port on the host, either directly or via a hub. Other devices, like a keyboard and a mouse, can be connected to the same hub. If you need to connect more than one Intermec USB printer to a host, you should use different USB ports. -
Page 17: Software Installation
Intermec USB printer driver, which is included on the CD-ROM that comes with the printer. If you run your EasyCoder C4 from a PC under Windows 95/98/Me, or Windows NT 4.0/W2000/XP, you may want to install the Intermec InterDriver and the Intermec LabelShop START found on the CD- ROM that comes with the printer. - Page 18 Chapter 1— Installation Intermec EasyCoder C4—User’s Guide...
-
Page 19: Operation
Operation This chapter describes how to control the printer, how to load it with media and ribbon, how to adjust the label gap sensor, and how to use the test mode. Intermec EasyCoder C4—User’s Guide... -
Page 20: Controls And Indicators
Chapter 2— Operation Controls and Indicators The EasyCoder C4 is controlled by the operator by means of an On/Off switch, a “Feed” key, and a multi-color indicator lamp. Indicator lamp Feed key On/Off Switch The On/Off switch is located at the back of the printer. -
Page 21: Indicator Lamp
If the printer is out of media and/or ribbon, the indicator lamp will glow red. Any error condition, such as label stop sensor problems, media jams, or... -
Page 22: Media Compartment
Label gap/ black mark sensor Top cover release Platen roller Label taken sensor Tear bar Ribbon supply hub Ribbon rewind hub Print mechanism Media roll spindle Edge guide adjustment wheel Peel-off bar Peel-off mechanism or paper cutter Intermec EasyCoder C4—User’s Guide... -
Page 23: Media Load
Chapter 2—Operation Media Load Introduction The EasyCoder C4 can print on heat-sensitive direct thermal paper, and in case of the thermal transfer model also on non heat-sensitive receiving face materials, in the form of self-adhesive labels, non-adhesive tags, or continuous stock. In case of non heat-sensitive face materials, a suitable thermal transfer ribbon must be used. -
Page 24: Label Taken Sensor
The built-in Label Taken Sensor (LTS) can be enabled to hold the printing until the previous label (or similar) has been removed from the printer's outfeed slot. As long as the sensor detects a label, the printer will be BUSY and cannot receive data from host. -
Page 25: Tear-Off Operation
(see markings on the spindle). Wind the green edge guide wheel towards the front of the printer so you can fi t the media roll between the guides. Place the media roll and spindle in the media compartment and snap the spindle into the slots on either side. - Page 26 24. Else, tap the Feed key either 4 times or until the indicator lamp glows green. If the printer did run out of media while printing, the printing will automatically be resumed. Else, tear off excessive media by pulling it upwards against the tear bar.
-
Page 27: Peel-Off Operation
(see markings on the spindle). Wind the green edge guide wheel towards the front of the printer so you can fi t the label roll between the guides. Place the label roll and spindle in the media compartment and snap the spindle into the slots on either side. - Page 28 Chapter 2— Operation Wind the green edge guide wheel towards the rear of the printer so the rear edge guides just touch the label roll without actually breaking its rotation. Thread the labels through the slits in the front edge guides.
-
Page 29: Cut-Off Operation
(see markings on the spindle). Wind the green edge guide wheel towards the front of the printer so you can fi t the roll between the guides. Intermec EasyCoder C4—User’s Guide... - Page 30 Place the roll and spindle in the media compartment and snap the spindle into the slots on either side. Wind the green edge guide wheel towards the rear of the printer so the rear edge guides just touch the media roll without actually breaking its rotation.
-
Page 31: External Supply
Follow the loading instructions for the type of operation in question, but ignore all paragraphs concerning the internal spindle. Instead, insert the media through the slot at the back of the printer (see illustrations). Be careful to protect any external media supply from dirt, grit, dust, water, and direct sunlight. -
Page 32: Ribbon Load
Loading a Fresh Ribbon Roll Open the printer's top cover by pressing the release buttons on both sides and folding the cover upwards/rearwards. Press the green release tabs at the bottom of the top cover on both sides of the printhead and fold down the print carriage halfway (45°... -
Page 33: Removing A Partially Used Ribbon
Open the printer's top cover by pressing the release buttons on both sides and folding the cover upwards/rearwards. -
Page 34: Label Gap Sensor
Label Gap Sensor Adjustment The EasyCoder C4 printer is fi tted with a label gap sensor that detects slots between tickets and tags, or gaps between labels, as the media is fed past the sensor during printing. Thus the fi rmware can determine the length of the tags or labels and control the media/ribbon feed accordingly. - Page 35 3-4 forms before the adjustment is completed. In case of peel- off operation, remove the labels as they are fed out. After a delay, a Test Label will be printed and the printer will be placed in the Dump Mode (see Intermec Esim v4.00, Programmer’s Reference Manual).
- Page 36 Chapter 2— Operation Intermec EasyCoder C4—User’s Guide...
- Page 37 Maintenance This chapter explains how to clean the printer externally and how to clean the printhead. Intermec EasyCoder C4—User’s Guide...
-
Page 38: External Cleaning
External Cleaning Keep your EasyCoder C4 clean by periodically wiping it with a soft cloth dampened with water. Do not use abrasive cleaners or solvents as they will scratch the surface. -
Page 39: Troubleshooting
Troubleshooting This chapter contains instructions for solving the most common problems the may occur when using an EasyCoder C4. The troubleshooting is restricted to the operator level. If the problem cannot be solved using this list, please contact the ditributor. -
Page 40: Problems And Solutions Or Reasons
Control lamp does Make sure connectors on power supply are securely plugged not light green into the receptacle on the printer and to an AC outlet. when power is on. Control lamp lights Label taken sensor active, label not removed. -
Page 41: Technical Data
Technical Data This appendix lists the technical data for the EasyCoder C4. Intermec EasyCoder C4—User’s Guide... - Page 42 Tear-off /peel-off or cut-off operation Dimensions Length: Length with cutter: Width: Height: Net Weight Thermal transfer printer, excl. power supply, media, cable, cutter, and memory cartridge: Power Separate power supply unit; Input: Output: Interfaces 1 × RS-232 serial (DB-9pin) 1 × Centronics parallel 1 ×...
- Page 43 Min. Thickness, all: Thermal Transfer Ribbons Intermec transfer ribbons only (wax, hybrid, and resin) in widths of 33, 60, 63.5, 83.5, 89, and 110 mm (1.33, 2.36, 2.5, 3.29, 3.5, and 4.33 inches) centered on 110 mm (4.33 inches) wide cardboard cores.
- Page 44 Printhead V-spring for stiff/thick media Keyboard/Display Unit 992K total. (778K fi rmware, 214K fonts, forms, and graphics) 512K total 120K fi rmware, 392K print buffer 120K fi rmware, 392K print buffer One “Feed” button 1 multi-color LED indicator. Intermec EasyCoder C4—User’s Guide...
-
Page 45: Media Specifi Cations
Media Specifi cations This appendix specifi es the physical characteristics and sizes for the direct thermal media, receiving face materials, and thermal transfer ribbons that can be used in an EasyCoder C4 printer. Intermec EasyCoder C4—User’s Guide... -
Page 46: Direct Thermal Media
Appendix B— Media Specifi cations Direct Thermal Media Intermec offers two quality grades of direct thermal media for the Easy- Coder range of printers: Premium Quality Top-coated media with high demands on printout quality and resistance against moisture, plasticizers and vegetable oils. Examples... -
Page 47: Thermal Transfer Media
Thermal Transfer Media Intermec offers stock media for thermal transfer printing in a wide range of quality grades. Uncoated Papers Used for economical high-volume printing in combinations with GP/ TMX 1100/TMX 1500 ribbons. Examples... Europe TTR Uncoated Coated Papers Coated papers havevarious coat-weight, smoothness, and gloss. To be used with HP/TMX 2500 and GP/TMX 100/TMX 1500 ribbons. -
Page 48: Transfer Ribbons
Appendix B— Media Specifi cations Transfer Ribbons Intermec offer three types of thermal transfer ribbons optimized for different purposes: • General Purpose (GP/TMX 1100, TMX 1500) transfer ribbons allow high speed printing and give a good printout, but are somewhat sensitive to smearing. -
Page 49: Media Roll Size
Protect the media against sand, grit, and other hard particles during printing and storage. Keep the cover closed. Even very small foreign particles may cause severe harm to the delicate printhead. Intermec EasyCoder C4—User’s Guide Appendix B— Media Specifi cations 25.4 or 38.1 mm (1.0 or 1.5 inches) 118 mm (4.65 inches) -
Page 50: Labels
25.0 mm ← b → Label length: Minimum: 6.35 mm ← c → Label gap height: Maximum: 10 mm Minimum: 2 mm Liner: Opacity: 75% (4.57 inches) (1 inches) (.25 inches) (.39 inches) (.08 inches) LABELS Intermec EasyCoder C4—User’s Guide... -
Page 51: Tags And Strip With Slots
← d → Detection slot height: Maximum: Minimum: The label gap sensor is offset 4.5 mm (0.177 inches) to the right of the center of the media path. Intermec EasyCoder C4—User’s Guide Appendix B— Media Specifi cations 116.0 mm (4.57 inches) 25.0 mm (1.00 inches) -
Page 52: Tags And Strip With Black Marks
Max. refl ectance 5% at 940 nanometer. Carbon black. 116.0 mm (4.57 inches) 25.0 mm (1.00 inches) 6.35 mm (0.25 inches) 28 mm (1.10 inches) 10 mm (0.39 inches) 3 mm 0.012 inches) TICKETS,TAGS, & CONTINUOUS STRIP Intermec EasyCoder C4—User’s Guide... -
Page 53: Plain Continuous Stock
Plain Continuous Stock The EasyCoder C4 can use continuous stock without any detection slots or black marks. The printer must be set for continuous stock by the Q command (see Intermec ESim v4.00, Programmer’s Reference Manual). The length of each copy is decided by the size of the print image and any additional media feed is decided by the Q command. - Page 54 Appendix B— Media Specifi cations Intermec EasyCoder C4—User’s Guide...
- Page 55 Interfaces This appendix describes the signals on the serial RS- 232 port and the parallel IEEE 1284 port. The USB port has a standard USB socket. Intermec EasyCoder C4—User’s Guide...
-
Page 56: Parallel Interface
500 mA. serial port must not exceed a total of 500 mA. DSTB to printer and BUSY to host. 36-pin female Centronics connector. Transmitter Host Host Printer Printer Printer Chassis ground Max. 500 mA Printer Intermec EasyCoder C4—User’s Guide... -
Page 57: Rs-232 Serial Interface
Signal DB-9 DB-9 /.The combined load on the external +5V on both the parallel and the serial port must not exceed a total of 500 mA. Intermec EasyCoder C4—User’s Guide DB-9pin female RS-232 connector. EasyCoder C4 Signal +5V 500 mA –... -
Page 58: Usb Interface
Appendix C— Interfaces USB Interface Printer end of USB cable Computer end of USB cable Intermec EasyCoder C4—User’s Guide... -
Page 59: Firmware Upgrading
Firmware Upgrading This appendix describes how to upgrade the printer‘s fi rmware. Intermec EasyCoder C4—User’s Guide... -
Page 60: Requirements
To upgrade the printer’s fi rmware via a cable connection from a PC running MS Windows, you will need the following: • The Intermec EasyCoder C4 Confi g Tool. This is a free software running under Microsoft Windows various fi rmware version either directly to the printer or to a memory cartridge. -
Page 61: Instructions
Instructions Using a PC Install the Intermec EasyCoder C4 Confi g Tool in your PC. Run the C4Conf.exe program. Set up the parameters for the fi rmware download. Use the on-line help for instructions. Start the Firmware download wizard and follow the instructions on the screen. - Page 62 Press the Feed key and keep it pressed and at the same time switch on the power to the printer (also see “Test Mode” on page 24). A test label will be printed. Check the version number on the test label to verify that the upgrading has been successful.
- Page 64 Intermec Printer AB Idrottsvägen 10, P.O. Box 123 S-431 22 Mölndal, Sweden tel +46 31 869500 fax +46 31 869595 www.intermec.com EasyCoder C4—User’s Guide *1-960572-01* *1-960572-01*...
Need help?
Do you have a question about the EasyCoder C4 and is the answer not in the manual?
Questions and answers