Table of Contents
Advertisement
Advertisement
Table of Contents

Summary of Contents for A10 Thunder Series
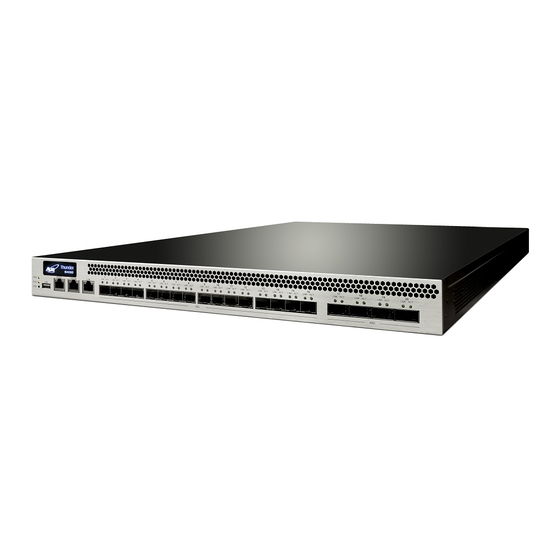
- Page 1 A10 Thunder Series 6430(S) ADC/CGN 29 March 2019...
- Page 2 DISCLAIMER This document does not create any express or implied warranty about A10 Networks or about its products or services, including but not limited to fit- ness for a particular use and non-infringement. A10 Networks has made reasonable efforts to verify that the information contained herein is accurate, but A10 Networks assumes no responsibility for its use.
-
Page 3: Table Of Contents
Table of Contents Getting Started ..........................3 Inspection ..........................3 Interface Connections ......................4 LED Locations and Status Indicators..................5 Installation ..........................7 Power-On..........................7 Rack-Mount Kit Installation ......................9 Getting Started ........................9 Rack-Mount Contents ..........................9 Required Tools ............................10 Rack-Mount Installation.......................10 Separate the End Brackets from the Inner Rails ................. 10 Attach the Inner Rails to the Chassis .................... - Page 4 A10 Thunder Series 6430(S) ADC/CGN Contents ..............................35 Splitter Cable Support for QSFP 40G Ports ................37 Overview of 40G Port Splitting.....................37 Supported Platforms ..........................37 Port Splitting Numbering .......................... 39 Additional Port Splitting Information ..................... 39 Port Splitting Configuration Examples................40 Configuring Port Splitting in ACOS 2.7.x Releases ................
-
Page 5: Getting Started
A10 Thunder Series 6430(S) ADC/CGN Getting Started This guide describes how to physically install the A10 Thunder 6430(S) ADC/CGN models, how to con- figure the MGMT (management) interface for network access to the Command-Line Interface (CLI), and how to configure the Lights Out Management (LOM) interface for remote access to specific sys- tem-level commands. -
Page 6: Interface Connections
Supported Web browser • Terminal Emulation Software (PuTTy, HyperTerminal, or similar) • Interface Connections The A10 Thunder Series 6430(S) model provides the following interfaces: Ethernet data interfaces: • 16 x 10 Gb Fiber (SFP+) data ports (#1 - #16) •... -
Page 7: Led Locations And Status Indicators
Guide for details on configuring this interface.) Figure 3 illustrates where these interfaces are located on the device, and their corresponding numbers. FIGURE 3 A10 Thunder Series 6430(S) Interfaces and Numbers #1 #2 #3 #4 #5 #6 #7 #8 #9 #10#11#12 #13 #14#15#16... - Page 8 A10 Thunder Series 6430(S) ADC/CGN LED Locations and Status Indicators FIGURE 4 A10 Thunder Series 6430 LEDs 40 GB Interface LEDs 10 GB Interface LEDs LNK ACT LNK ACT STAT DISK Table 1 summarizes the LED status indicators. TABLE 1 LED Status Indicator Descriptions...
-
Page 9: Installation
A10 Thunder Series 6430(S) ADC/CGN Installation Installation Table 2 describes the minimum requirements for your equipment rack. Verify these specifications against your equipment prior to installing the chassis. TABLE 2 Equipment Rack Specifications and Part Numbers Item Rack Mount Kit... - Page 10 A10 Thunder Series 6430(S) ADC/CGN Power-On This ACOS device also features a separate Lights Out Management (LOM) interface. The LOM interface allows you to power the device on or off over the network. For more information, see the Quick Start Guide or the Lights Out Management Reference.
-
Page 11: Rack-Mount Kit Installation
Rack-Mount Installation • Getting Started This section describes how to use the rack-mount kit to install the A10 Thunder Series 6430(S) into an equipment rack. Rack-Mount Contents The rack-mount kit contains the following items. Verify that all parts are included and are not damaged. -
Page 12: Required Tools
A10 Thunder Series 6430(S) ADC/CGN Rack-Mount Installation FIGURE 5 Rail Assemblies Required Tools To install the rack-mount kit, you will need the following tools: Anti-static wrist strap and conductive foam pad (recommended) • #2 Phillips-head screwdriver • Rack-Mount Installation Rack-mount Installation consists of the following tasks: Separate the End Brackets from the Inner Rails. -
Page 13: Attach The Inner Rails To The Chassis
A10 Thunder Series 6430(S) ADC/CGN Rack-Mount Installation FIGURE 6 Remove end brackets Attach the Inner Rails to the Chassis To attach the inner rails to the chassis. 1. Align either one of the inner rails over the 10 screw holes in the side of the device chassis, as shown in the figure below. -
Page 14: Attach The End Brackets To The Rack
A10 Thunder Series 6430(S) ADC/CGN Rack-Mount Installation 4. Repeat for the other side of the chassis. Attach the End Brackets to the Rack To attach the end brackets to the rack, use two pan-head screws to attach each end bracket to the rack. -
Page 15: Insert The Chassis Into The Rack
A10 Thunder Series 6430(S) ADC/CGN Rack-Mount Installation Insert the Chassis Into the Rack To insert the chassis into the rack: 1. Carefully lift the chassis into place, sliding the inner rail back into each of the 4 end brackets. Make sure each inner rail is inserted into both of its end rails. - Page 16 A10 Thunder Series 6430(S) ADC/CGN Rack-Mount Installation page 14...
-
Page 17: Sliding Rail Kit Installation
A10 Thunder Series 6430(S) ADC/CGN Sliding Rail Kit Installation This chapter describes how to install the sliding rail kit for the A10 Thunder Series 6430(S) device. The following topics are covered: Getting Started • Sliding Rail Kit Installation • Getting Started... - Page 18 A10 Thunder Series 6430(S) ADC/CGN Getting Started FIGURE 7 Rail Assemblies FIGURE 8 Bracket Front FIGURE 9 Bracket Back page 16...
-
Page 19: Required Tools
A10 Thunder Series 6430(S) ADC/CGN Getting Started FIGURE 10 Inner Rail Closeup Shows an inner rail attached to the chassis. NOTE: Following are the ear brackets closeup. Either set of ear brackets can be used depending on preference and rack used. The examples in this guide show the wide ear brackets. -
Page 20: Sliding Rail Kit Installation
A10 Thunder Series 6430(S) ADC/CGN Sliding Rail Kit Installation #2 Phillips-head screwdriver. • Sliding Rail Kit Installation Installation consists of the following tasks: Attach the Front Brackets to the Chassis. The factory-default brackets and the additional brackets are required. Attach the Inner Rails to the Chassis. -
Page 21: Attach The Inner Rails To The Chassis
A10 Thunder Series 6430(S) ADC/CGN Sliding Rail Kit Installation Make a note of the chassis side (left or right) for each bracket. The default brackets are labeled “L” and “R” (Left and Right). The front brackets used for sliding-rail installation are labeled the same way. -
Page 22: Attach The Rail Assemblies To The Rack
A10 Thunder Series 6430(S) ADC/CGN Sliding Rail Kit Installation FIGURE 13 Inner rail attachment (Front-end of rail): FIGURE 14 Inner rail attachment (Back-end of rail): 5. Use a total of 20 x pan-head screws to fasten the inner rails to each side of the chassis (10 x pan- head screws for each side). - Page 23 A10 Thunder Series 6430(S) ADC/CGN Sliding Rail Kit Installation 3. Extend the outer rail until it reaches the rear of the rack. 4. Insert 2 screws and partially tighten them. 5. Tighten all screws. FIGURE 15 Front of rail assembly:...
-
Page 24: Slide The Chassis Into The Rack
FIGURE 17 Front of rail assembly aligned with rack: Slide the Chassis Into the Rack To slide the chassis into the rack: Lifting the A10 Thunder 6430(S) chassis and placing in the rails is a two- CAUTION: person job. If needed, use an appropriate lifting device. - Page 25 A10 Thunder Series 6430(S) ADC/CGN Sliding Rail Kit Installation 1. With the front of the chassis facing you, lift the chassis and carefully insert the inner rails attached to the chassis into the rail. 2. Gently push the chassis into the rack until the finger tab locks into place.
- Page 26 A10 Thunder Series 6430(S) ADC/CGN Sliding Rail Kit Installation page 24...
-
Page 27: Fan Hot Swap
A10 Thunder Series 6430(S) ADC/CGN Fan Hot Swap This chapter provides fan hot swap instructions for the device. To determine the fan tray that needs to be replaced, run the show environment command from the CLI. The following topics are covered: Fan Module Location and Fan Numbers •... -
Page 28: Removing A Fan Module
A10 Thunder Series 6430(S) ADC/CGN Removing a Fan Module Removing a Fan Module Follow the steps below to remove a fan module: 1. Loosen the screws on either end of the Fan module the needs replacing. (Figure 2. Holding the two loose screws, pull the fan module away from the chassis. - Page 29 A10 Thunder Series 6430(S) ADC/CGN Inserting a Fan Module 2. Tighten the screws on each end. page 27...
- Page 30 A10 Thunder Series 6430(S) ADC/CGN Inserting a Fan Module page 28...
-
Page 31: Power Supply Unit Installation
A10 Thunder Series 6430(S) ADC/CGN Power Supply Unit Installation This guide describes how to connect the power supply unit to an applicable AC or DC power source. The following topics are covered: Overview • DC Power Supply Installation • Power Supply Hot Swap •... - Page 32 A10 Thunder Series 6430(S) ADC/CGN Overview FIGURE 23 Example of AC Power Supply FIGURE 24 Example of DC Power Supply page 30...
-
Page 33: Dc Power Supply Installation
A10 Thunder Series 6430(S) ADC/CGN DC Power Supply Installation FIGURE 25 Example of DC Power Supply (Assembled - Cable Inserted) DC Power Supply Installation Refer to the following instructions and figures for this procedure. (Also see figures on previous page.) 1. - Page 34 A10 Thunder Series 6430(S) ADC/CGN DC Power Supply Installation FIGURE 26 Connecting the DC Power Supply Cable page 32...
-
Page 35: Power Supply Hot Swap
A10 Thunder Series 6430(S) ADC/CGN Power Supply Hot Swap FIGURE 27 DC Power Supply Cables Power Supply Hot Swap Follow the directions in the following sections to remove and insert a power supply unit. FIGURE 28 Power Supply Hot Swap... -
Page 36: Removing A Power Supply
1. Push and hold the panel to unlock the lock (A). 2. Hold the panel and pull out the power supply Inserting a Power Supply Before inserting the new power supply on any A10 Thunder Series device, be sure to remove the power supply bottom gasket (see Figure 29). - Page 37 A10 Thunder Series 6430(S) ADC/CGN Power Supply Hot Swap page 35...
- Page 38 A10 Thunder Series 6430(S) ADC/CGN Power Supply Hot Swap page 36...
-
Page 39: Splitter Cable Support For Qsfp 40G Ports
• Overview of 40G Port Splitting The 40G Quad Small Form-factor Pluggable (QSFP+) ports on some Thunder Series devices can be configured to serve dual purposes. A 40G Ethernet port can be configured as one 40G port or four 10G ports. - Page 40 A10 Thunder Series 6430(S) ADC/CGN Overview of 40G Port Splitting A10 Thunder Series 6430(S) • A10 Thunder Series 5430-11(S) • A10 Thunder Series 4430(S) • page 38...
-
Page 41: Port Splitting Numbering
A10 Thunder Series 6430(S) ADC/CGN Overview of 40G Port Splitting Port Splitting Numbering In Figure 30, ports 17-20 are 40G Ethernet ports that are renumbered in the following way after the split: Port 17 will have four 10G ports that are numbered as port 17, port 21, port 25, and port 29. -
Page 42: Port Splitting Configuration Examples
A10 Thunder Series 6430(S) ADC/CGN Port Splitting Configuration Examples Port Splitting Configuration Examples This section provides examples of port splitting configuration. The CLI commands vary depending on your ACOS release: Configuring Port Splitting in ACOS 2.7.x Releases • Configuring Port Splitting in ACOS 3.x and 4.x Releases •... - Page 43 A10 Thunder Series 6430(S) ADC/CGN Port Splitting Configuration Examples Below is verification of the configuration change: ACOS# show hardware Thunder Series Unified Application Service Gateway TH6430 Serial No : TH64033013200001 : Intel(R) Xeon(R) CPU 32 cores stepping Storage : Single 93G drive...
-
Page 44: Enabling Port Splitting When Restoring System Files
A10 Thunder Series 6430(S) ADC/CGN Port Splitting Configuration Examples Disb None None None 001f.a006.4035 0.0.0.0/0 Disb None None None 001f.a006.4036 0.0.0.0/0 Disb None None None 001f.a006.4037 0.0.0.0/0 Disb None None None 001f.a006.4038 0.0.0.0/0 Disb None None None 001f.a006.4039 0.0.0.0/0 Disb... -
Page 45: Enabling Port Splitting When Restoring System Files
A10 Thunder Series 6430(S) ADC/CGN Port Splitting Configuration Examples ACOS(config)# system-4x10g-mode enable This command will modify your system to enable 4x10g-mode support. Any configurations on the affected interface(s) and interface references from VLANs/Trunks/Routing etc. are advised to be removed first, otherwise the interface configurations may cause errors and/or be lost. - Page 46 A10 Thunder Series 6430(S) ADC/CGN Port Splitting Configuration Examples ACOS(config)# no system-4x10g-mode enable This command will modify your system to enable 4x10g-mode support. Any configurations on the affected interface(s) and interface references from VLANs/Trunks/Routing etc. are advised to be removed first, otherwise the interface configurations may cause errors and/or be lost.
- Page 47 A10 Thunder Series 6430(S) ADC/CGN Port Splitting Configuration Examples page 45...
- Page 48 A10 Thunder Series 6430(S) ADC/CGN Port Splitting Configuration Examples page 46...
-
Page 49: Power Supply Product Specifications
A10 Thunder Series 6430(S) ADC/CGN Power Supply Product Specifications The A10 Thunder Series 6430(S) device is compatible with the power supply units described in this chapter: 1100W AC Power Supply Specifications • 1100W DC Power Supply Specifications • 1100W AC Power Supply Specifications Table 3 contains the 1100W AC power supply specifications. - Page 50 A10 Thunder Series 6430(S) ADC/CGN 1100W DC Power Supply Specifications page 48...
- Page 51 A10 Thunder Series 6430(S) ADC/CGN page 49...
- Page 52 CONTACT US a10networks.com/contact MARCH A10 T 6430(S) ADC/CGN 2019 HUNDER ERIES...
Need help?
Do you have a question about the Thunder Series and is the answer not in the manual?
Questions and answers