Table of Contents
Advertisement
Available languages
Available languages
Quick Links
Advertisement
Chapters
Table of Contents

Related Manuals for DiGiQuest G23+

Summary of Contents for DiGiQuest G23+
-
Page 2: Table Of Contents
ITALIANO INDICE SICUREZZA E PRECAUZIONI …………………………………….. PANNELLO FRONTALE …………………………………………… PANNELLO POSTERIORE ………………………………………… TELECOMANDO SEMPLIFICATO TASTI GRANDI 2 in 1……… TELECOMANDO COMPLETO …………………………………….. ALCUNI TASTI E FUNZIONI ……………………………………….. COLLEGAMENTI …………………………………………………….. 11 PRIMA ACCENSIONE ………………………………………….…… 12 MENU ………………………………………….……………………… 14 Menu LISTA CANALI ………………………………..……………… Menu RICERCA CANALI ………………………..…………………... -
Page 3: Sicurezza E Precauzioni
DIGIQUEST SICUREZZA E PRECAUZIONI ATTENZIONE: per ridurre i rischi di scosse elettriche, non aprire l’apparecchio. Qualunque intervento dovrà essere affidato ad un tecnico specializzato. L’apertura del ricevitore comporta la decadenza automatica della garanzia. Questo simbolo indica voltaggio Questo simbolo indica che ci sono pericoloso all’interno del prodotto,... - Page 4 ITALIANO decoder dall'alimentazione in caso di non utilizzo per un lungo periodo di tempo, durante i temporali o fenomeni particolari. Non staccare mai la spina da una presa tirando il cavo, evitare di toccare gli spinotti. Non effettuare operazioni di collegamento o scollegamento con mani bagnate o a piedi nudi.
- Page 5 Medesima. Fabbricato da DIGIQUEST SOLUTIONS s.u.r.l. Sede legale Via Privata Fratelli Gabba, 5 - 20121 Milano | Sede operativa Via Avisio, 18 - 00048 Nettuno (RM) - Italy.
-
Page 6: Pannello Frontale
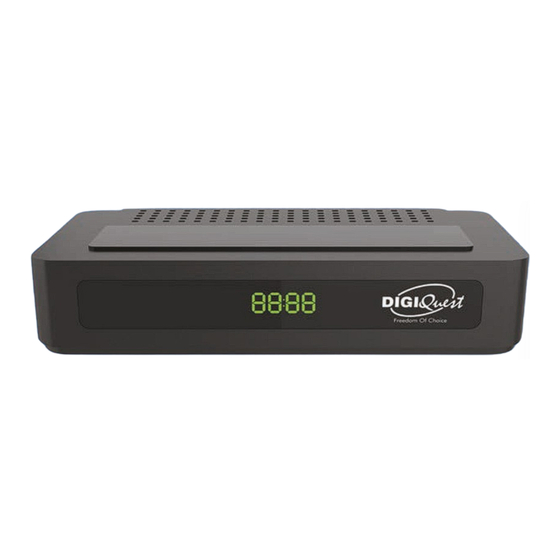
ITALIANO PANNELLO FRONTALE Display: visualizza il numero dei canali, in standby viene visualizzato l’orario. Sensore IR: riceve il segnale da telecomando. USB: sul lato destro, per collegare memorie USB esterne. PANNELLO POSTERIORE RF IN per il collegamento della antenna. HDMI per il collegamento alla TV in alta definizione con cavo HDMI (non incluso). -
Page 7: Telecomando Semplificato Tasti Grandi 2 In 1
DIGIQUEST TELECOMANDO SEMPLIFICATO TASTI GRANDI 2 in 1 Telecomando semplificato, le operazioni possibili sono limitate, per eseguire la prima installazione e accedere al menu usare il telecomando completo Ha la possibilità di essere programmato per poter gestire anche alcune funzioni del telecomando della TV (es. - Page 8 ITALIANO Gli altri tasti BLU: per accendere /spegnere (standby). EPG: per aprire la guida ai programmi. MUTO: per eliminare l’audio. Premere di nuovo per attivarlo. OK: per visualizzare la lista canali. V+ / V-: per aumentare o diminuire il volume. P+ / P-: per scorrere da un canale da un altro.
- Page 9 DIGIQUEST / : per aumentare o diminuire il volume. Nel menu per scorrere nei vari menu e cambiare impostazioni. Durante la riproduzione di immagini per passare a quella successiva o tornare alla precedente. ■ : per fermare la riproduzione dei file.
- Page 10 DIGIQUEST / : per aumentare o diminuire il volume. Nel menu per scorrere nei vari menu e cambiare impostazioni. Durante la riproduzione di immagini per passare a quella successiva o tornare alla precedente. ■ : per fermare la riproduzione dei file.
-
Page 11: Alcuni Tasti E Funzioni
ITALIANO ATTENZIONE: utilizzare pile (AAA). ATTENZIONE: l'incauto uso delle batterie può causare esplosioni, corrosioni e produzione di liquido acido. Usarle con accortezza per evitare perdite di acido. Se viene prodotto del liquido eliminarlo dall’interno del telecomando ed inserire nuove batterie. Nell’inserire le batterie badare ad allineare la polarità... - Page 12 DIGIQUEST Lista Canali Durante la visione, premendo il tasto OK si visualizza la lista dei canali. È possibile accedere alla lista anche da dentro il menu. Scorrere con i tasti / di canale in canale, con i tasti ◄ / ► si scorre nella lista di pagina in pagina.
-
Page 13: Collegamenti
ITALIANO COLLEGAMENTI ATTENZIONE: quando si eseguono i collegamenti TUTTI gli apparecchi devono essere scollegati dalla presa elettrica. È possibile collegare il decoder alla TV come segue: 1. In una TV con connessione HDMI, utilizzare un cavo HDMI. Inserire il cavo nell’uscita HDMI del ricevitore e l’altra estremità all’ingresso HDMI della TV. -
Page 14: Prima Accensione
DIGIQUEST immagine provare a selezionare la sorgente di ingresso esatta (es. SCART 1 o 2 ecc.) relativa all’ingresso utilizzato, premendo il tasto SOURCE sul telecomando della TV (a seconda della marca può essere identificato anche con INPUT, AV, AUX, ZERO, ecc.). - Page 15 ITALIANO scegliere quello adatto alla propria TV. Posizionarsi su Avanti e premere OK per passare alla schermata successiva. FTA: se si lascia Si verranno caricati solo i canali Free to Air. Se si sceglie No verranno caricati tutti i canali disponibili. LCN: Attivo / Spento.
-
Page 16: Menu
DIGIQUEST MENU Premere il tasto MENU per entrare nel menu del decoder. Con il tasto o è possibile selezionare i seguenti menu: Lista Canali, Ricerca Canali, Lingua, Impostazione AV, Regolazione Orario Locale, Sistema, Centro Multimediale, Rete. Posizionarsi su quello desiderato e usare li tasto per entrare nel sottomenu (finestra sotto) e posizionarsi sulla voce desiderata. -
Page 17: Menu Ricerca Canali
ITALIANO TTX (Gruppo): per selezionare i vari gruppi FAV creati. ■ (Elimina Tutti) cancellare tutti i canali. È possibile recuperare i canali erroneamente eliminati attraverso il menu Lista canali TV scartati / Lista canali radio scartati (vedi sotto). Lista canali TV scartati / Lista canali radio scartati Questo menu consente di recuperare i canali cancellati dal menu Lista canali TV / Lista canali radio. -
Page 18: Menu Lingua
DIGIQUEST i tasti o , ◄ o ► e quelli numerici impostare il canale (e di conseguenza la frequenza e la larghezza di banda). Posizionarsi poi su Avvia ricerca e premere il tasto OK per avviare la ricerca manuale del canale. -
Page 19: Menu Regolazione Ora Locale
ITALIANO Menu REGOLAZIONE ORA LOCALE Questo menu permette di impostare l’ora. - Orario: non regolabile. - Impostazione Fuso Orario: per impostare il fuso orario Auto o imposta sarà possibile impostare Manuale. Manuale manualmente il fuso orario con intervalli di mezz’ora. Menu SISTEMA Informazioni di sistema Per visualizzare informazioni relative al software e hardware del... - Page 20 DIGIQUEST modificare un evento già programmato premere il tasto GIALLO. NOTA: Quando si imposta un timer, si consiglia di disattivare le funzioni di Aggiornamento, vedi capitoli seguenti. ATTENZIONE, una risintonizzazione dei canali comporterà la perdita dei timer precedentemente impostati. Impostazioni OSD - Durata OSD: è...
-
Page 21: Menu Multimedia
ITALIANO l’aggiornamento. Ripetizione: giornaliero o settimanale. - Aggiornamento automatico Canali Per l'aggiornamento automatico della lista canali: In modalità Standby: il decoder può ricercare eventuali nuovi canali in automatico (Attivo) quando si trova in modalità standby. In modalità operativa: quando il decoder è acceso può ricercare eventuali nuovi canali in automatico: selezionare Attivo. - Page 22 DIGIQUEST Durante la riproduzione, in basso nello schermo sono presenti diverse opzioni selezionabili premendo il tasto corrispondente: - Tasto INFO Ordina: apre una finestra dove è possibile scegliere come ordinare i file per Nome A-Z o Z-A. - Tasto VERDE Partizione: per scegliere la partizione del Hard disk desiderata (se presente).
-
Page 23: Menu Rete
ITALIANO Film Selezionando questo menu sarà possibile accedere ai file video (AVI, MKV, MP4) presenti nella memoria USB collegata. Per avviare la riproduzione di un file video posizionarsi su di esso e premere OK. - Tasto VERDE Partizione: per scegliere la partizione del Hard disk desiderata (se presente). -
Page 24: Informazioni Aggiuntive
Se nessuna delle azioni indicate nella tabella aiutano a risolvere il problema, collegatevi al sito www.digiquest.it sarete guidati velocemente alla risoluzione del problema, grazie alle diverse possibilità che vi saranno proposte (aggiornamenti disponibili, chat online, form per richiesta assistenza). - Page 25 ITALIANO È consigliabile utilizzare un'antenna esterna standard che normalmente ha caratteristiche migliori di una antenna interna portatile. Controllare il cavo proveniente dall'antenna e i collegamenti. Sostituire i partitori o interporre un amplificatore di linea. Rivolgersi ad un tecnico antennista. Le immagini sullo schermo appaiono scomposte (squadrettate) Per un corretto funzionamento il decoder ha bisogno di una buona qualità...
- Page 26 DIGIQUEST Appare la scritta Codificato Il canale visionato fa parte di un pacchetto a pagamento. L'immagine appare schiacciata o tagliata Il formato immagine nel menu Impostazioni AV > Formato immagine non è stato impostato secondo le caratteristiche del televisore. Provare un altro formato.
-
Page 27: Specifiche Tecniche
ITALIANO Specifiche tecniche SECTION ITEM COMMENTS Frequency Range VHF:7M, 174 – 230MHz ; UHF 8M,470 MHz - 866 MHz Band 7MHz,8MHz DVB-T2 TUNER Input impedance 75 Ω Standard DVB-T2 Demodulation COFDM CHANNEL Constellation QPSK,16-QAM,64-QAM,hierarchical DECODING Combinations 16-QAM,hierarchical 64-QAM 1/2, 2/3, 3/4, 5/6, 7/8, Reed solomon 204, 188, t = 8 DEMULTIPLEXER... - Page 28 DIGIQUEST Specifiche tecniche sull’alimentatore Ai sensi del Regolamento 2019/1782, Allegato II, lettera b), si rimettono di seguito, le specifiche relative alla progettazione ecocompatibile dell'alimentatore esterno TEKA012-1201000EU Manufacturer’s name or trade mark, commercial registration number and address Shenzhen Teka Technology Co., Ltd. Address: Building A, No. 21, XiFu Road, Red Star Community, SongGang Street, Baoan District, Shenzhen, Guangdong Province, 518105, P.R.
- Page 29 Le foto e le illustrazioni hanno valore puramente illustrativo e possono non rispecchiare l’immagine del prodotto. A causa di aggiornamenti o errori, il contenuto di questo manuale potrebbe non corrispondere esattamente al prodotto reale. Consultare il sito www.digiquest.it per eventuali approfondimenti o rivolgersi all’assistenza tecnica info@digiquest.it...
- Page 30 ENGLISH CONTENTS SAFETY INFORMATION …………..………….……..………... 2 FRONT PANEL ……………………………….……………...………. REAR PANEL ………………………………………….……..….…… EASY REMOTE CONTROL 2 in 1 ……………………….…….. FULL REMOTE CONTROL …………………………………..….…… 6 SOME KEYS AND FUNCTIONS …………………………..….…… SYSTEM CONNECTION ……………………………………...……. GETTING STARTED ………………………..………………………. MENU …………………………………………………………………. 10 CHANNEL LIST menu ……………………………………..….……. CHANNEL SEARCH menu ………….…..……………..…..…….
-
Page 31: Safety Information
DIGIQUEST SAFETY INFORMATION CAUTION CAUTION: to reduce the risk of fire and CAUTION electric shock, do not open the unit. All work must be carried out by a specialised R I S K O F EL E CT R I C technician. - Page 32 LOCATION. Install the receiver in a location protected from direct sunlight or rain. Do not place near any heat sources. Do not place any other electronic equipment on the receiver. Manufactured by DIGIQUEST SOLUTIONS s.u.r.l. Head-quarter Via Avisio, 18 - 00048 Nettuno (RM) – Italy Made in China DIGIQUEST SOLUTIONS s.u.r.l.
-
Page 33: Front Panel
DIGIQUEST FRONT PANEL Display: shows the number of channel. In standby displays the time. IR sensor: receives the signal from the remote control. USB: to connect external USB memory and dongle WI-FI (not included). REAR PANEL RF IN: for antenna connection. -
Page 34: Easy Remote Control 2 In 1
ENGLISH EASY REMOTE CONTROL 2 in 1 Simplified remote control, possible operations are limited, to perform the first installation and access the menu use the full remote control. It can be programmed to manage some functions of the TV remote control as well (e.g. managing volume, power off, channel change). -
Page 35: Full Remote Control
DIGIQUEST P+ / P-: to scroll from one channel to another. Tasti NUMERCI (0~9): to enter the number of a channel. TXT: to open the teletext (if available). Inside the teletext page if you press once the background of the window will become transparent, if you press again you will exit teletext. -
Page 36: Some Keys And Functions
ENGLISH previous one. ■ : to stop the playback of files. EXIT: to exit the menu and some functions. : to move from one file to another. (PLAY): to re-play files when you are paused. II: while watching a program it freezes the picture, press again to unlock; while playing a file it activates pause, press the (PLAY) button to resume playing. - Page 37 DIGIQUEST Channel List During viewing, pressing the OK button displays the channel list. The list can also be accessed from within the menu. Scroll from channel to channel with the / buttons, use the ◄ / ► keys to scroll through the list from page to page.
-
Page 38: System Connection
ENGLISH SYSTEM CONNECTION There are many different types of TV and other equipment that you can connect to the box. In this manual you will see some of the most common ways to connect your equipment. WARNING: when making connections ALL the devices must be disconnected from the electrical socket. -
Page 39: Menu
DIGIQUEST □□□□ Enter your PIN again in Confirm Password. ATTENTION: if you make a mistake in entering the confirmation password, you will be able to repeat the procedure after a few seconds. Go to Next and press the OK button to go to the next screen. -
Page 40: Channel List Menu
ENGLISH CHANNEL LIST menu This menu allows you to set up the channels. TV/Radio Channel List This menu allows you to set up Fav, Lock, Sort, Rename, Delete and Move for the selected TV/Radio channels. - In Channel List menu, highlight the TV Channel List or Radio Channel List, press OK button to enter TV Channel List or Radio Channel List menu. -
Page 41: Channel Search Menu
DIGIQUEST Parental Lock Highlight the Parental Lock, press OK button, you will be asked to input your password. Inside the window that appears, press the or keys to select the desired item and the ◄ or ► keys to change the settings:... -
Page 42: Local Time Setting Menu
ENGLISH - AD Volume Offset: -3~3 - HDMI CEC: On/Off. When the CEC function is on, if the TV to which you connect this unit is equipped with and CEC function is active, you can use the TV remote control to also control some of the main functions of the set-top box such as volume, power, channel change. - Page 43 DIGIQUEST Wakeup Date: set Wakeup Date by pressing numeric button. On Time: set On Time by pressing numeric button. End Time: set End Time by pressing numeric button. Save: move to the Save box and press OK to save the set timer.
-
Page 44: Multimedia Menu
ENGLISH In operating mode: when the decoder is on it can search for any new channels automatically: select Active. Time: you can choose at what time the update should take place. Repeat: Daily/Weekly MULTIMEDIA menu This function allows you to play the media files from the USB or HDD. You can view pictures, listen to music, play video files. -
Page 45: Network Menu
DIGIQUEST Pictures By selecting this menu you can access the image files (JPG and BMP) in the connected USB memory. At the bottom of the screen there are several options that can be selected by pressing the corresponding button: - RED button: press to add the selected picture to Fav list. -
Page 46: Troubleshooting
The most common drawbacks are generally connected to the cable connection. If none of the actions listed in the table help you solve the problem, log on to www.digiquest.it and you will be guided quickly to solve the problem, thanks to the different possibilities that will be offered to you (available updates, online chat, form for assistance request). - Page 47 DIGIQUEST It is recommended to use a standard external antenna that normally has better features than a portable internal antenna. Check the cable coming from the antenna and connections. Replace the partitions or place a line amplifier. Contact an antennist technician.
- Page 48 ENGLISH Check whether the Mute function is activated. Use the decoder or TV remote control to turn it off. Make sure the volume of your decoder or TV is high enough. Press the volume buttons on the decoder or TV remote control to adjust. Check that the decoder is properly connected to your TV or audio system.
-
Page 49: Specifications
DIGIQUEST SPECIFICATIONS SECTION ITEM COMMENTS Frequency Range VHF:7M, 174 – 230MHz ; UHF 8M,470 MHz - 866 MHz Band 7MHz,8MHz DVB-T2 TUNER Input impedance 75 Ω DVB-T2 Standard Demodulation COFDM CHANNEL Constellation QPSK,16-QAM,64-QAM,hierarchical DECODING Combinations 16-QAM,hierarchical 64-QAM 1/2, 2/3, 3/4, 5/6, 7/8,... - Page 50 Photos and illustrations are for illustrative purposes only and may not reflect the product image. Due to updates or errors, the contents of this manual may not exactly match the actual product. Please refer to www.digiquest.it for further information or contact technical support info@digiquest.it...
- Page 51 ITALIANO COLLEGAMENTI ATTENZIONE: quando si eseguono i collegamenti TUTTI gli apparecchi devono essere scollegati dalla presa elettrica. È possibile collegare il decoder alla TV come segue: 1. In una TV con connessione HDMI, utilizzare un cavo HDMI. Inserire il cavo nell’uscita HDMI del ricevitore e l’altra estremità all’ingresso HDMI della TV.
- Page 52 DIGIQUEST SAFETY INFORMATION CAUTION CAUTION: to reduce the risk of fire and CAUTION electric shock, do not open the unit. All work must be carried out by a specialised R I S K O F EL E CT R I C technician.
- Page 53 DIGIQUEST P+ / P-: to scroll from one channel to another. Tasti NUMERCI (0~9): to enter the number of a channel. TXT: to open the teletext (if available). Inside the teletext page if you press once the background of the window will become transparent, if you press again you will exit teletext.
- Page 54 ENGLISH SYSTEM CONNECTION There are many different types of TV and other equipment that you can connect to the box. In this manual you will see some of the most common ways to connect your equipment. WARNING: when making connections ALL the devices must be disconnected from the electrical socket.
Need help?
Do you have a question about the G23+ and is the answer not in the manual?
Questions and answers