Table of Contents
Advertisement
Quick Links
Version: 1-01
User Manual
Each Energy Technology (Suzhou) Co., Ltd.
Address: No.8 Building, No. 38 of Beiguandu Road, Yuexi
Street, Wuzhong District, Suzhou, Jiangsu Province, China
Tel: +8651266581088
Email: service@eachenergy.com
Web:
www.eachenergy.com
Each Energy Technology (Suzhou) Co., Ltd.
www.eachenergy.com
Copyright © Each Energy Technology (Suzhou) Co., Ltd.
Advertisement
Table of Contents

Related Manuals for Each Energy EES3K-M1


Summary of Contents for Each Energy EES3K-M1
- Page 1 Each Energy Technology (Suzhou) Co., Ltd. Address: No.8 Building, No. 38 of Beiguandu Road, Yuexi Street, Wuzhong District, Suzhou, Jiangsu Province, China Tel: +8651266581088 Email: service@eachenergy.com Web: www.eachenergy.com Each Energy Technology (Suzhou) Co., Ltd. www.eachenergy.com Copyright © Each Energy Technology (Suzhou) Co., Ltd.
-
Page 2: Table Of Contents
Contents Copyright © Each Energy Technology (Suzhou) Co., Ltd. 1. About the Manual ......................3 Without written permission, any information of this document (partly or 2. Product Overview .......................4 entirely) cannot be extracted, copied or transmitted in any form or by any 3. -
Page 3: About The Manual
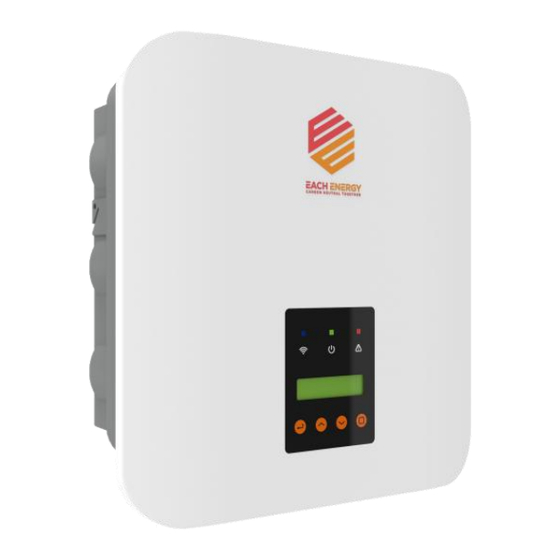
Valid Region This manual applies to the operation of Each Energy inverters in Australia, New Zealand, the UK, EU, South America, North America, and Southeast Asia. Name... - Page 4 2.2 Front Panel 2.3 Scope of Delivery Operation Panel: Description Quantity Name Communications Power Alarm Down Enter Inverter Light Light Light Wall Bracket Expansion Screws LED Light: Fastening Screws DC Connectors 2 (pairs) Light Status Explanation AC Connectors POWER The inverter is generating power WiFi/GPRS Stick The inverter is not generating power Documents...
-
Page 5: Mounting
requirements of local power authorities. 3. Safety Wear protective equipment for all work on the machines: helmet, insulated footwear, gloves, etc. Ensure that unauthorized persons and children have no access to the 3.1 Safety Symbols machines. Do not open the housing of the machines at any time. Unauthorized Symbol Explanation opening will void guarantee and warranty and may damage the... -
Page 6: Inverter Mounting
The following points should be considered when selecting an installation location. The wall bearing inverters shall be able to hold the weight of at least 4 times of the weight of the inverters. The location shall be convenient for electrical connection, operation and maintenance. -
Page 7: Electrical Connection
crimp-er. 5. Electrical Connection 3) Thread the cable through the Cable Gland, insert it into the insulator, and 5.1 DC Side Connection of Inverters gently pull backward the cable to ensure firm connection. Then screw up the Cable Gland to the Insulator. DANGER ELECTRICAL SHOCK Lethal high voltage will be generated by PV arrays under sunlight, so please disconnect DC and AC breakers and ensure no possibility of... - Page 8 When connecting an inverter to the utility grid, please use 4 – 6 mm² outdoor cable. For Each energy 3 KW to 4 KW inverters, it is recommended to use 4 mm² cable, and for 5 KW to 6 KW inverters, use 6 mm² cable.
-
Page 9: Over Current Protection Device
LCD will display ‘ISO Out Range’ or ‘PEN No Connect’. In that case, please refers to Chapter 7 for troubleshooting or contact Each Energy for help. -
Page 10: Electrical Connection Overview
1) Plug the stick to the Wifi port on the inverter Detail specifications of meter and CT can be found on Each Energy Website 2) Rotate the front operative part of the stick clockwise till the secure and a customer can purchase a suitable meter and CT for inverters on the connection of the stick website. -
Page 11: Operation
When a DRED is connected to an inverter, the inverter will receive and 5.9 Residual Current Device (RCD) response to the outside signal directly. And the DRM working mode will be shown in the BASIC INFO in the LCD menu. An internal residual current device is integrated in the inverter to protect against any potential residual current. -
Page 12: Lcd Operation
6.2.2 Basic Info. CAUTION WAIT The table below explains the meaning of information displayed in the Beware of the risk of electrical shock! Wait at least 5 minutes before sub-menu of Basic Info. touching the machine although the DC switch has been turn off! 6.2 LCD Operation Displays Duration... -
Page 13: Main Menu
Frequency: the frequency of the utility GRID FREQ:50.2Hz 6.2.3.1 Time Setting-up 10 S grid POWER : 1000 W When the sub-menu of ‘SET TIME’ is selected, the LCD will display the screen Output Power: 1000 W as below. TOTAL RUNTIME: 10 S Cumulative energy generation time NEXT = ENT OK = ESC... - Page 14 10 S This menu indicates: BusVol: 385.5V 1) Enter the password: Bus voltage DCI : 0 mA Please contact your inverter supplier for the default password. When finishing AC direct component password entering, press ENT to verify the password. If the password is 10 S This menu indicates: PF:+1.00 ac...
- Page 15 UP/DOWN to scroll the screen to view. 6.2.4.6 Rated Voltage The rated voltage of the inverter is displayed here. Rated Voltage NOTE: This operation is for maintenance personnel only. Password 220V is required to access this part! Please reset the password at the first 6.2.4.7 Daily Energy operation.
-
Page 16: Technical Set - Maintenance Personnel Only
To set up the AC instant voltage 6.2.5 Technical Set – Maintenance Personnel Only AC Inst Limit limit This section is for maintenance personnel only, enter password to access the To set up the power control sub-menu as guided by Chapter 6.2.4. Power Control The sub-menu: To set up the increase power rate... - Page 17 press ESC to return to the previous menu. 6.2.5.3 AC Output Voltage Limit This section is to set up the high and low limit of AC output voltage as NOTE: This part is accessible for qualified and accredited permitted by local grid company if the grid voltage is beyond the range technicians only! specified by national standards.
- Page 18 Step3: Go to set up the ‘ To set up power factor Pwr UpSlope’ or ‘Pwr DownSlope’ for the soft ramp up/down of rated power per minute. +80% To restore reactive power NOTE: This operation is for maintenance personnel only. Password Reset is required to access this part! YES=ENT...
- Page 19 reference frequency (frequency shift). It is enabled by default. To enable the ISO protection ISO Prot 6.2.5.8.2 Volt-var Response Mode QU CURVE To enable the island protection Island Prot The QU Curve is enabled by default. The volt-var response mode changes the reactive power absorbed or supplied by the inverter in response to the To enable the buzzer Buzzer Enabled...
- Page 20 for the volt–watt response according to the standard of AS/NZS 4777.2:2020. Inverter reactive supplying absorbing power level (Q)% of S rated Australia B Voltage 205 V 220 V 235 V 255 V Inverter reactive supplying absorbing power level (Q)% of S rated Australia C Voltage...
- Page 21 Step2: go to ‘Special Func’ and then go to ‘PU Curve’ Step3: enable or disable the ‘Volt-watt Response Mode’ by changing the NOTE: This operation is for maintenance personnel only. Password status to ‘ON’ or ‘OFF’. is required to access this part! 6.2.5.9 Password Set-up NOTE: This operation is for maintenance personnel only.
-
Page 22: Maintenance And Troubleshooting
This function is to control the grid connection or disconnection of inverters. NOTE: The use of cleaning agents may damage the machine and Inverter ON/OFF its components. Only use a cloth moistened with clear water to clean the machine. Press UP/DOWN to scroll the menu, press ENT to perform the selection, and press ESC to return to the previous menu. - Page 23 3. Check whether grid is not in PV current 1. Restart the inverter DC Over service exceeds the 2. Decrease solar panels Current 4. If the above reasons have software quantity in parallel if it occurs Soft been excluded and this fault protection limit repeatedly still occurs in the LCD screen,...
- Page 24 been connect with the Over Export reduction 1. Check the ventilation of corresponding grid L, N, E line Temperatu due to over installation environment correctly temperature 2. Avoid direct sunlight Fault in current 1. Check the ventilation of GFCI Device Restart the inverter or contact Temp is Temperature is...
-
Page 25: Specification
Adjust the protection value Specification Grid Freq Grid frequency is limit through self-designing Out Range out of range function as permitted by the grid company Fault in Restart the inverter or contact Relay Fault grid-connection the installer relay Communication fault between MS Comm Restart the inverter or contact the main CPU...
Need help?
Do you have a question about the EES3K-M1 and is the answer not in the manual?
Questions and answers