
Related Manuals for KESNOS PD160A


Summary of Contents for KESNOS PD160A
- Page 1 Home Dehumidifier Please read the manual carefully before using the unit PD160A USER MANUAL www.kesnos.com...
- Page 2 TO ACCESS CUSTOMER SUPPORT FASTER If there is any problem of the product, please contact Kesnos Customer Service support@kesnos.com with your Purchase Order ID to help you address the...
- Page 3 BEFORE FIRST USE: To prevent any internal damage, it is very important to keep refrigeration units (like this one) upright throughout their journey. Please leave it standing upright and outside the box for 24 HOURS before plugging it in.
-
Page 4: Table Of Contents
TABLE OF CONTENTS Safety Instructions..............Parts Description ..............Control Interface..............Operation Instructions............Cleaning & Maintenance............Troubleshooting..............Special Notes............... Technical Parameters.............. Warranty & Contact Us............Statement The graphics and functions provided in this manual may not be the same as the actual product. Please always refer to the actual product. The model of the machine on the manual is for reference only, please check the corresponding content and operate the machine based on the actual product. -
Page 5: Safety Instructions
SAFETY INSTRUCTIONS Safety Notes: For your safety, please read the manual carefully and keep the manual for future reference. Please use this product according to the instructions of installation and operation of this manual. Unplug the power supply cord before cleaning or storage. Do not immerse the unit in water,or place it close to water. -
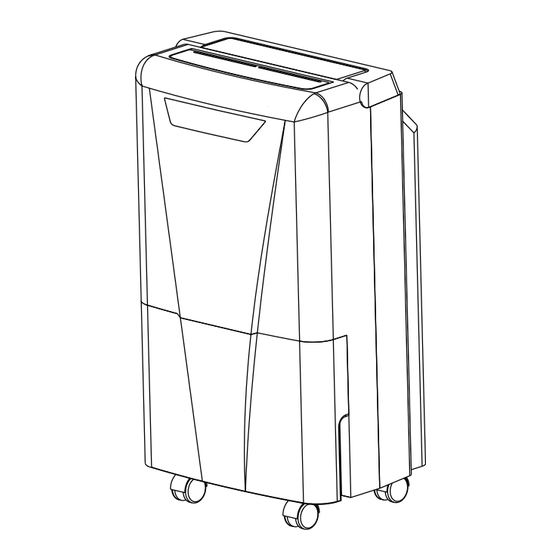
Page 6: Parts Description
PARTS DECARIPTION Front Air Outlet Grilles Control Panel Water Tank Rear Handle Air Filter Air Inlet ( the air filter is equipped inside ) Caster - 2 -... -
Page 7: Control Interface
CONTROL INTERFACE 1.Control Panel Low Indicator Tank Full Indicator High Indicator Timer Indicator Run Indicator Lock Indicator Humidity Display Defrost Indicator LOCK POWER Power Button Lock Button Speed Button Humidity Button Timer Button Timer Button Power Button Press the "TIMER", you can set the Press to turn on/off the machine. -
Page 8: Operation Instructions
OPERATION INSTRUCTIONS 2.Setting Humidity Setting When power-on status, press the "SET" button to set the humidity value within the range of 30%RH-80%RH in 5%RH increments (can be set again after invalid). Long press the button for seconds, you can adjust the humidity value continuously. - Page 9 OPERATION INSTRUCTIONS Water Overflow Protection When the water tank is full of water, the machine will turn off automatically, the "Full" indicator light will flash. After you empty the water tank, this indicator light will go out, and the machine will restart to work.
- Page 10 2.Humidity sensor failure? will return to normal. humidity) Repair and replace the humidity sensor. contact Kesnos Customer Service at support@kesnos.com for help. - 6 -...
- Page 11 OPERATION INSTRUCTIONS 5. Empty The Water Tank Two ways are available to remove the collected water. Use the Water Tank When the water tank is already full, the WATER FULL indicator will light up, the dehumidifier will automatically shut down until the tank has been emptied and placed back to the unit.
- Page 12 OPERATION INSTRUCTIONS - 8 -...
- Page 13 OPERATION INSTRUCTIONS 6. Continuous Drainage Continuous Drainage Port Water Tank Drainage Port Rubber Plug Pull out the black rubber plug, insert the water hose into the continuous drainage port for draining. The outlet of the water hose should be lower than the continuous drainage port by more than 3.9 inches, and the water hose cannot be bent.
-
Page 14: Cleaning & Maintenance
CLEANING AND MAINTENANCE WARNING: Turn the dehumidifier off and remove the plug from the wall outlet before Cleaning. A- Cleaning the dehumidifier body Please use only a soft and a bit wet textile or cloth to clean it. B- Cleaning filter 1. -
Page 15: Troubleshooting
TROUBLESHOOTING - 11 -... - Page 16 TROUBLESHOOTING - 12 -...
- Page 17 TROUBLESHOOTING If the dehumidifier is still not working properly as expected and the troubleshooting steps or solutions above may not resolve the issue, please unplug the power and shut down the dehumidifier then contact Kesnos Customer Service support@kesnos.com. - 13 -...
-
Page 18: Special Notes
SPECIAL NOTES When using, please do not put When using, please keep the Do not insert thin rods and hard machine away from heating the machine at the soft and objects into the machine body to uneven ground, avoid vibration furnace, electric kettle and avoid malfunction and danger. -
Page 19: Technical Parameters
TECHNICAL PARAMETERS MODEL PD160A POWER SOURCE 120V~60Hz RATED POWER (95°F, 90%RH) 230W RATED CURRENT (95°F, 90%RH) 2.0A MOISTURE REMOVAL (65°F, 60%RH) 9.0 Pints/Day (4.25L/Day) MOISTURE REMOVAL (80 ℉, 60%RH) 14 Pints/Day (6.6L/Day) 25 Pints/Day (12L/Day) MOISTURE REMOVAL (86 ℉, 80%RH) MOISTURE REMOVAL (95 ℉, 90%RH) -
Page 20: Warranty & Contact Us
CONTACT US Warranty Kesnos offers a 12-month warranty to all of our products together with the original proof of purchase when a defect occured, including those newly purchased and unused, from Kesnos or through an authorized reseller, wholly or substantially, or as a result of faulty manufacturing parts, or workmanship during the Warranty Period. - Page 22 We are expecting to see our products fulfill your life and hear your voice. Your satisfaction means a lot to us. Please tag us if you share a snap on your social media. www.kesnos.com...
Need help?
Do you have a question about the PD160A and is the answer not in the manual?
Questions and answers