Table of Contents
Advertisement
Advertisement
Table of Contents

Summary of Contents for POHL+SCHMITT PCS-550
- Page 1 BREAD MAKER Model: PCS-550 Instruction Manual...
-
Page 2: Introduction
Your satisfaction is guaranteed. If you are not completely satisfied with our Bread Maker and the results it brings, we insist that you let us know. We’ll help you make the Bread Maker work for you, or we’ll refund your money. BEFORE YOU START Pohl &... -
Page 3: Important Safety Information
IMPORTANT SAFETY INFORMATION When using electrical appliances, necessary safety precau�ons should always be followed, including the following: READ ALL INSTRUCTIONS, PRODUCT LABELS, AND WARNINGS BEFORE USING THE BREAD MAKER. Do not touch hot surfaces. Always use oven mi�s when handling hot materials, and allow metal parts to cool before cleaning. -
Page 4: Before First Use
BEFORE FIRST USE Remove any packing material, plas�c, labels, s�ckers, or tags that may be a�ached to the appliance. Clean the machine thoroughly: 1. Wash the bread pan, kneading paddle, measuring cup and measuring spoon in hot soapy water. 2. Rinse and dry thoroughly. 3. -
Page 5: Parts And Functions
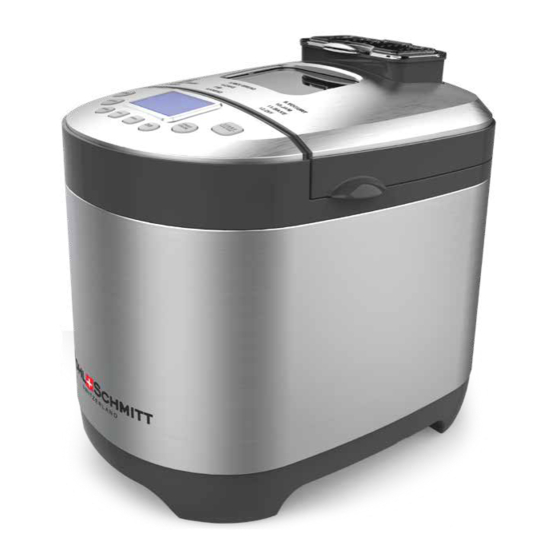
PARTS AND FUNCTIONS Top Lid Viewing Window Nut Dispenser Kneading Paddle Bread Pan Control Panel Housing Hook Measuring (used to help get the kneading paddle out) -
Page 6: The Control Panel
THE CONTROL PANEL 6. CAKE 11. DIY 1. BASIC 2. SWEET 7. RICE BREAD 12. BAKE 3. WHOLE WHEAT 8. MIX 13. YOGURT 4. FRENCH 9. DOUGH 14. JAM 5. GLUTEN FREE 10. KNEAD START MENU PAUSE/STOP CRUST WEIGHT COLOR GLUTEN TIMER- TIMER+... - Page 7 Press this bu�on to select the program you want. Each �me you press the MENU bu�on, you will hear a "beep" sound and the MENU program will change. Keep pressing the bu�on con�nuously un�l you reach your desired program. The func�ons and the �meline of the cycles for each of the 14 programs are explained below.
- Page 8 6. CAKE This se�ng lets you bake the dough, whose recipe calls for baking soda and/ or baking powder as leavening agents. Dura�on of this program is 1 hour and 50 minutes. 7. RICE BREAD With this program, you can make bread that is a mixture of cooked rice and flour.
- Page 9 Adjustable Default range (min) (min) First Mix 0-30 0-30 First Rest 0-30 Second Mix Second Rest 0-30 Third Mix 0-25 0-60 Third Rest 0-60 Fourth Mix Rise 0-60 Bake 0-80 Keep Warm 0-60 NOTE: If you choose the DIY program and do not make any changes in the cycles, the program will go through all the 10 steps according to the default se�ngs.
-
Page 10: Timetable For Cycles
TIMETABLE FOR CYCLES Each cycle of the bread maker has different amounts of �me devoted to mixing, res�ng, rising, and/or baking. The chart below shows how many minutes are in each phase for specific cycles: BASIC SWEET Program Weight 1000g 750g 500g 1000g... -
Page 11: Display Window
Program RICE BREAD GLUTEN FREE DOUGH Weight 1000g 750g 500g 1000g 750g 500g Total �me 02:30 02:25 02:20 03:05 03:00 02:55 01:30 First Mix 10 min 10 min 10 min 10 min 10 min 10 min 7 min First Rest 5 min 5 min 5 min... - Page 12 Use the "START/STOP" bu�on for star�ng, pausing or stopping the selected program. • To START a program, press the START/STOP bu�on once. You will hear a signal tone indica�ng that the program has begun. • To PAUSE the program press START/STOP bu�on for half a Half second.
-
Page 13: Keep Warm Function
Press the Weight bu�on to select the loaf size for the recipe you are making. You may choose between 500gr, 750g, or 1,000g WEIGHT (1lbs, 1.5lbs, and 2lbs). You can adjust the weight of the bread on programs 1-6 only. GLUTEN FREE Press this bu�on to select the gluten free program. -
Page 14: How To Use Your Bread Maker
HOW TO USE YOUR BREAD MAKER 1. Remove the bread pan by shi�ing it counterclockwise and li�ing it out using its handle. You will hear a clicking sound once it is removed. It is important to remove the Bread pan from the unit before pu�ng the ingredients into the pan to avoid accidentally spilling ingredi- ents into the inner case. - Page 15 4. Place the bread pan into the oven chamber and make sure it is firmly locked in place by turning it clockwise. You will hear a clicking sound when the pan is placed in posi�on properly. Close the lid. 5. Connect the bread maker plug to the electric outlet. The unit will beep and show the default program, which is the BASIC program (no.
- Page 16 hot pads or oven mi�s; rotate the bread pan to the right and li� it out by its handle. Be careful! The pan can be very hot. 10. Turn the loaf out of the pan and onto a wire rack to cool. If necessary, use a nons�ck spatula gently inserted along the sides of the pan to loosen bread.
-
Page 17: Cleaning And Maintenance
CLEANING AND MAINTENANCE • NEVER immerse the bread maker in water or any liquid. • DO NOT put the bread pan in the dishwasher. • DO NOT soak the bread pan in water. CAUTION: Make sure that the unit is unplugged from the electric outlet before cleaning. -
Page 18: Troubleshooting
TROUBLESHOOTING 1. Use exact amounts of ingredients as specifed in the RECIPES sec�on of this Use & Care Guide. The included measuring cup is for liquids only. View cup markings at eye level for accurate measurement. Spoon dry ingredients into a standard measuring cup and level off... - Page 19 PROBLEM POSSIBLE CAUSE SOLUTION The bread is small, Too dry, not enoigh Check the recipe and adjust heavy, dense or wet liquid ingredients accordingly. Bread collapsed Too much Yeast and/ Check the recipe and adjust a�er over-rising or water ingredients accordingly. S�cky and Under- Not enough yeast or Check the recipe and adjust...
-
Page 20: Tips For Baking Whole Wheat And Multigrain Bread
Tips for baking whole wheat and multigrain bread The final result of whole-wheat bread and mul�grain bread is significantly affect- ed by the quality of ingredients, especially the flour. The flour quality revolves around storage methods, the temperature, humidity, as well to the quality of the wheat crop. - Page 21 SALT – Use only non-iodized salt (iodine a�acks the yeast ac�vity, slowing down the first fermenta�on). Salt is a yeast inhibitor, and it is best to add it, so it is not touching the yeast. If you are having trouble with small loaves, try cu�ng back on the salt (some�mes this solves the problem).
-
Page 22: Placement Matters
PLACEMENT MATTERS 1. Liquid 2. Flour 3. Yeast TECHNICAL SPECIFICATIONS Model No.: PCS-550 Power supply: 120V/50Hz Power consumed: 550W Pan and paddle materials: Paddle - aluminum alloy ADC12 Pan - aluminum alloy 6063 Both are with Whi�ord coa�ng (QUANTUM2 Whi�ord coa�ng). -
Page 23: Table Of Contents
TABLE OF CONTENTS INTRODUCTION IMPORTANT SAFETY INFORMATION BEFORE FIRST USE PARTS AND FUNCTIONS THE CONTROL PANEL DISPLAY SCREEN TIMETABLE FOR CYCLES DISPLAY WINDOW KEEP WARM FUNCTION HOW TO USE YOUR BREAD MAKER CLEANING AND MAINTENANCE TROUBLESHOOTING TIPS FOR BAKING WHOLE WHEAT AND MULTIGRAIN BREAD TIPS FOR USING INGREDIENTS PLACEMENT MATTERS TECHNICAL SPECIFICATIONS... - Page 24 Such warranty shall not apply to damages resulting from accidents, abuse or misuse. Your purchase comes with a 100% satisfaction guarantee from Pohl+Schmitt CUSTOMER If you are not happy with the product for any reason, please SATISFACTION contact us at support@pohlschmitt.com or at (877) 899-8189...
Need help?
Do you have a question about the PCS-550 and is the answer not in the manual?
Questions and answers
Where can I get a new bread pan?