Table of Contents
Advertisement
Quick Links
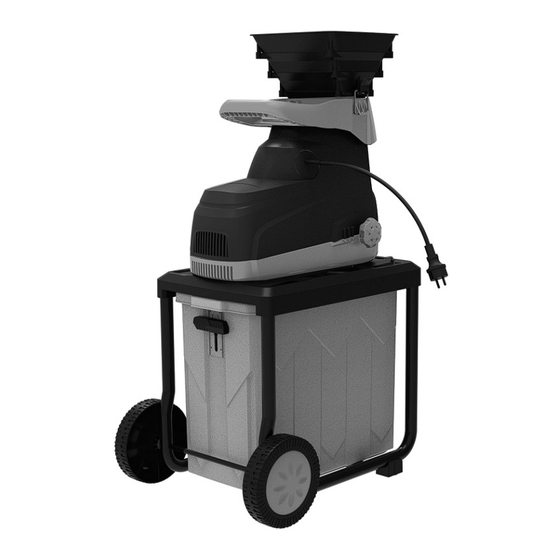
Silent Wood Chipper
Manual
WARNING:
Read carefully and understand all INSTRUCTIONS before operating. Failure to follow the safety
rules and other basic safety precautions may result in serious personal injury.
Save these instructions in a safe place and on hand so that they can be read when required.
Keep these instructions to assist in future servicing.
REV 04/22/20
Advertisement
Table of Contents

Related Manuals for Super Handy GUT037


Summary of Contents for Super Handy GUT037
- Page 1 Silent Wood Chipper Manual WARNING: Read carefully and understand all INSTRUCTIONS before operating. Failure to follow the safety rules and other basic safety precautions may result in serious personal injury. Save these instructions in a safe place and on hand so that they can be read when required. Keep these instructions to assist in future servicing.
-
Page 2: Intended Use
Please recycle where facilities exist. Check with your Local Authority or retailer for recycling advice. SPECIFICATIONS Item No. GUT037 Rated Voltage-Frequency 120V-60Hz Rated Power Capacity of Collection Box Max. Cutting Capacity 1.9" (49mm) -
Page 3: Safety Precautions
SAFETY PRECAUTIONS TO REDUCE RISK OF INJURY: Before any use be sure everyone using this product reads and understands all safety instructions and other information contained in this manual. Wear appropriate personal hearing protection during use. Under some conditions and duration of use, noise from this product may contribute to hearing loss. - Page 4 STORE IDLE UNIT INDOORS- When not in use, the garden shredder should be stored indoors in a dry and high or locked-up place, out of children’s reach. MAINTAIN UNIT WITH CARE- Keep clean for best performance and to reduce the risk of injury.
-
Page 5: Operating Tips
OPERATING TIPS 1. Before starting the garden shredder, make sure that the hopper inlet is empty. 2. Keep your face and body away from the opening. 3. Do not allow hands or any other part of the body or clothing near the hopper or discharge chute. - Page 6 2. Install the wheel and wheel cover on the left and right sides of the bracket, as shown in the following Fig. 1. 65 Shim 68 Wheel Axle 63 Wheel Cover 66 650 Wheel 64 Pin Fig. 1. 3. Install the four plastic rings from the bottom to the top in the order of small to large, the accessories package includes 14pcs No.
- Page 7 5. Install the power part and the support frame, and tighten them with 4 bolts (No. 59 screw : ST6*25), See Fig. 4. Power Part Support Frame 59 screw ST6*25 4pcs Fig. 4. 6. Install collection box by pushing it into the frame beneath shredder body, See Fig. 5. Fig.
- Page 8 7. Push the collection box pin up is lock the box,down is open the box, See Fig 6. Fig 6 OPERATION INSTRUCTIONS 1. Starting and stopping. Starting: Below picture is the switch control panel, See Fig. 7. Counter clockwise OFF ON rotation Reset Button Stop...
- Page 9 Stopping: (See Fig. 7) Push the I/O switch to “O” to turn the garden shredder off. If the wood chipper is blocked when it is working, please press the three-way switch to the "stop" position (the middle part of the three-way switch) immediately, and then press the reverse switch, then push the I/O switch to “O”...
-
Page 10: Maintenance
MAINTENANCE Always turn off the garden shredder and unplug the power cord from the outlet before maintaining the shredder. Always wear gloves when cleaning. 1. Cleaning garden shredder: a) Before any maintenance or cleaning is done on the blades, always turn the switch off and disconnect the plug from the outlet. - Page 11 7. Cutting blade replacement. See Fig. 9 & 10. Refer to the “Cleaning garden shredder” part, the blade can be removed directly without tools. But be careful not to miss the pin, because it is very easy to fall down. When you install a new blade, put the side with arrow and word on the blade facing outward, in case install it in the opposite direction.
- Page 12 EXPLODED AND PARTS LIST...
- Page 13 Part No. Description Q’ty Part No. Description Q’ty Capacitance Adjusting knob Material mouth O-ring rubber ring Cleaning rod All metal locknut m10 Prizing board Small baffle knife plate Buckle Screw m4x8 Knurled pin φ4x30 Adjusting plate Screw st4x16 Switch panel Big gear 3 block type switch Axle sleeve 4...
- Page 14 List of Accessories with Wood Chipper Package: Wheel cover Wheel Shim Cotter pin Wheel Axle inner hexagon Screw ST6x25 spanner M6 Cleaning rod ST4-16 Screw...
-
Page 15: Troubleshooting
TROUBLE SHOOTING Problem Cause Remedy The motor does Power failure / unit not plugged Check to make sure unit is plugged into a not run . into a working receptacle. working outlet. Make sure extension cord is not damaged. The overload protection has responded. Remove any chips and press the reset button. - Page 16 Great Circle USA Support Line: 1-866-493-0524 superhandy@greatcircleus.com www.greatcircleus.com Size: 145x210mm 157克铜版纸 REV 04/22/20...
Need help?
Do you have a question about the GUT037 and is the answer not in the manual?
Questions and answers