Table of Contents
Advertisement
Advertisement
Chapters
Table of Contents

Related Manuals for ALDI BELAVI 199159_20210429


Summary of Contents for ALDI BELAVI 199159_20210429
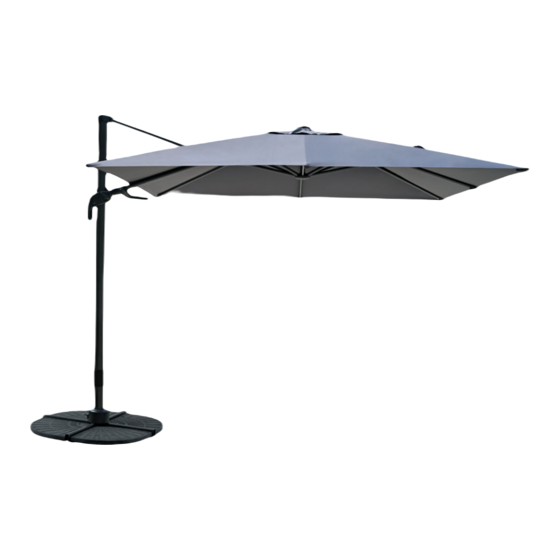
- Page 1 Assembly Instructions GARDEN PREMIUM CANTILEVER UMBRELLA ID: #05007...
-
Page 3: Contents
Contents Contents Base lower bar Pedal Base upper bar Swivel unit Support pole Base cover cap Support pole sleeve Base cover Umbrella pole Crank handle Tilt lever Collapsible rod Umbrella handle Protective cover Hook and loop fastener Zip string Umbrella Connecting elements supplied Large bolt, 4×... -
Page 4: Table Of Contents
Table of contents Table of contents Contents ........................3 Connecting elements supplied ................3 Tools supplied ......................3 General information ....................5 Reading and storing the assembly instructions ............ 5 Proper use ........................5 Explanation of symbols ..................5 Safety ........................6 Signal symbol/word definitions ................6 Safety instructions ......................6 Product description .................... -
Page 5: General Information
General information IMPORTANT, RETAIN FOR FUTURE REFERENCE: READ CAREFULLY General information Reading and storing the assembly instructions These assembly instructions accompany this garden premium cantilever umbrella (referred to only as the “product” below). They contain important information about safety, use and care. Before assembling and using the product, read the assembly instructions carefully. -
Page 6: Safety
Safety CAUTION: HEAVY. 16.1 to 40 kg. Consider two person lift or mechanical aid. Safety Signal symbol/word definitions The following symbols and signal words are used in these assembly instructions. This signal symbol/word designates a hazard WARNING! with moderate risk, which may result in death or severe injury if not avoided. - Page 7 Safety − Make sure children do not play with, climb or stand on the product. − Use base weights (not included) totalling a minimum of 120 kg to prevent the product from tipping over. − Make sure that the product is stable and inspect the product before each use.
-
Page 8: Product Description
Product description Product description The product is exclusively designed for providing shade and protection from direct sunlight. Use base weights (not included) totalling a minimum of 120 kg to prevent the product from tipping over. Base weight, 4× (not included) -
Page 9: First Use
First use First use Checking the product and package contents NOTICE! Risk of damage! If you are not cautious when opening the packaging with a sharp knife or other pointed object, you may quickly damage the product. − For this reason, be very careful when opening it. 1. -
Page 10: Assembly
Assembly Assembly WARNING! Risk of injury! If you use the product improperly, it may result in personal injury. − Only use the product with sufficient weight on the base (minimum 120 kg, not included). The product could tip over and cause serious injury to bystanders. NOTICE! Risk of damage! Improper handling of the product may result in damage to the... -
Page 11: Separating The Support Pole Sleeve From The Support Pole
Assembly 1 Separating the support pole sleeve from the support pole − Remove the support pole sleeve by lifting it out of the support pole 2 Setting up the swivel unit − Press the pedal down and turn the top of the swivel unit one position to the left or to the right. -
Page 12: Assembling The Support Pole And Other Parts
Assembly 3 Assembling the support pole and other parts 1. Join the base upper bar and the base lower bar together (see step 1 in Fig. 3). 2. Attach the bottom of the swivel unit to the top of the bars with 4 large (see step 2 in Fig. -
Page 13: Attaching The Base Cover And Base Weights
Assembly 4 Attaching the base cover and base weights 1. Attach the base cover cap to the base cover by pushing the base cover cap onto the base cover (see step 1 in Fig. 4). (see step 2 in Fig. 4). 2. -
Page 14: Attaching The Umbrella Pole To The Support Pole
Assembly 6 Attaching the umbrella pole to the support pole − Slide the umbrella pole onto the support pole . Make sure the screw hole on the umbrella pole and on the support pole are aligned. 7 Securing the umbrella pole 1. -
Page 15: Attaching The Crank Handle (1)
Assembly 8 Attaching the crank handle (1) 1. Pull the trigger on the umbrella handle to unlock the umbrella handle (see step 1 in Fig. 8). 2. Slide the umbrella handle up a little to tilt the umbrella and reveal the side of the umbrella handle (see step 2 in Fig. -
Page 16: Use
1 Opening and setting the height of the umbrella 1. Wind the crank handle clockwise to fully extend the umbrella (see step 1 in Fig. 10). 2. Pull the trigger to unlock the umbrella handle and slide it up to set the umbrella at the desired height (see step 2 in Fig. -
Page 17: After Use
After use 3 Swivel the umbrella left or right 1. Step on the pedal and push it down to unlock the support pole 2. Rotate the support pole left or right to the desired position (16 swivel positions in total). 3. - Page 18 After use 2 Closing the umbrella − Wind the crank handle anti-clockwise to close the umbrella 3 Setting the umbrella to the upright position − Pull the trigger to unlock the umbrella handle and slide the handle all the way down to set the umbrella to the upright position.
- Page 19 After use 4 Fastening the loop and hook fastener − Fasten the hook and loop fastener around the umbrella 5 Using the collapsible rod 1. Unfold the collapsible rod and slide the ends of each section into each other to assemble the rod (see step 1 in Fig. 17). 2.
- Page 20 After use 6 Placing the protective cover over the product − Use the assembled collapsible rod to place the protective cover over the product and wrap the product inside the protective cover. 7 Zipping up the protective cover (see step 1 in Fig. 19). 1.
-
Page 21: Cleaning And Maintenance
Cleaning and maintenance Cleaning and maintenance NOTICE! Risk of damage! Improper handling of the product may result in damage to the product. − Do not use any aggressive cleaners, brushes with metal or nylon bristles or sharp or metallic cleaning utensils such as knives, hard scrapers and the like. -
Page 22: Storage
Technical data Storage NOTICE! Risk of damage! Storing the product in a damp area will allow rust to form on bolts. This may permanently and irreparably damage the functionality of the product. − Avoid dust, water, moisture, frost, extreme temperature and high humidity. -
Page 23: Disposal
Disposal Disposal Disposing of the packaging Sort the packaging before you dispose of it. Dispose of paperboard and cardboard with the recycled paper service and wrappings with the appropriate collection service. Disposing of the product − Should the product no longer be capable of being used at some point in time, dispose of it in accordance with the regulations in force in your city or county. -
Page 24: Warranty Details
GARDEN PREMIUM CANTILEVER UMBRELLA Warranty Details REGISTER YOUR PURCHASE AT www.aldi.com.au/en/about-aldi/product-registration/ TO KEEP UP-TO-DATE WITH IMPORTANT PRODUCT INFORMATION The product is guaranteed to be free from defects in workmanship and parts for a period of 12 months (dependant on product) from the date of purchase. Defects that occur within this warranty period, under normal use and care, will be repaired, replaced or refunded at our discretion. -
Page 25: Repair And Refurbished Goods Or Parts Notice
Please be assured though, refurbished parts or replacements are only used where they meet ALDI’s stringent quality specifications. If at any time you feel your repair is being handled unsatisfactorily, you may escalate your complaint. - Page 26 ALDI guarantees that our exclusive brand products are developed to our stringent quality specifications. If you are not entirely satisfied with this product, please return it to the nearest ALDI store within 60 days from the date of purchase, for a full refund or replacement, or take advantage of our after sales support by calling the supplier’s Customer Service Hotline.
Need help?
Do you have a question about the BELAVI 199159_20210429 and is the answer not in the manual?
Questions and answers