
Subscribe to Our Youtube Channel
Related Manuals for Wosports LY-121

Summary of Contents for Wosports LY-121
- Page 1 User’s Guide for Trail Camera Thanks for purchasing this trail camera. Please read this instruction manual carefully before using this product.
-
Page 2: Packing List
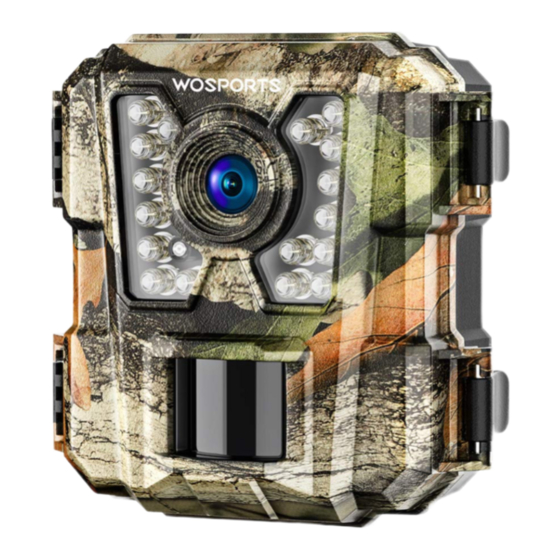
Packing List Please carefully unpack camera and check that below accessories are contained in the box. Manual ① ② ③ ④ ⑤ ①. Trail camera x1 ②. Instruction Manual x1 ③. Mounting Belt x1 ④. Wall Mount x1 ⑤. Screws x3 Product Structure locking bracket... - Page 3 ① LED lamp ② Lens ③ LED lamp ④ PIR ⑤ SD card slot ⑥ Power key ⑦ Display ⑧ Down key ⑨ UP key ⑩ OK key...
-
Page 4: How To Use
The Camera Operating HOW TO USE? 1. Install 4pcs AA batteries (NOT INCLUDED). 2. Install SD card (CLASS 6 or higher class Up to 32GB max, NOT INCLUDED). 3. Put the switch to "AIM", then you can setting(Time/ Date, Interval Time etc). -
Page 5: Loading Batteries
Loading Batteries 1. Open the locking bracket ,you can see the battery compartment inside the camera. 2. Please loading batteries. Be sure to inset each battery so its polarity (+/- direction) matches the polarity indications at the bottom of the battery tray (Fig1). -
Page 6: Inserting Sd Card
Inserting SD Card Make sure that the SD card is insert correctly. If you hear “click” sounds that means it has be inserted correctly .If the SD card is not inset correctly, or no card is in the slot,”CArd” will appear on the LCD display (Fig2), and please reinsert the SD card. - Page 7 ① UP key: page up ④ ON key: working mode ② Down key: page down ⑤ AIM key: setup mode ③ OK key: confirm the setting ⑥ OFF key: stop working mode 2. Power/Mode Switch Operation Instruction Slide the switch to choose work mode: OFF Mode: The camera’s power switch is in the OFF position.
- Page 8 take the batteries out the battery compartment if the camera will not be used for a long time ON Mode Please be sure the batteries were loaded and SD card was inserted, and placed the camera to the right induction height or area ,then, move the mode switch to ON mode.
- Page 9 Note: Always move the power switch from OFF to AIM mode. It is possible that the camera could would lock up if it is switched from ON to AIM mode. If this occurs, simply move the switch to OFF and then push it over to AIM again.
-
Page 10: Setting Time And Date
current setting, simply press OK to confirm and skip to the next item. Setting Time and Date After the Initial setup screen, the next few display screens will allow you to set the current time and date, so the time/date stamp imprinted on all your photos and videos will be accurate when captured by the camera to change the time and date to be current, starting at the current time show on screen. - Page 11 Use UP/DOWN to select your preferred image capture mode: Single Photo per trigger (display shows 1+ a still camera icon, Fig8) Rapid Sequence of 3 photos per trigger (display shows 3+a camera icon+, Fig9). Press UP/DOWN arrow to select image resolution(low photo frequency - 2MP,display shows LO, Fig10.
-
Page 12: Setting Camera Id
the interval time as you want,3sec,15sec (default value), 30 sec, 1min or 3min. Press OK after setting (Fig13). Setting Camera ID Use UP/DOWM to select a reference ID# (from “01” to “99” ) for this camera, which will be imprinted on all photos/videos along with the time and date. - Page 13 SD Card Format (delete all files) The display will show “FOrn” . Use UP/DOWN to change the “N” after “FOrn_”to “Y”, then press OK to confirm (Fig16). Note: Please be sure to backup and save all files you want to keep first, as formatting will clear the card completely of all first-they will then be difficult or impossible to recover form the card .
- Page 14 Fig17 Camera won’t power up 1. Make sure that you have installed all batteries in the battery compartment, filling all battery spaces with no “gaps”. 2. We recommend using a full set of 4 Energizer® Lithium AA batteries. 3. Make sure that the batteries are installed correctly, observing proper polarity.
-
Page 15: Camera Stops Taking Images Or Won't Take Images
Camera stops taking images or won’t take images 1. Please make sure that the SD card is not full. If the card is full (display indicates ”FULL” ,the camera will stop talking images.) 2. Make sure that the power/mode switch is in the ON position and not set to OFF or AIM. - Page 16 to obtain maximum battery life. 2. These are several variables that will determine the battery life including type of batteries, temperature outside, recording settings, frequency of camera activity, etc. Colder temperatures, night photos and photo frequency (low camera delay) will result in shorter battery life.
- Page 17 3. Higher temperature will make the PIR detection distance become shorter. So that sometimes the animal will not be monitored even it is through by the PIR sensor’s detection of activity in the area it covers. Please be sure to mount the camera in place correctly and securely. The height is need to keep the same between the animal and camera.
- Page 18 electronic component issue. If this the case, please contact service team. Photo and video quality problems 1. The image is blurred or out of focus Check if something stuff on the lens, please be sure the lens is clean. 2. Daytime photos or videos appear too bright/dark Make sure that the camera is not aimed at the sun or other light sources during the day.
- Page 19 Specifications Camera Size 102mmx101mmx63mm Camera Weight 171g Image Sensor Type 1/4- inch CMOS,1 million pixels Lens F=2.4; FOV=58 degree; Auto IR-Cut Max IR Flash Range 15meters (850nm ) Txt Screen 34x16mm 1/4 Duty 1/3 BIAS Storage SD / SDHC Card, up to 32GB Capacity Class 4 or higher Image Resolution-Photo mode LOW: 2MP: 1920x1080...
- Page 20 5% ~ 95% Security Authentication FCC & CE & ROHS If you have any questions or problems. Please contact us by email: support@wosports.com We will offer prompt and authoritative reply within 24 hours, and try our best to resolve your problem ASAP.
Need help?
Do you have a question about the LY-121 and is the answer not in the manual?
Questions and answers