Table of Contents
Advertisement
AMSV2 User Guide
Guide Index
INSTALLATION
Introduction
Introduction to Music Server terminology - p1
•
Make The Connections
Install an EX in your system – p8
•
Install a CX in your system - p11
•
Install a CX+EX in your system – p42
•
Install a P1 in your system – p137
•
Install a P2 in your system – p139
•
Basic Operations
How to start and shutdown your Antipodes music server – p124
•
Use any desktop, laptop, tablet or smartphone to manage your Antipodes – p14
•
Easily manage the applications on your Antipodes – p117
•
Optimising Audio Quality – p121
•
Assemble Your Music Library
Add internal storage to your Antipodes to enable playback from internal storage – p3
•
Rip your CDs to internal storage using any USB Optical Drive, or with high precision using
•
an Antipodes P1 – p39
Copy your music files to the internal storage of the Antipodes over your network – p16
•
Manage your music library on your desktop or laptop and synchronise the Antipodes
•
library to it – p18
Setup an automated backup where every change to the Antipodes music library is backed
•
up to your desktop, laptop or NAS – p125
Backup internally stored files to a USB drive – p31
•
Add files stored a your desktop/laptop/nas, or on a USB disk, to the music library of your
•
Antipodes – p29
SETUP
About Playing Music
Remote control playback using any desktop, laptop, tablet or smartphone – p115
•
Play from the Antipodes music library – p116
•
Play from internet streaming services – p5
•
Advertisement
Table of Contents

Related Manuals for Antipodes EX

Summary of Contents for Antipodes EX
- Page 1 Rip your CDs to internal storage using any USB Optical Drive, or with high precision using • an Antipodes P1 – p39 Copy your music files to the internal storage of the Antipodes over your network – p16 • Manage your music library on your desktop or laptop and synchronise the Antipodes •...
- Page 2 Complete Playback Solutions Roon Server Local – p35 • Roon Server With Roon Ready – p63 • Roon Server With Squeezelite – p58 • Roon Server With HQPlayer – p87 • HQPlayer Local – • HQPlayer Server With HQPlayer NAA – p78 •...
- Page 3 All Antipodes Music Servers combine the Server function and the Renderer function in a single device, for a simple solution. The DX also incorporates a ripper. The CX and EX do not incorporate a ripper, but you can add a P1 to add a ripper to these models. The P1 is a slim isolation platform carved from a solid block of alloy, that holds a high quality ripper.
- Page 4 EX – The EX is our lowest priced model, combining server and renderer functions, plus a simple DAC. So you can move from a CD Player to an EX and leave getting a DAC till a later date. You can progress from here to our top of the line solution without needing to sell the EX. The two upgrade steps are to add a USB DAC, and to add a CX.
- Page 5 Because Antipodes Music Servers are so low-noise then you get the best sound quality by playing from les stored on internal SSD storage. Beginning with the CORE and the EDGE, and in the current line-up with the EX and CX, users are able to buy and install their own storage. This makes the use of SSD storage, and future expansions of storage more affordable and much simpler to accomplish.
- Page 6 The online support session will setup a single logical location across the disks so that it appears to you to be a single large disk and all the les will automatically be part of your music library. Similarly, you can replace the disks with larger capacity disks with the assistance of Antipodes Support without the Antipodes server even having to be removed from your stereo system.
- Page 7 Users of Squeezebox can also use TIDAL, QOBUZ, DEEZER and a number of others, plus can access internet radio stations. Many of you also use Spotify Connect on your Antipodes to allow your family members to easily use your system.
- Page 8 1. Set MPD as your renderer and set the resolution that matches your TIDAL and/or QOBUZ memberships (see above). 2. Setup DLNA access to your Antipodes library (Using Squeezebox Server, MiniDLNA or MinimServer). 3. You can also setup DLNA access to your NAS or other devices on your network.
- Page 9 We need to add some notes of caution. Many of these apps are in rapid development and may have bugs from time to time, but the competition is erce and winners will emerge that are very good. Some are pretty good already. You also need to have a good local network in your house for these services to work well at high bit rates, preferably a wired network. ...
- Page 10 You can make the connections shown to run either functions 1, 3 and 4, or functions 2, 3 and 4 at the same time. 1. Play from the EX to your Ampli er via Analog Interconnects Con gurationConnections...
- Page 11 2. Play from the EX to your DAC via USB Con gurationConnections 3. Play from the EX to your DAC via Direct Ethernet Con gurationConnections 9 / 140...
- Page 12 4. Stream from your EX to networked players on your network Con gurationConnections 10 / 140...
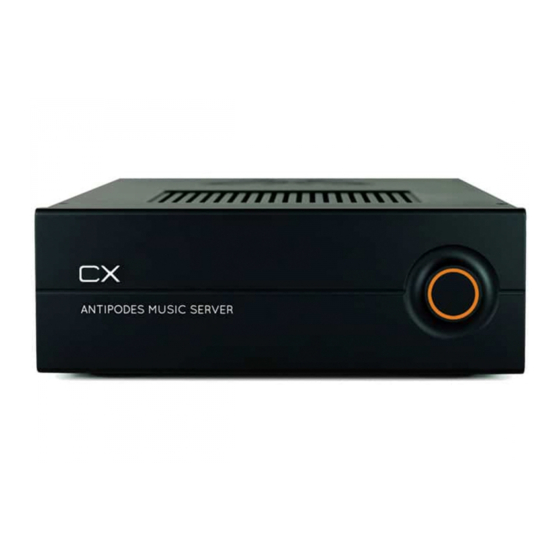
- Page 13 Install A CX HOW TO INSTALL A CX: The image below illustrates all CX functions This is broken down into the three separate functions below. Select the tabs to see the network con guration and the rear panel connections for each function. You can make the connections shown to run all 3 functions at the same time. 1.
- Page 14 2. Play from the CX to your DAC via Direct Ethernet Con gurationConnections 3. Stream from your CX to networked players on your network Con gurationConnections 12 / 140...
- Page 15 13 / 140...
- Page 16 Whenever you start or shutdown an Antipodes, it will communicate with myantipodes.com to keep a record of any Antipodes on your network, and what its IP Address is. The sole purpose of this process is so that you can quickly get to the Antipodes Control Panel of any Antipodes device on your network.
- Page 17 Amongst other things, the Control Panel allows you to install or uninstall optional applications. We recommend that you uninstall apps you do not think you will use, to minimise services activity and therefore optimise sound quality. You can easily re-install these apps at any time. Click on “Apps”...
-
Page 18: Copy Files
If ‘antipodes’ does not show in File Explorer then there may be a network problem. Enter the address of your Antipodes in the address bar of File Explorer – eg. \antipodes\storage, or \192.168.1.214\storage (use the IP address found by browsing to myantipodes.com). If you are asked for login credentials, just enter ‘guest’... - Page 19 17 / 140...
- Page 20 Resilio Sync by Resilio, Inc. is a proprietary peer-to-peer le synchronization tool available for Windows, Mac, Linux, Android, iOS, Windows Phone, Amazon Kindle Fire and BSD. You can use it to back up the music library on your Antipodes to Windows or Mac PCs or to a NAS drive.
- Page 21 On the next screen enter a name for this Resilio Sync device (suggestion: use the host name, e.g. AntipodesCX). Also check the two boxes at the bottom: 19 / 140...
- Page 22 Then log in to the Resilio Sync app on the Antipodes using the Id and Password you have just created: You will get this screen. You will come back to this screen in Step 5 after you have set up the music folder that you want to sync to the...
- Page 23 Installing and Using Resilio Sync on NAS devices The Resilio Sync app runs on selected NAS devices. A NAS is an ideal location to hold a synchronised backup of the Antipodes music library. Go to the Resilio Sync Downloads page (https://www.resilio.com/platforms/desktop/) and download the app for the NAS that you will be using...
- Page 24 How to setup the Music Folder to be synced to the Antipodes In this example Resilio Sync on a Windows PC is going to send a copy of the music library to the Antipodes music library and update it with changes as they occur (synchronise).
- Page 25 Select the folder to be copied/synced: A settings window will open. Check the ‘Read and Write’ permission ad uncheck the ‘Link will expire’ option (these settings can be changed at any time): How to use the Key option for the copy process If you click the ‘Link’...
- Page 26 How to setup the Antipodes music library to receive the sync copy Here Resilio Sync on the Antipodes is going to receive a copy of the music foder on the PC, and then sync any subsequent changes. Here you will con gure the Antipodes music library folder to store the copy.
- Page 27 Go to the Resilio Sync app on the Windows PC/Mac/NAS and click ‘Share’ at the right-hand end of the line that identi es the music library folder you previously set up: 25 / 140...
- Page 28 The key will be copied to the Windows clipboard. Go back to the Resilio Sync screen on the Antipodes, right click the keyboard or mouse button.and click ‘Paste’: Go back to the Resilio Sync screen on the Antipodes, right click the keyboard or mouse button.and click ‘Paste’: You will then be prompted to enter a destination folder.
- Page 29 You will see the copy process start immediately: You can view the progress by clicking the clock icon You can check that the les have been copied to the Antipodes: 27 / 140...
- Page 30 28 / 140...
-
Page 31: External Storage
The USB drive selected is now mounted on \storage\usbdrive on your Antipodes. Note that the USB controller electronics will typically inject high levels of noise interference into your Antipodes and so the sound quality is likely to be a little inferior to all other methods. - Page 32 Enter the network address of the les Provide User Name & Password for the device the les are on Click on ‘Save Changes’. Your remote les are now mounted on your Antipodes and can be added to your library for playback. 30 / 140...
-
Page 33: Usb Backup
‘Apps’ menu item, and then click on the ‘Storage Backup’ icon. If this is the rst time you have connected the USB drive to the Antipodes for backup, make sure you do not need any les that are currently on the drive, and click on the ‘Format USB drive’... - Page 34 Click ‘OK’ and the screen will display progress until it has nished formatting the USB Drive. When the USB drive has been formatted then click the ‘Backup to USB drive’ button. 32 / 140...
- Page 35 Click the ‘OK’ button and the screen will display progress until it has nished the backup to the USB Drive, adding all new and changed les added since the last backup. When the backup has nished disconnect the USB drive and store it in a secure place. 33 / 140...
- Page 36 34 / 140...
- Page 37 Roon Local SETUP ROON LOCAL PLAYBACK: The simplest way to play music with Roon Server, is to play ‘Local’. In the Antipodes Control Panel, select the Settings Menu, and then click on the Roon Server icon. Click to enable local playback and then on ‘Save changes’.
-
Page 38: Library Settings
There are two Library settings we recommend you make. Open Settings and click on Library. Antipodes servers run fanless for silent operation and for optimum sound quality. We highly recommend that the Background Audio Analysis function be set as shown below. - Page 39 At the top we have ‘Connected to this …’. Ignore this section, as it is just displaying the outputs available on the remote device you are using, but you can enable these if you wish. The next section down is labelled ‘Connected to Core’. This displays available outputs on your Antipodes and in the image at right, it shows that an ‘Antipodes Prototype DAC’ is connected.
- Page 40 Note however that while the alternative Roon playback methods involve more setup, they provide slightly superior audio performance. 38 / 140...
- Page 41 RIP CDs TO INTERNAL STORAGE: If you are going to rip your music then you should do it once and do it the best available way. Using the ripper in your Antipodes, or using the P1 with an Antipodes makes sure of that.
- Page 42 Connect your USB optical drive to any of the blue ports of a CX or EX, or any of the USB ports on earlier models, but do not connect to the USB Audio output ports. To rip a CD just insert the CD (label up) into the Antipodes, and wait until the CD ejects. The software has a time-out period where the disc may eject before the CD is completely ripped. ...
- Page 43 41 / 140...
- Page 44 Install A CX+EX HOW TO INSTALL A CX+EX SOLUTION: The image below illustrates logical CX+EX functions 42 / 140...
- Page 45 This is broken down into the three separate functions below. Select the tabs to see the network con guration and the rear panel connections for each function. You can make the connections shown to run either functions 1 and 3, or functions 2 and 3 at the same time. 1. Play from the CX+EX to your AMP via Analog Interconnects Con gurationConnections 2.
- Page 46 3. Stream from your CX+EX to networked players on your network Con gurationConnections 44 / 140...
- Page 47 45 / 140...
- Page 48 Squeezebox SETUP SQUEEZEBOX WITH SQUEEZELITE: Setup the renderer in the Antipodes Control Panel of an Antipodes that is connected via USB to your DAC: Select the ‘Settings’ menu item Click on the ‘Squeezelite’ icon – this will open the screen shown below Select the correct output driver Select how your DAC likes to receive DSD files...
- Page 49 Orange Squeeze for Androids. DESKTOP/LAPTOP You can use your Desktop or Laptop computer to control what plays. To do this, open the Antipodes Control Panel and click on the ‘Apps’ menu item. 47 / 140...
- Page 50 Click on the Squeezebox Server icon. 48 / 140...
- Page 51 Here is a quick run through of the playback options. ‘My Music’ consists of music tracks stored on the Antipodes, on network-connected NAS drives, or on other shared devices in your home network. You have a wide range of selection choices available, from ‘Artists’ or ‘Albums’ to ‘Playlists’ that you have compiled and stored, and...
-
Page 52: Playing Music
‘Radio’ gives you access to a wide range of streamed Internet radio stations from around the world My Apps lists streaming services you have setup and are subscribed to, such as Tidal, Spotify, Pandora, Rhapsody, Qobuz, and Deezer. You need to have a ‘mysqueezebox.com’ login to register for some of these streaming services. PLAYING MUSIC To play music you make your selection from one of the options in the left hand pane: You then click on the play or the plus symbol to add the selection to a ‘playlist’... -
Page 53: Streaming Services
The controls at the top of the ‘playlist’ pane allow you to play or pause the music. To clear the ‘playlist’ pane click the cross icon at the bottom right of the screen. STREAMING SERVICES You need to have a ‘mysqueezebox.com’ login to register for some of the streaming services in Squeezebox. As an example we will go through the steps to enable TIDAL streaming. - Page 54 Click ‘Con gure’ and enter your TIDAL credentials (email id and password). Go to the Squeezebox Server screen, click ‘My Apps’ and you should nd that TIDAL has been added to the list of apps. 52 / 140...
- Page 55 Click the TIDAL icon to start using TIDAL. SQUEEZEBOX SETTINGS At the bottom right hand side of the Squeezebox Server control screen is a Settings icon. Click on this to make various settings for Squeezelite and Squeezebox Server. When you click this icon a new window will open in your browser. Most of the settings have already been set to the commonly used options.
- Page 56 This window allows you to set the folders in your Antipodes to be included in the Squeezebox library. And it allows you to force Squeezebox to scan for new additions. CDs ripped will be automatically added to the library, but les copied to the Antipodes require a scan before they are included in the Squeezebox library.
- Page 57 MPD can be used as a complete solution, able to perform the server and renderer function with a single app. This contrasts with the more common requirement to have a separate server app and separate renderer app. When using MPD as a complete solution, the rst step is to setup the MPD renderer app at the Antipodes Control Panel: Select the menu item ‘Settings’...
- Page 58 To use MPD, you need a remote control app. Via the remote control app, you can point MPD at the Antipodes music library, and play music. In effect the remote control app is performing the server function. As such, you may suffer lag issues with a large library that taxes the resources of your remote control device.
- Page 59 You can increase the functionality of MPD by using it as just a DLNA renderer, and installing a DLNA server to handle the server function. For example: Setup a DLNA server on your Antipodes using either SqueezeBox Server or MinimServer, or on any other device on your network Set MPD as the Antipodes renderer as described above.
- Page 60 SETUP ROON SERVER WITH SQUEEZELITE: You can use Roon to play to Squeezelite (Squeezebox) end-points on your network. To use Squeezelite on an Antipodes open the Antipodes Control Panel: Select the ‘Settings’ menu item Click on the ‘Squeezelite’ icon – this will open the screen shown below Select the correct output driver Select how your DAC likes to receive DSD files...
- Page 61 Setting Up Roon Server Roon Server is pre-installed on your Antipodes, but the next steps require you to install Roon on the device you intend to use as a remote control. For a PC go to roonlabs.com to download the application. For a tablet or smartphone, go to the app store for your device and search for ‘roon’.
-
Page 62: Library Settings
If you intend to use DSP for resampling/transcoding, then to tap into all of the power of your server, you should turn ‘Parallelize Sigma-Delta Modulator’ on. To optimise sound quality, an Antipodes server runs the CPU at around 50% of its full speed. To deliver high power without compromising sound quality, you can use all of the CPU cores for the task by setting this option to ‘Yes’. - Page 63 Squeezelite audio zone and play music through the Squeezelite player. You can also use Squeezelite with Roon Server on the same Antipodes or on an Antipodes you are using as a renderer. Go to Settings/Squeezelite, set the ‘Audio Device’...
- Page 64 62 / 140...
- Page 65 Roon Server and Roon Ready together on the same device will result is more coherent sound and we believe this is because there is less interference/contention between the server and renderer functions. If you are using any Antipodes to stream to a Roon Ready DAC/Renderer via Ethernet then you don’t need to setup Roon Ready on the Antipodes.
- Page 66 Setting Up Roon Server Roon Server is pre-installed on your Antipodes, but the next steps require you to install Roon on the device you intend to use as a remote control. For a PC go to roonlabs.com to download the application. For a tablet or smartphone, go to the app store for your device and search for ‘roon’.
- Page 67 Setting Up Roon Ready Once you have saved, the Antipodes will appear under ‘Networked’ as a Roon Ready device in Roon’s Audio Settings, and will display the IP Address. If the IP address is 127.0.0.1, it signi es that the player is on the same device as the current Roon Server app.
- Page 68 There are some USB DACs using the XMOS U8 chip that have a bug in their rmware. This bug surfaces with Roon only with very low latency servers such as the Antipodes servers. The bug means that the USB input chip in your DAC can crash when there is a transition between a 44.1kHz 16 bit track and a 44.1kHz 24 bit track, in your playlist.
- Page 69 Antipodes to which the DAC is connected. HQPlayer Server on Antipodes servers is a demo installation. It will therefore shut down after 30 minutes and will have to be restarted. You can licence HQPlayer on the Antipodes on which it runs by purchasing a licence key from Signalyst.
- Page 70 How to set up HQPlayer Server on an Antipodes to play via ALSA If your DAC is connected to the Antipodes where HQPlayer Server is running you can use ALSA (Advanced Linux Sound Architecture) to play directly to the DAC.
- Page 71 Connect a USB DAC to the Antipodes and power it on. Go to Settings/System Settings/Custom DAC, and look for the device line item ‘USB Audio Class Digital’; note the Device Name: 69 / 140...
- Page 72 On the HQPlayer con guration screen in the rst line, under the Generic heading, enter the hostname of your Antipodes in the Title box. In the Backend box click the selection arrow and select ‘ALSA’. Then click ‘Apply’. Under the ALSA Backend heading in the Device box click the selection arrow. You should see a line that represents the DAC (see 3.
- Page 73 How to set up HQPlayer Server on an Antipodes to play via NAA You can use the NAA option when the DAC is connected to the same Antipodes where HQPlayer Server is running. Under this mode you can use Audio App Switcher to switch to MPD, Squeezebox Server or Roon for different server/player options.
- Page 74 Under the Network Audio Backend heading in the Device box click the selection arrow. You should see a line that represents the DAC that is connected to the Antipodes,in this example an iFi DAC: Select that option and also select the DOP option if appropriate for your DAC.
- Page 75 You can use either the HQPlayer ALSA or NAA options for playback. You should understand that under the ALSA option HQPlayer ‘owns’ the USB output on the Antipodes and you cannot use the Audio App Switcher to switch to Roon Ready. However if you use the NAA option you can switch between NAA and Roon Ready.
- Page 76 Leave ‘localhost’ unchanged; this is because HQPlayer Server is running on the same Antipodes as this Roon Core: 74 / 140...
- Page 77 Go to Roon Remote Settings/Audio. Under Networked you will see an HQPlayer zone. Enter a name of your own choice for this zone. You will now be able to select the HQPlayer zone for playback: 75 / 140...
- Page 78 Playback will be streamed through HQPlayer Server: 76 / 140...
- Page 79 The con guration screen is also used to fully con gure the HQPlayer parameters. You should visit the Signalyst website at https://www.signalyst.com for detailed information about how to fully utilise the facilities of HQPlayer. 77 / 140...
- Page 80 Antipodes to which the DAC is connected. HQPlayer Server on Antipodes servers is a demo installation. It will therefore shut down after 30 minutes and will have to be restarted. You can licence HQPlayer on the Antipodes on which it runs by purchasing a licence key from Signalyst.
- Page 81 Manager’ message. How to Install HQPlayer NAA If you are going to use the NAA playback option, on the Antipodes to which your DAC is connected, i.e. EX or DX3, go to Apps/Software Manager/Available Apps and click the HQPlayer Server icon Then click ‘Install’:...
- Page 82 Connect a USB DAC to the Antipodes and power it on. Go to Settings/System Settings/Custom DAC, and look for the device line item ‘USB Audio Class Digital’; note the Device Name: 80 / 140...
- Page 83 How to set up HQPlayer Server on an Antipodes to play via NAA You will use the NAA option when HQPlayer Server is running on a different Antipodes from the one to which the DAC is connected, for example HQPlayer Server running on a CX and HQPlayer NAA running on an EX or DX3.
- Page 84 You can use either the HQPlayer ALSA or NAA options for playback. You should understand that under the ALSA option HQPlayer ‘owns’ the USB output on the Antipodes and you cannot use the Audio App Switcher to switch to Roon Ready. However if you use the NAA option you can switch between NAA and Roon Ready.
- Page 85 In Roon Remote go to Settings/Setup/HQPlayer and click ‘Add HQPlayer’: 83 / 140...
- Page 86 If you have decided to run HQPlayer Server on the ‘renderer’ Antipodes, for example on EX or DX3, enter the IP Address of that Antipodes server: Note: if the IP Address of this Antipodes changes following a reboot you will need to remove this instance and setup a new HQPlayer zone with the updated IP Address.
- Page 87 You will now be able to select the HQPlayer zone for playback: Playback will be streamed through HQPlayer Server to the DAC that was selected earlier in the HQPlayer Server con guration screen (4e or 5c above): 85 / 140...
- Page 88 The con guration screen is also used to fully con gure the HQPlayer parameters. You should visit the Signalyst website at https://www.signalyst.com for detailed information about how to fully utilise the facilities of HQPlayer. 86 / 140...
- Page 89 You can use Roon to play to HQPlayer Server. You will get a different audio performance than Roon Ready and opinions are likely to differ on what is preferred. You can use this playback solution on a single Antipodes, or with a CX+EX you can use Roon Server on the CX and HQPlayer Server on the EX.
- Page 90 The way you are likely to want to use it is as a renderer app on the same Antipodes device as you run Roon Server on, or on the EX in a CX+EX system. Even though it is called HQPlayer Server, you are using it as a renderer.
- Page 91 Then click on the ‘Apply’ button and you have setup your Antipodes. Connect Roon to HQPlayer Now, in Roon Remote, go to Settings/Setup/HQPlayer and click ‘Add HQPlayer’. Input the IP address of the Antipodes that connects to your DAC (eg in a CX+EX solution, input the IP address of the EX).
- Page 92 You can now use Roon Server to play music through HQPlayer Server. Disconnecting Roon From HQPlayer To switch to using a different playback option, you will need to turn off the option in the screenshot above. However, we recommend you go further and uninstall HQPlayer in order to use another playback option.
- Page 93 SETUP MPD DLNA RENDERER: If you wish to use a DLNA/UPnP solution and want an Antipodes to perform the DLNA renderer function then you can use MPD. Setup the renderer in the Antipodes Control Panel of an Antipodes that is connected via USB to your DAC: Select the menu item ‘Settings’...
- Page 94 select the server and the renderer to control, and then you can start playing music. 92 / 140...
- Page 95 But in many cases we nd the simplest solution and with the widest compatibility is achieved by installing one plug-in to Squeezebox server to enable it to be a DLNA Server. In the Antipodes Control Panel, navigate to Apps/Squeezebox Server, to open Squeezebox Server. Then click on ‘Settings’ at the bottom right of the screen.
- Page 96 Wait for two minutes to let the plugin nish installing, and then click on ‘Restart now’ to restart Squeezebox Server. You will now nd that your DLNA/UPnP remote control will see it as ‘Logitech Media Server’ and ready to be set as a DLNA server to play from. 94 / 140...
- Page 97 MinimServer is not installed on Antipodes servers by default. Therefore you need to install it before you can use it. At the Antipodes Control Panel, select the ‘Apps’ menu item, click on the ‘Software Manager’ icon, and then select the ‘Available Apps’ tab.
- Page 98 Set the Content Directory to ‘/storage/music’, as shown above, and select ‘Update’. How to Run MinimServer After MinimServer has been installed on the Antipodes server it will start automatically and run continuously. There are no ‘Start’ or ‘Stop’ commands for MinimServer.
- Page 99 97 / 140...
- Page 100 Media Server Access your UPnP/DLNA servers across different networks Set up BubbleUPnP Server by selecting the ’Apps’ menu item in the Antipodes Control Panel, and then click on the BubbleUPnP icon. Click ‘OK’ at the welcome screen.
- Page 101 Click the ‘Status’ tab and check that the ‘Internet Connectivity Test’ has worked successfully, as shown below. Leave the other settings unchanged. If the ‘Internet Connectivity Test’ was unsuccessful, click the ‘Restart Server’ button at the bottom of the screen. Click the ‘Media Servers’...
- Page 102 After it has been successfully installed BubbleUPnP Server will be started automatically and then runs continuously. It is automatically started when the Antipodes server is powered on. It can be restarted by pressing the ‘Restart Server’ button on the ‘Status’ screen.
- Page 103 Shairport SETUP SHAIRPORT: Shairport is an Apple Airport Emulator. This makes the Antipodes work as if it was an Apple Airport device. So you can play music that is on your Apple Airplay device across your network to the Antipodes.
- Page 104 Then click ‘Save Changes’ and check under Apps/Audio App Switcher that Shairport shows as ‘Active’: How to use Shairport from an Airplay-capable device On your Apple device go to the Sound control on the device. You will see the Antipodes Shairport player in the menu and can select it for playing music tracks,podcasts etc.
- Page 105 MacBook 103 / 140...
- Page 106 104 / 140...
- Page 107 Spotify SETUP SPOTIFY CONNECT: With Spotify Connect, you can use your Spotify app on PC, smart phone or table to play Spotify music through your Antipodes. You must have a Spotify Premium subscription. How to set up Spotify Connect on the Antipodes In the Antipodes GUI go to Settings/Spotify Connect, enter a Player Name and then ‘click ‘Save Changes’:...
- Page 108 How to connect to the Antipodes from the Spotify app Open Spotify on your PC, smartphone or tablet. Click the speaker icon at the bottom right of the screen: You will see the Antipodes listed as an optional device: 106 / 140...
- Page 109 Click the Antipodes icon to play the music selection through the Antipodes: ‘Listening On’ will now show the Antipodes as the playback device 107 / 140...
- Page 110 108 / 140...
- Page 111 Install and setup this application and your Antipodes Music Server will appear within your SONOS application as a music source. This means you can use your Antipodes music server to rip and store music, play to a high quality DAC in your stereo system, and have the same music available for playback using SONOS hardware, throughout your home.
- Page 112 Plex Terms of Service. You will then be taken to the Plex interface to complete the setup. The setup is well- designed and intuitive. The key part of the setup with respect to the Antipodes server, is to setup the library location on the Antipodes (which is ‘/storage’) as a library within Plex.
- Page 113 In the following screens you will select the folders to include in your music library. Click the ‘storage’ entry on the left hand side, then ‘music’, and nally ‘ ac’; this points to where album folders are stored on the Antipodes (/storage/music/ ac).
- Page 114 Then click ‘ADD’ to add the folder to your music library. You can add additional folders to your library now or later on; here ‘/storage/nas’ has also been added. When you have nished adding folders click ‘NEXT’, select ‘Create a basic music library’ on the following screen followed by ‘NEXT’, and then ‘ADD LIBRARY’...
- Page 115 Plex Media Server will then create the library on your Antipodes. Support 113 / 140...
- Page 116 Plex website: https://plex.tv/ Plex apps for Android, iOS, Windows: https://plex.tv/downloads 114 / 140...
-
Page 117: Remote Control
Remote Control REMOTE CONTROL OF MUSIC PLAYBACK: You don’t need to connect a screen, mouse or keyboard to your Antipodes music server. You run the Antipodes ‘headless’ in your music system, like any other stereo component, not in a back room. - Page 118 Internal Playback PLAY FROM THE MUSIC LIBRARY: Historically, the primary purpose of each of the playback applications available for you to use on an Antipodes music server, is to play music in the Antipodes music library You can assemble a single seamless library, incorporating les you have ripped, copied or downloaded to the Antipodes, les on external devices on your network like desktops, laptops or a NAS, and les located on an attached USB disk.
-
Page 119: Manage Applications
MANAGE APPLICATIONS: The Antipodes Control Panel offers a wide range of best-of-breed applications for playing music. You can choose to install or uninstall any of them with a couple of clicks. It is a good idea, from a sound quality point of view, to only install the playback applications that you intend to use regularly, because installed applications will load services at start-up that will consume resources and raise the noise oor of the system. -
Page 120: Installing Applications
When the update has nished click on ‘Back to main menu’, and reboot to complete the update process. Installing Applications On the Software Update screen (see above) select the ‘Available Apps’ tab. Click the icon of the app you wish to install and then on ‘Install’ and ‘Install’ to con rm. 118 / 140... -
Page 121: Uninstalling Applications
Click on ‘Back to Package Manager’. The application has now been installed and can be seen in ‘Installed Apps’. Uninstalling Applications On the Software Update screen (see above) select the ‘Installed Apps’ tab and click the icon of the application you wish to uninstall. 119 / 140... - Page 122 Click on ‘Delete’ and ‘Delete’ to con rm, and the application will be removed from the ‘Installed Apps’ list and appear on the ‘Available Apps’ list. 120 / 140...
- Page 123 If you have a CX+EX Solution then the Ethernet cable between the CX and the EX will have a very signi cant impact on sound quality. Ask your dealer for a recommendation.
-
Page 124: Hqplayer Naa
This however is not mandatory and you may nd it works satisfactorily with wireless PC connection. Once HQPlayer NAA is installed on your Antipodes there is no more to do in the Antipodes Control Panel than select HQPlayer NAA at the ‘Audio App Switcher’... - Page 125 123 / 140...
- Page 126 Sequence When Using Direct Ethernet Antipodes Music Servers allow you to connect your server (eg. a CX) to the network, and connect your renderer (eg. an EX) direct to the server with a short, high quality Ethernet cable. This lifts audio performance compared to connecting both the server and renderer to the network.
- Page 127 Resilio Sync by Resilio, Inc. is a proprietary peer-to-peer le synchronization tool available for Windows, Mac, Linux, Android, iOS, Windows Phone, Amazon Kindle Fire and BSD. You can use it to back up the music library on your Antipodes to Windows or Mac PCs or to a NAS drive.
- Page 128 On the next screen enter a name for this Resilio Sync device (suggestion: use the host name, e.g. AntipodesCX). Also check the two boxes at the bottom: 126 / 140...
- Page 129 Then log in to the Resilio Sync app on the Antipodes using the Id and Password you have just created: You will get this screen. Now you must de ne the music library folder to be backed up: 127 / 140...
- Page 130 How to setup a Folder to be synchronised In this example Resilio Sync on the Antipodes is going to send a copy of the music library to other devices and update the remote copies with changes as they occur (synchronise). Here you will con gure the music library folder to copy/sync.
- Page 131 Select the folder to be backed up. (suggestion: select the /storage/music folder): 129 / 140...
- Page 132 A settings window will open. Uncheck the ‘Link will expire’ option (these settings can be changed at any time): Click the ‘Link’ option and then ‘Copy’ (bottom right) . An http link will now be displayed. You can use this link to activate the sync action from the Internet browser on PC or Mac.
- Page 133 How to setup a Folder to receive the Backup copy Here Resilio Sync on a Windows PC is going to receive a copy of the music library on the Antipodes. Here you will con gure a folder to store the copy.
- Page 134 Go to the Resilio Sync app on the Antipodes and click ‘Share’ at the right-hand end of the line that identi es the music library folder you previously set up: 132 / 140...
- Page 135 On the following screen click ‘Copy’ next to the ‘Read Only’ key: Go back to the Resilio Sync screen on the Windows PC, right click the keyboard or mouse button: Paste the key from the Antipodes into the blank eld and click ‘Next’: 133 / 140...
- Page 136 You will then be prompted to enter a destination folder. Select the folder you set up in i. above: You should see the copy process start immediately: You can view the progress by clicking the clock icon: Restoring the Music Library from the Resilio Sync Backup Antipodes: 134 / 140...
- Page 137 If the ac folder on the Antipodes has to be restored the entire / ac folder can be copied to the Antipodes /music folder using Copy/Paste in File Explorer or Finder 135 / 140...
- Page 138 136 / 140...
- Page 139 In the picture above, you will see that the USB cable is captive in the P1 and is a short length to tidily connect to a CX or EX. If you need a longer length you should advise your dealer prior to purchase. Because the purpose of the connection is just a le transfer there is no need to use a high quality USB cable –...
- Page 140 138 / 140...
- Page 141 INSTALL A P2: Set the P2 underneath or on top of your Antipodes server, or in close proximity to the Antipodes server used for rendering, so that a short high quality USB cable can be used to connect between them.
- Page 142 Attach a high quality USB cable from the black ‘5v On’ USB Audio 2.0 port on your Antipodes Server to the USB input of the P2.
Need help?
Do you have a question about the EX and is the answer not in the manual?
Questions and answers