Table of Contents
Advertisement
Advertisement
Table of Contents

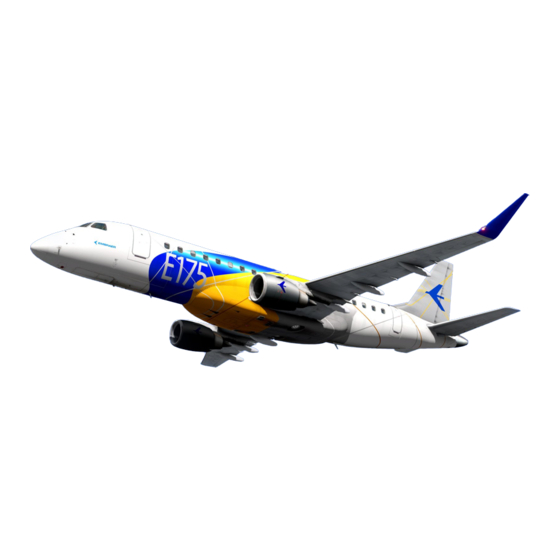
Summary of Contents for X-Crafts Embraer EJets Series
-
Page 3: Table Of Contents
CONTENTS 1.0 INTRODUCTION 1.1 INSTALLATION 1.2 COPYRIGHT 1.3 THE TEAM 1.4 DEMO FLIGHT 1.5 TUTORIAL VIDEOS 1.6 VIEWING OPTIONS 2.0 GENERAL 2.1 BACKGROUND 2.2 SPECIFICATIONS 2.3 DIMENSIONS 3.0 COCKPIT 3.1 GENERAL 3.2 DARK AND QUIET COCKPIT 3.3 GUIDANCE PANEL 3.3.1 LATERAL MODE GUIDANCE 3.3.2 HDG KNOB 3.3.3 ALT KNOB 3.3.4 VERTICAL MODE GUIDANCE... - Page 4 3.6.2.2 STATUS SYNOPTIC PAGE 3.6.2.3 FLIGHT CONTROL SYNOPTIC PAGE 3.6.2.4 HYDRAULICS SYNOPTIC PAGE 3.6.2.5 FUEL SYNOPTIC PAGE 3.6.2.6 ELECTRICAL SYNOPTIC PAGE 3.6.2.7 ECS SYNOPTIC PAGE 3.6.2.8 ANTI-ICE SYNOPTIC PAGE 3.6.2.9 OPTIONAL TERRAIN MAP 3.6.3 EICAS (ENGINE INDICATION AND CREW ALERTING SYSTEM) 3.6.4 AUTOBRAKES 3.6.5 CLOCK AND CHRONOMETER 3.6.6 POP-UP PANELS...
-
Page 5: Introduction
Copyright © 2016-2018 Marko Mamula, Steve Wilson and Todd Fleck 1.3 THE TEAM Marko Mamula (X-Crafts on the forum) - 3D model, flight model, textures, project manager Steve Wilson (Steve.Wilson on the forum) - and SASL plugin programmer T ekton FMS ... -
Page 6: Demo Flight
Our Beta Testers - We would also like to thank our legion of beta testers whom have helped make this product what it is and to verify the functionality, catching many bugs along the way so that you don’t have to. You fine flight simulation enthusiasts know who you are! And we also thank our many users that have provided constructive criticism, thoughtful suggestions and bug reports of their own over the years. - Page 7 You can also set a custom QuickLook. T he steps are as follows: 1. In the 3D cockpit view, set the desired view. Or even an exterior view ... 2. Now press Ctrl 1 (or any other digit from 0 to 9). The number must be on the number pad on the keyboard.
-
Page 8: General
2.0 GENERAL 2.1 BACKGROUND Based in São José dos Campos, Brazil, Embraer (Empresa Brasileira de Aeronáutica, S. A.; Brazilian Aeronautics Company, Inc.) was founded in 1969 as a government enterprise; and became a privately owned business December 7, 1994. Announced during the 1999 Paris Air Show, the Embraer series of E-jets are designed to be larger than regional aircraft (50 seats or less) and smaller than larger mainline jets (110 or more seats). -
Page 9: Specifications
2.2 SPECIFICATIONS E175: Flight deck crew 2 pilots Passengers Powerplants 2× G E CF34-8E turbofans 61.4 k N (13,800 l b ) thrust each f Range 3,889 km (2,100 nmi) Maximum speed 890 km/h (481 kn, Mach 0.82) Service ceiling 12,500 m (41,000 ft) Empty weight... - Page 10 2.2 SPECIFICATIONS (Continued) E195: Flight deck crew 2 pilots Passengers Powerplants 2× GE CF3410E turbofans 82.3 kN (18,500 lbf) thrust each Range 3,334 km (1,800 nmi) Maximum speed 890 km/h (481 kn, Mach 0.82) Service ceiling 12,500 m (41,000 ft) Empty weight 28,970 kg (63,870 lb) Maximum takeoff weight...
-
Page 11: Dimensions
2.3 DIMENSIONS E175: Wing span 26.00 m (85 ft 4 in) Length 31.68 m (103 ft 11 in) Height 9.67 m (32 ft 4 in) E195: Wing span 28.72 m (94 ft 3 in) Length 38.65 m (126 ft 10 in) Height 10.28 m (34 ft 7 in) -
Page 12: Cockpit
3.0 COCKPIT 3.1 GENERAL This X-Plane add-on includes an advanced and complete 3D virtual cockpit to emulate the real aircraft’s cockpit as closely as possible in the X-Plane flight simulator. While not all aircraft systems are simulated, the controls and indicators are located in their proper places with respect to the real aircraft. -
Page 13: Guidance Panel
3.3 GUIDANCE PANEL Along the top of the panel glareshield is the flight guidance control panel (FGCP). The many autopilot modes and functions are engaged using this panel's many buttons and knobs. You must take the time to fully understand how each control effects the E-jet during each phase of flight. Be sure to engage any autopilot mode, if you want it to do anything! Basically if there is a yellow light above the button, it is ... -
Page 14: Alt Knob
3.3.3 ALT KNOB The ALT knob has 2 options, the inner circle changes the value by 10ft on click and by 100ft on hold. The outer circle changes the value by 1000ft/click. I find this super useful because you can go from 0 to FL300 in no time. -
Page 15: Display Controller Panel
3.3.5 DISPLAY CONTROLLER PANEL FMS - Selects FMS as the primary navigation ● source for both PFDs Radio Altimeter (RA) minimums selector knob ● (sets the radio altimeter decision height) V/L - VOR/LOC button (Selects the VOR or ●... -
Page 16: Overhead Panel
3.4 OVERHEAD PANEL 3.4.1 ELECTRICAL The E-Jet electrical system is fully automated and under normal operations, no pilot action is required. Two electrical networks work independently from one another for electrical fault isolation purposes. In the event of a power source fault, bus ties automatically connect between the networks with no significant operational or workload needed. -
Page 17: Cockpit Lights & Hud Panel
● 1 DC external power unit (not simulated in this release version) ● Avionics displays are turned on with turning BATT1 ON, as in the real aircraft. ● After selecting GPU on the Options menu, it means the GPU is only connected but not providing power to the aircraft. - Page 18 ● Pull down (click on) the fire extinguisher handle should an engine catch fire.
-
Page 19: Auxiliary Power Unit (Apu)
3.4.5 AUXILIARY POWER UNIT (APU) The APU is a gas turbine engine located in the airplane tail cone. It provides electrical and pneumatic power while the engines are not operating. It consumes around 310 pounds of fuel per hour and draws from the LEFT fuel tank. -
Page 20: External Lights
3.4.6 EXTERNAL LIGHTS 3.4.7 HYDRAULICS A pump provides static pressure for the hydraulic systems. When running, engines provide the pressure necessary to drive the hydraulic systems. The real aircraft operates three independent hydraulic systems and any hydraulic pump can provide sufficient pressure for all aircraft systems that require it. -
Page 21: Air Conditioning
Engine 1 and 2 ice protection button ● Push IN: allows automatic operation of the associated engine anti-ice system ● Push OUT: deactivates the associated engine anti-ice system ANTI-ICE protection selector knob ● OFF: deactivates all principal anti-ice systems. ● ON: activates all principal anti-ice systems. -
Page 22: Pressurization
Passenger cabin temperature rotating knobs: ● Controls cockpit and cabin temperature according to the knob position. Cross-bleed button: ● Push IN: allows automatic operation by the AMS. This position commands the cross-bleed valve, according to the system logic. ● Push OUT: manually closes all cross-bleed valves. Bleed air valve buttons: ●... -
Page 23: Pedestal
3.5 PEDESTAL 3.5.1 OVERVIEW... -
Page 24: Slat / Flap
3.5.2 SLAT / FLAP The flaps lever may be moved using the mouse or the keyboard flaps commands. NOTE : Flap 4 and flap 5 positions do not change the positions of the flaps or slats. The difference between these modes is that flap 4 is used for take-off while flap 5 is used for landing. 3.5.3 SPEEDBRAKE LEVER Deploys the multi-function spoilers. -
Page 25: Nav/Com/Adf Receiver
3.5.5 NAV/COM/ADF RECEIVER There are many ways how you can set the radio frequencies. You can use radio panels on the pedestal or on the pop-up radio panel. The best way, though would be to use the MCDU RADIO page. This page is always shown when the FMS is first powered up with the battery switches. -
Page 26: Starters
3.5.9 STARTERS To start the engines follow the startup procedure in section 6.0 or use the checklist provided by the tab labeled “C” whenever you move the mouse cursor to the left side of your X-Plane window. 3.5.10 AUDIO SELECTOR There are three sets of controls on this panel that are functional, and serve the purpose of turning communication, navigation or ADF radios’... - Page 27 The RAT will deploy on the right front side of the fuselage and will produce power for the electrical system.
-
Page 28: Main Panel
3.6 MAIN PANEL The main panel consists of three screens that make up the Electronic Flight Instruments System (EFIS). On the Left is the Primary Flight Display (PFD), middle the Multi-Function Display (MFD), and to the right is the Engine Indication and Crew Alerting System (EICAS). 3.6.1 PFD - ... -
Page 29: Mfd - Multi Function Display
3.6.2 MFD - Multi function display The MFD presents MAP and PLAN navigation formats and various systems synoptic formats selectable by keys on the top and bottom of the display. The synoptic system pages provide visual representation of the selected system’s functions and parameters. -
Page 30: Navigation Page
3.6.2.1 NAVIGATION PAGE Click on the NAVIGATION key to choose the map. You can switch between MAP and PLAN mode by clicking on the top left key. Click on the Options or Weather keys to change the map range or to choose what will be shown on the map. -
Page 31: Status Synoptic Page
viewing the entire flight route at one time - if that’s even possible - the clearer NAV map that has been developed provides better utility for visualizing key portions of the lateral flight path. 3.6.2.2 STATUS SYNOPTIC PAGE Status synoptic page provides basic information like time, temperature, cabin pressurization, engine oil level, batteries, which doors are open etc. -
Page 32: Flight Control Synoptic Page
3.6.2.3 FLIGHT CONTROL SYNOPTIC PAGE The Flight controls synoptic page provides a visual representation of flight control operations. NOTE: T he parameters shown under the STATUS line are not simulated in this release version. -
Page 33: Hydraulics Synoptic Page
3.6.2.4 HYDRAULICS SYNOPTIC PAGE The hydraulics synoptic page provides a visual representation of the hydraulic system operation. -
Page 34: Fuel Synoptic Page
3.6.2.5 FUEL SYNOPTIC PAGE The fuel synoptic page provides a visual representation of the fuel system operation. -
Page 35: Electrical Synoptic Page
3.6.2.6 ELECTRICAL SYNOPTIC PAGE The electrical synoptic display provides a visual representation of the electrical system operation. ● White lines and black crosses mean the system is disconnected or not active on busses and TRUs. ● Green lines and green crosses mean the system is connected or active on busses and TRUs. NOTE... -
Page 36: Ecs Synoptic Page
3.6.2.7 ECS SYNOPTIC PAGE The ECS synoptic page provides a visual representation of the air conditioning and pneumatic system. -
Page 37: Anti-Ice Synoptic Page
3.6.2.8 ANTI-ICE SYNOPTIC PAGE The flight controls synoptic page provides a visual representation of the anti-ice control operations. ICE CONDITION : appears when the Anti-ice automatic system is turned on. -
Page 38: Optional Terrain Map
Technical support for this plugin is provided via the link. Radar. We only make this function available through the EJets for your convenience and enjoyment. It is not an X-Crafts product, and the magic behind it’s marvels are not something we’re familiar with. Use at your own risk, etc.. - Page 39 The rather scenic mountains around Tucson, Arizona can reach up and bite you if you’re not careful, especially if going missed approach from runway 29R. Here we see a descent depicted on the VSD and mountainous terrain to the northeast of KTUS and some significant hills to the west. The terrain is only displayed in the two quadrants in front of the aircraft.
-
Page 40: Eicas (Engine Indication And Crew Alerting System)
3.6.3 EICAS (ENGINE INDICATION AND CREW ALERTING SYSTEM) The upper screen displays engine thrust and caution/warning alerts. The lower half summaries fuel, secondary engine readouts, APU, cabin pressure, gear, flaps, trim, gear status and environmental information. The EICAS includes the following information: ●... -
Page 41: Clock And Chronometer
3.6.5 CLOCK AND CHRONOMETER ● CHR - starts/stops the chronometer ● RST - resets the chronometer 3.6.6 POP-UP PANELS Pop-up panels are included so that radios and FMS can be operated in forward view. -
Page 42: Enlarging The Main Panel Displays
3.6.7 ENLARGING THE MAIN PANEL DISPLAYS Each of the main panel screens (PFD, MFD, EICAS) can be enlarged by placing the mouse pointer over the display and conducting a right-mouse-click. To return the screen to the original size by once again right-mouse-clicking over the screen. -
Page 43: Special Cockpit Clickable Areas
3.7 SPECIAL COCKPIT CLICKABLE AREAS 3.7.1 HANDLES AND MANIPULATORS The picture below shows where the clickspots are for various manipulators. NOTE: Cockpit windows can only be opened while the aircraft is not moving and the gear lever can’t be used while the aircraft is on the ground. -
Page 44: Hide Yoke Function
3.7.2 HIDE YOKE FUNCTION 3.7.3 COCKPIT DOOR Click anywhere on the cockpit door to open/close it. -
Page 45: Disabling Windshield And Screen Reflections
3.7.4 DISABLING WINDSHIELD AND SCREEN REFLECTIONS 3.8 SIDE PANEL - COCKPIT LIGHTING Use this panel to change the main panel, cabin flood, panel lights and instrument brightness. The CHART knob does not change anything in this release version. The knobs are a xis drag-able . Click on the knob and drag left or right to change the knob value. -
Page 46: Flight Controls
4.0 FLIGHT CONTROLS 4.1 OVERVIEW The flight control system is composed of the primary and secondary flight control systems and their associated system components. Hydraulic actuators control the respective flight control surfaces. These are generally referred to as Power Control Units (PCUs). Elevators, rudder and roll spoilers as well as all the secondary flight control systems, including the horizontal stabilizer, flaps and slats, ground spoilers and speed brakes, are controlled using Fly-by-Wire technology. - Page 47 5.0 OPERATIONS UTILITIES 5.1 MENU - OPTIONS This model has a pop-up menu where you can control the door, ground objects,GPU or enable the pushback plugin. IMPORTANT: In order for the ground objects and GPU to work, you m ust set the ...
-
Page 48: Pushback Plugin
The mouse click zones are shown here. In addition to controlling the doors, you can request a pushback, toggle the presence of ground equipment and activate the GPU, or ground power unit. 5.2 PUSHBACK PLUGIN 5.2.1 PUSHBACK MENU Firstly you have to e nable the pushback through the plug-in menu. After that you can access the pushback menu by clicking on the P button on the side of the screen. -
Page 49: Winglet And Ground Support Equipment Options
After you select the right combination, press ‘ACCEPT’. A verbal and written message will notify you to release the brakes, click on the ‘CONFIRM’ button to proceed. After you release the brakes, there will be another message informing you that the pushback will start shortly. - Page 50 Since 2014 all the E175s coming off the assembly line have the new winglets. After the flight test campaign, fuel burn was proven to be in fact 6.4% lower compared to earlier-production E175s. You can change the winglet type directly through the standard X-Plane Plugins menu: The last used configuration is saved for your next flight.
-
Page 51: Load Planning
5.4 LOAD PLANNING The load planner is accessed using the side menu tabs, and selecting WGT & BAL. With the load planner utility, you can dynamically create a simulated loadout for each of your flights. While real airline pilots get this information from their dispatchers, here we give you the chance to create realistic data to enter into the FMS so that your flights have more flavor and realism. - Page 52 The CG indicator is on the lower right, and it gives you an representation of where the CG is located. The aircraft is more dynamically stable when the CG is forward than when it is aft. Therefore a position to the left of the center of the indicator is desirable, but not mandatory. You cannot move this indicator - it is not a control.
- Page 53 It is very easy to exceed max weight with the E195, and you may have to remove passengers or fuel. Fortunately, the range of the E195 is substantial, so offloading enough fuel to keep the aircraft from being overloaded isn’t a major concern. If the E195 is flying with a full load of passengers, you have no room for extra cargo, and in fact need to offload a bit of fuel to stay within allowances.
-
Page 54: Checklist Use
6.0 AIRCRAFT OPERATION 6.1 CHECKLIST USE This is a good place to remind you that there are a series of checklists for the all phases of the flight that are available to the immediate left of the X-Plane window by moving your mouse cursor to within 50 pixels of the left side. -
Page 55: Power On
Continue the appropriate START checklist from this point until it is complete. Remove all ground equipment, both using the MENU options as well as any third party ground equipment you have deployed. Make your PUSHBACK selection and follow the ground crew’s instructions. After the pushback tug has parked and you have ground control clearance, proceed to the runway and have fun…... -
Page 56: Apu Start
6.2 APU START In the interests of ease of use, both start procedure types are complete with all notations. These steps result in complete power on settings - they are not 1:1 with the simulation checklists that include even more detail. 1. - Page 57 10. APU: (ON) START Click and hold the APU knob - it should rotate clockwise to the START indication. You won’t be able to watch the RPM build up on the EICAS, but if you wait at least 3 to 5 seconds you’ll be okay. By this point, if you listen carefully you should hear the APU spooling up.
- Page 58 12. Now complete FMS preparations. At this point you have set the aircraft up sufficiently to complete your tasks in the FMS MCDU. This part is not necessary if all you’re going to do is take off and sight-see. On the other hand, if you’re going to try to emulate a passenger carrying flight, you’ll probably have completed your load planning and have some numbers to enter.
-
Page 59: Gpu Start
20. Bleed air to BOTH 21. Air conditioning packs to ON Steps 20 and 21 are essential if you do not wish to black out due to lack of pressurization. X-Plane simulates this by slowly dimming your monitor screen(s) to black after you’ve gotten too high to get enough oxygen when you breathe - usually over 14,000 feet MSL or so. - Page 60 8. Now complete FMS preparations. At this point you have set the aircraft up sufficiently to complete your tasks in the FMS MCDU. This part is not necessary if all you’re going to do is take off and sight-see. On the other hand, if you’re going to try to emulate a passenger carrying flight, you’ll probably have completed your load planning and have some numbers to enter.
- Page 61 As mentioned under the APU start, steps 14 and 15 are essential if you do not wish to black out due to lack of pressurization. X-Plane simulates this by slowly dimming your monitor screen(s) to black after you’ve gotten too high to get enough oxygen when you breathe - usually over 14,000 feet MSL or so. By the time you pass FL180, half of the atmosphere of our planet is below you.
Need help?
Do you have a question about the Embraer EJets Series and is the answer not in the manual?
Questions and answers