Table of Contents
Advertisement
Quick Links
Advertisement
Table of Contents

Related Manuals for Planitar iGUIDE PLANIX

Summary of Contents for Planitar iGUIDE PLANIX
- Page 1 Instruction Manual v1.0...
-
Page 2: Table Of Contents
Table of Contents Regulatory Information What’s in the box System Overview Charging Setup 360° Camera Installation Connect Typical Workflow Survey System Settings Stitch System Maintenance User Replaceable Accessories Usage Tips Specifications Warranty Setup ➤ Connect ➤ Survey ➤ Stitch... -
Page 3: Regulatory Information
Regulatory Information Manufacturer: Planitar Inc. Product Name: iGUIDE PLANIX Model: IMS-6 COMPLIANCE This product has been tested and was found to comply with the following standards: FCC CFR 47, PART 15, SUBPART B, Class B – Unintentional Radiators. ● ISED Canada ICES-003, Issue 7 - Innovation, Science and Economic Development Canada, Verification Authorization - ●... - Page 4 ● Consult the dealer or an experienced radio/TV technician for help. ● WARNING: Any product modifications not expressly approved by Planitar could void the user’s authority to operate PLANIX equipment under FCC rules. INNOVATION, SCIENCE AND ECONOMIC DEVELOPMENT (ISED) CANADA This device complies with Industry Canada license-exempt RSS standard(s).
-
Page 5: What's In The Box
System battery System power supply USB 3.0 Flash drive Carrying case with shoulder strap Ricoh Theta Z1 Theta Lens cap iGUIDE PLANIX Pro iGUIDE PLANIX System battery System power supply USB 3.0 Flash drive Carrying case with shoulder strap Ricoh Theta Z1 (with calibrated lenses) Figure 1 - What’s in the box... -
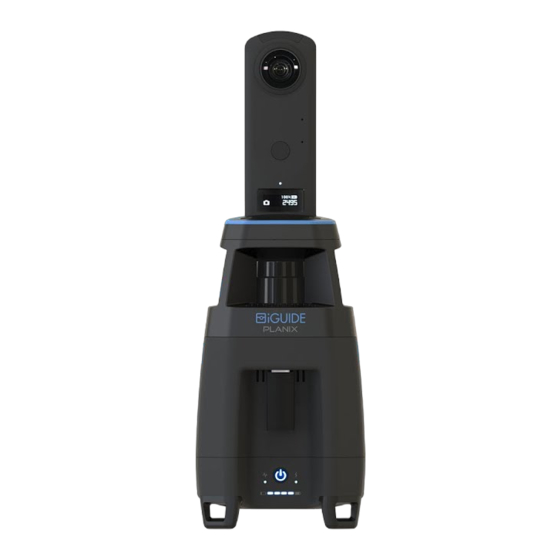
Page 6: System Overview
System Overview PLANIX is an iGUIDE camera system designed to simultaneously measure and photograph spaces to create floor plans and iGUIDE 3D virtual tours. The PLANIX uses a built-in laser scanner for gathering laser measurement data and a user-replaceable 360° camera for capturing panoramas. All surveyed data is stored on a user-replaceable USB flash drive. - Page 7 Handling & Care Additional maintenance information is available in the System Maintenance section. Handling the System It is important to handle the PLANIX with care and to avoid storing the camera in extreme heat or cold for extended periods of time. When placing the camera in resting position, the camera should be set upright.
- Page 8 If you have spots on the lenses that will not come off, try using a lens cleaning solution or pre-moistened lens cleaning tissues and gently rub the spot with soft cloth and avoiding direct finger pressure. Consider using the lens cap to prop the camera up for cleaning (as shown in figure 4). Removing the Lens Cap The lens cap from the 360°...
-
Page 9: Charging
Charging Remove the PLANIX camera system, system battery, and power supply from the carrying case. Insert the system battery into the PLANIX. Plug the power supply into an electrical outlet. On the power supply, a blue light should turn on to indicate that the power supply is working. -
Page 10: Setup
Setup Remove the PLANIX camera system from the carrying case. Ensure the PLANIX system battery is charged. Level the ball head on the tripod. Attach a QR plate to PLANIX and attach the QR plate to the ball head on the tripod. Raise the tripod so that the laser scanner is about 120 cm (~4 feet) from the floor surface for optimal measurement height and 3D touring experience. -
Page 11: 360° Camera Installation
360° Camera Installation If you ordered a PLANIX Core configuration and are providing your own supported 360° camera or are replacing the 360° camera, follow the steps below, paying careful attention to detail. Figure 7 shows proper USB cable routing. Remove the four M3 screws from the 360°... -
Page 12: Connect
Connect The Survey web app is used to collect data and is stored on the PLANIX itself. You will need to connect to PLANIX via Wi-Fi from a compatible smart device. Survey web app can then be loaded into a web browser. Power on the PLANIX by pressing the power button. -
Page 13: Typical Workflow
Typical Workflow To produce an iGUIDE, it is necessary to capture images in every room to create 360° panoramas as well as collect laser measurement data, which will form a map of the space during the survey process. The PLANIX can be controlled from any phone or tablet over Wi-Fi through the Survey web application running in a web browser. -
Page 14: Survey
Survey Upon loading the Survey web app, the following message may appear on-screen: “The 360° Camera has not been aligned...” Follow the on-screen instructions, then proceed. The Survey menu presents the following options (see figure 12): Survey: The main PLANIX and data alignment controls. Create a new scan or browse to view a previous scan. - Page 15 Stand facing the front side of the PLANIX and tap the Scan button again. A second 360° image will be captured and merged with the first image, excluding the halves from both images containing you, the user. Align data manually Tap the Align button.
-
Page 16: System Settings
System Settings Auto Align - Laser measurement data will be automatically arranged following each scan. Toggle on or off. HDR (High Dynamic Range) - Retains more details in bright and dark areas of the 360° images by merging images with different exposure settings. Toggle on or off. Coverage Opacity - Change the opacity of measured areas when looking at the laser measurement data. - Page 17 Update Firmware - Add features and improve usability. On-screen instructions will guide you through a simple update procedure. Reset to Factory Settings - Reset all settings back to their defaults. System Information - System Firmware Version, System Serial Number, 360° Camera Firmware Version and 360°...
-
Page 18: Stitch
Stitch The post-processing in Stitch desktop software is explained in detail on goiguide.com/stitchtraining. Find that page by going to Resources ➤ Technical Training ➤ iGUIDE Training 2 - Stitch Software. Copy data to a computer Eject the USB drive from the PLANIX. Insert the USB drive into a computer. -
Page 19: System Maintenance
System Maintenance Use the information in this section together with the information in the Handling & Care section. USB Flash Drive Avoid running low on free disk space as this will slow down writing new data. Keep at least 50% of the disk space free. - Page 20 Factory Reset A reset button is located inside the small hole on the underside of the PLANIX, next to the charging port. It can be used to reset all user settings, including Wi-Fi password, to factory defaults. To reset, power the PLANIX on, wait until the status indicator stops blinking and use a paperclip to hold the reset button down for ~3 seconds, until the status and battery life indicators turn off, then release.
-
Page 21: User Replaceable Accessories
User Replaceable Accessories The following accessories can be purchased and used in conjunction with PLANIX providing the replacement accessories are an exact model number match to the information listed below. Accessory Description/Model Number Source 360° Camera Ricoh Theta Z1 / R02020 www.theta360.com System Battery POWERPAQ / RRC2057... -
Page 22: Usage Tips
Usage Tips Choosing a QR plate It is recommended to use PLANIX with a QR (quick-release) plate and a ball head to allow for easy leveling on a tripod. Arca Swiss type QR plates with a release screw are recommended over QR plates with a release lever due to possible interference of the lever with the feet. -
Page 23: Specifications
360° Camera: Ricoh THETA Z1 ● Connectivity and System Control Wi-Fi: Wi-Fi 802.11 2.4GHz/5GHz Access Point ● Survey Web App: Planitar web app in a browser over Wi-Fi from any device ● Electrical System Battery: 7.2V 6.9Ah/49.7Wh Li-Ion battery, user-replaceable ●... -
Page 24: Warranty
No. or serial No. sticker of the Hardware; vi) damage to the System arising out of the use of any accessories other than those supplied by Planitar; or vii) any defect that is the result of physical breakage, electric connection or electrical faults external to the System.
Need help?
Do you have a question about the iGUIDE PLANIX and is the answer not in the manual?
Questions and answers