
Related Manuals for SEABOB F5


Summary of Contents for SEABOB F5
- Page 1 Operator's Manual Read this manual carefully and completely before operating the SEABOB...
- Page 3 – before operating the SEABOB. So get ready to dive into a fascinating new world! We wish you many hours of fun with your SEABOB! The following symbols are used in this Operator's Manual to bring your attention to important information: Risk of serious injury and / or death.
-
Page 4: Table Of Contents
5.5 Operation on the water surface ......................... 43 5.5.1 How to navigate your SEABOB ........................43 5.5.2 SEABOB charge state and emergency reserve ..................... 45 5.6 Diving to a depth of up to 2.5 m / 8 ft ....................... 45... - Page 5 5.9 Switching the SEABOB to the Sleep mode ......................49 5.10 Storing the SEABOB ............................50 5.11 Air transport / transport of the SEABOB ......................51 5.12 Switching off the SEABOB for storage or transport ..................53 6. Care ................................. 54 6.1 Cleaning the SEABOB ............................54 6.2 Changing the screw cap ............................
-
Page 6: Safety Information
1. Safety information The SEABOB is a state-of-the-art device. It conforms to current standards and is safe to operate if used properly. Failure to use the device as designed and/or failure to follow the safety information, may cause serious injury or death of the operator, injury or death of others, or cause damage to the SEABOB, and/or other property. -
Page 7: Special Safety Information
• Important! Observe Operator's Manual! • Suitable only for strong swimmers aged 16 or older! • The SEABOB is not intended as a flotation device and is not a life-saving device. Do not use as a swimming aid! • Wear a life jacket at all times when using the SEABOB! •... - Page 8 Display screen may become irreparably damaged if exposed to heat. Never transport a fully charged SEABOB by airplane or over long distances. The SEABOB should only be partially charged during transport (selected the "Air Transport / Storage" option). Only switch off the SEABOB for transport when the airplane symbol is displayed.
-
Page 9: General Safety Information
• The SEABOB is not designed for use as a swimming aid or flotation device. Users may lose the craft in the water. The SEABOB is not a substitute for a life jacket, life preserver or other such flotation device. For this reason, you should wear a life jacket at all times when operating the SEABOB. - Page 10 • For better visibility, wear secure diving goggles. Attention! Despite every precau- tion taken, it is still possible for diving goggles to come off during operation of the SEABOB and for contact lenses to be lost. • Water spraying against and over your body cannot only be strenuous, but also takes away body heat.
- Page 11 The Display Screen may become irreparably damaged if ex- posed to heat. • Moor the SEABOB safely if you decide to leave it in the water for a short time. Ensure that the SEABOB cannot become unattached, injure others or obstruct their path.
- Page 12 The securing device could be pulled out of the SEABOB housing during lifting. In this case, the SEABOB could fall and be damaged or cause damage to other objects or injury or death to persons nearby.
- Page 13 Power Level 1. Gradually increase the power while operating the craft so that you can familiarize yourself with the handling of the SEABOB. It is vital that you are in control of the SEABOB at all times. Risk of collision and injury! •...
- Page 14 In addition, long hair or pieces of clothing of other people can get sucked into the jet channel. Should this occur, there is a risk of injury. In addition, the SEABOB may also be damaged considerably.
- Page 15 Prevent sand or stones from getting into the jet channel. Sand or stones in the jet channel may damage the device. • The operating time of the SEABOB is limited. Return to the shore or accompany- ing boat in time.
-
Page 16: Safety Information For Diving To A Depth Of Up To 2.5 M / 8 Ft
"0.0 m"(0 ft). For this reason, you should switch on the SEABOB only when the craft is close to or at the same level of the surface of the water. -
Page 17: Safety Information For Diving To A Depth Of More Than 2.5 M / 8 Ft
• Only divers with a valid diving license or accompanied by a certified diving instruc- tor are allowed to use SEABOB for diving to a depth of more than 2.5 m / 8 ft. • Only use the SEABOB for diving if you are completely healthy. Consult a doctor if you are in doubt. - Page 18 10 minutes (Time-off). After switching the SEABOB back on, you will need to re-enter your Owner-PIN if you want to start the motor at a diving depth of more than approx. 2.5 m / 8 ft. After entering your Owner-PIN, you can increase the depth limit again so that the set maximum div- ing depth is greater than the one currently shown.
-
Page 19: Safety Information Concerning The Batteries
Never transport a fully charged SEABOB by airplane or over long distances. The SEABOB should only be partially charged during transport (charge state "Air Transport / Storage"). Only switch off the SEABOB for trans- port when the airplane symbol is displayed (see Chapter 5.11 "Air transport / transport of the SEABOB"). - Page 20 • While charging, do not place any objects on the SEABOB or charger to ensure that heat created during the charging process is dissipated properly. Ensure that air can circulate freely. • Carry out charging in a shady place that is dry, cool and well ventilated.
-
Page 21: Proper Use
SEABOB under the supervision of a responsible adult. the water and weather conditions are safe; adjust your Only let other people use your SEABOB if they are aged speed according to visibility. 16 or over and have shown you adequate proof of age... -
Page 22: Registration Papers / Driving Licence
0.5 m / 1.5 ft maximum you wish to operate the SEABOB. We urge all SEABOB height, for example from passing vessels. operators to be informed themselves about the laws and... -
Page 23: Included In Delivery
3. Included in delivery The SEABOB is delivered in a partially charged state. To avoid total discharge, you should charge the SEABOB The following standard equipment is included in immediately after delivery (within 1 week) to at least delivery of the SEABOB: the charge state "Air Transport / Storage". -
Page 24: Description Of The Device
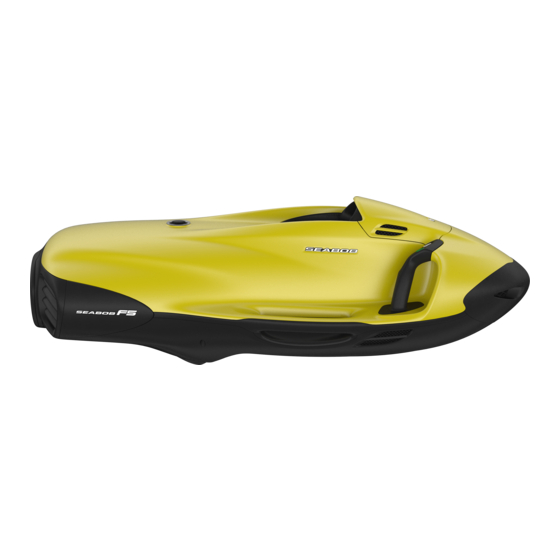
4. Description of the device 4.1 SEABOB housing 1. SEABOB housing 2. SEABOB bow 3. Jet channel (water intake) 4. Jet channel (water discharge) 5. Right Control Grip 6. Left Control Grip 7. Trigger 8. Display 9. Carrying handles 10. Connection port 11. -
Page 25: Right Control Grip
4.2 Right Control Grip 1. Trigger 2. Green button 3. Silver button 4.3 Left Control Grip 1. Red button 2. Blue button... -
Page 26: Operation
Protect the charger, in particular the connector and mains Take the SEABOB and the charger out of the packaging, plug as well as the connection port of the SEABOB, from and place them on a dry and sturdy surface that will not damage, dirt, dust, moisture and heat. - Page 27 SEABOB is shown by the battery symbol Storage), tap the green button on the right Control on the right side of the SEABOB display. As the charg- Grip. A partially filled charge symbol will appear in ing process increases, more bars appear in the battery the center of the display with an arrow to indicate symbol.
- Page 28 When all bars are present in the on the cable line of the connector. Always hold on to battery symbol, the SEABOB is fully charged for op- the connector itself. eration.
- Page 29 SEABOB cannot be charged: See Chapter 7.7 "SEABOB cannot be charged". 14. After the charger has been disconnected, the SEABOB Using auxiliary power units / electric generators: performs a 5-second system check and then switches off to the Off mode if programmed to partial charging Only electric generators with precise closed-loop control (see Chapter 5.3.5 "Off mode") or to the Sleep mode...
-
Page 30: Operating The Seabob
5.3 Operating the SEABOB 5.3.1 Controls and Display panel Never run the motor out of the water for longer than 1. Green button = plus button or scroll up approx. 10 seconds. The motor seals and the hard-coated 2. Red button = minus button or scroll down motor shaft are designed exclusively for use in the wa- 3. -
Page 31: Arrangement Of The Controls
A pulse may also be emitted if the SEABOB falls hard to the ground or is struck hard by another object, if the SEABOB is hit hard or the buttons are inadvertently touched. For safety... -
Page 32: Information Display
In the right-hand field there is a battery symbol with in- The current Power Level and the current power in % of dividual bars showing the charge state of the SEABOB (1 maximum power are set parallel to each other. The power bar = 10 % charge state). - Page 33 The timer dis- play appears. The operating time of the SEABOB in the On mode ("on mode") is shown in the center of the display in the fol- The speed range as well as the set maximum power...
-
Page 34: Off Mode (Air Transport / Storage) - Switching On / Off
Off mode by tapping the device‘s buttons. It can only be switched on using a connected and active charg- er. When the SEABOB is in the Sleep mode, however, it can be switched back on using the device‘s buttons. -
Page 35: Sleep Mode / On Mode - Switching On / Off
"push trigger" appear. charge by means of a connected and active charger (may take up to 24 hours) or by running the SEABOB to empty 3. Push the Trigger against the Control Grip (within 5 in a controlled fashion as described in Chapter 5.11. -
Page 36: Charge Mode
Manual switching off to the Sleep mode: to switch on the motor. The charge display showing the You can also manually put the SEABOB into the Sleep battery symbol will appear in the display (see Chapter mode. To do so, proceed as follows: 5.3.8 "Charge display"). -
Page 37: Charge Display
6. If programmed to partial charging for Air Transport / Storage, an aircraft symbol will appear when the cor- After the charger is connected to the SEABOB and then rect partial charge state has been reached. to a power source, the system first performs a system 7. -
Page 38: Displaying Serial Numbers
Trigger. The PIN prompt when switching on the device is deac- 5. The serial numbers of the SEABOB (the first letter is tivated in the factory. This means that you will be able an "S") and batteries (the first letter is an "A"), as to switch the SEABOB on without entering a PIN. -
Page 39: Settings (Menu)
5.3.11 Settings (menu) To enter the PIN, you must use the four buttons and confirm your entry with the Trigger: 1. The system is in the On mode. The Information Display 1. Tap the red button (repeatedly). The digit under the is shown on the display. - Page 40 ("diving depth") is automatically reset to the default set- is shown in white. Select the desired menu item by ting of 2.5 m / 8 ft each time the SEABOB is switched on. pushing the Trigger. Tip: With the exception of the maximum diving depth 5.
-
Page 41: Operation
5.3.12 Operation Charge the SEABOB after each use (within 24 hours) to at least the charge state "Air Transport / Storage" to avoid 1. Switch on the SEABOB. The Information Display ap- irreparable total discharge of the valuable Lithium-Ion pears on the display. -
Page 42: Before Starting
1. Tap the blue button. and motor shaft. Danger of short circuit! 2. The display is switched on. The SEABOB logo and the 7. After a successful function check, tap the red button prompt "push trigger" appear. -
Page 43: Operation On The Water Surface
5.5.1 How to navigate your SEABOB Both before and during operation, observe the Hold on to the two Control Grips on the SEABOB secure- safety information provided in Chapter 1 as well as ly. The force of acceleration can be very high, especially that listed below: when starting. - Page 44 8. To stop, continue holding on to both Control Grips of the SEABOB. It is vital that you are in control of the securely, and release the Trigger in your right hand.
-
Page 45: Seabob Charge State And Emergency Reserve
• Only skilled and experienced swimmers are allowed to ing your way back to the starting point, shore or accom- use the SEABOB for diving to a depth of up to 2.5 m / 8 ft. panying boat in time. -
Page 46: How To Dive With Your Seabob
4. After the craft is submerged, you can adjust the pow- SEABOB for diving to a depth of more than 2.5 m / 8 ft. er to the level you want. -
Page 47: Setting The Maximum Diving Depth
Bear in mind that the SEABOB switches off automatically lows: (Sleep mode) if inactive for a period of more than 10 min- 1. Switch on the SEABOB (the device should be ready utes (Time-off). After switching the SEABOB back on, you for operation). The Information Display appears on will need to re-enter your Owner-PIN if you want to start the display. -
Page 48: Adjusting The Buoyancy Of The Seabob
3. Do not leave the SEABOB in the sun if it is not being characteristics of the SEABOB by means of test drives in used. Without water to cool the device, the direct sun- shallower waters. -
Page 49: Switching The Seabob To The Sleep Mode
Chapter 5.3.6 "Sleep mode / On mode". ing in damage to the SEABOB as well as damage to the Tip: When the SEABOB is completely discharged / run to motor and the motor‘s electronic system. -
Page 50: Storing The Seabob
7. To save energy and to reduce maintenance charging, the display turns itself off automatically 10 minutes If you do not plan to use the SEABOB for an extended after charging is completed (“complete”). By pressing period, it must be stored at least in a partial charge state any button, the display can be switched on again (for (charge state "Air Transport / Storage"). -
Page 51: Air Transport / Transport Of The Seabob
SEABOB from damage, dirt, dust, moisture and 1. Place the SEABOB on a dry and sturdy surface that heat. May result in electric shock and will not damage the components. - Page 52 / transport has been reached display. If only 1 bar is still displayed, charge the SEABOB ("complete"). as specified to the charge state "Air Transport / Storage"...
-
Page 53: Switching Off The Seabob For Storage Or Transport
Tip: Always bear in mind, particularly if you plan to oper- ate the craft, that you will need an active charger con- nected to a power source to switch the SEABOB back on from the Off mode. -
Page 54: Care
SEABOB checked, please contact the manufacturer or of the seal, resulting in damage to the SEABOB as well as your specialist dealer. damage to the motor and the motor‘s electronic system. -
Page 55: Changing The Screw Cap
6.2 Changing the screw cap sealed connection port and the screw cap with fresh water (low pressure, for example, using a garden hose Even minute damage or dirt on the screw cap can reduce or watering can). Avoid leaving any scratches on the the effectiveness of the seal, resulting in damage to the sealing surfaces or contact surfaces. -
Page 56: Troubleshooting
7. Troubleshooting 7.1 SEABOB cannot be switched on If you cannot switch on the SEABOB, either the SEABOB Repairs and maintenance work on the SEABOB and is completely discharged / run to empty or it has been charger that go beyond the procedures described in this switched off for Air Transport / Storage. -
Page 57: Motor Does Not Run
7.3 Warning and error message of the electronics • Check the charge state of the SEABOB by checking to see if the display is working. The SEABOB is dis- Your SEABOB is equipped with cutting-edge electronic charged / run to empty when the voltage per Lithi- technology to monitor the functions of the watercraft. -
Page 58: Impeller Does Not Turn (No Thrust)
If this is the case, proceed as follows: 2. The Trigger may freeze in frosty weather, causing it to 1. Switch off the SEABOB, take it out of the water and stick. Place the SEABOB in the water so that frozen com- place it on a dry and sturdy surface that will not dam- ponents can thaw off. -
Page 59: Moisture Present In Connection Port
If the charge indicator does not appear on the display the connection port, the seals are defective or the screw and the SEABOB does not switch to charge mode de- cap was not put on or has been put on incorrectly. Charge... -
Page 60: Technical Specifications
8. Technical specifications Special motor sealing case • Multiple-stage sealing rings for redundant seal ef- All specifications are only intended for use in describing fect throughout the sealing system the product. They are not to be construed as guaranteed • Special rotary shaft seals are mounted in mul- properties. - Page 61 • 65 °C: / 149 °F: maximum discharging tempera- Speed ture (motor stops) Depends on the water resistance of the SEABOB user • 60 °C / 140 °F: discharging temperature warning and the set power (power limited to Power Level 2) •...
- Page 62 No special maintenance is required if the care instruc- tions are adhered to (cleaning of the device and pos- sible replacement of wearing parts) Recommended: Have the SEABOB (for example, the motor sealing case) checked by the manufacturer or specialist dealer after approx. 3,000 hours of motor...
- Page 63 Ort und Datum der Ausstellung Place and date of issue *Mustererklärung. Bei Modellen ohne Kameramodul entfällt die RED-Richtlinie. Die Originalerklärung erhalten Sie mit Ihrem SEABOB-Zertifikat. *Model declaration. For models without camera system the RED directive does not apply. You receive the declaration`s...
-
Page 64: Disposal
9. Disposal Never separate the batteries from the device. They are firmly integrated in the SEABOB. Doing so may cause flammable gases to be discharged causing serious injury. Used batteries (batteries which are faulty or no longer provide adequate power) are to be disposed of in accordance with statutory regulations in order to protect the environment and health. -
Page 65: Replacement Parts
10. Replacement parts • Screw cap (for connection port) -
Page 66: Service
11. Service For service or repairs, please contact CAYAGO AG: • by e-mail at service@seabob.com • by phone at +49 (0)52 22- 8 03 50-11 / -41 (Mon-Fri, 9:00 a.m. to 6:00 p.m. CET, except on public holidays) or your specialist dealer. -
Page 67: Imprint
1881 W State Road 84 #104 Ft. Lauderdale, FL 33315 United States Phone 1-754-216-4600 info@seabob.us www.seabob.com As of 02/2019 © 2019 CAYAGO AMERICAS INC. Copying, transmitting, storing or translating this Opera- tor's Manual in any shape or form, whether in part or whole, is not permitted without the prior written consent of CAYAGO AMERICAS INC. - Page 68 www.seabob.com...
Need help?
Do you have a question about the F5 and is the answer not in the manual?
Questions and answers