Advertisement
Quick Links
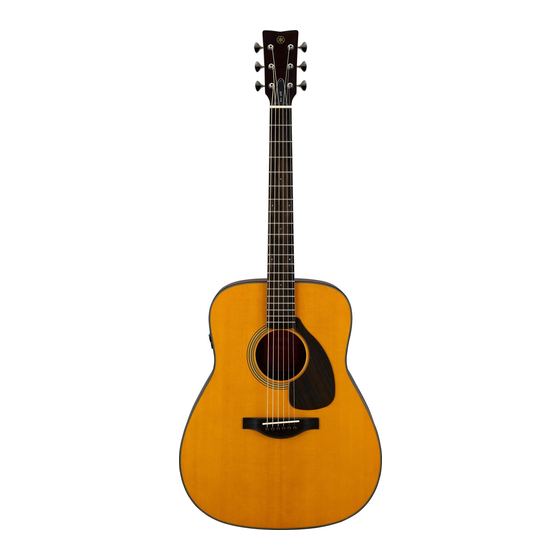
Acoustic Electric Guitar
Owner's Manual
Thank you for purchasing the Yamaha Guitar with the Atmosfeel™ technology.
Featuring Yamaha's newly developed three-way system with built-in piezoelec-
tric sensors, the acoustic guitar sound is captured as is, with amazing accuracy
across the entire frequency range - from low to high - creating an expressive,
natural warm stereophonic sound. To obtain the best performance and potential
from this instrument, we encourage you to read this manual before use.
Note that this manual covers only the electronic parts of this product. For infor-
mation on the other non-electronic parts, refer to the separate Acoustic Guitar
Owner's Manual.
PRECAUTIONS
PLEASE READ CAREFULLY BEFORE PROCEEDING
Please keep this manual in a safe and handy place for future reference.
WARNING
Always follow the basic precautions listed below to avoid the possibility of serious injury
or even death from electrical shock, short-circuiting, damages, fire or other hazards. These
precautions include, but are not limited to, the following:
Do not open
Water warning
If you notice any abnormality
CAUTION
Always follow the basic precautions listed below to avoid the possibility of physical injury to
you or others, or damage to the instrument or other property. These precautions include, but are
not limited to, the following:
Connection
Location
Handling caution
* Yamaha cannot be held responsible for damage caused by improper use or modifications
made to this instrument.
* Information regarding the batteries can be found in the Specifications Section of this
owner's manual.
Specifications
l System:
System74
l Pickup:
Hybrid 3-way System
l Control:
Master Volume, Mic Blend, Bass EQ
l Output Jack:
Combination end pin/line out power switch
l Output Impedance:
1 kΩ
l Power:
AA battery x2 (alkaline or nickel-metal hydride) * 1
l Battery Life:
Approximately 28 hours using alkaline batteries, approximately
24 hours using nickel metal hydride batteries.* 2
l Accessories:
Neck adjustment hex wrench x1, AA battery x2
Part Names/Control Descriptions
EN
Controls
q Master Volume
When a cable is connected to the r Output Jack, the LED located inside the Master
Volume lights green for one second, then the Atmosfeel™ feature will be turned ON.
Turn the Master Volume control all the way down to the minimum before connecting/dis-
connecting a cable. The output level can be adjusted by turning this control to the right
(clockwise) to increase the level, or to the left (counterclockwise) to reduce the level.
w Mic Blend
Adjusts the level of the sound picked up with the microphones installed inside the body.
Turning this control to the right (clockwise) to enhance the reverberation and spacious-
ness of the sound. In this condition, the output level is not changed.
NOTE
Feedback might occur depending on the usage conditions. Use the w Mic Blend or
the e Bass EQ to adjust the sound.
e Bass EQ
Adjusts the level of the low frequencies. Turning this control to the right (clockwise)
gradually boosts the lower frequencies. Turning it to the left (counterclockwise) gradu-
ally cuts the lower frequencies. Turn it to the left when you play in a band, turn it to the
right when you play solo and emphasize the bass.
r Output jack/battery holder
The output jack and battery compartment are combined into a single unit. Inserting a
plug into the output jack switches the internal preamplifier ON. To prolong the life of
your battery, unplug the cable from the output jack when not in use.
q Slide the tab on the endpin section in the direction indicated by the arrow in the diagram
below to release the lock, then pull out the battery holder.
w Insert two AA batteries making sure that the battery poles are properly aligned with the
polarity markings on the battery holder.
e Slide the battery holder back into the endpin section until the tab is locked.
NOTICE
When using nickel metal-hydride batteries, take care not to damage the battery
casing or poles when installing and removing the batteries.
Battery holder
Remaining Battery Level
The LED located inside the Master Volume flashes red when it is time to change the
batteries. Once the LED begins flashing, the remaining operation time is approximately
two hours with alkaline batteries and about one hour when using nickel metal hydride
batteries (Time varies according to operating conditions). Please replace the batteries
as soon as possible.
*1 For best performance, we recommend the use of alkaline or nickel-metal hydride bat-
teries. When using nickel-metal hydride batteries, please follow the instructions in the
manual provided with the batteries.
*2 Depends upon operating conditions.
* The contents of this manual apply to the latest specifications as of the printing date.
Since Yamaha makes continuous improvements to the product, this manual may not
apply to the specifications of your particular product. To obtain the latest manual, access
the Yamaha website then download the manual file.
Replacing the Batteries
Endpin section
Release the lock
q
Tab
AA battery
x2
Advertisement


