Table of Contents
Advertisement
Quick Links
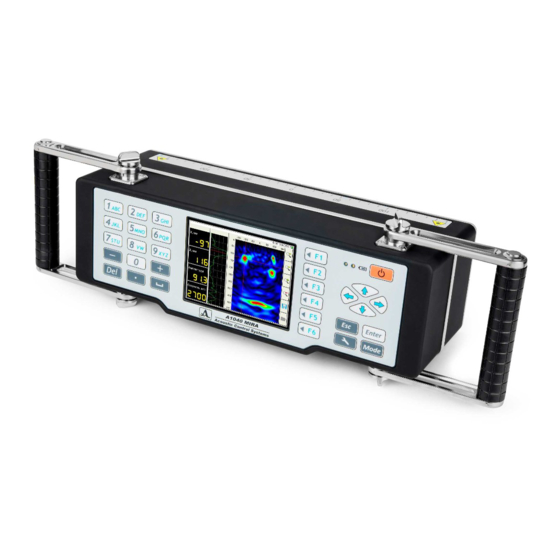
A1040 MIRA 3D
Ultrasonic low-frequency tomograph
Operation manual
Revision 1.0.6
Acoustic Control Systems – ACS Group
Saarbrücken, Germany 2021
This instruction manual contains essential information on how to use this ACS product safely and effectively.
Before using this product, thoroughly review this instruction manual. Use the product as instructed.
Advertisement
Table of Contents

Related Manuals for ACS A1040 MIRA 3D


Summary of Contents for ACS A1040 MIRA 3D
- Page 1 Revision 1.0.6 Acoustic Control Systems – ACS Group Saarbrücken, Germany 2021 This instruction manual contains essential information on how to use this ACS product safely and effectively. Before using this product, thoroughly review this instruction manual. Use the product as instructed.
- Page 2 18.3 File manager ......................... 45 19. MAP 19.1 Main parameters ......................47 19.2 Display parameters ...................... 48 19.3 File manager ......................... 48 19.4 MAP manager ....................... 48 20. C-Det A1040 MIRA 3D © 2021 Acoustic Control Systems – ACS Group...
-
Page 3: Table Of Contents
Automatic transducer testing ..................59 23. Getting started 23.1 App installation ......................63 23.2 App activation ......................64 23.3 Preparation for work ....................66 23.4 Update .......................... 67 Index A1040 MIRA 3D © 2021 Acoustic Control Systems – ACS Group... - Page 4 Cover Page Back Service Address: ACS-Solutions GmbH Science Park 2 66123 Saarbrücken Germany Phone: +49 (0) 681 9659 2270 Fax: 49 (0) 681 9659 2280 E-Mail: info@acs-international.com Web: acs-international.com A1040 MIRA 3D © 2021 Acoustic Control Systems – ACS Group...
- Page 5 It is possible that formerly described functions are not available any more, new functions are added or pictograms and/or procedures change. These changes will be documented in the latest, online available manual. Check page for available manuals and software updates. A1040 MIRA 3D © 2021 Acoustic Control Systems – ACS Group...
- Page 6 Control Unit that is seated in a specially developed housing. The Control Units provided by ACS are selected to guarantee a save and reliable operation of the all over system. Please do not try to open the provided Housing for the control unit.
- Page 7 Failure to avoid it may result in minor injury. Indicates a potentially harmful situation. If it is not avoided, the device or something in its vicinity may be damaged. A1040 MIRA 3D © 2021 Acoustic Control Systems – ACS Group...
- Page 8 Abbreviations Abbreviations Abbreviations Geben Sie hier den Text ein. A1040 MIRA 3D © 2021 Acoustic Control Systems – ACS Group...
- Page 9 Figure 2: Position Laser class 2M Sticker Description Content device identification Sticker Device Name: A1040 MIRA 3D Manufacturer: Acoustic Control Systems-ACS Group Manufacturer Homepage Address: ACS- Interantiona.com Country of origin: Made in Germany A1040 MIRA 3D © 2021 Acoustic Control Systems – ACS Group...
- Page 10 S/N: Serial number of the Device beginning with 120 followed by 5 digits. Laser class 2 M Warning sign placed on the exiting points of all 4 Laser-Diodes. Please see chapter "Safety" for further Detail A1040 MIRA 3D © 2021 Acoustic Control Systems – ACS Group...
- Page 11 Number Part description A1040 Mira 3D device Mobile control device Electric socket adapters Charging devices for A1040 Mira 3D and moblie control device Cables for charger Transducer test plate Documentation box containing the user manual, the warranty certificate and the meteorology certificate.
- Page 12 Scope of Delivery Scope of Delivery Transportation box * A1040 MIRA 3D 4x8 configuration is delivered with only one charging device. A1040 MIRA 3D © 2021 Acoustic Control Systems – ACS Group...
- Page 13 Main Components Main Components Main Components A1040 MIRA 3D © 2021 Acoustic Control Systems – ACS Group...
- Page 14 Main Components Main Components A1040 MIRA 3D © 2021 Acoustic Control Systems – ACS Group...
- Page 15 Main Components Main Components A1040 MIRA 3D © 2021 Acoustic Control Systems – ACS Group...
- Page 16 Main Components Main Components A1040 MIRA 3D © 2021 Acoustic Control Systems – ACS Group...
- Page 17 Keys and system LEDs Keys and system LEDs The A1040 Mira 3D Has two key -Types Type One is the key for the operational preparation of the system and to run status checks. This KEy is found on the Main Keypad Figure 3: Keypad position The Keypad has three basic functionalities.
- Page 18 Option 1: The main device is not connected to the control program. Option 2: The main device is acting as slave in combination 4x16 or 8x8 with another device. A1040 MIRA 3D © 2021 Acoustic Control Systems – ACS Group...
- Page 19 50 % battery charging orange 25% [5] 25 % battery charging 10% [6] 10 % battery charging * * at 10 % battery charging. the device should be recharged. A1040 MIRA 3D © 2021 Acoustic Control Systems – ACS Group...
- Page 20 Rechagreable Battery of the Main Device The rechargeable batteries of the Main Device shall not to be replaced by the operator, only by full trained personnel that has been authorized by ACS. For safety reasons, do not attempt to remove or replace the battery.
- Page 21 If the device is not charged through the USB power supply, but for example via a computer, this may result in a reduced charging speed due to a limited electrical power supply · You cannot use the device while it is being charged. A1040 MIRA 3D © 2021 Acoustic Control Systems – ACS Group...
- Page 22 · It is advisable to install the charging unit close to the mains connection and to keep the surroundings free, so that easy access is possible anytime. A1040 MIRA 3D © 2021 Acoustic Control Systems – ACS Group...
- Page 23 Control Unit that is seated in a specially developed housing. The Control Units provided by ACS are selected to guarantee a save and reliable operation of the all over system. The housing provides an opening for charging the control unit via the USB-C.
- Page 24 In normal mode the device switches OFF as soon as the level drops beyond a certain safety limit. It is recommended not to restart the device before the charging procedure is complete to avoid damage. A1040 MIRA 3D © 2021 Acoustic Control Systems – ACS Group...
- Page 25 · It is advisable to install the charging unit close to the mains connection and to keep the surroundings free, so that easy access is possible anytime. A1040 MIRA 3D © 2021 Acoustic Control Systems – ACS Group...
- Page 26 Ambient limits · Temperature Range: o Storage: From -20 °C to +60 °C o Operation: From -10°C to +50°C · Relative humidity: 95% A1040 MIRA 3D © 2021 Acoustic Control Systems – ACS Group...
- Page 27 Loss of IP protection. Insufficient attachment of the handle Dropping of the device and injury by arm/ open fastening screws for grip uncontrolled movement of the device. adjustment A1040 MIRA 3D © 2021 Acoustic Control Systems – ACS Group...
- Page 28 The Device contains four Class 2M laser for positioning purposes. The Laser are located at the bottom of the device. Specific safety instructions: All laser outlets are marked with the following symbol Protective measures: A1040 MIRA 3D © 2021 Acoustic Control Systems – ACS Group...
- Page 29 A minimization requirement applies both with regard to the spatial size of the laser area and the number of people staying in the laser area. · Keep laser under lock to prevent misuse. A1040 MIRA 3D © 2021 Acoustic Control Systems – ACS Group...
- Page 30 For this measuring device, calibration is imperative. It should be included in the measuring equipment monitoring of the enterprise. Always keep the A1040 Mira 3D clean and maintained state. Avoid unnecessary force when using the device and always dry and clean the device before storage. For storage use the provided box with the foam inlay.
- Page 31 Check for mechanical damage and cleanliness / Clean with a Control Unit little moistened cloth Complete A1040 Inspection and calibration by ACS or authorized dealer. Mira 3D system A1040 MIRA 3D © 2021 Acoustic Control Systems – ACS Group...
- Page 32 Repair is reserved to factory service or authorized dealer. Initial Step for Troubleshooting In case of device failure switch OFF and ON the device. If the device problem is not solved, consult the chapter troubleshooting. A1040 MIRA 3D © 2021 Acoustic Control Systems – ACS Group...
- Page 33 3d warranty certificate, chapter 3 "Main Technical Specifications", that was given to you as part of the delivery set. The technical specification can be altered by ACS anytime by means of optimizing the device or for safety reasons. Please check the homepage path of A1040 MIRA 3D, for the latest technical specification of the device.
- Page 34 Repeat the operation on the other handle. Attachment and detachment of the control device Place the Control Unit on the Main Unit like shown in the sketch below, gripping it on the corners. A1040 MIRA 3D © 2021 Acoustic Control Systems – ACS Group...
- Page 35 Rotate the Control Unit, gripping it on the corners, until the magnetic locking system snap out of place . Remove the Control Unit from the Main Unit. Switching on the A1040 Mira 3D system A1040 MIRA 3D © 2021 Acoustic Control Systems – ACS Group...
- Page 36 Operation Operation Before switching on the A1040 Mira 3D system, check the status of the batteries according the chapters "Rechagreable Battery of the Main Device" and "Rechargeable Battery of the Control Unit" Press On Key [1] for three seconds to switch the Main device on.
- Page 37 Dirt or or a small item is Check if the LEDs are off by placing work or is blocking the laser beam the device on white A4 sheet of blurred outlet. paper, or similar. . A1040 MIRA 3D © 2021 Acoustic Control Systems – ACS Group...
- Page 38 Never try to If the bellow is disassembled, lubricate the the carefully try to retract the bellow suspension until the sensor suspension is system. visible. Try to clean the A1040 MIRA 3D © 2021 Acoustic Control Systems – ACS Group...
- Page 39 Check if your Control Software on the Software malfunction Mobile Unit is starting properly. If the software is not responding properly, reinstall the software on your Mobile Unit. A1040 MIRA 3D © 2021 Acoustic Control Systems – ACS Group...
- Page 40 The product must not be disposed of with the domestic waste. A1040 MIRA 3D © 2021 Acoustic Control Systems – ACS Group...
- Page 41 CE Certificate CE Certificate CE Certificate A1040 MIRA 3D © 2021 Acoustic Control Systems – ACS Group...
- Page 42 Panel with list of parameters. Operator can scroll the list of parameters up and down by using touch. Put a finger on the panel, hold it pressed and move it up or down Table 2: Description of parameters A1040 MIRA 3D © 2021 Acoustic Control Systems – ACS Group...
- Page 43 18.2 Display parameters Display parameters allows user to adjust representation of inspection results in a best suitable way. Main screen of display parameter tab and corresponding description are given below. A1040 MIRA 3D © 2021 Acoustic Control Systems – ACS Group...
- Page 44 Lable Description Tab with listed display parameters Start gate control. Defines first cross-section to be projected End gate control. Defines last cross-section to be projected. Table 4: Description of parameters A1040 MIRA 3D © 2021 Acoustic Control Systems – ACS Group...
- Page 45 Operator can setup a number of cross-sections which will result into a single image. 18.3 File manager File manager allows operator to save data, load offline data, rename measurements, delete measurements. A1040 MIRA 3D © 2021 Acoustic Control Systems – ACS Group...
- Page 46 Allows the operator to delete list entry by holding long touch with simultaneous horizontal right to left movement. Save as button causes appearing of touch keyboard for entering a measurement name. Rename control New measurement control A1040 MIRA 3D © 2021 Acoustic Control Systems – ACS Group...
- Page 47 In MAP mode in comparison to B-Scan mode the list of main parameters has been extended. For description of standard parameters refer . Additional MAP parameters are listed in table below. Table 6: Description of parameters A1040 MIRA 3D © 2021 Acoustic Control Systems – ACS Group...
- Page 48 File manager in MAP mode has similar functionality as the manager in B-Scan mode. Please, refer to file manager description here. 19.4 MAP manager MAP manager parameters are listed in the corresponding tab as is shown below. A1040 MIRA 3D © 2021 Acoustic Control Systems – ACS Group...
- Page 49 Hold touch and move a finger to pan · move cursor by touch or arrow control [4] · delete data set at selected position by pressing on thrash bin button [5] A1040 MIRA 3D © 2021 Acoustic Control Systems – ACS Group...
- Page 50 · Switch off automatic velocity calibration · Set desired velocity. If velocity is not known try to estimate it on crack-free surface or using back-wall. Figure 5: Crack-depth estimation A1040 MIRA 3D © 2021 Acoustic Control Systems – ACS Group...
- Page 51 C-Det Evaluation Figure 6: Crack-depth evaluation · Try to locate the area of interest using the cursor ( Figure 6) · Estimate X and Z location of the crack-pitch A1040 MIRA 3D © 2021 Acoustic Control Systems – ACS Group...
-
Page 52: A-Scan
Second gate control works similar to the first one. Panel indicates the currently selected gate by triangle. Number in brackets introduces begin and end of the gate expressed in µs. Table 9: Description of parameters A1040 MIRA 3D © 2021 Acoustic Control Systems – ACS Group... - Page 53 Operator can choose between two excitation types: four transducers excites simultaneously and excitation with a single transducer. Select a desired group of A1040 MIRA 3D © 2021 Acoustic Control Systems – ACS Group...
- Page 54 (right image below) by using transmitter control as it shown below Farm view in linear array mode cleary shows saturation on four transmitting receive whereas in matrix array mode saturation can be observed on the single transmitting receiver. A1040 MIRA 3D © 2021 Acoustic Control Systems – ACS Group...
-
Page 55: Setup
Setup mode allows for the operator to adjust system parameters, scan for online devices, configure instrument, set master and slave instruments, carry out transducer self test. Figure 7: : Description of elements A1040 MIRA 3D © 2021 Acoustic Control Systems – ACS Group... - Page 56 Indicator shows whether instrument is currently connected. Button calls routine for transducer test. Detailed description [10] of transducer test procedure is give here. [11] Button removes current instrument Table 10: Description of parameters A1040 MIRA 3D © 2021 Acoustic Control Systems – ACS Group...
-
Page 57: Instrument Configuration
Step 1 Switch on the tomograph. It is supposed, that access point parameters are already preset in the tomograph. Wait until "connect" LED starts to blink. A1040 MIRA 3D © 2021 Acoustic Control Systems – ACS Group... - Page 58 The parameters of the assigned device are depicted in configuration type panel. The app establishes connection with the assigned device. A1040 MIRA 3D © 2021 Acoustic Control Systems – ACS Group...
-
Page 59: Automatic Transducer Testing
Switch on the tomography, start the app on the mobile and ensure that the tomograph goes online. Set the tomograph as master. Step 3 Start the transducer testing procedure by pressing button. After presing it the following window will be shown A1040 MIRA 3D © 2021 Acoustic Control Systems – ACS Group... - Page 60 Step 4 Press "data collection" button which is located on the handles of the tomograph. After pressing the button the tomograph starts scanning. The dialog looks as presented below. A1040 MIRA 3D © 2021 Acoustic Control Systems – ACS Group...
- Page 61 In case of a error a transducer will be colored red. In this case it is necessary to contact with service center of the manufacturer by e- mail at info@acs-international.com or by phone: +49 681-9659-2270. A1040 MIRA 3D © 2021 Acoustic Control Systems – ACS Group...
- Page 62 Setup Setup A1040 MIRA 3D © 2021 Acoustic Control Systems – ACS Group...
-
Page 63: Getting Started
Getting started Getting started Getting started 23.1 App installation This chapter describes the steps for Installation or reinstallation of A1040 MIRA 3D android application Copying installation package · Copy installation package com.acs.a1040mira3d-X.X.XX.apk to "acs-solutions apps" tablet internal storage folder. The name of apk file contains X.X.XX symbols. -
Page 64: App Activation
The app will be trying to verify the license by sending request to the license server. In case of successful verification activation dialog will be closed and notification dialog will be opened. A1040 MIRA 3D © 2021 Acoustic Control Systems – ACS Group... - Page 65 · License does not exist, contact the support An example of failed activation is shown below. If you are not able to finish activation press X and contact support. A1040 MIRA 3D © 2021 Acoustic Control Systems – ACS Group...
-
Page 66: Preparation For Work
· Successful connection of the tomograph to the hotspot will be indicated by the little number [1] next to the hotspot icon, see the following image. A1040 MIRA 3D © 2021 Acoustic Control Systems – ACS Group... -
Page 67: Update
Automatic update · The notification dialog informs the operator about a new available app version on the license server. · Force the update by pressing the button in setup mode: A1040 MIRA 3D © 2021 Acoustic Control Systems – ACS Group... - Page 68 USB cable to the instrument TYPE C plug. The update indicator is on now. It confirms the device's readiness for the update. · Windows PC detects the A1040 MIRA 3D storage device. Please, open it in the file explorer. A1040 MIRA 3D...
- Page 69 Wait until the update indicator stops blinking. · Disconnect the A1040 MIRA 3D from the PC. The instrument is updated now. · Start the instrument, connect the device to the app, and finally, check the firmware version in the setup mode.
Need help?
Do you have a question about the A1040 MIRA 3D and is the answer not in the manual?
Questions and answers