Table of Contents
Advertisement
Quick Links
IMPORTANT SAFEGUARDS
Warnings:
1. Read all of these instructions Save these instructions for later use,
please.
2. Unplug this monitor from the wall outlet before cleaning. Do not use
liquid cleaners or aerosol cleaners. Use a damp cloth for cleaning.
3. Do not use attachments not recommended by the monitor
manufacturer as they may cause hazards.
4. Do not use this monitor near water. For example near a bathtub,
washbowl, kitchen sink, or laundry tub, in a wet basement, or near a
swimming pool, etc...
5. Do not place this monitor on an unstable cart, stand, or table. The
monitor may fall, causing serious injury to a child or adult, and serious
damage to the appliance. Use only with a cart or stand recommended
by the manufacturer or sold with monitor. Wall or shelf mounting
should follow the manufacturer's instructions, and should use a
mounting kit approved by the manufacturer.
6. Slots and openings in the cabinet and the back or bottom are
provided for ventilation, and to insure reliable operation of the
television receiver and to protect it from overheating, these openings
must not be blocked or covered. The openings should never be
blocked by placing the monitor on a bed, sofa, rug, or other similar
surface. This monitor should never be placed near or over a radiator
or heat register. This monitor should not be placed in built-in
installation such as a bookcase unless proper ventilation is provided.
7. This monitor should be operated only from the type of power source
indicated on the marking label. If you are not sure of the type of power
supplied in your home, consult your monitor dealer or local power
company.
8. This monitor is equipped with a three-wire grounding type plug, a plug
having a third (grounding) pin. This plug will only fit into
IMPORTANT SAFEGUARDS
E
N
G
L
I
S
H
Advertisement
Table of Contents

Summary of Contents for Yiynova MVP22U+RH
- Page 1 IMPORTANT SAFEGUARDS Warnings: 1. Read all of these instructions Save these instructions for later use, please. 2. Unplug this monitor from the wall outlet before cleaning. Do not use liquid cleaners or aerosol cleaners. Use a damp cloth for cleaning. 3.
- Page 2 grounding-type power outlet. This is a safety feature. If you are unable to insert the plug into the outlet, contact your electrician to replace your obsolete outlet. Do not defeat the safety purpose of the grounding-type plug. 9. Do not allow anything to rest on the power cord. Do not locate this monitor where the cord will be abused by persons working on it.
- Page 3 16 .When replacement parts are required, be sure the service technician has used replacement parts specified by the manufacturer that have the same characteristics as the original parts. Unauthorized substitutions may result in fire, electric shock, or other hazards. 17. Upon completion of any service or repairs to this monitor, ask the service technician to perform routine safety checks to determine that the monitor is in safe operating condition.
-
Page 4: Table Of Contents
Contents 1. INTRODUCTION ..................5 1.1 P ..................5 ACKING 1.2 D ................5 ISPLAY VERVIEW 1.3 I ..................9 NSTALLATION 2. OPERATION GUIDE................24 2.1 A ......24 DJUSTING ISPLAY REQUENCY AND ESOLUTION 2.2 W ............24 ORKING WITH THE ABLET 2.3 OSD F ................ -
Page 5: Introduction
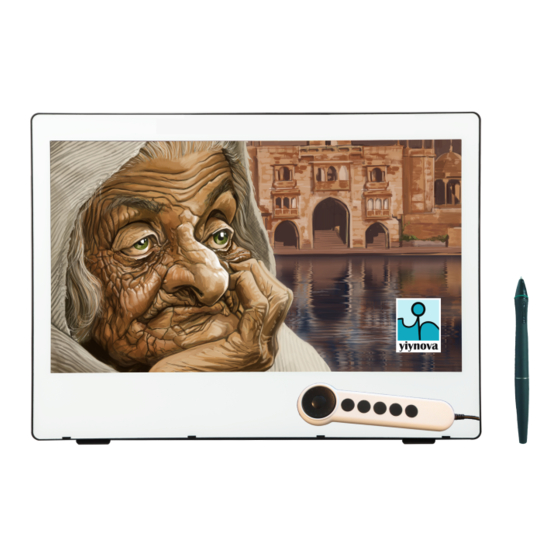
1. Introduction 1.1 Packing List After unpacking, make sure that all of the following parts are included. LCD monitor User’s guide Tablet CD Power adapter Power cord Tablet pen module Pen holder If there is a defect or missing part, contact the agency where you purchased the product. - Page 6 combination see above the figure 1. Factory preset with Enter, Zoom out, Page down, Right, Left, Page up, Zoom in & Esc ② Active display area and tablet operating area Receives text and graphical information entered with the tablet pen, and transmits the data to a PC. ③...
- Page 7 1.2.3 Rear Cover(see figure 3) ①DC input port: Plug the adapter port to DC input port, ② VGA input/USB 2 in 1 cable: Plug the VGA cable & USB cable into your computer VGA & USB port. ③ ② ① Figure 3 ③Pen holder slot: Insert the pen holder to the slot.
- Page 8 1.2.4 Adjusting the Base Your LCD Monitor is designed to allow you to adjust it to an optimal viewing angle. Figure 4 CAUTION: Make sure the angle of the monitor is at least 10 degrees from the vertical; otherwise the monitor will be unstable and could fall over.
-
Page 9: Installation
1.3 Installation 1.3.1 System Requirement Before installing the monitor, make sure your PC Operation system is Windows XP, Windows Vista/ 7 / 8 or MAC 10.4 above. 1.3.2 Software Installation 1.3.2.1 Pen Tablet Driver Installation A. If your PC operation system is Windows XP. You must install driver before you use tablet pen. - Page 10 (2) After complete the installation, you can see an icon on the system tray and make sure you can use your pen on the screen to move the cursor. B. If your PC operation system is Windows Vista/7/8, Pen input function will plug-n-play &...
- Page 11 Press►【Continue】 Press ►【Install】 Introduction...
- Page 12 ► Remember to enter your user name and password ►Press【OK】 ► Installation Successful When the installation is completed, Click “Close” to exit the installation program. After that, Please reboots your system for the software and hardware to operate properly. Introduction...
- Page 13 1.3.2.2 Pen tablet setup A. Pen tablet setup for windows OS The first step to customize or to diagnose Digital Pen Device is to call up Tablet Configuration Panel. There are two ways to do so. 1. Tap on Tablet Icon ( ) at the lower right corner of the screen.
- Page 14 a. Click【Monitor Setting】 Note: Pay attention that at the “ monitor setting ” window in there you will see the “monitor 1 or monitor 2” block , which shown “monitor1”only while the monitor setting at mirror mode .It will shown “monitor 1 and monitor 2” for your selection while the monitor setting at extended mode, Which realizing dual screen mode pen tablet operation.
- Page 15 b. Click【Button Setting】 You can define the button of the pen to Left / Right/Middle/Eraser Toggle or barrel key of your mouse. Introduction...
- Page 16 c. Click【Pressure Setting】 Note: You can set pen pressure lighter or heavier accordingly via moving the setting bar at the “Pressure” window. In the mean time, pressing the pen at inside white area of the “pressure” window for testing the pen pressure. Introduction...
- Page 17 d. Click【Express Keys Setting】 Note: All express key are assignable with any one to four keys combination see above the figure. Introduction...
- Page 18 e. Click【Calibration Setting】 Attention: Default setting will fit most of the user , once needed you can recalibrate your screen by tapping “4 or 9 point calibration ”, tap the screen along with the cross section mark appear on the screen then tap “...
- Page 19 Pen tablet setup for MAC OS Connect tablet monitor with computer using USB connector to any free USB port, then follow the steps below to set up the functions of Tablet monitor. 【Go】►【Applications】►【Pen Tablet Setting】 ► Double click【Pen Tablet Setting】 Introduction...
- Page 20 ► Double click【Tablet Setting】 a. Click【Button Setting】 Introduction...
- Page 21 Note: Pay attention that at the “ Button ” window in there you will see the “monitor mapping” block , which shown “monitor 1 ” only while the monitor setting at mirror mode . It will shown “monitor 1 and monitor 2 ” for your selection while the monitor setting at extended mode.
- Page 22 Note: All express key are assignable with any one to four keys combination, see above figures. Introduction...
- Page 23 If you experience a problem with any device, indentify whether the driver is the source of your problem end, if necessary, update the driver, and you could visit our web site to get more information of driver and software upgrade. Our web site is: http://www.yiynova.com. Introduction...
-
Page 24: Operation Guide
2. Operation Guide 2.1 Adjusting Display Frequency and Resolution The monitor’s true (physical) resolution for 21.5 is 1920 x 1080,be sure to set the monitor refresh rate to 60 Hz .For 19” resolution 1440 x 900 ,be sure to set the monitor refresh rate to 60 Hz .. 2.2 Working with the Tablet Pen The stylus pen use a AAA battery, This is an energy saving stylus pen. - Page 25 while writing on paper and the allowed pen input angle is 45° in any direction from a position. 2.2.2 Using the Pen Side Buttons The stylus pen have two side buttons and the default button settings as follows. 1) In Windows XP/ Windows 7/Windows 8 The upper button is set to mouse right click, and the lower button is set to mouse middle click by default.
-
Page 26: Osd Function
2.3 OSD Function Press button to activate OSD menu. 2.3.1 Picture control Figure 8 BRIGHTNESS: Adjust the image and background screen brightness CONTRAST: Adjust the image brightness in relation to the background. RATIO SELECT: Select screen ratio between FULL SCREEN (16:10) and NORMAL (4:3). 2.3.2 Geometry control Figure 9 Operation Guide... - Page 27 H POSITION: To adjust the image horizontally left or right. V POSITION: To adjust the image vertically up or down. PHAES: To adjust the focus of the display. H SIZE: To increase or decrease the horizontal size of image. 2.3.3 OSD control Figure 10 H POSITION: To adjust the OSD menu horizontally left or right.
- Page 28 Native mode : White color a natural tint. sRGB mode: Sets your screen colors to adapt to the color standards used in the image technology industry. User Mode: RED: Red color adjustment. GREEN: Green color adjustment. BLUE: Blue color adjustment. MEW: Include STANDARD, SCENERY, THEATER picture modes.
- Page 29 2.3.5 Enhance control LANGUAGE: Language selection. AUTO: Auto adjust display mode to its utmost performance according to VGA setting. RESET: Reset the currently highlighted control to the factory setting. Figure 12 Operation Guide...
-
Page 30: Troubleshooting
3. Troubleshooting If you encounter problems with the monitor, please refer to the following tables. 3.1 Display problems Problem & Question Possible Solution No picture, the LED *The Signal Cable should be completely connected to the indicator is light up computer *If it is red, then the monitor and the computer are in dormancy mode. -
Page 31: Tablet Problems
3.2 Tablet problems Problem & Question Possible Solution The pen is no function *Check the battery whether worn out? If Yes, replace the pen battery *Check whether the pen is too short. If yes replace the pen * Re-plug the USB cable. *Restart your computer or your application. -
Page 32: Product Specifications
4. Product Specifications 4.1 LCD Display Characteristics Item Specification Product name Tablet Monitor TFT color LCD Display type Backlight LCD Display 408.24mm(H)*255.15mm(V) (19 in.) Dimension 476.64 mm(H) x268.11mm(V)(21.5 in) 1440×900 (WXGA) (19Inch) Resolution 1920×1080(WXGA) (21.5Inch) Pixel pitch 0.285×0.285mm(19Inch) 0.24825x 0.24825mm(21.5Inch) Standard colors 16,700,000 colors Viewing angles... -
Page 33: Tablet Characteristics
4.2 Tablet Characteristics Input system Electromagnetic induction Stylus pen Tablet resolution 4000Lpi Pen Pressure 2048 levels Pen Power Consumption 950uA(Max) Reading accuracy ± 0.5 mm(center) Data Report Rate 200 points per second Inking start Data Interface USB interface (USB2.0) Product Specification... -
Page 34: Battery Replacement
Appendix A Battery replacement If the residual battery capacity is not enough, the center of side button will light up blue and you need to change the battery,please change battery as following : (1) Separate the pen into its two halves.(As Show in figure 13) Figure 13 (2) Turn countercolockwise to remove rear cover, Remove the battery, insert a new AAA alkaline dry battery by “-”side insert into main body... -
Page 35: Factory Preset Timing Table
Appendix B Factory Preset Timing Table Support/ Resolution Vertical Size Freq.(kHz) Freq.(kHz) Dots x line 720 × 400 31.47 kHz 70 Hz 19”and 21.5” 640 × 480 31.47 kHz 60Hz 19”and 21.5” 640 × 480 37.86 kHz 73Hz 19”and 21.5” 640 ×...
Need help?
Do you have a question about the MVP22U+RH and is the answer not in the manual?
Questions and answers