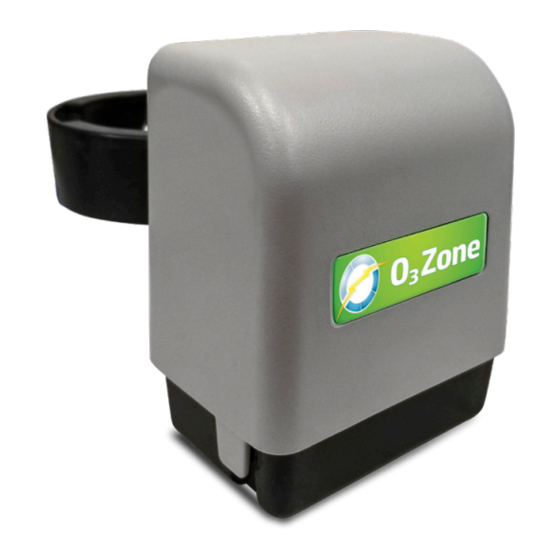
Summary of Contents for O3Zone OZ-1-A
- Page 1 Ozone Generator Complete Kit Instructions Installation, Programming, and Maintenance Instructions for the O3Zone Generator...
-
Page 2: Table Of Contents
O3zone Generator Kit Instructions Table of Contents How It Works ..................3 Applications ................3 Parts ..................4 Installation Instructions ..............5 Programming Procedures ..............8 Maintenance Instructions ..............9 Check Ozone History ..............9 Adjust the Potentiometer ............10 Replace the Cell ................ -
Page 3: How It Works
OZONE GENERATOR KIT Model No. oz-1-a The Ozone Generator Kit is an optional system designed exclusively for use on air filtration units. The generator, when installed and operated correctly, will assist in keeping your filtration unit and media clean and functional without harmful chemical byproducts. -
Page 4: Parts
O3zone Generator Kit Instructions Parts: Prior to installation, confirm that the parts below are included with the kit. Some components may arrive pre-installed. For replacement parts, contact Water-Right customer service. Item # Part # Description OZ1-A Ozone Kit Assembly with Replacement Board... -
Page 5: Installation Instructions
Installation Instructions Prior to installing the ozone generator, ensure that you have all of the required parts listed on page 1. Some parts, such as the mounting clip, may have been factory assembled or pre- installed. No tools are required to install the ozone generator or any of its components. Black Ferrule Clear Ferrule step 1:... - Page 6 O3zone Generator Kit Instructions Installation Instructions step 6: Insert the tube connected to the ozone generator into the air-draw elbow. step 9: Hand-tighten the nut onto the elbow. Remove board bracket from the backplate. Lift up on the two upper clips...
- Page 7 Installation Instructions step 11: step 13: Replace the board bracket into Re-install the front valve cover the backplate until it snaps into place. If to the backplate. Plug the control valve the generator kit came with a new board, transformer into a 110-volt power supply. install it into the board bracket, making Continue to programming procedures on sure it clicks into place.
-
Page 8: Programming Procedures
O3zone Generator Kit Instructions Programming Procedures Once the ozone generator has been properly installed, it must be turned on and programmed in the controller’s settings prior to operation. Settings for ozone generators takes place in the Service/OEM Filtering level of programming. -
Page 9: Maintenance Instructions
Maintenance Instructions For optimal performance, it is necessary to perform yearly maintenance on the filter and ozone generator in use by replacing the ozone check valve and injector. Failure of the check valve may result in water flowing to the ozone generator. This may, in turn, result in the failure of the generator and cause water damage to the surrounding area. -
Page 10: Adjust The Potentiometer
O3zone Generator Kit Instructions Maintenance Instructions 2. Adjust the Potentiometer If the recorded amperage or voltage is outside of normal levels, the potentiometer may need to be adjusted. This dial is accessible on the back of the ozone generator unit once removed from its enclosure and can be adjusted using a screwdriver. - Page 11 Maintenance Instructions step 7: GENERATOR Once the amperage and voltage 260 12.0 are within acceptable ranges, press the NEXT button on the controller to exit the live-view. Replace the enclosure cover. If successful, the unit will resume normal operation and the alarm will cease. If moisture is suspected to have affected the cell, such as with a check valve failure or the result of environmental conditions,...
-
Page 12: Replace The Cell
O3zone Generator Kit Instructions Maintenance Instructions 3. Replace the Cell Over time, the ozone generator cell will become clogged with debris, will lose its generating capabilities, and will require replacement. If adjusting the potentiometer does not solve an ozone alarm issue, replacing the cell is necessary. -
Page 13: Replace The Ozone Check Valve And Injector
Maintenance Instructions 4. Replace the Ozone Check Valve and Injector Replacement of the check valve and the injector is required yearly for optimal performance of the ozone generator and filter. This yearly maintenance also prevents check-valve related failure, which can cause significant water damage to the filtration unit and the area surrounding it. -
Page 14: Board Replacement
O3zone Generator Kit Instructions Board Replacement Procedure The Ozone Generator Kit is compatible with XP, WU, and WX style PC Boards. These boards are characterized by a smaller 4-pin power connector. Ozone Generator Compliant Non-Ozone Generator Compliant WI Series boards are incompatible with the Ozone Generator Kit. For board replacements or questions regarding compatibility, please contact Water-Right Technical Service at 800-777-1426. -
Page 15: Maintenance Log
Maintenance Log Check Valve/Air Date Generator Cell Injector Draw Elbow... - Page 16 MAN-O3ZONE KIT RevB1119...

Need help?
Do you have a question about the OZ-1-A and is the answer not in the manual?
Questions and answers