Advertisement
Quick Links
Advertisement

Related Manuals for Wallbox MID METER


Summary of Contents for Wallbox MID METER
- Page 1 MID METER Installation Guide...
-
Page 2: Table Of Contents
INDEX INSTALLATION Installing and configuring a MID power meter for your charging infraestructure Before Starting Supported Chargers Installing the MID meter Electrical wiring Communication Installation Three-phase MID meter installation Closing the charger Installing the MID meter Single-phase MID meter installation... - Page 3 Mit dem „MID Meter“ können Sie den Energieverbrauch einer Ladeinstallation oder eines bestimmten Ladegeräts gemäß der Messgeräterichtlinie (MID) aufzeichnen. The “MID meter” allows you to record the energy consumption of a charging installation or a specific Installazione e configurazione di un contatore elettrico MID per la vostra infrastruttura di charger, in conformity with the Measuring Instruments Directive (MID).
-
Page 4: Supported Chargers
Els següents carregadors són compatibles amb el mesurament MID: Commander 2 | Pulsar Plus | Pulsar Max | Cooper SB | Quasar Antes de empezar Actualmente, Wallbox es compatible con dos medidores de alimentación certificados por la MID. Se pueden adquirir directamente en nuestra tienda de Internet: •... -
Page 5: Electrical Wiring
Installation des MID Meters Elektrische Verkabelung The MID meter should always be placed after the RCDs and MCBs on the charger’s power line Der MID Meter sollte immer nach den RCDs und MCBs auf der Stromleitung des Ladegeräts platziert (MID meter represented as position F on the installation diagram below). -
Page 6: Communication Installation
You can choose one of the following communication installations schemes, according to the logistical • Buslinieninstallation: Empfohlen, wenn die Power Boost (PB) und die MID Meter nahe beieinander oder hintereinander angeordnet limitations of your charging infrastructure: sind. Es ist möglich, einen Kommunikationsbus mit nur einem Kabel zu erstellen, das mit dem RS485-Anschluss verdrahtet wird. - Page 7 Installation des MID Meters • Zweilinige Installation: Falls die PB und MID Meter weit voneinander entfernt und in entgegengesetzten Richtungen liegen, können Sie sich für zwei verschiedene Anschlussleitungen entscheiden. Beide gehen von demselben Punkt am RS485-Ladegerätanschluss aus gestartet und sind mit diesem verbunden.
-
Page 8: Three-Phase Mid Meter Installation
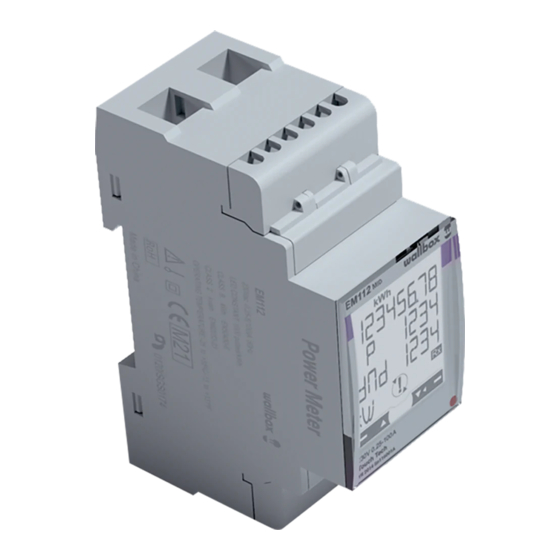
Weitere Informationen finden Sie in der Installationsanleitung des Leistungsmessers. For further information, refer to the power meter installation guide • Anschluss des Ladegerätes an das Messgerät Schließen Sie zunächst den MID Meter mit dem empfohlenen STP-Kabel Kat. 5E an das Ladegerät an. • Verdrahtung des Leistungsmessers •... - Page 9 INSTALLATION Installing the MID meter Installation du compteur MID 3. Installez le câble neutre (dans le cas de sections de câble plus importantes, vous devrez réduire la taille du neutre pour l’adapter au compteur de puissance). 4. Installez le câble de communication STP conformément au schéma.
- Page 10 INSTALLATION Installing the MID meter Installation du compteur MID 5. Enfin, installez les cache-câbles pour sécuriser votre installation. Le cas échéant, scellez les caches avec les câbles fournis conformément aux réglementations locales. IMPORTANT : N’UTILISEZ PAS de paire torsadée à chaque connexion - Démêlez les câbles avant de les connecter séparément. Vous pouvez utiliser une chute de câble pour effectuer la boucle entre les positions 7 et 9.
- Page 11 INSTALLATION Closing the Charger Fermeture du chargeur • Activation de la résistance de terminaison Pulsar Plus, Commander 2 et Copper SB ont deux résistances de terminaison différentes. Celle dédiée aux compteurs MID et PB est marquée « RS485 » : Pour INSTALLER LA LIGNE DE BUS : placez l’interrupteur RS485 du chargeur sur la position T. Seul le compteur POWER BOOST doit être relié...
- Page 12 Abschlusswiderstandsbrücke sowohl mit dem MID als auch mit dem PB Meter. • Konfiguration Der MID Meter ist korrekt installiert. Nun müssen Sie ihn über die myWallbox-App konfigurieren, indem Sie den Erläuterungen im entsprechenden Abschnitt dieses Artikels folgen. Chiusura del caricatore Per l’INSTALLAZIONE A DUE LINEE: posizionare l’interruttore RS485 del caricabatterie sulla posizione NT e collegare il ponte della resistenza di terminazione ai contatori MID e PB.
-
Page 13: Installing The Mid Meter
• Anschluss des Ladegerätes an das Messgerät For further information, refer to the power meter installation guide. Schließen Sie zunächst den MID Meter mit dem empfohlenen STP-Kabel Kat. 5E an das Ladegerät an. • Verdrahtung des Leistungsmessers Installieren Sie den Leistungsmesser auf der DIN-Schiene. - Page 14 INSTALLATION Installing the MID meter Installation du compteur MID 3. Installez le câble de communication STP conformément au schéma. 4. Enfin, installez le dernier cache-câbles pour sécuriser votre installation. Le cas échéant, scellez les caches avec les câbles fournis conformément aux réglementations locales.
- Page 15 INSTALLATION Installing the MID meter Installation du compteur MID • Raccordement du chargeur Raccordez votre chargeur en suivant les instructions inclues dans le guide d’installation. • Activation de la résistance de terminaison Pulsar Plus, Commander 2 et Copper SB ont deux résistances de terminaison différentes. Celle dédiée aux compteurs MID et PB est marquée « RS485 » : Pour INSTALLER LA LIGNE DE BUS : placez l’interrupteur RS485 du chargeur dans la position T. Seul le compteur POWER BOOST doit être connecté...
- Page 16 • Stromwählerkonfiguration Der MID Meter ist korrekt installiert. Sie müssen nun ihn über die myWallbox-App konfigurieren, indem Sie den Erläuterungen im nächsten Abschnitt folgen. Installazione del contatore MID Per l’INSTALLAZIONE A DUE LINEE: posizionare l’interruttore RS485 del caricabatterie sulla posizione NT e collegare il ponte della resistenza di terminazione ai contatori PB e MID.
- Page 17 INSTALLATION Configuration du compteur MID avec myWallbox Configuring the MID meter using • Téléchargez et ouvrez l’application myWallbox. • Connectez-vous à l’application en saisissant vos identifiants, ou inscrivez-vous si vous n’avez pas encore de compte. • Associez votre chargeur à votre compte en scannant son code QR dans l’application.
- Page 18 Enable the toggle button. Instellen van de MID-meter met gebruik van myWallbox • Enter the serial number of your MID Meter, it must be entered without the letter at the end (you can • Maak via Bluetooth verbinding met je oplader.
- Page 19 Se i numeri di serie del MID e del caricatore non corrispondono, lo stato del contatore MID sarà “Enabled - MID not found” (abilitato, MID non trovato). If the MID Meter is replaced, the field will be marked in red and will be editable.
-
Page 20: Configuring The Mid Meter
INSTALLATION Configuration du compteur MID avec myWallbox Configuring the MID meter using • Choisissez entre Énergie utilisée par heure (kWh) ou Temps pour arrêter automatiquement le chargeur au cas où la connexion MID ne serait pas rétablie. Valeurs indicatives pour cette configuration : myWallbox Valeur par défaut (kWh) : 1 kWh... - Page 21 È possibile verificare che il contatore MID sia configurato correttamente nel portale web myWallbox. Quando il charger is configured and connected to Internet, the MID meter icon will appear next to your charger’s caricatore è configurato e collegato a Internet, l’icona del contatore MID appare accanto al nome del caricatore:...
- Page 22 V-1.0 08/2022...
Need help?
Do you have a question about the MID METER and is the answer not in the manual?
Questions and answers