Sharp SDW6767HS Operation Manual
Hide thumbs
Also See for SDW6767HS:
- Manual (13 pages) ,
- Quick start manual (2 pages) ,
- Quick start manual (2 pages)
Table of Contents
Advertisement
Quick Links
CUSTOMER ASSISTANCE ....................................... 2
CONSUMER LIMITED WARRANTY ............................. 3
QUICK START GUIDE ............................................ 4
IMPORTANT SAFETY INSTRUCTIONS ......................... 7
APPEARANCE OVERVIEW ....................................... 8
CONTROL PANEL ................................................. 9
CONVENIENT FEATURES ....................................... 11
DISHWASHER
MODEL : SDW6767HS
OPERATION MANUAL
GETTING STARTED .............................................. 13
DISHWASHER CYCLE OPTIONS ............................... 17
CARE AND CLEANING .......................................... 19
TROUBLESHOOTING ............................................ 21
ERROR CODES .................................................. 23
DRAIN HOSE INSTALLATION .................................. 24
Feb 23, 2022
Advertisement
Table of Contents

Related Manuals for Sharp SDW6767HS


Summary of Contents for Sharp SDW6767HS
-
Page 1: Table Of Contents
OPERATION MANUAL DISHWASHER MODEL : SDW6767HS CUSTOMER ASSISTANCE ........2 GETTING STARTED ..........13 CONSUMER LIMITED WARRANTY ......3 DISHWASHER CYCLE OPTIONS ....... 17 QUICK START GUIDE ..........4 CARE AND CLEANING .......... 19 IMPORTANT SAFETY INSTRUCTIONS ......7 TROUBLESHOOTING ..........21 APPEARANCE OVERVIEW ........ -
Page 2: Customer Assistance
Æ Downloads including the Installation Guide, Spec Sheet, and Owner’s Manual CONTACT US If at any time you have questions or comments concerning your SHARP product, please contact the SHARP Customer Assistance Center. We are available to assist you through multiple contact methods for your convenience:... -
Page 3: Consumer Limited Warranty
Sharp. The warranties described herein shall be the sole and exclusive warranties granted by Sharp and shall be the sole and exclusive remedy available to the purchaser. -
Page 4: Quick Start Guide
QUICK START GUIDE WI-FI CONNECTIVITY INSTRUCTIONS DISHWASHER MODEL: SDW6767HS WI-FI SPECIFICATIONS Wireless LAN: IEEE802.11b/g/n Frequency range: 2.4GHz frequency band There are three di erent ways to connect your dishwasher to Amazon Alexa. First, download the Amazon Alexa app, then connect your Dishwasher to Wi-Fi using one of three methods: With a Barcode, Without a Barcode and Zero Touch Setup. - Page 5 Dishwasher Add Device Devices Proceed to Step 2: Sharp Enable Remote Command & Control Option 3: Zero Touch Setup Zero Touch Setup is only available if your dishwasher was purchased through Amazon.com and Zero Touch Setup was applied to your personal Amazon account during checkout.
- Page 6 QUICK START GUIDE WI-FI CONNECTIVITY INSTRUCTIONS Step 2: Enable Remote Command & Control With the Dishwasher connected to Wi-Fi and paired to the mobile app, authorize your appliance to accept control commands from your mobile app or voice commands. To start the network control, touch and hold Rinse Only and START/CANCEL together for 5 seconds until the Wi-Fi indicator stops ashing and remains lit.
-
Page 7: Important Safety Instructions
3 When loading items to be washed: other appliance. • Load sharp items and knives so they are not likely to 14 Use only detergents or rinse agents recommended for use damage the door seal and tub. -
Page 8: Appearance Overview
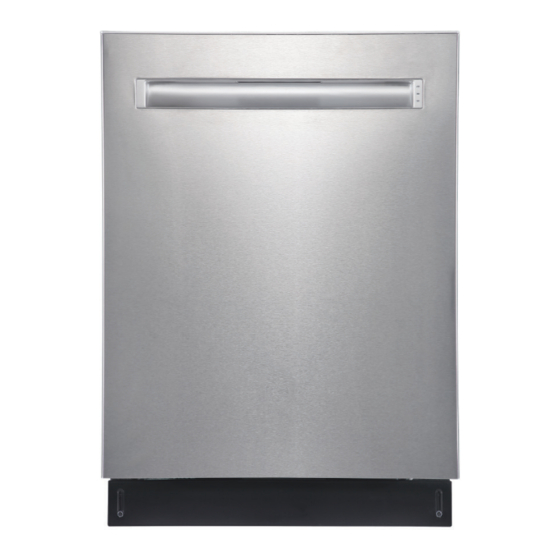
APPEARANCE OVERVIEW PACKAGE CONTENTS • Dishwasher • Operation Manual • Drain Hose • Installation Instructions • Installaiton kits • Energy Guide (4 wood screws, 2 top mounting clip, 1 hose clamp) • Extended Warranty LED Light Top Spray Arm Adjustable 3 Rack Tub Gasket Adjustable Upper Rack... -
Page 9: Control Panel
CONTROL PANEL 4 6 7 Control Panel is located on the top edge of the door. The door must be opened to select settings and operate the dishwasher. 7 Child Lock Indicator Light OPERATIONS & DISPLAYS 1 Power When the Child Lock function is selected, the indicator light will be on. - Page 10 CONTROL PANEL 16 Power Wash Use this option to wash pots, pans, durable serving bowls CYCLE PROGRESS INDICATOR and other large, heavily soiled or hard-to-clean dishes. To The cycle progress lights indicate the progress of the cycle while use Power Wash, place the dishes facedown in the lower rack the dishwasher is running.
-
Page 11: Convenient Features
CONVENIENT FEATURES LED LIGHTS ADJUSTABLE UPPER RACK When the door is opened, the two LED lights on the top of The Upper Rack height can be raised or lowered to accommodate the tub will automatically turn on. loading taller dishes in either rack. The Upper Rack clearance height is 8"... - Page 12 CONVENIENT FEATURES FOLDABLE TINES FILTER SYSTEM The upper and lower racks include flexible tines that can be The multiple filter system has four mesh filters that separate folded down to create more space for dishes. The tines may be soiled water and clean water into different chambers to help the left in the up position for normal use or folded down for more dishwasher run well, using less water and energy.
-
Page 13: Getting Started
GETTING STARTED HOW YOUR DISHWASHER CLEANS LOADING THE UPPER RACK Your dishwasher cleans by spraying a mixture of hot water and The Upper Rack is designed for cups, glasses, small plates, bowls detergent through the spray arms against soiled surfaces. and plastic items marked dishwasher safe. - Page 14 GETTING STARTED LOADING THE ADJUSTABLE 3RD RACK LOADING THE LOWER RACK Use the Adjustable 3rd Rack for cutlery or other utensils, such The Lower Rack is designed for plates, soup bowls, saucers and as spatulas or cooking spoons. Silverware, knives and utensils cookware with 13"...
- Page 15 • To avoid injury, load utensils such as knives and skewers with The silverware basket consists of three separate sections. For handles pointing up and sharp metal edges pointing down. optimum loading flexibility, the center section of the basket Items such as forks and spoons may be loaded with handles...
- Page 16 GETTING STARTED FILLING THE RINSE AID DISPENSER HEAT DRY FUNCTION The Heat Dry function is used with rinse aid to enhance drying Your dishwasher is designed to use a liquid rinse aid. performance. If Heat Dry is not selected, items in the load may Do not use a solid or bar-type rinse aid.
-
Page 17: Dishwasher Cycle Options
DISHWASHER CYCLE OPTIONS CYCLE CHART Select a cycle based on the type of dishes to be washed and the level of soil on the dishes. Cycle times are approximate and will vary with options selected. The timer will be delayed to allow for the water to heat for the main wash of all cycles if the sensor detects the water is not hot enough. - Page 18 DISHWASHER CYCLE OPTIONS CYCLE TIME WITH OPTIONS CYCLE TIME WASH POWER HI TEMP HEAT SANITIZE FAN DRY W/O OPTIONS ZONE WASH WASH PROGRAM DESCRIPTION OF CYCLE MINUTES Pre-Wash Wash 118˚F–126˚F (48°C–52°C) AUTO 90–121 N.A. N.A. 116–148 123–158 108–145 165–202 Rinse 136˚F (58°C) Pre-Wash Wash 131˚F (55°C) HEAVY...
-
Page 19: Care And Cleaning
CARE AND CLEANING CLEANING THE EXTERIOR DOOR CLEAN THE FINE FILTER AND CONTROL PANEL To remove the Fine Filter, remove the Lower Rack, then remove the bottom spray arm as shown below and remove the Cylinder 1 Clean the stainless steel door and handle regularly with a soft Filter. - Page 20 CARE AND CLEANING AIR GAP CLEAN THE DOOR GASKET An air gap is an external plumbing device separate from the Clean the door gasket with a damp cloth regularly to remove dishwasher, usually located on the sink or countertop near the food particles.
-
Page 21: Troubleshooting
TROUBLESHOOTING BEFORE CALLING FOR SERVICE PROBLEM POSSIBLE CAUSE SOLUTION Door is not closed properly Ensure the door is properly closed Power supply or power line is not connected Ensure power supply is correctly connected Dishwasher won't start Delay Start option is selected Refer to Delay Start section in this manual to reset Child Lock is activated (selected models) Refer to Child Lock section in this manual to deactivate... - Page 22 TROUBLESHOOTING PROBLEM POSSIBLE CAUSE SOLUTION Drain is clogged If an air gap is installed, check the air gap Dishwasher does not If a food disposer is connected, empty the food disposer drain properly Drain hose is kinked Ensure the drain hose is properly connected to the sink Suds in the tub Improper detergent is used Only use automatic dishwasher detergent...
-
Page 23: Error Codes
Drain Hose is extended more than 10 ft from the dishwasher Drain Hose is not properly looped underneath sink or not installed with air gap Drain Hose is kinked, compressed or otherwise damaged Wrong Drain Hose used (use only supplied Sharp Dishwasher Drain Hose) Overflow Some element of dishwasher leaks... -
Page 24: Drain Hose Installation
CORRECT - METHOD 2 HIGH DRAIN LOOP WITH WASTE TEE OR DISPOSER FASTEN TO UNDERSIDE FASTEN TO UNDERSIDE OF CONTERTOP OF CONTERTOP WASTE TEE INSTALLATION DISPOSER INSTALLATION SHARP ELECTRONICS CORPORATION • 100 Paragon Drive • Montvale, New Jersey 07645 • USA...