Table of Contents
Advertisement
Quick Links
AIRDATA
MULTIMETER
ADM-880C
™
ELECTRONIC MICROMANOMETER
WITH 2000 READING MEMORY, DATALOGGING
CAPABILITY AND RS232 COMMUNICATIONS PORT
• AIR FLOW • VELOCITY • PRESSURE • TEMPERATURE •
OPERATING INSTRUCTIONS
S
Shortridge Instruments, Inc.
i
7855 East Redfield Road / Scottsdale, Arizona 85260-3430
Phone (480) 991-6744 • Fax (480) 443-1267
®
www.shortridge.com
ADM-880C 07/20/09
Advertisement
Table of Contents

Related Manuals for Shortridge Instruments AIRDATA ADM-880C


Summary of Contents for Shortridge Instruments AIRDATA ADM-880C
- Page 1 WITH 2000 READING MEMORY, DATALOGGING CAPABILITY AND RS232 COMMUNICATIONS PORT • AIR FLOW • VELOCITY • PRESSURE • TEMPERATURE • OPERATING INSTRUCTIONS Shortridge Instruments, Inc. 7855 East Redfield Road / Scottsdale, Arizona 85260-3430 Phone (480) 991-6744 • Fax (480) 443-1267 ®...
-
Page 2: Table Of Contents
CONTENTS 1.0 INTRODUCTION 2.0 SPECIFICATIONS 3.0 EXTERNAL FEATURES 3.1 KEYPAD LAYOUT 3.3 FEATURES ON SIDES AND BACK OF METER 4.0 DISPLAY MESSAGES AND PROMPTS 4.1 READ PROMPTS 4.2 MEASUREMENT READOUTS 4.3 FUNCTION READOUTS 5.0 USING THE ADM-880C AIRDATA MULTIMETER 5.1 KEYPAD 5.1.1 KEYPAD LAYOUT 5.1.2 KEYPAD FUNCTIONS 5.1.3 NUMERICAL ENTRY... - Page 3 5.10.2 INSTALLING DATAFLOW SOFTWARE 5.10.3 USING DATAFLOW SOFTWARE 5.10.4 IMPORTING SAVED DATA INTO A SPREADSHEET 5.11 BATTERY DISPLAY AND BATTERY LIFE 5.12 RESET SWITCH 6.0 VELOCITY MEASUREMENT 6.1 VELOCITY CORRECTION FACTORS 6.2 PITOT TUBE VELOCITY MEASUREMENT 6.3 AIRFOIL PROBE VELOCITY MEASUREMENT 6.3.1 DUCT VELOCITY USING AIRFOIL PROBE 6.3.2 FUME HOODS AND SAFETY CABINETS 6.3.3 EXHAUST HOODS - AIRFOIL PROBE...
- Page 4 REPLACEMENT PARTS LIST INDEX Copyright © Shortridge Instruments, Inc., 2009. All rights reserved. This information may not be reproduced or duplicated in any manner, or for any purpose, without permission in writing from Shortridge Instruments, Inc. Addendums or revisions made to this manual after July 2009 may be found at www.shortridge.com.
- Page 5 ILLUSTRATIONS 3.1 ADM-880C METER FRONT AND BACK 5.1 ADM-880C AIRDATA MULTIMETER SPREADSHEET EXAMPLE 6.1 PITOT TUBE 6.2 AIRFOIL PROBE 6.3 VELGRID ASSEMBLY 7.1 STATIC PRESSURE PROBE 8.1 ADT442 TEMPROBE 8.2 AIRDATA MULTITEMP 10.1 FRAME STORAGE 10.2 FLOWHOOD IN CASE 10.3 FLOWHOOD ASSEMBLY 10.4 2X2 FRAME ASSEMBLY 10.5 1X4 FRAME ASSEMBLY 10.6 2X4 FRAME ASSEMBLY...
-
Page 6: Introduction
The ADM-880C AirData Multimeter includes a custom serial cable with an RS232 connector for use with the RS232 port on the meter. The kit also includes the Shortridge Instruments, Inc. ADM DataFlow software utility, which may be used to download readings into a Microsoft Excel® or similar spreadsheet for display, analysis, and manipulation. The DataFlow software downloads all readings in all measurement modes, along with all related statistics and associated data for each measurement mode. -
Page 7: Specifications
The measurement range is 25 to 29,000 fpm with a Dwyer Series 160 standard pitot tube, and 25 to 5,000 fpm with the Shortridge Instruments, Inc. AirFoil probe. The measurement range using the VelGrid is 25 to 2500 fpm. Accuracy is ± 3% of reading ± 7 fpm from 50 to 8000 fpm. Pitot tube velocity readings from 8,000 fpm to 29,000 fpm are based on compressible isentropic flow theory and are not certified NIST traceable. - Page 8 as the level of charge decreases. NOTE: A battery charge level displayed when the meter is first turned on may not be representative of the true level of battery charge. Wait five or ten minutes after turning the meter on to view the charge status.
-
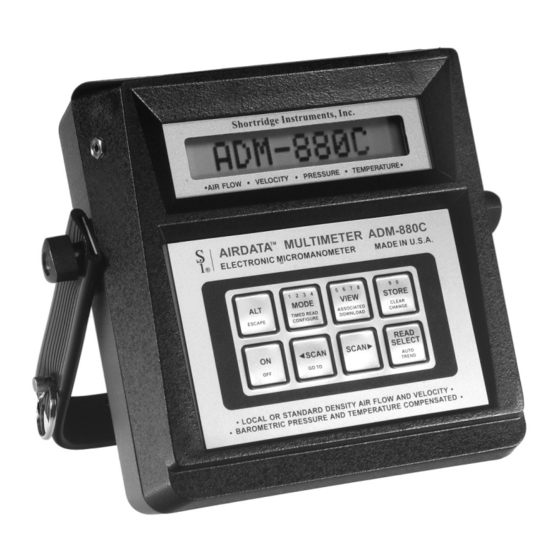
Page 9: External Features
3.0 EXTERNAL FEATURES External Read Jack for 10 Digit, 0.4" LCD Display Pushbutton Handle Plug Battery Charger Jack Green LED indicates if charger is plugged in RS232 Serial Port Jack Alters function of following key ESCAPE Exits loop; displays current selections MODE Flow/Press/Temp/VelGrid/AirFoil/Pitot TIMED READ... -
Page 10: Keypad Layout
3.1 KEYPAD LAYOUT There are eight keys on the keypad, arranged as shown below. Several keys have multiple functions. MODE VIEW STORE ESCAPE TIMED READ ASSOCIATED CLEAR CONFIGURE DOWNLOAD CHANGE READ <SCAN SCAN> SELECT GO TO AUTO TREND PRIMARY FUNCTION (F) SECONDARY FUNCTION (ALT / F) TERTIARY FUNCTION (ALT / F / ALT / F) Alternate... -
Page 11: Features On Sides And Back Of Meter
3.3 FEATURES ON SIDES AND BACK OF METER BATTERY CHARGER JACK When viewed from the front, the battery charger jack is on the right side of the meter toward the top. The battery charger plug is to be connected here. EXTERNAL READ JACK When viewed from the front, the external read jack is on the left side of the meter toward the top. -
Page 12: Display Messages And Prompts
4.0 DISPLAY MESSAGES AND PROMPTS The display messages and prompts displayed by the meter are listed alphabetically within this section. Display messages and prompts are shown within square brackets throughout the text in other sections of this Instruction Manual. An AirFoil probe reading in MANUAL reading mode is shown as [FP ±... -
Page 13: Function Readouts
English Units CF c ± nnnn Indicates that the result represents an air flow measurement (cfm). "C" indicates that the result has been compensated for backpressure effects. CF u ± nnnn Indicates that the result represents an air flow measurement (cfm). "U" indicates that the result has not been compensated for backpressure effects. - Page 14 nn:nn:nnI This display is used to set the INTERVAL TIME for the TIMED READ mode and is also used to display the time after the setup has been completed. The display follows the [HH:MM:SS I] sequence, where HH is the hour, MM is the minutes and SS is the seconds.
- Page 15 xx 8 n.nnnn This display indicates that the meter is in TREND mode and that the readings are increasing rapidly. xx indicates the units for the reading. xx ` n.nnnn This display indicates that the meter is in TREND mode and that the readings are decreasing slowly. xx indicates the units for the reading.
- Page 16 store sequence within the same memory group. AUTO ZERO When the meter is first turned ON, it will perform a self-calibration process that takes a few seconds. The display will read [AUTO ZERO] during this period and the operating controls will be inhibited. No READ operations or function changes may be made during the AUTO ZERO period.
- Page 17 CONFIGURE This message is flashed if the user presses ALT / MODE / ALT / MODE and indicates that the configuration loop has been selected by the user. CORR Part of the FLO-HOOD / CORR message sequence. This message sequence indicates that the meter is taking a FlowHood reading that is compensated for backpressure..
- Page 18 FLOW H CFM This message is part of the ASSOCIATED READING sequence and precedes the display of the temperature and absolute pressure readings associated with an air flow reading. FLOW ONLY [FLOW ONLY] will be displayed if the operator inserts the FlowHood flaps plug while the meter is in a velocity or differential pressure measurement mode and presses the READ key.
- Page 19 This message sequence is displayed when a change in setup would invalidate the result in incompatible readings. MODE / UNITS This message sequence is displayed when the ASSOCIATED function has been selected. It is followed by a display of the measurement mode and units for that particular reading. NEG PITOT This message indicates an invalid, negative, pitot tube velocity reading.
- Page 20 OVER VEL This display advises the operator that the velocity measurement being attempted is beyond the range of the meter. [OVER VEL] may also be displayed if internal voltage settings are out of proper range. (Contact the factory if the meter continues to read [OVER VEL] at inappropriate times).
- Page 21 STD DENS s This prompt indicates that standard density is being selected using the meter configuration loop. STORE ALL This message indicates that the meter will store every following reading in sequence. STORE FULL This message indicates that the number of readings in memory has reached the maximum storage capacity of 2000 readings.
- Page 22 TOO LOW This message will appear as part of the [NO LIGHT / BATTERY / TOO LOW] sequence, when the battery charge is too low to support use of the light. TREND This message is displayed as part of the overall meter status if the user presses ALT / READ / ALT / READ to display [TREND RDY], then presses ALT / ALT instead of READ.
-
Page 23: Using The Adm-880C Airdata Multimeter
5.0 USING THE ADM-880C AIRDATA MULTIMETER 5.1 KEYPAD These instructions will be easier to follow if you have the meter in front of you as you are reading. You will be able to press the keys and observe the results as you work your way through the instructions. Sections 5.2 ALT KEY through Section 5.9 MODE KEY, describe the use of each meter key in detail, beginning with the ALT key in the upper left of the keypad, working across the bottom of the keypad to the READ key on the lower right, up to the STORE key on the upper right and then across to the MODE key on the left side of the keypad. -
Page 24: Numerical Entry
PRIMARY FUNCTION (F) SECONDARY FUNCTION (ALT / F) TERTIARY FUNCTION (ALT / F / ALT / F) Alternate Escape MODE MEASUREMENT TIMED READ CONFIGURE Differential pressure Interval Time Units - English or Metric Temperature Begin Time Density - Local or Standard VelGrid velocity End Time Time... -
Page 25: Alt Key
may briefly display the temperature probe status and the density selection before displaying the measurement result. Press ALT / OFF to turn the meter off. Turning the meter off will not affect the following settings: Measurement mode, unless the FlowHood or TemProbe connections have been changed Units selection (English or metric) Time Date... -
Page 26: Go To" A Reading
increase as the key is held down. Individual readings are displayed in reading sequence within each memory group. The memory groups are displayed in the order in which they were originally saved, not in alphabetical order. The statistics and the associated data for any reading stored in memory can be viewed while the reading is on display as described in Sections 5.8.1 VIEW GROUP STATISTICS and 5.8.2 VIEW ASSOCIATED DATA. -
Page 27: Automatic Readings
5.6.2 AUTOMATIC READINGS Select the AUTO (automatic) reading mode by pressing ALT / READ. The meter will display [AUTO READY]. When the READ/SELECT key is pressed again, the meter takes continuous, repeated readings. Readings will continue until the user executes a halt by pressing the READ/SELECT key again. The meter then displays [HALT]. Automatic readings may be stored in memory by pressing ALT / READ / STORE as described in Section 5.7.1.1 STORE ALL. -
Page 28: Store All
the memory is full, the user may make non-stored readings in the MANUAL or AUTO read modes. If the meter was in a STORE mode when it was turned off, it will display the last reading taken along with the STORE mode when it is turned on again. -
Page 29: Change Memory Group
Press ALT / STORE / ALT / STORE. The meter will briefly display [CHANGE MEM], and then will display [CHG GROUPs]. Press the READ/SELECT key. The meter will display the current memory group letter. Press = SCAN repeatedly to show prior memory letters or SCAN <... -
Page 30: View Associated Data
.4129 3 is the sequence of the highest reading, ^ is the maximum reading symbol and .4129 is the highest reading .12639 F is the standard deviation symbol and .12639 is the standard deviation of the readings DIFF PRES Displays the measurement mode for the viewed statistics .4129 Display returns to the specific reading originally displayed 5.8.2 VIEW ASSOCIATED DATA... -
Page 31: Mode Key
# Rdg Abs Pres 28.5 Hg Abs Pres 85.6 Hg Abs Pres 28.5 Hg Abs Pres 28.6 Hg Abs Pres Std Dev 0.05 Hg Abs Pres 5.9 MODE KEY The MODE key is used to access the measurement modes, the TIMED READ setup options, and the CONFIGURATION setup options for English or metric units, local or standard density, time and date. -
Page 32: Configuration Settings
The BEGIN TIME data entry display will initialize with the current time shown as a reference. Enter a BEGIN TIME using the number keys. If the user does not revise the BEGIN TIME before pressing the READ/SELECT key, the reading process may be started manually by pressing the READ/SELECT key following the [STORE ALL / TIMED RDY / PRESS READ] display sequence. -
Page 33: Configure Date
RS232 serial cable. The data communications utility program that performs the data download is Shortridge Instruments, Inc. ADM DataFlow®. DataFlow ports the data from the meter to the computer and then saves the data in a format known as comma separated value (CSV). This *.csv file is a text file, which can be directly imported into most spreadsheet applications, including Microsoft Excel®. -
Page 34: Importing Saved Data Into A Spreadsheet
The readings will remain stored in the meter memory until the memory is cleared by pressing the ALT / STORE / READ key sequence. 5.10.4 IMPORTING SAVED DATA INTO A SPREADSHEET The following example is for Microsoft Excel. Start Excel, and select File > Open. Navigate to the directory where the data file was saved. -
Page 36: Velocity Measurement
6.0 VELOCITY MEASUREMENT Air velocity measurements obtained with the AirData Multimeter are automatically corrected for the density effect of barometric pressure on the velocity readings. The TemProbe sensor must also be used to obtain readings corrected for the changes in density caused by the temperature of the air being measured. If the TemProbe has not been connected to the meter, [STD 70 F] or [STD 21.1 C] will be displayed during the calculation period, and all data will be processed... -
Page 37: Pitot Tube Velocity Measurement
3. Calculate the effective average face velocity (fpm) by dividing the actual air flow measured in Step #2 (cfm) by the gross active face area (sq ft) calculated in Step #1. 4. Measure the average face velocity at the AMD using the VelGrid, AirFoil probe or other velocity instrument being tested for a Kv. -
Page 38: Airfoil Probe Velocity Measurement
Connect one of the tubing sections from the positive (+) port of the meter to the total pressure connection (in line with the main shaft) on the pitot tube and connect the negative (-) port to the static pressure connection (perpendicular to the main shaft). -
Page 39: Duct Velocity Using Airfoil Probe
NOTE: The AirFoil probe readings will be displayed with a negative sign if the hoses are connected backwards to the meter or to the probe. The AirFoil probe lee side pressure connector should point downstream with the air flow. FIGURE 6.2 AIRFOIL PROBE The AirFoil probe lee side pressure port is not equivalent to the static pressure port on a pitot tube, and must not be used to obtain static pressure readings. -
Page 40: Laminar Flow Workstations - Airfoil Probe
The face of the exhaust hood should be divided into a grid with each section of the grid representing an equal area division of the exhaust hood. The equal area divisions are often set at 6" x 6", and seldom need to be set at less than 4" x 4". Each velocity sampling location should be at the center of an equal area division of the grid. -
Page 41: Chemical Exhaust Hoods - Velgrid
6.5.1 CHEMICAL EXHAUST HOODS - VELGRID The VelGrid provides the average of 16 measurement points at 3.5 inch centers, and represents a 14" x 14" area for each reading. When using the VelGrid for chemical exhaust hood readings, the sash opening must be set at a minimum opening of 14 inches in width for horizontal sliding sash, or 14 inches in height for vertically adjustable sash. -
Page 42: Velgrid Assembly
FIGURE 6.3 VELGRID ASSEMBLY ADM-880C 07/20/09... -
Page 43: Pressure Measurement
7.0 PRESSURE MEASUREMENT 7.1 DIFFERENTIAL PRESSURE Differential pressure measurements can be made with static pressure probes, a pitot tube or by connecting the pneumatic tubing directly to any appropriate pressure source within the safe operating limits for the meter. The manner in which a pitot tube is connected to the meter is critical to the type of differential pressure measurement obtained. -
Page 44: Pitot Tube "Total Pressures
7.1.4 PITOT TUBE "TOTAL PRESSURES" Total pressure measurements may be obtained using the pitot tube and the differential pressure mode by connecting the positive (+) port on the meter to the total pressure connection (in line with the main shaft) of the pitot tube and leaving the negative port of the meter exposed to the ambient pressure. -
Page 45: Temperature Measurement
8.0 TEMPERATURE MEASUREMENT 8.1 TEMPROBE Temperature measurements are obtained using the TemProbe temperature probe. The TemProbe may be plugged directly into the temperature input jack on the back of the meter. Since this receptacle is keyed, the plug of the TemProbe sensor must be correctly aligned for proper insertion. -
Page 46: Airdata Multitemp
The automatic reading function may be used with the MultiTemp. Set the meter for automatic readings and take as many readings as needed for any of the switch positions. Press the READ key to halt the reading process prior to changing switch positions. -
Page 47: Air Flow Measurement
9.0 AIR FLOW MEASUREMENT 9.1 FLOWHOOD FUNCTION The AirData Multimeter utilizes the Series 8400 FlowHood Kit for backpressure compensated measurement of air flow. The FlowHood unit captures and directs the air flow from an outlet, or inlet, across the highly sensitive flow sensing manifold within the FlowHood base. -
Page 48: Flowhood Assembly
10.0 FLOWHOOD ASSEMBLY 10.1 UNPACKING The FlowHood case has been specifically designed for the most efficient storage and handling of the FlowHood unit and its accessories. Note the arrangement of the various items as you unpack the unit. Especially note the placement of the foam cushioning around the instrument, and the orientation of the meter face toward the side of the case. -
Page 49: Handle
shown in Figures 10.5 and 10.6. The 1'x5' top requires an 8.5" dowel extender at the bottom of each support dowel. The dowel end pins are to be inserted into the inner set of frame support cups as shown in Figure 10.7. The 3'x3' top requires dowel extenders added to both the top and bottom of the support dowels. -
Page 50: Frame Storage
FIGURE 10.1 FRAME STORAGE FIGURE 10.2 FLOWHOOD IN CASE ADM-880C 07/20/09... -
Page 51: Flowhood Assembly
FIGURE 10.3 FLOWHOOD ASSEMBLY ADM-880C 07/20/09... -
Page 52: 2X2 Frame Assembly
FIGURE 10.4 2X2 FRAME ASSEMBLY FIGURE 10.5 1X4 FRAME ASSEMBLY FIGURE 10.6 2X4 FRAME ASSEMBLY ADM-880C 07/20/09... -
Page 53: 1X5 Frame Assembly
FIGURE 10.7 1X5 FRAME ASSEMBLY FIGURE 10.8 3X3 FRAME ASSEMBLY ADM-880C 07/20/09... -
Page 54: Flowhood Operating Procedure
11.0 FLOWHOOD OPERATING PROCEDURE The meter handle should be removed from the AirData Multimeter by unscrewing the captive fasteners on the sides. The meter is inserted into the recess in the FlowHood base, using the captive fastener inside the base to secure it. The two pneumatic tubes from the flow sensing grid attach to the pneumatic inlets on the meter. -
Page 55: Memory Display In Flowhood Mode
First, perform the nonbackpressure compensated portion of the measurement with the flaps open, as described above in Section 11.1 NONBACKPRESSURE COMPENSATED READINGS. This first reading will be displayed with a small ‘u’ for uncompensated (nonbackpressure compensated) as [CF u nnn]. Close the flaps after the reading is displayed. Allow the system to settle, then press the READ key to take the second (backpressure compensated) reading. -
Page 56: Special Balancing Procedures
12.0 SPECIAL BALANCING PROCEDURES 12.1 PROPORTIONAL BALANCING Backpressure compensated readings should be taken during the preliminary survey of the entire system with all dampers fully open, and also during the final reading after balancing is complete. Nonbackpressure compensated readings require less time and are usually adequate for the preliminary balancing of outlets. -
Page 57: Linear Slot Diffusers
to the FlowHood base. This can result in an extremely uneven velocity distribution across the flow sensing grid when the flaps are open. The air flow is more evenly distributed across the flow sensing grid when the flaps are closed. Linear slot diffuser readings at less than 100 cfm per lineal foot of diffuser should be taken with the FlowHood flaps closed. -
Page 58: Correction Factors
13.0 CORRECTION FACTORS 13.1 BAROMETRIC PRESSURE DENSITY CORRECTION The AirData Multimeter automatically corrects air flow and velocity readings to represent local density cfm or fpm as effected by barometric pressure. 13.2 TEMPERATURE DENSITY CORRECTION Air flow and velocity readings are density corrected for the effect of temperature if the TemProbe temperature sensor is used during flow or velocity measurements. - Page 59 conditions if these results are to represent true air velocity. Local density velocity readings taken with the ADM-880C AirData Multimeter may be compared with hot wire anemometer readings if the hot wire readings are corrected for local air density conditions to obtain true air velocity results. The precise method for calculating local density corrected air velocity from measurements taken with a hot wire anemometer requires the use of the following equation: Where:...
-
Page 60: Meter Accuracy Field Testing
14.0 METER ACCURACY FIELD TESTING 14.1 METER ZERO FUNCTION Disconnect all tubing from the positive (+) and negative (-) ports of the meter. Perform several readings with the meter set for the flow or velocity mode, with no air passing across the meter ports. The meter should display zero readings, but may occasionally show a low reading such as 25 cfm or fpm. -
Page 61: Duct Traverse Comparison, Inclined Manometer Or Micromanometer
14.5 DUCT TRAVERSE COMPARISON, INCLINED MANOMETER OR MICROMANOMETER An inclined manometer or standard micromanometer does not correct for density effects due to barometric pressure or temperature. The density correction necessary for duct traverse readings which are to be compared with FlowHood readings taken with the TemProbe in place is as follows: Where: = local barometric pressure (in Hg) -
Page 62: Meter Maintenance
15.0 METER MAINTENANCE The AirData Multimeter is a precision instrument designed for long term field use if given reasonable care and maintenance. The meter and FlowHood should be kept reasonably clean, and should be stored in the protective case when not in use. The meter case and internal components are rugged, and well able to withstand normal handling. -
Page 63: Recalibration And Repair Information
12" x 12" x 8" with sufficient additional cushioning to fill the carton. Do not use spray foam. Spray foam can damage the meter and it is also possible to “lose” a meter in a chunk of spray foam. Ship directly to: Shortridge Instruments, Inc. 7855 E. Redfield Rd. Scottsdale, Arizona 85260 Attention: Recalibration and Repair Dept. -
Page 64: Warranty
Shortridge Instruments, Inc. reserves the right to make changes at any time, without notice, in prices, colors, materials, specifications and models, and also to discontinue models. -
Page 65: Appendix A - Nist Velocity Testing
APPENDIX A - NIST VELOCITY TESTING The AirData Multimeter is primarily an electronic micromanometer which measures pressures very accurately. The velocity pressure generated by the various probes is used to calculate and display air velocity and air flow. Confirmation of the meter pressure measurement accuracy is fairly simple using NIST traceable transfer standard gages. -
Page 66: Appendix B - Laboratory Differential Pressure Test
Some applications such as nuclear power plants, health care facilities and clean rooms require more frequent instrument calibration testing and accuracy verification. Calibration services and documentation is available at Shortridge Instruments, Inc. However, if interim calibration tests are required at your own metrology department or at an independent laboratory, the following information will be helpful. -
Page 67: Appendix C - Battery Test Procedure
If the same capacity cells are not available, replace all 12 cells with new batteries. See the Instruction Manual Section 15.0 METER MAINTENANCE. If the problem is not corrected through these procedures, please return the meter to our factory for repair and calibration services. Shortridge Instruments, Inc. 7855 E. Redfield Road Attn: Recalibration Department Scottsdale, Arizona, USA 85260 Phone: (480) 991-6744 Fax: (480) 443-1267 www.shortridge.com... - Page 68 Please call 1-800-822-8837 for information on Ni-Cd battery recycling and disposal bans/restrictions in your area. Shortridge Instruments, Inc. involvement in this program is part of our commitment to preserving our environment and conserving our natural resources.
-
Page 69: Replacement Parts List
ADM-880C REPLACEMENT PARTS LIST Part no No reqd per set Description ADM-880CM Advanced AirData Multimeter PS8201 Battery charger PS8202 Battery charger for European use 0445 Plug adapter for use with PS8202 battery charger AA-NICAD Rechargeable Ni-Cd batteries ADT442 TemProbe temperature probe - 4" x 1/8" diameter TRC16 Temperature retractile cord - 1'x 6' TEW19... - Page 70 ADM-880C REPLACEMENT PARTS LIST (continued) Part no No required per set Description 1' x 5' TOP (33 x 152.4 cm) Side channel (type 1) Side channel (type 2) End channel (type 3) Side extender (type 5) 1x5F Complete frame assembly (all of above) 1x5S Cloth skirt (13"...
-
Page 71: Index
ADM 880C INDEX ?CLR ALL? s CF: CORR ?CLR ALL?s CF: UNCORR <SCAN key CHANGE F n.nnnn CHANGE / NOT ALLOWD CHANGE MEM 11, 24 12-HR CHANGE memory 24-HR change memory group chemical exhaust hoods AA NICAD CHG GROUPs 11, 24 AABC clean room filter outlets ABS PRES... - Page 72 FlowHood function MS ± nnn.nn FlowHood maintenance MultiTemp 40, 41 ± nnnn National Environmental Balancing Bureau FP READ NEBB frame channels neckstrap free point air velocities NEG PITOT 14, 33 function loops negative air velocities n.nnnn GO TO nn ERASED grease extractor face velocities nn c nnnn GRP IN USE...
- Page 73 RESET SWITCH UNCORR response time UNDER TEMP 17, 40 return air outlets UNITS s RS232 download to computer UNITS s RS232 serial cable 6, 28 UNITS - XX UNITS / RESTORED 17, 23 safety cabinets SCAN> key vapor pressure SCAN < 18, 21 VelGrid 2, 17, 35...
Need help?
Do you have a question about the AIRDATA ADM-880C and is the answer not in the manual?
Questions and answers