Table of Contents
Advertisement
Quick Links
Advertisement
Table of Contents

Summary of Contents for Intelbras VIP 3430 B G2
- Page 1 User’s Manual VIP 3430 B G2 VIP 3430 D G2...
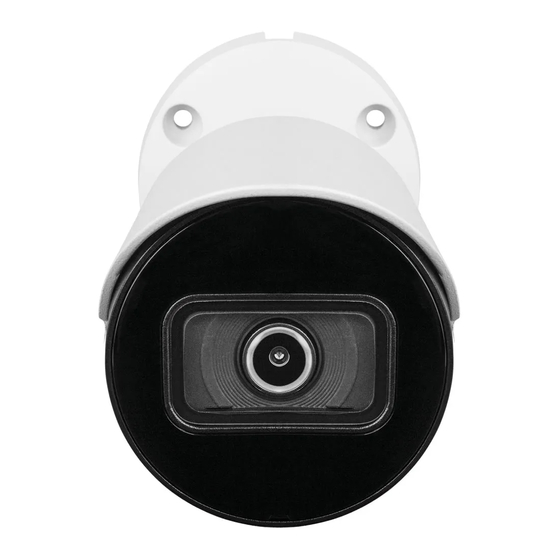
- Page 2 Intelbras IP cameras are security cameras with 2 megapixel resolution and high definition images for IP video monitoring and surveillance systems. They can be used with Intelbras CCTV systems, for a safe, stable and integrated monitoring system. Their installation and...
- Page 3 » Save the packaging for future use: carefully save the Intelbras VIP camera packaging in case it needs to be sent to your local reseller or to the manufacturer for maintenance services. Packaging other than the original may cause damage to the device during transport.
-
Page 4: Table Of Contents
1.1. VIP 3430 B G2 and VIP 3430 D G2 ....... - Page 5 7. Configure Information 7.1. Version .................57 7.2.
-
Page 6: Products
1. Products 1.1. VIP 3430 B G2 and VIP 3430 D G2 Connections The following figure illustrates the camera’s multi-function cable. VIP 3430 B G2 and VIP 3430 D G2 multifunction cable 1. Blue Model Function Connector Description 2. Orange 3. - Page 7 VIP 3430 D G2 Attach the camera using the screws and plugs that come with the product. The following illustration shows the details: Detailed view VIP 3430 B G2 Detailed view VIP 3430 D G2 On the bottom of the camera there is a cover that can be opened, where the camera reset button is located (in case of loss of password, the user can perform a factory reset by pressing and holding this button for more than 10 seconds) and the micro-SD card slot (not included).
-
Page 8: Installation Requirements For Intelligent Video Analytics
Reset Button Reset Button Bottom Cover VIP 3430 D G2 Bottom Cover VIP 3430 B G2 1.3. Installation requirements for intelligent video analytics VIP 3430 G2 camera has video analytics features that provide a more complete and reliable monitoring system. Please observe the following details during installation to use video analytics: »... - Page 9 Note: the client is asked to set up a password on first access. Startup Configuration Note: » After 5 login attempts with an incorrect password, the system automatically blocks further attempts for this user for 30 minutes. » When accessing the camera for the first time, you will be prompted to download and install the video viewer plugin in Internet Explorer.
-
Page 10: View
3. View Once logged into the camera, you will be in the View tab: View 1. Stream setup. 2. Camera Functions. 3. Video display control. 4. System menu. 5. Play. 3.1. Stream setup The cameras have two video streams: the main stream and the extra stream. You can select which stream to display in the browser, as well as which protocol will be used for display. -
Page 11: Camera Functions
3.2. Camera Functions In the View interface you can perform some functions such as recording the displayed video and taking pictures. These functions are listed below. Camera Functions 1. Photo: takes a picture of the video being played. The photos are saved¹ in the directory specified in item 5.8 Media destination . 2. -
Page 12: System Menu
Intelbras Cloud Although it does not appear in the Services menu, the Intelbras Cloud is a service, and its configuration will be described below. This service allows you to access your security system quickly and easily, eliminating the need for port redirection and complicated configurations. -
Page 13: Play
» The Intelbras Cloud service grants access to your device without the need for port redirection. » To help you remotely manage your device, Intelbras Cloud will be activated. After activating and con- necting to the internet, we need to collect the IP address, MAC address, device name, device ID, etc. All information collected is only used for the purpose of providing remote access to the user. - Page 14 3. Playback controls. Playback options Item Function Play Stop Next frame Slow forward Fast forward Volume Video analysis display 4. Type of recordings. The system generates the files according to the pre-configured events, there are different search options: All, Regular, Event, Alarm, and Manual.
-
Page 15: System Configuration
4. System configuration Through this menu you can make general settings, video, network, maintenance, services, interface, activate analysis, parameters, and of the photos captured by the camera. 4.1. General Within this item are settings for Device Name, Language, Date Format, Time Format, Time Zone, Current Time, Summer Time, Synchronize with NTP, and Alternative NTP. -
Page 16: Video
4.2. Video In this menu you can make video settings. The device has two streams or viewing planes. The Main Stream is always enabled, while the Extra Stream can be disabled. Video » Compression type: there are four options: H.264, H264B, H.265 and Smart Compression (H.265+). H.264B uses a lower compression level compared to H.264. -
Page 17: Network
» Watermark: watermarks are intended to ensure that a video generated by the camera is not altered. The watermark text can be up to 126 characters long. Attention: the watermark is not shown on the video. It can be used to check if the video has been altered using a specific software. - Page 18 » IP Version: the camera operates with both IP protocols, IPv4, as shown in TCP/IP Version 4 image, and IPv6 , as shown in the following image. TCP/IP - version 6 » IP address: in Static mode you can set the desired IP. Attention: it is necessary to check an available IP on the network to avoid conflict between two devices.
-
Page 19: Maintenance
Being: » IP: the device’s IP address. » Port: port configured in the RTSP Port field. It can be left blank if the default value is 554 . » User/Password: username and password for access to the web interface. These fields can also be excluded if verification is not required. -
Page 20: Services
4.5. Services This menu makes it possible to configure various functions. These are: PPPoE, DDNS, RTSP, Multicast, , IP Filter, QoS, UPnP ® IEEE 802.1X ,Bonjour, SIP, Onvif, HTTPs, SMTP (E-mail), RTMP and Security. PPPoE In this option the camera’s PPPoE authentication settings are made. Simply enter the user name and password and enable the function. - Page 21 » E-mail address: e-mail for registration of the Intelbras DDNS service . When using it for the first time, an e-mail will be sent to this configured address, so that the user creates a registration and his domain name does not expire.
- Page 22 Attention! Intelbras DDNS is a standard DDNS service, allowing you to keep the domain address (Hostname) of your equipment up to date with the public IP of your location. For the service to work some information is collected, such as the Hostname, IP address, MAC number, E-mail, etc.
- Page 23 Once connected to the LAN, the camera exchanges discovery messages with control points. These messages contain specific information about the camera, such as IP and MAC address, of which Intelbras IP Utility Next uses three: IP, MAC, and Camera model.
- Page 24 In the following image you can see how rules are created for a specific IP Address, IP Segment (to select an IP address range) and MAC (to specify a physical address). Add IP/MAC QoS ( Quality of Service ) is a network security mechanism, a technology that corrects problems related to delays, congestion, packet loss, etc.
- Page 25 Using the respective fields, you can prioritize your packets coming from the IP camera. Choose values between 0 and 63 (DSCP values in decimal system, as seen in the DSCP chart ) to rank the priorities of the data packets travelling over the network.
- Page 26 » Server: enter in this field the IP address or domain name of the SIP Server , whose registration the camera will request, or enter the address of your Intelbras SIP central. » SIP Number:it is the name of the extension, and serves as the ID, used with the server. In general, this field is configured with the same information as the account´s.
- Page 27 » SIP port: As with most protocols, there is a communication and access port to the SIP service. This field is for the port number to access the SIP server. The port that must be used is the default SIP protocol: port 5060. »...
- Page 28 » Change: allows you to change the password of the selected user. Change Onvif User » Change Password: by selecting the field Change password you can change the password of the corresponding user, by entering the old password and the new password twice, as shown in the following image: Change password »...
- Page 29 HTTPS If the user wants to connect to the camera via a secure internet link it is necessary to create the HTTPS certificate. » Enable: select this item to enable the HTTPS protocol function in the camera. » Activate TLSv1.2: changes the HTTPS protocol version to TLSv1.2. Activate TLSv1.2 »...
- Page 30 » Official company name: name of the user company (optional). » Department: user’s department (optional). » E-mail: registration e-mail for the digital signature of the responsible party » Create: after completing the entry, creates the certificate. » Install own certificate: when you already have a valid previous certificate and you want to register this certificate for the camera, you can load the certificate by using this menu.
- Page 31 Security In this menu you can configure the security functions. Security » System Services: » SSH: The SSH function is intended for authorized technical assistants, in order to facilitate the identification of the camera. By default this function is disabled and for security reasons should only be enabled during maintenance. By keeping this function disabled, you will be preserving the security of your device.
-
Page 32: Interface
RTMP This service provides the user with the possibility to share the video stream through a third party software or platform. Cameras with no audio input or built-in microphone may be incompatible with some streaming platforms. To avoid incompatibility please refer to the regulations provided by the software or platform developer. RTMP Service »... - Page 33 Channel Title » Time Title: positions and sets the date/time information in the displayed video. By selecting the Weekly display option, the day of the week will be displayed along with the date and time. Time title » Text: in this option it is possible to add texts of up to 45 characters in each field, and it is also possible to position and define the alignment, as seen in the following image: Text...
-
Page 34: Parameters
4.7. Parameters Viewing and configuration of image patterns. Parameters » Profile: selects the Day or Night profiles, and the settings displayed on this page refer to the selected profile. Parameters Note: the adjustments in the following fields are applied directly to the image display, and can be viewed in real time in the web browser, softwares, and video players. - Page 35 » Mode: enables the choice of some methods for shutter configurationr: » Automatic: the device takes care of setting the exposure time automatically, trying to make the image look visibly good. » Gain Priority: level from 0 to 100 of the set priority (can be lower limit greater than 0). »...
- Page 36 White Balance It has an effect on the overall tone of the video by setting the white balance control. It has the following options: » Auto: white balance is active. It automatically adjusts the image dots in relation to the white dots, avoiding excess reflection or brightness in the image highlights.
-
Page 37: Photo
IR Illumination Provides three configuration modes for IR actuation. » Manual: has the possibility to adjust the IR level and keep it fixed. » Automatic: compensates the IR according to the distance to the subject. » Disabled: disables the IR function. IR Illumination Manage profile tab In this tab you can define which type of profile will be used:... -
Page 38: Activate Analysis
4.9. Activate analysis In this menu it is possible to enable or disable video analytics (Intelligence) such as Virtual Line, Virtual Fence and Area of Interest. Note: If this option is disabled, none of the above functions will work. Enable/Disable Analysis 5. - Page 39 » Add User: To create a new user, click on the Add User button. A screen will appear as shown below: Add user Note: On this screen you can define name, password and group. You can add a note, which will be displayed on the accounts display screen.
-
Page 40: Default Configuration
» Delete User: allows you to delete a user. Confirmation to delete user Note: the logged-in user must have the Account field selected his list of authorities in order to continue with these procedures. » User and group names must contain a maximum of 32 characters. »... -
Page 41: Backup
When you press the Default button, you will be prompted for confirmation. Confirmation for default setting If you also want to restore the TCP/IP and Accounts settings, you should use the Factory Default function, which resets all settings to the factory defaults. Pressing the button (General Default or Factory Default ) will prompt you for the user password. - Page 42 You can schedule up to six periods for each day, as shown in the following image, each with up to six different time ranges. There are two recording modes: » Regular: the device captures video constantly. » Event: the device captures video only when there is motion detection or a video masking event, if previously configured. »...
-
Page 43: Location
Scheduled Photo Note: the settings are the same as for the previous item. Scheduled Photo Holiday Schedule This tab configures the holiday days for use in Scheduled Recording and Scheduled Photo, as seen earlier. The interface is shown in the following image. Holiday Schedule In this tab you can select the holiday days, associating them to the option Record and/or Photo . - Page 44 Mode On this tab you can select Record and Photo modes for the event types ( Regular, Event Detection and Alarm ), which can be done directly on the SD card or on a configured FTP server . Location - mode »...
- Page 45 » Test: simulates the execution of an FTP server access, warning the user if it was successful or not. Note: The device’s video files are saved with the .dav extension. To play the files, you must use the Intelbras Media Player ®...
-
Page 46: Update
» Automatic: when enabled, the camera automatically searches for the latest firmware version available on the Intelbras server. » Manual check: this option makes an instant query to the Intelbras server to check if there is a newer firmware available. 5.7. Recording... -
Page 47: Media Destination
» Recording mode: Auto, Manual or Disabled. In Auto, t he recording will follow the scheduling configuration. In Manual , the camera will record the main stream directly, ignoring the scheduling settings. In Disabled , the camera does not do any recording. -
Page 48: Configure Event
6. Configure Event 6.1. Motion Detection In the Motion screen you can configure the motion detection parameters, such as region and sensitivity, as well as the actions the camera will take when it detects motion. Motion Detection » Enable: if checked, the camera will perform motion detection. »... - Page 49 » Stabilization The camera memorizes only one event during the stabilization period. This prevents a motion detection event from generating multiple events. This value ranges from 0 to 100 seconds. » Area In this option it is possible to configure up to four monitoring regions for motion detection, as shown in the following image: Detection area »...
-
Page 50: Audio Detection
Note: To record videos, the Schedule from item 5.4. Scheduling and mode of item 5.5. Location must be configured and enabled. And for recording photos, the Schedule from item 5.4. Scheduling and mode from item 5.5. Location must also be configured and enabled. The location and time of remote recording must be set in item 5.5. Location. »... -
Page 51: Object Detection
6.3. Object Detection In this tab we configure the Virtual Line and Virtual Fence video analysis rules. You can add up to 10 video analysis rules. In this option you must create the rule by clicking on the symbol. Object Detection The rule types are: »... - Page 52 » Period of operation: this option is used to set the period of operation for the rule. In the period of operation, you define the time and days that the function will be enabled. If it is not changed, it will be without interruption. »...
- Page 53 » Virtual fence This function makes it possible to analyze whether objects have entered and/or left a given area, and it is possible to create up to 4 different areas, with different analysis directions, i.e., it is defined whether the camera should supervise objects entering, leaving, or both, or even monitor any movement within the area.
-
Page 54: Anomaly
6.4. Anomaly SD Card SD Card You can generate SD card-related alarms in the following situations: » Mode: There are three options, No SD card, SD card error, and Capacity alert . » No SD card: the alarm will be generated upon removal of the SD card with the camera on. »... - Page 55 Illegal access The camera can be configured to trigger an alarm and send an e-mail in the event of excessive login attempts on the interface. Illegal access » Enable: enables the function. » Number of attempts: number of times to make a wrong login before triggering the alarm, it can be between 3 and 10 times.
-
Page 56: Video Masking
6.5. Video Masking In this tab, as shown in the following picture, the options are configured to generate events when the lens is obstructed (example: when covering the camera lens with a hand or some other object). It is also possible to enable, when this type of event occurs, video recording on FTP, sending e-mail (SMTP), photo recording on FTP, and SIP calls. -
Page 57: Configure Information
Version (illustrative version image) » Device type: Informs the model of the Intelbras IP camera. » Software version: informs the firmware version of the Intelbras IP camera. » Web version: application version of the web interface. » Onvif version: Onvif protocol profile. -
Page 58: Logged User
» Remote log Recording: it is possible to record camera logs on an external dedicated server. With these logs it is possible to do statistical analysis and/or automation for different situations that may occur. Remote log Recording » Enable: enables the Remote Logging function. »... - Page 59 Alarm type Select the type of alarm that will be generated in the device. Alarm type Note: all options require prior configuration. Visual Alert If the Alert check-box is selected, when a new alarm occurs, an icon will appear on the Alarm tab, as shown in the following image.
-
Page 60: Logout
Unable to access camera even after double Network IP addresses of Check if the camera’s IP address, which Intelbras IP Utility Next clicking using Intelbras IP Utility Next camera and PC presents, is in the same logical network as your PC’s address. -
Page 61: Warranty Terms
7. Intelbras is not responsible for the installation of this product, nor for any attempts of fraud and/or sabotage on its products. Keep the software updates and applications used up-to-date, if relevant, as well as the network protections required for protection against intrusions (hackers). - Page 62 These being the conditions of this supplemental warranty term, Intelbras S/A reserves the right to alter the general, technical and aesthetic characteristics of its products without prior notice. The manufacturing process for this product is not covered by the requirements of ISO 14001.
- Page 63 Support via e-mail: suporte@intelbras.com.br Customer Service: 0800 7042767 Where to buy? Who installs it? 0800 7245115 Imported to Brazil by: Intelbras S/A – Indústria de Telecomunicação Eletrônica Brasileira Rodovia SC 281, km 4,5 – Sertão do Maruim – São José/SC – 88122-001 01.22 CNPJ 82.901.000/0014-41 –...
Need help?
Do you have a question about the VIP 3430 B G2 and is the answer not in the manual?
Questions and answers