
Related Manuals for Advent DV1418A

Summary of Contents for Advent DV1418A
-
Page 1: User Manual
USER MANUAL Please read this manual carefully DV1418A before using this TV set and keep it for future reference. - Page 2 Any cost incurred in shipping the product for repair. Signal reception problems caused by external antenna, cable systems or interference. Incompatibility due to a change in TV/CATV broadcast systems after the product was sold. Batteries. Images burnt on to the screen.
-
Page 3: Table Of Contents
CONTENTS Before Operation Warning and cautions... Installation...3 Antenna Connection Preparation of the remote control...3 Function buttons and Front panel of the TV set...4 Rear panel of the TV set...4 Using the remote control...5 Basic operation Menu Functions DVD Operation DVD Features...18 Advanced Playback...19... -
Page 4: Important Safety Instructions
Important safety Instructions CAUTION: TO REDUCE THE RISK OF ELECTRIC SHOCK, DO NOT REMOVE COVER (OR BACK). NO USER SERVICEABLE PARTS INSIDE. REFER SERVICING TO QUALIFIED SERVICE PERSONNEL. DANGEROUS VOLTAGE Uninsulated Dangerous Voltage, that may be of sufficient magnitude to constitute a risk of electric shock, is present within the cabinet of this unit. - Page 5 Important safety Instructions 10. POWER SOURCES This unit should be operated only from the type of power source indicated on the rating plate. If you are not sure of the type of power supply to your home, consult your appliance dealer or local power company. For units intended to operate from battery power, or other sources, refer to the operating instructions.
-
Page 6: Installation
Installation Antenna connection Generally speaking, to enjoy a clearer picture, we recommend that you use a CATV system or an outdoor antenna .In different places, the suitable antenna type and position may vary. AC power socket Note: * It is recommended that a 75 ohm coaxial antenna is used to avoid interference. -
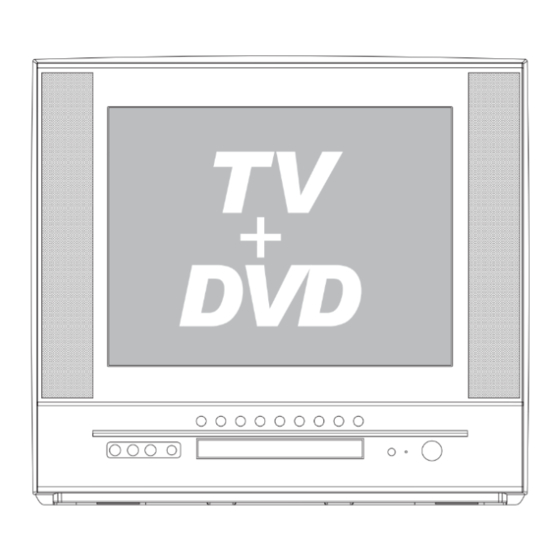
Page 7: Function Buttons And External Connections
Function Buttons and External Connections Front panel the TV set Earphone Audio Video VIDEO L/MONO-AUDIO/R EARPHONE Open/close the DVD Rear panel of the TV set COAXIAL OUTPUT S-VIDEO VIDEO AUDIO Coaxial terminal Video output terminal Video input terminal S-VIDEO S-Video terminal... -
Page 8: Using The Remote Control
Program Number CCD ( closed caption) Multi-digit Channel Selection Display Channel Recall Exit Screen Display RECALL Time Menu Picture Mode TV/AV TV/AV Exchange Volume Selection Channel Selection MENU ZOOM SCAN Scan DVD FAST REVERSE / FAST FORWARD DVD next Chapter SLEEP... - Page 9 This will show you the current channel number. System will also be displayed if set. DVD/TV Button: Press this button to change between TV and DVD. Sleep Timer Button This feature allows you to turn off the television in pre-selected minutes (180.170,160, ...,10 and 0).
- Page 10 Channel (+/-) Select Button: You can go up and down the channels by pressing CH (+) button and CH (-) button. This button can also be used in adjusting the functions in the Menu Mode. Menu Select Button: You can select the menu by pressing the MENU button. You can call on the menu (PICTURE, TIME, TUNE andFUNCTION) by pressing the corresponding button on the remote control.
-
Page 11: Menu Functions
FCC. Menu Functions Video Setup: Pressing MENU button once will bring the Video Setup menu on the TV. The following is shown on your TV screen: Video Picture Brightness... - Page 12 Remind Time: Press VOL(+/-) buttons to set HOURS of attention and VOL (+/-) buttons to set MINUTES of attention. You will see the flashing time on your TV when the the reminder time arrives. Note: This exclusive feature can remind you of important chores while watching TV.(e.g.
- Page 13 A built in decoder displays the audio portion of a program as text on the screen when this option is selected. OFF: When off is displayed on TV means C.Caption is turned off. CC1: When CC1displays on TV means C.Caption is turned on.
- Page 14 Demo Mode: This will display the main functions of the TV set. Setup Language English Background Black Stretch Fade C. Caption Demo Mode...
- Page 15 Auto Program: Press VOL (+) button to auto program in channels. This search automatically adds only the active channels in your area to the TV's memory. It deletes any channels on which there is no broadcast or a poor signal.
- Page 16 Calendar: Your TV has been designed with a calendar. By pressing MENU button ,and then pressing VOL(-/+) buttons it will bring you to Calendar. You will see the following display on TV screen. Calendar Solar 2001 11 12 13 18 19 20 21 22 23 24...
- Page 17 FCC. To set the V-CHIP function: Select the TV Rating option. You will see the TV Rating menu on your TV screen: 1.Press CH(+/-) buttons to go up and down the menu. 2. Press VOL(-/+) buttons to go into TV Rating and Movie Rating menus.
- Page 18 When MPAA Rating is selected, you will see the following rating table on your TV screen. MPAA Rating P G - 1 3 NC-17 U Note: You can press CH(+/-) buttons to go up and down the menu, then press VOL(+) button to select "B"...
- Page 19 V-Chip Technology: The "V-Chip Technology" allow you to use U.S. And Canada Movies and TV PROGRAMS Guide ratings to block certain types of TV programs and movies. To understand clearly about TV programs rating codes, read the following list: U.S. TV Program Ratings NR: Not Rated-this means that programs are not rated or rating does not apply.
- Page 20 To understand clearly about movies rating codes, read the following list: U.S. Movies Rating Chart NR: This means movie is not rated yet. It is pending government rating approval. G:General Audience-this type of movie rating means all ages admitted to see the movie.
-
Page 21: Dvd Features
DVD Features Basic Playback Preparations Preparations Press the DVD/TV button on the remote control or the TV to enter the DVD status. Basic playback Basic playback 1. Press OPEN/CLOSE to open the disc tray, place a disc on the disc tray. -
Page 22: Advanced Playback
DVD Features(Continued) Advanced Playback Advanced Playback Advanced Playback IMPORTANT NOTE: ALL DESCRIBED FUNCTION IS FOR DVD DISCS. IF YOU PLAY OTHER FORMAT DISC, THE OPERATION AND DISPLAY ON SCREEN WILL BE SOME DIFFERENCE. CAPTION CAPTION Press " CAPTION ", the screen will display "SUBTI- Press "... -
Page 23: Special Function Playback
Special Function Playback JPEG DISC PLAYBACK When a disc containing standard JPEG picture files is inserted into the player, a navigation menu will be displayed automatically. Use the UP and DOWN cursor buttons to select a file then press PLAY/ENTER. The slide show will commence. Press PREVIOUS or NEXT to move between pictures. -
Page 24: Dvd System Setup
16 9 You may select this if you have a widescreen (16:9) TV . Back bars may still appear above and below the picture even if using a widescreen TV. This is because some film directors prefer to use ultra widescreen aspect ratios e.g. - Page 25 SCREEN SAVER: If the screen saver is on,then there will be an animated picture of DVD on the screen whenever the DVD player is idle for more than 3 minutes . ..General Setup Page.. TV Display Angle Mark OSD Lang Spdif Output Captions Screen Saver Off ..General Setup Page..
- Page 26 DVD System Setup(Continued) DVD System Setup SETUP PLAY/ENTER Password Page The Password Page is only available when there is no disc in the player. These settings are applied consistently to all discs which are inserted and played. PARENTAL: The parental control function works in conjunction with the different censorship classes...
- Page 27 DVD System Setup(Continued) DVD System Setup DEFAULT: SETUP (except password and parental lock status) for this DVD player back to the manufacturers original settings. Press ENTER to perform the reset. PLAY/ENTER Resets all settings Note: Some functions may not be available depending on the type of disc. ..Password Page..
-
Page 28: Playable Discs
Playable Discs The following discs can be played: You cannot play discs other than those listed above. You cannot play non-standardized discs, even if they may be labelled as above. The performance of CD-R or CD-RW disc depends on the way the disc was burned. In a few cases, their performance may not be consistant or may not even operate at all. -
Page 29: Disc Protection And Dvd Characteristics
Disc Protection and DVD Characteristics Compare DVD disc with other discs: Encode Digital/MPEG method Single- Double side -side Capacity single- single layer -layer 8.5G 4.7G Playing Time minutes minutes Disc diameter Horizontal More than 500 line resolution Picture proportion Subtitle Language 48KHz, 96KHz/ Sound quality... - Page 30 Connecting the TV set to the other video and audio equipment Connecting to the other video and audio equipment You can connect the DVD,VCR and stereo system to the output to enjoy a higher quality of picture and sound effect.
-
Page 31: Troubleshooting Guide
2.The TV set must only be repaired by a qualified registered service person. Never attempt to remove the back cover as TV set has dangerous voltages inside that may cause a fatality or fire. 3. The cabinet may produce the occasional "snapping sound" This is normal and caused by the materials in the cabinet expanding with room temperature changes. -
Page 32: Specifications
14 colour picture tube Sound output power 2X2W 10% THD Power requirements AC 120V Power consumption 16.54inch x 15.16inch x 15.04inch Dimension NOTE Design and specifications are subject to change without notice. Dimensions quoted in this manual are approximate. DV1418A 60Hz... - Page 36 90504600...
Need help?
Do you have a question about the DV1418A and is the answer not in the manual?
Questions and answers