
Related Manuals for Sony HDXS-C200


Summary of Contents for Sony HDXS-C200
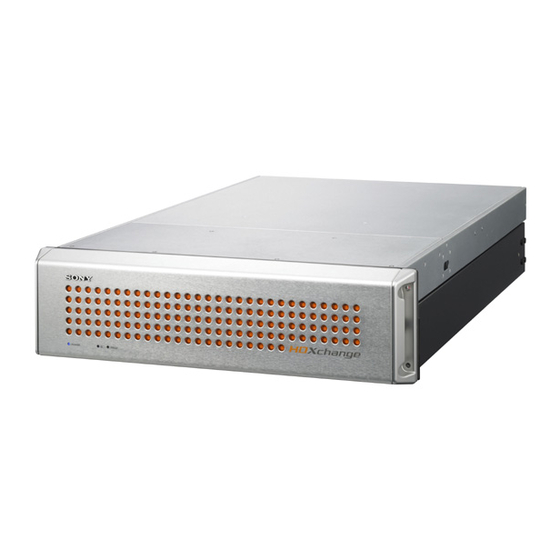
- Page 1 Networked Content Management Server Service Manual Before operating this equipment, please read this manual thoroughly and retain it for future reference. HDXS-C200 Edition 1 © 2008 Sony Corporation...
- Page 3 Safety notices disconnection device Rack mounting When this product is installed in a rack, observe the WARNING following safety precautions: This unit has no power switch. When installing the unit, incorporate a readily accessible disconnect device in the Prevention against overloading of branch circuit fixed wiring, or connect the power cord to a socket-outlet When this product is installed in a rack and is supplied which must be provided near the unit and easily accessible,...
- Page 4 ADVARSEL! Lithiumbatteri-Eksplosionsfare ved fejlagtig håndtering. Udskiftning må kun ske med batteri af samme fabrikat og type. Levér det brugte batteri tilbage til leverandøren. CAUTION ADVARSEL Danger of explosion if battery is incorrectly replaced. Lithiumbatteri - Eksplosjonsfare. Replace only with the same or equivalent type Ved utskifting benyttes kun batteri som recommended by the manufacturer.
-
Page 5: Table Of Contents
Table of Contents Chapter 1 Overview Introduction..................11 About this manual ................11 Manual structure.................. 11 How to use this manual ............... 11 Functional description ..............12 Data storage ..................12 Processing.................... 14 Interface....................14 Power distribution ................14 Chapter 2 Description Introduction.................. - Page 6 How to upgrade the software version..........47 How to re-install the software ............. 47 Transportation and packaging ............. 48 Returning parts to your Sony representative ........48 Returning the server to your Sony representative ....... 48 Chapter 4 Utilities Introduction..................49 About this chapter ................49 About the utilities ................
- Page 7 Advanced diagnostic tests ..............62 SEL viewer..................63 Introduction ..................63 Saving a motherboard log file ............. 63 Sending a log file to your Sony representative........63 PuTTY terminal emulator .............. 64 Introduction ..................64 Logging on to PuTTY from the server ..........64 Logging on to PuTTY from a Windows client........
- Page 8 Introduction..................81 About this chapter ................81 Parts replacement policy ..............81 Safety precautions ................81 Tools required..................81 Returning parts to Sony............... 81 Removing the covers ..............82 Front bezel................... 82 Rear lid ....................83 Front lid ....................83 Hot-swappable parts ..............
- Page 9 About this chapter ................99 Notes on spare parts ................99 Parts list..................100 Parts location ................101 Table of Contents...
- Page 10 Table of Contents...
-
Page 11: Chapter 1 Overview
For faults or repairs outside of action to rectify the problem. the scope of this manual, return the server to your Sony • Chapter 6 Parts Replacement - provides procedures representative for repair. -
Page 12: Functional Description
Functional description The Sony HDXS-C200 server is designed specifically to The HDDs are accessible from the front of the unit, after support HDXchange, a client-server workgroup system for removal of the front bezel, and are arranged in a specific importing, exporting and editing audio visual (AV) order which must be maintained. - Page 13 Functional description...
-
Page 14: Processing
Green status LEDs are provided on the rear panel The HDXS-C200 is a high performance server containing of each module to enable identification of a faulty module. -
Page 15: Chapter 2 Description
Description Chapter Introduction About this chapter Server component parts This chapter provides a detailed description of the The server chassis is divided into two compartments: front component parts of the server. It also describes any and rear, which separate the main functions of the server. jumpers, switches and on-board LEDs. - Page 16 Front compartment - storage The front compartment houses the storage components of the server: • Media RAID hard disk drives (HDDs) • OS RAID HDDs • DVD/CD disk drive • led switch board These parts are accessible by removing the front lid the top cover (see “Front lid”...
-
Page 17: Physical Description
Physical description Chassis Internal cabling The server unit is a rack-mountable 3U-high chassis. The To assist in fixing a problem associated with the cabling unit is 132 mm (5.2 in.) high, 482 mm (19 in.) wide, within the chassis, the figure below may be used in 711 mm (28 in.) deep and weighs 42 kg. -
Page 18: External Parts
External parts Front bezel A push-on front bezel covers the front of the server. ‘Light-pipes’ are integrated into the bezel to route the status LED indications from the front panel behind the Cooling air is drawn in through the holes in the front bezel. front bezel to allow the user to view the status LEDs A filter, fitted to the rear of the bezel, filters the air and without having to remove the bezel. -
Page 19: Front Panel Controls And Indicators
Front panel controls and indicators The front panel provides the following status indicators Note and controls, behind the front bezel of the server. Their It is necessary to remove the front bezel to gain access to functions are described in the following table. the front panel indicators/controls functions by pressing the round recesses in the outside faces of the handles (see “Front bezel”... -
Page 20: Media Raid
Media RAID The Media RAID array consist of two parts: the RAID The RAID controller stores certain configuration array itself comprising 16 hard disk drives (HDDs) for parameters on a reserved area of each disk drive called the storage, and a RAID controller card mounted on the Drive Configuration Block (DCB). -
Page 21: Dvd/Cd Drive
DVD/CD drive The server provides a DVD/CD disk drive, used to install software onto the server. Activity LED Green ON/BLINKING = Accessing data on the disk. OFF = disk is not being accessed. Tray Open/Close Button Press to eject/load disk. Tray Eject Hole Insert paperclip, or similar, to eject disk. -
Page 22: Power Supply Modules
Power supply modules Three power supply modules provide a 2 + 1 redundant Power supply module DC output voltages power supply delivering 650 W. By having multiple Output Output Current (A) modules it ensures that the server continues to operate in Voltage (V) Min. -
Page 23: Rear Panel Connectors And Leds
Rear panel connectors and LEDs The rear panel provides a connector interface and indictors The indicators at the rear panel interface are status and from the Motherboard. Power On Self Test (POST) diagnostic indicators (see “Motherboard” on page 27 for a description of LEDs and The rear panel interface is used to connect the mouse, Chapter 5, Troubleshooting for a list of POST error codes keyboard and monitor, which is required to monitor the... -
Page 24: Connector Pinouts
Connector pinouts Signal standard: Signal standard: USB series A. USB Mini D-sub 15-pin, standard Version 2.0 female, Vesa Pin No. Signal name Pin No. Signal name Vcc (+5 V) RED Video DATA (-) GREEN Video DATA (+) BLUE Video ID 2 Serial interface 1 &... - Page 25 The connector also contains two integral LEDs that display the status of the NIC port. State NIC Function Green/Amber 10 Mb/s Green 100 Mb/s Amber 1000 Mb/s Green Blinking Transmit/receive activity External parts...
-
Page 26: Internal Parts
Internal parts Operating system (OS) RAID The OS RAID comprises two S-ATA 2.5 inch Hard Disk Drives (HDDs) which are mounted in the front section of the server unit, located on top of the Media RAID. The HDDs are configured in a ‘mirror’ arrangement that creates an exact copy (or mirror) of a set of data on two both disks. -
Page 27: Motherboard
Motherboard Description Item Description PCI Express x8 slot 6 The Motherboard is a dual-processor board which provides the processing functions of the server. CMOS battery P12V4 connector RMM connector (Remote Management Module) Back panel I/O ports Diagnostic and Identify LEDs System fan 6 header System fan 5 header Main power connector... - Page 28 Jumpers Item Description J1D1 CMOS Clear Jumper. If you are not able to The Motherboard provides various jumpers for access the BIOS setup screens, use the CMOS configuring and monitoring the server. Clear jumper to reset the configuration RAM. Default Clear CMOS 1 - 2 Protect CMOS: these pins should be jumpered for normal operation.
- Page 29 Power connectors Signal Name The main power supply connection are listed below. GND (black) GND (black) J9B5 main power connector +12 Vdc (yellow/black) A 24-pin connector is an SSI-compliant connector, +12 Vdc (yellow/black) providing the main power connection for the Motherboard. Signal Name Signal Name Indicators...
- Page 30 Item Description Colour Condition Description DIMM C2 fault LED (amber). Normally off. Green Continuous System ready/functioning (AC DIMM D1 fault LED (amber). Normally off. power present). DIMM D2 fault LED (amber). Normally off. Blinking System ready/functioning but degraded (possible CPU/DIMM fault +5 Volt standby LED (green).
- Page 31 For removal/replacement instructions, see “CMOS battery replacement” on page 91. CPU Fans Each of the central processing units (CPUs) have fans mounted on their heatsinks to aid cooling and performance. If CPU 1 Fan fails, a fan fail LED (item S in the table on “Indicators”...
-
Page 32: Raid Controller Card
RAID controller card NIC card The RAID Controller Card is a 3ware 9650SE-16ML plug- The NIC Card is a Intel Pro/1000 PT Dual plug-in board in board that provides hardware control of the Media the provides a Gigabit Ethernet interface for the server. RAID. -
Page 33: S-Ata Backplane Board (Pn16-0107)
S-ATA backplane board (PN16-0107) A Serial-ATA (S-ATA) Backplane Board supports a Four Backplane Boards are required to support the full single row of hot-swappable Serial ATA hard disk drives. complement of four rows of Media RAID HDDs (16 HDDs in total). DEVIC4 DEVIC3 DC_IN... - Page 34 JP6 Serial ATA Activity and Failed Signal Header This 8-pin header carries status signals. The upper 4 pins are connected to the Serial ATA controller activity signal header and the lower 4 pins are connected to the Serial ATA controller failure signal header. Activity Signal Failed Signal JP7 Hard disk Status Signal Header...
-
Page 35: System Cooling Fans
System cooling fans Fan adapter board (PN16-0106) Two System Cooling Fans are located in the centre of the Two hot-swappable system fans are provided by the server unit, separating the front and rear compartments of server, and the interconnection between the fans and the the chassis. -
Page 36: System Power Board (Pn16-0101)
System power board (PN16-0101) A System Power Board consolidates all power cables to The System Power Board is equipped with system support backplane and hot-swappable system fans. It management sensors such as fan failure signal, power distributes dc power to the Media RAID HDDs, OS RAID failure signal and over-temperature signal. - Page 37 FAN4 Fan Header SIGNAL LED switch board Header This 3-pin jumper connector supplies power to the Fan Edge Adapter Board and receives the fan speed signal This 16-pin jumper connector back. provides communication between the System Power Board to the LED switch board through the Front Panel Cable.
-
Page 38: Slim Power Distribution Board (Pn16-0103)
Slim power distribution board (PN16-0103) The Slim Power Distribution Board provides dc power supplies to the slim-line DVD/CD disk drive (via the Slim DVD board described below) and to the two OS hard disk drives. Jumper position Threshold Setting 113 degrees F PWR1 (45 degrees C) - default 131 degrees F... -
Page 39: Slim Dvd Board (Pn16-0105)
Slim DVD board (PN16-0105) Signal Name +12 V The Slim DVD Board is configured for either the slim-line Ground (COM) DVD/CD disk drive. Ground (COM) The following table describes the connector pin +5 V assignments on the slim CD/DVD-Rom Board. JP2 2.54 mm pitch Audio Output Header IDE1 This connector is not used. -
Page 40: Led Switch Board (Pn16-0102)
LED switch board (PN16-0102) The LED switch board houses the pushbuttons, status Signal Name Signal Name LEDs and 2 USB ports that are accessible on the front panel of the server unit. USB Port 2 Power USB Port 1 Power Port 2 (-) Port 1 (-) DC power for the various on-board components is received... -
Page 41: Chapter 3 Servicing
Servicing Chapter Introduction About this manual Notifying clients of interruptions This chapter describes servicing tasks and provides an Servicing tasks should, in general, be performed, with overview of safe working practices to be used when consideration for the HDXchange clients and, where servicing the server unit. -
Page 42: Safe Working Practices
Safe working practices Safe handling precautions Electrostatic discharge (ESD) precautions High voltage Caution WARNING This equipment contains electrostatic sensitive devices. Only qualified persons familiar with appropriate ESD Danger of electric shock - high voltages exist within this handling precautions and procedures should remove equipment. -
Page 43: Environmental Considerations
Note Do not install the server in the following environments: Sony recommends that this unit be located in a dedicated • Areas where the unit will be exposed to direct sunlight or server room. Noise levels from the unit may cause people any other strong lights. - Page 44 WARNING Never use a damaged power cord. Power cord (USA) WARNING This warning is applicable for USA only. If used in USA, use the UL LISTED power cord specified below. DO NOT USE ANY OTHER POWER CORD. Plug Cap: Parallel blade with ground pin (NEMA 5-15P Configuration) Cord: Type SJT, three 16 or 18 AWG wires Length: Minimum 1.5 m (39 3/8 in.)
-
Page 45: Basic Operations
Pings send a network request The server may be shutdown or re-booted remotely from a to a computer asking it to respond (ICMP client PC. Please refer to the HDXS-C200 Installation ECHO_REQUEST). Manual for details. - Page 46 Ping options • -a - resolve Address to hostname. • -f - set "Don't fragment Flag" in packet. • -i - Time To Live (TTL). • -j - host-list loose source route along host-list. • -k - host-list strict source route along host-list. •...
-
Page 47: How To Upgrade The Software Version
Ping the IP address of network device See HDXC-C030 HDXC-B030 HDXC-X030 HDXC-L030 Installation Manual for details of the Administration web located on a remote network - ping <IP pages. address> Successfully pinging the IP address of the remote host The upgrade is achieved by transferring a set of RPM verifies that the local client can communicate with the (Red-hat Package Manager) software packages from a remote host through a router. -
Page 48: Transportation And Packaging
Returning parts to your Sony representative If parts are to be returned to your local Sony representative for repair or further investigation, please ensure that they are adequately cushioned and packaged. Ensure that anti- static packaging is used for circuit boards and parts that require protection from electrostatic discharge. -
Page 49: Chapter 4 Utilities
Utilities Chapter Introduction • SEL viewer - used to obtain a system error log (SEL). About this chapter Available from the SupportWEB (see “SEL viewer” on page 63). This chapter describes the recommended utilities that may • PuTTY terminal emulator - used to log on to the be used by the service engineer to configure the server, service account from a client machine (see “PuTTY diagnose faults and test functionality. -
Page 50: Motherboard Bios Manager
Motherboard BIOS manager Introduction The built-in BIOS manager may be used to configure and manage the BIOS settings and firmware on the Motherboard. Accessing the utility The Motherboard BIOS manager is accessed by pressing the function key F2 when prompted by the on-screen display during the boot up procedure. -
Page 51: Hdxchange Administration Web Pages
HDXchange administration web pages Introduction The Administration web page utility enables the setting up of user accounts and other management tasks on the HDXchange system. It also provide a Diagnostics page that enables routine checking of the server data and system RAIDs, as well as enabling the creation of diagnostic logs and quota checking. -
Page 52: Recovery From A Failed Os Disk Drive
drives will not be available and the administrator web pages will be unavailable. • Dual complete OS disk failure - in the unlikely event of a dual OS disk failure, both disks must be replaced. The operating system will then need to be restored using the Restore CD and the latest Checkpoint file. - Page 53 Click the [Refresh] button to update the System RAID disks) - remember the serial number of the healthy page with the current drive status. If the display shows drive was noted in step 2. two healthy disks, then drive has been successfully recovered.
- Page 54 continue the Restore, wait ten seconds or press the Enter key. When the boot-up has completed the HDXchange Restore Desktop will be displayed. Double click the ‘Restore checkpoint’ icon Note There will be a delay before the GUI appears. Select desired checkpoint from the list. Click the [Restore] button.
-
Page 55: 3Ware Disk Manager
3ware disk manager Introduction The 3ware disk Manager application is used in conjunction with the RAID Controller Card to configure and monitor the Media RAID hard disk drives. Instructions are described in this section for: • checking RAID status • recovery from a failed Media drive For further details see the ‘AMCC Users Guide for 3ware 9650SE, 9590SE, and 9550SX Series Controllers (PC)’... -
Page 56: Recovery From A Failed Media Disk Drive
Ensures the status of each unit is ‘OK’ (displayed as Select the controller to display the Unit Information green). Troubleshoot any RAID which has ‘FAILED’ page which will show which unit or array is degraded. or ‘DEGRADED’ (displayed as red). Note If you see ‘INITIALIZING’... -
Page 57: Checking Raid Controller Bios Settings
Checking RAID controller BIOS settings The RAID Controller Card BIOS settings determine the configuration of the Media RAID and should can be checked using the 3ware utility, as well as using the 3ware RAID BIOS Manager. The 3ware utility Management > Controller Settings page provides Background Task Rate which can be adjusted to prioritise the actions of rebuild/migrate and verify. -
Page 58: 3Ware Raid Bios Manager
3ware RAID BIOS manager Introduction Setting up the RAID arrays The 3ware RAID BIOS manager may be used for Caution configuring the 3ware RAID Controller Card. Take care to set up the RAID correctly and not to delete units, as this will result in loss of data. Notes •... - Page 59 Repeat steps 7, 8, and 9 above for the remaining drives to create eight different Mirrored (RAID 1) disk arrays called:Array0, Array1, Array2, Array3, Array4, Array5, Array6 and Array7. When complete, the screen will show all eight disk arrays. Select the first 2 HDDs (ports 0 and 1) by highlighting the relevant drive and press the spacebar.
-
Page 60: Pc-Check
Pc-Check • motherboard (including controllers, timers and PCI bus) Introduction • hard drives • serial ports The Pc-Check utility is a utility produced by Eurosoft, used to monitor the status of the server hardware and Boot to the Pc-Check CD. monitor internal communications. - Page 61 Press the <ESC> key to go back to the BURN-IN Highlight the Video Memory. MENU and highlight the Select Tests option using the arrow keys, then press the <ENTER> key to select. Highlight all CPU and configure for 5 passes. Highlight the Motherboard and set to 5 passes for each test.
-
Page 62: Advanced Diagnostic Tests
Highlight the Serial Port 1 and 2. Advanced diagnostic tests The Pc-Check utility enables advanced diagnostic tests to be performed on the server, in the event of a particular problem being discovered by the continuous burn-in test described above. These enable relatively quick tests to be performed on specific areas of server. -
Page 63: Sel Viewer
The SEL viewer will open automatically and start reading SEL entries. Sending a log file to your Sony representative Your local Sony representative may ask for logs to be emailed to them for examination in order to investigate a Notes problem. -
Page 64: Putty Terminal Emulator
PuTTY terminal emulator Introduction HDXchange allows service engineers to log on using a service account. Using this account, service engineers can run commands which allows them to investigate problems at operating system level. PuTTY commands are divided into three groups. •... -
Page 65: Logging On To Putty From A Windows Client
Logging on to PuTTY from a Windows client Logging on to the PuTTY service account can be done from a Windows client: Run the PuTTY utility to display the PuTTY configuration screen. Enter the IP address of the HDXchange server in order to open a login session, and press the Open button. -
Page 66: Mac Client (Ldap) Commands
promoted to the archive. When run, the process is visible Options: None in the terminal window. Description: This command is used to manually delete an HDXchange group from the ldap database. This command can be used when a user that has been deleted from Mac client (ldap) commands HDXchange via webadmin, has failed to update the ldap database. - Page 67 Options: start, stop, status, restart Description: This command may be used with the above listed options. The DNS service is used to translate computer hostnames to IP addresses on the HDXchange domain. DHCP service Command: sudo /etc/init.d/dhcpd Options: start, stop, restart, status Description: This command may be used with the above listed options.
- Page 68 PuTTY terminal emulator...
-
Page 69: Chapter 5 Troubleshooting
This chapter is organised into the following topics: the HDXS-C200 Installation Manual to verify that the fault • Error messages is not due to operator error and cannot be easily rectified. -
Page 70: Error Messages
Error Messages Code Error Message Response POST errors 8120 Processor 01 thermal trip error on Pause last boot The Power On Self Test (POST) diagnostics are controlled by the server’s BIOS settings, which should not be altered. 8121 Processor 02 thermal trip error on Pause last boot Errors encountered while performing the POST are... - Page 71 8586 DIMM_B3 correctable ECC error Pause cards are absent, the encountered Motherboard has a serious problem. Return to your Sony 8587 DIMM_B4 correctable ECC error Pause representative for repair. encountered If the beep codes are not...
- Page 72 Code Description Code Description 0x71h A Disabling the video controller Host Processor (VGA) 0x10h O O O R Power-on initialization of the host 0x72h R Enabling the video controller processor (bootstrap processor) (VGA) 0x11h O O O A Host processor cache initialization Remote Console (including AP) 0x78h...
-
Page 73: Windows Messenger Error Messages
Code Description Code Description 0xD6h G R Trying boot device selection 0x31h O O R A Crisis recovery has been initiated by software (corrupt flash) 0xD7h A Trying boot device selection 0x34h O G R R Loading crisis recovery capsule 0xD8h R O R Trying boot device selection 0x34h... -
Page 74: Power Supply Problems
Power supply problems In the event of failure of one of the PSUs, an alarm will Caution sound. The server will continue to function normally with Faulty PSUs should be replaced as soon as possible as a two working PSUs. further PSU failure may result in loss of data. -
Page 75: Audible Alarms
Audible alarms The HDXS-C200 server provides three types of audible Caution alarms to indicate fan, temperature and power problems Faulty Fans must be replaced as soon as possible to avoid within the server. Troubleshoot in accordance with the overheating of the server. Prolonged overheating of the tables given below. -
Page 76: Communication Problems
Communication problems Communications to client workstations is accomplished connection that is connected to clients via an Ethernet via the network interface card (NIC) connector in slot 3. Gigabit Switch. The NIC provides an Ethernet (RJ-45) 1000BaseT No communications between server and client Symptom Possible Problem Recommended Action... -
Page 77: Raid Problems
RAID problems • Errors reported on the Diagnostics page of the Caution Administration web page utility. • Faulty HDDs should be replaced as soon as possible • Red LED present on the affected Media RAID drive (to as a further HDD failure may result in loss of data. be visible, the Front Bezel must be removed). - Page 78 Media RAID HDD degraded Symptom Possible Problem Recommended Action HDD reported as RAID configuration settings Check ‘DRIVE information’ using the 3ware disk manager utility. ‘DEGRADED’ by the are incorrect or wrongly Reconfigure HDD, if necessary. Administration Web adjusted. Pages or 3ware disk HDD fault.
- Page 79 OS RAID HDD not present Symptom Possible Problem Recommended Action HDD reported as ‘NOT Poor HDD connector Check HDD cable and connections (see “Operating system (OS) PRESENT’ or ‘NOT contact. RAID” on page 26). RECOGNISED’ by the Check HDD status. Administration web HDD cable fault.
-
Page 80: Miscellaneous Problems
Miscellaneous problems If the following problems or fault symptoms occur, troubleshoot according to the recommended action given in the following tables. Time and date reset Symptom Possible Problem Recommended Action Time and date are reset Internal battery or Replace internal battery on Motherboard (see “CMOS battery on monitor and cannot Motherboard replacement”... -
Page 81: Chapter 6 Parts Replacement
“Safe working practices” on page 42. For replacement tasks outside of the scope of this manual, return the server to your Sony representative for repair. Tools required What are hot-swappable parts? Key parts of the server are ‘hot-swappable’... -
Page 82: Removing The Covers
Removing the covers Checks after replacement Front bezel After replacement, ensure that the front panel LEDs are The front bezel protects the controls, indicators and RAID displayed through the light pipes and are visible from with HDDs on the front panel of the server unit. To gain access the bezel in place. -
Page 83: Rear Lid
Rear lid Front lid Removing the rear lid provides access to the rear Removing the front lid provides access to the front compartment of the chassis, houses the Motherboard, compartment of the chassis, housing Media RAID, OS processing ancillary boards. RAID and DVD drive. -
Page 84: Hot-Swappable Parts
Hot-swappable parts For convenience it may be possible to carry out Release button replacement of parts without removing the server from the rack. In this case, ensure that there is no danger of the rack tipping as the chassis is drawn forward on its slide rails. Warning Before starting work on a powered unit, consider the following hazards:... -
Page 85: Power Supply Module Replacement
Power supply module removal Hard disk Drive Isolate and unplug the AC power cord from the defective power supply module. Remove the #6-32x6 mm hexagonal fixing screw on the retaining bar that secures the power supply modules. Carrier Retaining bar Lift the HDD from the carrier and set it down. -
Page 86: System Cooling Fan Replacement
Power supply module installation Fan edge board removal Carefully slide the replacement module into the Unscrew the two Flat Head, #6-32x8 mm screws chassis until it clicks into place. securing the fan edge board assembly to the fan. Put the retaining bar back in position and secure with the #6-32x6 mm hexagonal fixing screw. -
Page 87: Powered-Off Replacement Parts
Powered-off replacement parts The following parts require that the server unit is powered Remove the faulty drive from the tray by removing the off before attempting to replace parts (see “How to power four Flat Head, M3x5 mm screws. off the server” on page 45 for details). OS HDD replacement Two Operating System (OS) hard disk drives (HDDs) are located in the front compartment of the server chassis. -
Page 88: Dvd/Cd Drive Replacement
Disk drive installation DVD/CD drive replacement Secure the DVD/CD adapter board to the new DVD/ CD using the two Pan Head, M2x8 mm screws Disk drive removal previously removed. Power off the unit (see “How to power off the server” Insert the new DVD/CD drive into the mounting on page 45) and then remove the rear and front lids bracket and snap the fingers into the slim DVD/CD... -
Page 89: Raid Controller Card Replacement
Insert the card edge connector firmly into the RAID controller card replacement expansion card connector until the card is fully seated. Replace and secure the expansion-card with the Pan Caution Head Screw, #6-32x4 mm screw previously removed. If the S-ATA connector cables are not returned to their original positions on the RAID Controller Card, media Re-connect the controller card S-ATA cables in their data will not be recoverable. -
Page 90: Nic Card Replacement
Checks after replacement NIC card replacement After replacement, check that the Gigabit Ethernet connection is functioning as required by performing a ping NIC card removal command (see “How to ‘ping’ a computer” on page 45) and that the connector integral LEDs indicate a healthy Power off the unit (see “How to power off the server”... -
Page 91: Cmos Battery Replacement
Hold the top corners of the memory module and lift it CMOS battery replacement clear from its socket. Place the module in an anti-static bag. Warning • Damage may result to the equipment if battery is Repeat for each memory module being removed. connected incorrectly. -
Page 92: Chassis Replacement (Containing Motherboard And Cpus)
Battery installation Chassis replacement (containing motherboard and CPUs) Insert the new battery, taking care to observer the correct polarity with the + symbol positioned facing For situations where the server chassis must be returned the clip and PCI card connector. for repair, it is possible to transfer parts from the faulty chassis to a good chassis to minimise downtime and allow Replace the rear lid (see “Rear lid replacement”... -
Page 93: Power Supply Cage Replacement
Replace the front and rear lids (see “Front lid replacement” on page 83). Install the rebuilt unit in its rack. Power on the server (see “How to power on the system” on page 45). Checks after replacement After replacement, test the unit on the bench. Use the BIOS setup utility to check the BIOS settings (see “Motherboard BIOS manager”... -
Page 94: S-Ata Backplane Replacement
When the cage has been slotted into position and the all the connectors are re-attached, carefully wind any excess wire into a loop and secure in position with cable-ties. Attach the wire loop to the side of the cage using the stick-on clip provided to hold the top of the loop, ensuring the wires are clear of the Motherboard and taking care not to obscure the air vents in the power... - Page 95 Check that the Power Distribution Board does not touch the Fan bracket when re-assembled, by sliding a piece of paper underneath. Re-adjust/re-fit as necessary. After the mounting screws removed, carefully slide out the backplane mounting bracket. Checks after replacement After replacement, use the 3ware utility to check the configuration of the Media RAID and the operation of the RAID controller card (see“3ware disk manager”...
- Page 96 Powered-off replacement parts...
-
Page 97: Chapter 7 Maintenance
Maintenance Chapter Introduction Periodic maintenance About this chapter Daily maintenance This chapter provides information about regular • Check for alarms, if the server is located in an isolated maintenance to be carried out on the server unit. room. • Visually inspect the server for build-up of dirt or dust, particularly around the air intake at the front bezel and Maintenance policy the air outflow from the unit rear panel and power supply... -
Page 98: Maintenance Tasks
Maintenance tasks Cleaning the front bezel filter The removable front panel bezel contains a filter for cooling air to be drawn into the unit. How often the filter must be cleaned depends on the environment in which the server operates. As the filter collects dust, the air in-take of the unit will become restricted, causing the server’s internal fans to spin faster and work harder to maintain the internal temperature... -
Page 99: Chapter 8 Spare Parts
Introduction Substitution of parts About this chapter Parts supplied by Sony may differ from those listed in the This chapter lists the spare parts that are available for the table (see “Parts list” on page 100). Such parts, where server unit and provides exploded views of the unit to supplied, will be appropriately tested and approved for permit identification of the component parts. -
Page 100: Parts List
Should other parts be required that are not listed below, contact your dealer or sales office with details for advice on availability. Item number Sony part number Description 9-885-120-89 BLACK FILTER 9-885-120-90 SCREW PACKAGE 9-885-120-78 2.5 INCH OS DISK... -
Page 101: Parts Location
Parts location Parts location... - Page 102 Parts location...
- Page 103 Parts location...
- Page 104 Parts location...
- Page 106 Sony Corporation...