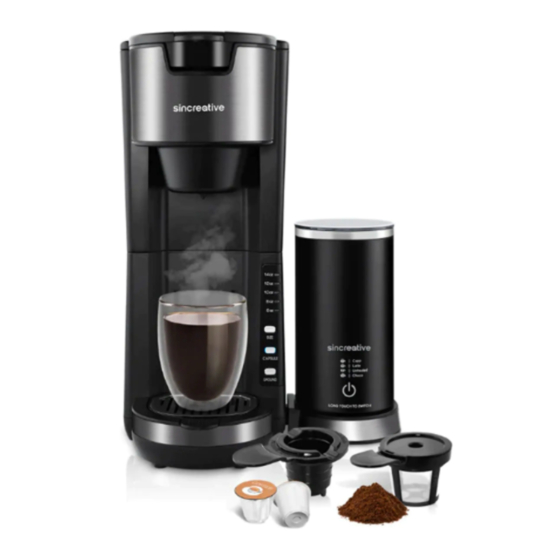
Summary of Contents for Sincreative KCM 207
- Page 1 · life Model: KCM 207 life style User Manual 2 in 1 Coffee Maker with Milk Frother...
-
Page 2: Table Of Contents
Contents IMPORTANT SAFEGUARDS --------------------------------------------------- �-� PACKAGE CONTENTS ------------------------------------------------------------ � KNOW YOUR COFFEE MAKER ------------------------------------------------ �-� TECHNICAL DETAILS ------------------------------------------------------------ � BEFORE USING ------------------------------------------------------------------ �-� USING THE APPLICANCE ---------------------------------------------------- �-�� REPARATION-MILK FROTHER --------------------------------------------- ��-�� HINTS AND TIPS ----------------------------------------------------------------- �� CLEANING AND MAINTENANCE ----------------------------------------- ��-�� REMOVEL OF MINERAL DEPOSITS --------------------------------------- ��-��... -
Page 3: Important Safeguards
IMPORTANT SAFEGUARDS When using electrical appliances, basic safety precautions should always be followed, including the following: ��. Read all instructions before use. �e. Do not touch hot surfaces. Use handles or knobs. WARNING To protect against electric shock, fire and personal injury: - Do not immerse cord in water or other liquids - Do not immerse the appliance or any electrical components in water or any other liquids... - Page 4 ��. Do not use appliance for other than intended use. ��. Do not clean with metal scouring pads. Pieces can break o the pad and touch electrical parts involving a risk of electric shock. ��. Never leave the appliance unattended during operation. ��.
- Page 5 ��. Always use fresh, cold water for brewing. ��. Use extreme caution when removing the Ground Co ee Holder/ Capsule Holder and disposing of used co ee grounds/capsules. Possibility of injury! The underside of the Lid and Capsule CAUTION: Holder contain sharp needles. Use caution when handling and during cleaning.
-
Page 6: Package Contents
PACKAGE CONTENTS 1 * Co ee Maker 1 * Ground Co ee Holder 1 * Capsule Holder 1 * Milk Frother 1 * User Manual 1 * Warranty Card Check the delivery contents immediately after unpacking to ensure you received all the items. -
Page 7: Technical Details
��. Drip tray ��. Capsule holder ��. Cup holder ��. Water level mark ��.Mounting slots ��. Cup size indicator lights ��.Nozzle ��. Cup size button with indicator light ��. Insert holder ��. Capsule button with indicator light ��. Release lever ��. -
Page 8: Using The Applicance
Danger of su ocation! - Packaging materials are not toys. Always keep plastic bags, foils and foam parts away from babies and children. Packaging material could block airways and prevent breathing. - When using the appliance for the first time, it is recommended to operate it for at least 1 full cycle without co ee or a capsule (see USING THE APPLIANCE). - Page 9 Lift the Release Lever to open the lid. When using capsules insert a capsule in the Capsule Holder. Insert the Capsule Holder in the Insert Holder. WARNING - Do not touch the sharp Needle on the underside of the Lid or inside the Capsule Holder.
- Page 10 NOTE: - Use the lower Mounting Slots when using large mugs and the upper or middle Mounting Slots when using small cups. - When removing the Water Reservoir with Lid close the lid, do not touch the underside of the Lid or inside the Capsule Holder. Lift the Water Reservoir with Lid and remove it from the appliance.
- Page 11 NOTE: - Another way to brew is to press the CUP SIZE Button first and then press either the GROUND Button or CAPSULE Button - If the GROUND Button or CAPSULE Button is not pressed within 30 seconds, all indicator lights will switch o and the appliance will switch to stand-by mode. Restart previous steps (Brewing).
- Page 12 Allow the appliance to cool down before removing the Ground Co ee Holder/ Capsule Holder from the Insert Holder. Always remove any used co ee grounds/ capsules after use. Remove with caution as recently used co ee grounds or capsules can be hot.
-
Page 13: Hints And Tips
This appliance is not intended for use by persons WARNING (including children) with reduced physical, sensory or mental capacities, or lack of experience and knowledge, unless they have been given supervision or instruction concerning use of the appliance by a person responsible for their safety. If the supply cord is damaged, it must be replaced by the manufacturer, its service agent or another qualified person in order to avoid a hazard. -
Page 14: Removel Of Mineral Deposits
Remove the Drip Tray, Cup Holder, Ground Co ee Holder, and Capsule Holder from the appliance. These parts can be washed in hot soapy water. Wipe the seal on the needle on the underside of the Lid with a damp cloth. Do not remove the seal. -
Page 15: Storage
Press both the CAPSULE and GROUND buttons at the same time until their indicator lights switch on and flash. The appliance will start pumping water. NOTE: - The appliance will run for 5 cycles of 25 seconds each, alternating water pumping and resting time during each cycle. -
Page 16: Trouble Shooting
TROUBLE SHOOTING PROBLEM CAUSE SOLUTION The appliance not plugged Insert the plug into the wall outlet. Wall outlet not energized. Check fuses and circut breaker. Appliance not switched on. Switch the appliance on by pressing CAPSULE button or The appliance is GROUND button. - Page 17 Water reservoir is empty. Refill the water reservoir with fresh water. Brewing process does not start. No action for 30 seconds Repeat settings selection. after volume selection. Lid opened during Close the lid, wait for the brewing process. indicator lights to switch o and restart settings selection.
-
Page 18: Warranty Claim Procedure
- Partially or completely dismantled appliances. Contact our friendly customer service team with questions. Here's how we can connect: support@sincreative.com ENVIRONMENT-FRIENDLY DISPOSAL This product must be dropped o at an authorized electronics waste disposal site. Do not throw away with your regular waste. - Page 20 Sincreative Brands Inc ����� Currier Rd, Unit C, Walnut, CA �����, United States of America support@sincreative.com www.sincreative.com...


Need help?
Do you have a question about the KCM 207 and is the answer not in the manual?
Questions and answers