Table of Contents
Advertisement
Available languages
Available languages
Quick Links
DCB-P850R / DCB-P850RS
Gebruiksinstructies
NED
F
GB
Gebruiksinstructies ..............................NED
Mode d'emploi ............................................ F
Instructions for use ................................ GB
MF68-00408A
REV. 1.0
DIGITALE KABELONTVANGER MET INGEBOUWD HARDESCHIJFSTATION
DIGITALE KABELONTVANGER MET INGEBOUWD HARDESCHIJFSTATION
Advertisement
Chapters
Table of Contents

Related Manuals for Samsung DCB-P850R


Summary of Contents for Samsung DCB-P850R
- Page 1 DCB-P850R / DCB-P850RS Gebruiksinstructies Gebruiksinstructies ......NED Mode d’emploi ..........F Instructions for use ........ GB MF68-00408A REV. 1.0 DIGITALE KABELONTVANGER MET INGEBOUWD HARDESCHIJFSTATION DIGITALE KABELONTVANGER MET INGEBOUWD HARDESCHIJFSTATION...
- Page 3 Gebruiksinstructies ......NED Mode d’emploi ..........F Instructions for use ........ GB DCB-P850R / DCB-P850RS...
- Page 5 DCB-P850R / DCB-P850 R S Gebruiksinstructies DIGITALE KABELONTVANGER MET INGEBOUWD HARDESCHIJFSTATION DIGITALE KABELONTVANGER MET INGEBOUWD HARDESCHIJFSTATION...
-
Page 6: Veiligheidsvoorschriften
VEILIGHEIDSVOORSCHRIFTEN Deze STB is geproduceerd volgens internationale veiligheidsnormen. Lees de volgende veiligheidsvoorschriften zorgvuldig door. HOOFDSTROOMTOEVOER: AC 230V~, 50/60Hz OVERBELASTEN: Stopcontacten, verlengkabels of adapters niet overbelasten aangezien dit kan leiden tot brand of een elektrische schok. VLOEISTOFFEN: Houd vloeistoffen uit de buurt van de STB. SCHOONMAKEN: Voordat u begint met schoonmaakwerkzaamheden moet u de stekker van de STB uit het stopcontact halen. - Page 7 VEILIGHEIDSVOORSCHRIFTEN WAARSCHUWING! 1. Volg deze aanwijzingen om beschadiging van het stroomsnoer of de stekker te voorkomen. ● U mag het stroomsnoer of de stekker niet eigenmachtig wijzigen of bewerken. ● U mag het stroomsnoer niet teveel buigen of draaien. ● U moet ervoor zorgen dat u het stroomsnoer alleen lostrekt aan de stekker; trek niet aan het snoer zelf.
-
Page 8: Table Of Contents
INHOUDSOPGAVE Veiligheidsvoorschriften ......................2 Algemene Eigenschappen ...................... 5 Uw ‘STB’ Aansluiten ......................... 6 Beschrijving ..........................8 Voorpaneel ............................... 8 Achterpaneel ............................9 Afstands-bediening ..........................10 TV-besturingen instellen met de afstandsbediening ................12 Eerste Installatie ........................13 Basisfuncties ..........................14 De Ontvanger Bedienen ......................25 Hoofdmenu ............................. -
Page 9: Algemene Eigenschappen
ALGEMENE EIGENSCHAPPEN 1. GEBRUIKERSGEDEELTE 400 PROGRAMMEERBARE ZENDERS GEAVANCEERDE ELEKTRONISCHE PROGRAMMERINGSGIDS MEERTALIGE ONDERSTEUNING VOOR OSD ONDERTITELING & TELETEKST MET MEERTALIGE ONDERSTEUNING VOLLEDIG FUNCTIONERENDE AFSTANDSBEDIENING MET INFRAROOD AUTOM. ZOEKOPTIE ZENDERS ORDEREN (PROGRAMMEERBAAR) LAAG STROOMVERBRUIK ... -
Page 10: Uw 'Stb' Aansluiten
UW ‘STB’ AANSLUITEN 1. PLAATSING VAN DE ONTVANGER Uw ontvanger moet over voldoende ventilatie kunnen beschikken. Plaats hem niet in een volledig afgesloten kast; een beperkte luchtstroom zal leiden tot oververhitting van het apparaat. De ontvanger mag niet blootgesteld staan aan direct zonlicht en overmatig vocht, mag niet ruw behandeld worden en moet buiten bereik van huisdieren opgesteld staan. - Page 11 UW ‘STB’ AANSLUITEN Afbeelding aansluiting Signaalkabel Als u een verminderde afbeeldingskwaliteit waarneemt bij het bekijken van VOD (Video-on- Demand)-films met kopieerbeveiliging, sluit de STB dan direct aan op de TV-set. Niet aansluiten via een videorecorder. Geproduceerd onder licentie van Dolby Laboratories. ‘Dolby’ en het dubbele D-symbool zijn handelsmerken van Dolby Laboratories.
-
Page 12: Beschrijving
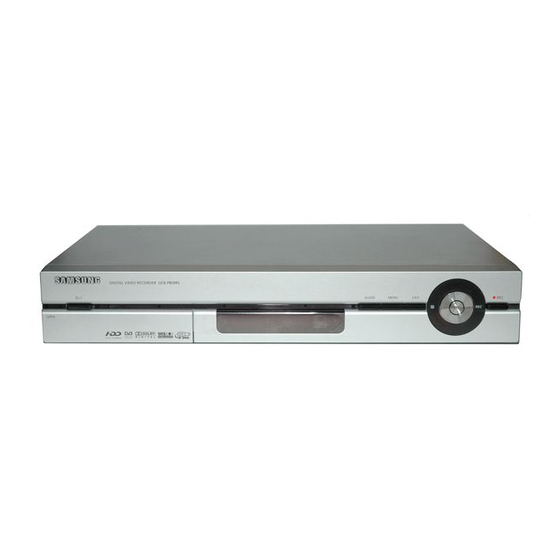
1. POWER Schakelt de ontvanger in en uit (stand-by). 2. Smartcard-sleuf 1 sleuf voor Irdeto-smartcard. Smartcards worden alleen verspreid door providers en speciale distributeurs, niet door SAMSUNG. 3. USB-poort Verbindt een extern USB-opslagapparaat zoals een USB-schijf of USB-stick. 4. Display Geeft de afspeelstatus weer. -
Page 13: Achterpaneel
BESCHRIJVING Achterpaneel Ventilator De ventilator draait altijd als de stroom is ingeschakeld. Zorg bij het installeren van het product voor minstens 10 cm vrije ruimte rondom de ventilator. 1. LICHTNET Voor de aansluiting van het snoer van de hoofdstroom (AC). Het inputbereik voor AC-voltage is 230V~, 50/60Hz toevoer. -
Page 14: Afstands-Bediening
BESCHRIJVING Afstands-bediening 1. TV Schakelt de TV-modus. 2. STB Schakelt de STB-modus. 3. TV/RADIO Schakelt tussen de TV-zender en de radiozender. 4. INPUT SEL. Selecteert inputsignaal in externe inputmodus. 5. STANDBY/ON Schakelt de ontvanger in en uit (stand-by). 6. PIP Wordt gebruikt voor PIP-functie (Picture in Picture of afbeelding in afbeelding). - Page 15 BESCHRIJVING 14. ZOEKEN(/)-toetsen Wordt gebruikt voor het voorwaarts of achterwaarts zoeken. 15. LIVE()-toets Wordt gebruikt om te stoppen met afspelen in de hardeschijfmodus of om terug te gaan naar de rechtstreekse uitzending wanneer tijdverschuiving geactiveerd is. 16. TIME SHIFT(II) Wordt gebruikt om het afspelen in hardeschijfmodus te starten of te pauzeren of om de tijdverschuiving te starten.
-
Page 16: Tv-Besturingen Instellen Met De Afstandsbediening
3. Voer het fabrikantnummer voor de TV in met de NUMERIEKE(0~9)-toetsen, terwijl u de TV-toets ingedrukt houdt. Bijv. voor een Samsung TV drukt u op 0, 0 en 1 in deze volgorde door middel van de NUMERIEKE(0~9) toetsen, terwijl u de TV-toets ingedrukt houdt. -
Page 17: Eerste Installatie
EERSTE INSTALLATIE U moet uw ontvanger instellen, wanneer de stekker voor de eerste keer in het contact wordt gestoken. Voor deze instelling moet u de MENU( )-toets indrukken en vervolgens Setup > Systeem > Eerste installatie installeren. Nadat u uw pincode hebt ingevoerd (de eerste instelling is ‘0000’), voert u de volgende stappen uit: Taal instellen... -
Page 18: Basisfuncties
BASISFUNCTIES 1. Displayscherm Voordat u het televisieprogramma kunt bekijken, moet u de installatie uitvoeren. Daarom ziet u eerst alleen de menuafbeeldingen. Nadat u de televisiezenders hebt geprogrammeerd, ziet u de volgende afbeelding (banner) telkens wanneer u van zender wisselt: ● Druk op de INFO(i)-toets in rechtstreekse modus. Zendernaam Programmavoortgangsbalk Huidige tijd... - Page 19 BASISFUNCTIES 2. Volumecontrole Hoe controleert u het volumeniveau: ● Druk op de VOL +/--toetsen om het volumeniveau aan te passen. ● Druk op de (DEMPEN)-toets om over te schakelen naar de stille modus. ● Druk nogmaals op de (DEMPEN)-toets of VOL +/--toetsen om de stille functie te op heffen.
- Page 20 BASISFUNCTIES 5. Zenderlijst ● Druk op de OK-toets terwijl u naar een programma kijkt. ● Druk op de TV/RADIO-toets om een TV- of radiozender te selecteren. U kunt alle TV- of radiozenders selecteren, evenals alle zenderlijsten. ● Druk op de /-toetsen om een gewenste zender te selecteren en druk vervolgens op de OK-toets.
- Page 21 BASISFUNCTIES 7. Teletekst Wanneer het huidige uitgezonden programma teletekst levert, druk dan op de GEEL(TEXT)-toets om de huidige taallijst voor teletekst te bekijken. Drukt u eenmaal op deze toets, dan ziet u de VBI-teletekst (vertical blanking interval of verticaal knipperend interval); drukt u nogmaals, dan wordt de OSD-teletekst weergegeven.
- Page 22 BASISFUNCTIES 9. Programma-informatie (EPG—Elektronische programmeringsgids) De elektronische programmagids toont u programma-informatie voor de geselecteerde zender. 1. Deze dienst is afhankelijk van de provider. 2. Nadat de ontvanger de GMT-tijd van het signaal heeft herkend (dit kan enkele seconden duren), kan hij de juiste EPG-informatie weergeven. ●...
- Page 23 BASISFUNCTIES 10. Direct opnemen Neemt direct op, terwijl u geniet van een rechtstreeks TV- of radioprogramma. Het opgenomen bestand wordt automatisch opgeslagen in Video- en Radio-mappen in het menu Bibliotheek. Deze functie is niet bedoeld voor permanente opname, dus als u de set loskoppelt zonder de opname stop te zetten, dan wordt er geen bestand opgeslagen.
- Page 24 BASISFUNCTIES Hoe neemt u één zender op: ● Schakel over naar de zender die u wilt opnemen en druk vervolgens op de REC-toets om te starten met opnemen. ● Om te stoppen met opnemen, drukt u op de STOPPEN()- of REC-toets.
- Page 25 BASISFUNCTIES 12. A–B-herhalingsfunctie Speelt het geselecteerde gedeelte (A–B) meermaals af. ● Druk op de REPEAT-toets tijdens het afspelen. ● Druk op de OK-toets in de scène waarin u wilt starten met herhalen. ● Druk opnieuw op de OK-toets in de scène waarin u wilt stoppen met herhalen.
- Page 26 BASISFUNCTIES Hoe verwijdert u een bladwijzer: ● Druk op de /-toetsen om de bladwijzer te selecteren die u wilt verwijderen. Het nummer van de geselecteerde bladwijzer verandert. ● Na uw selectie drukt u op de BLAUW(PRE.CH)-toets om de vooraf ingestelde bladwijzers te verwijderen. Het laatste bladwijzernummer wordt verminderd met 1, zonder wijziging in de locatie.
- Page 27 BASISFUNCTIES - [PIP]: Nadat u deze optie op ‘Aan’ hebt gezet, kunt u twee zenders bekijken met hoofd- en subafbeeldingen. Wanneer u 2 programma’s tegelijkertijd aan het bekijken bent, gebruik dan de ROOD(LIBRARY)-toets om te schakelen tussen de hoofd- en subafbeelding. De zender op de subafbeelding wordt naar boven verplaatst met de GEEL(TEXT)-toets;...
- Page 28 BASISFUNCTIES 14.3. Signaalinfo U kunt de signaalsterkte en -kwaliteit van de huidige zender controleren. 14.4. Opnamestatus U kunt de opnamestatus controleren op de volgende punten: zendernummer, evenementnaam, opnametype, frequentie en resterende tijd. Wanneer er 2 opnames beschikbaar zijn, gebruik dan de /-toetsen om de opnamestatus van opname 1 of opname 2 te bekijken.
-
Page 29: De Ontvanger Bedienen
DE ONTVANGER BEDIENEN Hoofdmenu Na de installatie van uw kabelsysteem en STB met de juiste aansluitingen. ● Stop de stekker van de hoofdstroom AC in het stopcontact en schakel de ontvanger in. ● Druk op de MENU( )-toets om het hoofdmenu op te roepen. Het volgende schermdisplay verschijnt: U ziet het hoofdmenu op het TV-scherm zoals hieronder afgebeeld. -
Page 30: Volledige Gids
DE ONTVANGER BEDIENEN 1.1. Volledige gids Deze functie geeft u informatie voor de volledige zenders. Deze dienst is afhankelijk van de provider. Wanneer u een zender selecteert met de /-toetsen, dan zal deze gids diverse informatie weergeven zoals huidige tijd en datum, zendernaam, programmanaam, programmering en programmastatus (Opname, Favoriete zender, etc.). -
Page 31: Zender
DE ONTVANGER BEDIENEN 2. Zender Het zendermenu heeft vier submenu’s: Favoriete zender, Automatisch zoeken, Zenderlijst en Ouderlijk toezicht. Met deze opties kunt u zenderinstellingen wijzigen. U kunt alle gewenste instellingen maken. ● Gebruik de /-toetsen om Zender in het hoofdmenu te selecteren en druk vervolgens op de -toets. - Page 32 DE ONTVANGER BEDIENEN 2.1.2. Opnieuw nummeren U kunt het zendernummer wijzigen dat in de lijst geselecteerd is. ● Gebruik de /-toetsen om de zender die u opnieuw wilt nummeren te selecteren en druk vervolgens op de GROEN(ALT)-toets. ● Gebruik de /-toetsen om het zendernummer te wijzigen en druk vervolgens op de OK-toets.
-
Page 33: Automatisch Zoeken
DE ONTVANGER BEDIENEN 2.2. Automatisch zoeken Met dit menu kunt u automatisch beschikbare zenders downloaden. ● Gebruik de /-toetsen om items te selecteren en druk vervolgens op de /-toetsen om wijzigingen door te voeren. ● Druk op de OK-toets om het zoeken te starten. ●... - Page 34 DE ONTVANGER BEDIENEN 2.3.1. Sorteren U kunt zenders in de lijst met zenders sorteren. ● Druk op de ROOD(LIBRARY)-toets om de zenders te sorteren. ● Gebruik de /-toetsen om een gewenste sorteermethode te selecteren; u kunt hierbij kiezen uit Alfabetisch en Standaard. ●...
-
Page 35: Ouderlijk Toezicht
DE ONTVANGER BEDIENEN 2.4. Ouderlijk toezicht Deze functie voorkomt dat kinderen of onbevoegden programma’s kunnen bekijken. U kunt ook uw pincode (Persoonlijk Identificatienummer) wijzigen. De in de fabriek ingestelde pincode is ‘0000’. 2.4.1. Programmabeoordeling Deze beoordelinginstelling zorgt voor blokkering van alle programma’s die inbreuk maken op deze instelling. -
Page 36: Bibliotheek
DE ONTVANGER BEDIENEN 3. Bibliotheek In het Bibliotheek-menu kunt u opnames van TV-zenders afspelen en bewerken, evenals opnames van radiozenders, videobestanden, fotobestanden en muziekbestanden. U kunt ook luisteren naar JPG- en MP3-bestanden die op uw externe USB-opslagapparaat zijn opgeslagen. ● Gebruik de /-toetsen om Bibliotheek in het hoofdmenu te selecteren en druk vervolgens op de -toets. - Page 37 DE ONTVANGER BEDIENEN ● Nadat u een bestand hebt geselecteerd kunt de volgende toetsen gebruiken: - [GEEL(TEXT)-toets]: U kunt de bestanden rangschikken op het geselecteerde medium, zoals Video, Muziek, Foto en Radio met de /- en OK-toetsen. - [GROEN(ALT)-toets]: U kunt bestanden bewerken met Sorteren, Verplaatsen, Hernoemen, Blokkeren, Wissen, Nieuwe map, A–B wissen, Combineren en Splitsen.
- Page 38 DE ONTVANGER BEDIENEN 3.1.3. Hernoemen U kunt de naam van het bestand of de map wijzigen. ● Druk op de BLAUW(PRE.CH)-toets om de naam van het bestand of de map te wijzigen. - [///-toetsen]: Verplaatst de cursor. - [OK-toets]: Voert tekens in. - [ROOD(LIBRARY)-toets]: Schakelt tussen hoofdletters en kleine letters.
- Page 39 DE ONTVANGER BEDIENEN 3.1.7. A–B wissen U kunt het geselecteerde gedeelte A–B wissen. ● Nadat u startpunt hebt geselecteerd, drukt u op de OK-toets op de verlichte balk A. De cursor beweegt naar balk B. ● Selecteer het eindpunt en druk op de OK-toets. ●...
-
Page 40: Muziek
DE ONTVANGER BEDIENEN 3.2. Muziek U kunt muziekbestanden met de extensie *.mp3 afspelen en bewerken. ● Gebruik de ///-toetsen om een muziekbestand te selecteren en druk vervolgens op de OK-toets. - [AFSPELEN/PAUZE(II)-toets]: Het huidige bestand wordt afgespeeld of gepauzeerd. - [STOPPEN()-toets]: Afspelen wordt stopgezet en de bestandenlijst wordt geopend. - Page 41 DE ONTVANGER BEDIENEN 3.2.2. Sorteren U kunt muziekbestanden sorteren in de lijst met bestanden. ● Gebruik de /-toetsen om een gewenste sorteersoort zoals bestandsnaam en -formaat te selecteren. ● Wanneer u drukt op de OK-toets, dan wordt de lijst met bestanden gesorteerd volgens de door u gewenste sorteersoort.
-
Page 42: Foto
DE ONTVANGER BEDIENEN 3.3. Foto U kunt fotobestanden met de extensie *.jpg afspelen en bewerken. ● Gebruik de ///-toetsen om een fotobestand te selecteren en druk vervolgens op de OK-toets. - [AFSPELEN/PAUZE(II)-toets]: De diavoorstelling wordt afgespeeld of gepauzeerd. - [STOPPEN()-toets]: Afspelen wordt stopgezet en de bestandenlijst wordt geopend. - Page 43 DE ONTVANGER BEDIENEN 3.3.2. Diaoptie U kunt de snelheid van de diavoorstelling instellen en achtergrondmuziek in- of uitschakelen. ● Gebruik de /-toetsen om een gewenste optie te selecteren uit Normaal, Traag, Snel, Aan en Uit en druk vervolgens op de OK-knop voor de controle. ●...
-
Page 44: Radio
DE ONTVANGER BEDIENEN 3.4. Radio U kunt opnames van radiozenders afspelen en bewerken. ● Gebruik de ///-toetsen om een gewenste opname van een radiozender te selecteren en druk vervolgens op de OK-toets. ● Voor de invoer van een map: u gebruikt eerst de ///-toetsen om een map te selecteren en vervolgens drukt u op de OK-toets. -
Page 45: Tijdgestuurde Opname
DE ONTVANGER BEDIENEN 4. Tijdgestuurde opname U kunt tijdgestuurde opnames plannen voor de TV- en radiozenders. ● Gebruik de /-toetsen om Tijdgestuurd opnemen in het hoofdmenu te selecteren en druk vervolgens op de -toets. ● Gebruik de /-toetsen om een submenu te selecteren en druk vervolgens op de OK- of -toets. -
Page 46: Epg-Instelling
DE ONTVANGER BEDIENEN 4.1.2. Bewerken U kunt de tijdgestuurde opnames in de gereserveerde lijst bewerken. ● Gebruik de /-toetsen voor de selectie van een tijdgestuurde opname die u wilt bewerken en druk vervolgens op de GROEN(ALT)-toets. ● Gebruik de ///-toetsen voor het bewerken van de items van de tijdgestuurde opname, en druk op de ROOD(LIBRARY)-toets voor bevestiging. -
Page 47: Handmatig Instellen
DE ONTVANGER BEDIENEN 4.3. Handmatig instellen U kunt de zenders instellen met EPG. ● Gebruik de ///-toetsen voor het instellen van de zender, datum, starttijd, eindtijd en frequentie en druk vervolgens op de ROOD(LIBRARY)-toets voor bevestiging. - [/-toetsen]: Past de waarden aan. - [/-toetsen]: Verplaatst de items. -
Page 48: Setup
DE ONTVANGER BEDIENEN 5. Setup U kunt de set-up-items zoals PVR, Voorkeursinstellingen, Taal, Systeem, Postvak en CA-status Irdeto. ● Gebruik de /-toetsen om Setup in het hoofdmenu te selecteren en druk vervolgens op de -toets. ● Gebruik de /-toetsen om een submenu te selecteren en druk vervolgens op de OK- of -toets. -
Page 49: Voorkeursinstellingen
DE ONTVANGER BEDIENEN 5.2. Voorkeursinstellingen U kunt het menu met voorkeuren instellen. ● Gebruik de /-toetsen om een submenu te selecteren en druk vervolgens op de OK- of -toets. 5.2.1. Breedte/hoogteverhouding U kunt de breedte/hoogte-verhouding instellen. ● Gebruik de /-toetsen voor de selectie van een gewenste breedte/hoogte-verhouding (zoals 4:3, 16:9) en druk vervolgens op de OK-toets. - Page 50 DE ONTVANGER BEDIENEN 5.2.3. Video Out U kunt het signaalformaat voor video-output instellen. ● Gebruik de /-toetsen om het gewenste signaalformaat voor video-output te selecteren (zoals RGB en Composite) en druk vervolgens op de OK-toets. - [RGB]: Selecteert u voor SCART-kabel. - [Composite]: Selecteert u voor RCA-kabel.
-
Page 51: Taal
DE ONTVANGER BEDIENEN 5.3. Taal U kunt de talen voor OSD, Audio uit, Audioprioriteit en Ondertiteling instellen. 5.3.1. OSD U kunt de OSD-taal instellen. ● Gebruik de /-toetsen om een gewenste taal te selecteren en druk vervolgens op de OK-toets. 5.3.2. -
Page 52: Systeem
DE ONTVANGER BEDIENEN 5.4. Systeem U kunt het systeemmenu instellen. ● Gebruik de /-toetsen om een submenu te selecteren en druk vervolgens op de OK- of -toets. 5.4.1. Eerste installatie U kunt de eerste installatie instellen. ● Voer uw eigen pincode in en druk op de OK-toets. ●... -
Page 53: Postvak
DE ONTVANGER BEDIENEN 5.4.2. Productinformatie U kunt de productinformatie weergeven inclusief merknaam, productnaam, laderversie, softwareversie en hardeschijfformaat. Hoe werkt u software bij: ● Druk op de OK-toets in het menu Product Information (Productinformatie) en het menu SW-upgrade verschijnt. ● Om naar een bepaalde zender te zoeken gebruikt u de /-toetsen;... -
Page 54: Irdeto Ca-Status
DE ONTVANGER BEDIENEN 5.6. Irdeto CA-status U kunt informatie bekijken over smartcard, service, lader en onderdelen. Status Smartcard Geeft de status van de Irdeto-smartcard weer, zoals in de afbeelding. Servicestatus Geeft de status van de digitale radio- en televisiediensten weer, zoals in de afbeelding. Laderstatus Geeft de laadstatus van de toegang tot de smartcard en fabrikant weer, zoals in de afbeelding. -
Page 55: Beschikbare Fabrikantnummer Voor Tv
NAAM fabrikant (merk) LIJST MET CODENUMMERS (BESTAANDE UIT 3 CIJFERS) (BESTAANDE UIT 3 CIJFERS) SAMSUNG 001 002 003 004 005 006 007 008 009 ATLANTIC 049 050 071 113 152 236 379 010 050 066 076 102 195 217 365 379... - Page 56 BESCHIKBARE FABRIKANTNUMMER VOOR TV NAAM fabrikant (merk) LIJST MET CODENUMMERS NAAM fabrikant (merk) LIJST MET CODENUMMERS (BESTAANDE UIT 3 CIJFERS) (BESTAANDE UIT 3 CIJFERS) CAPSONIC 049 076 152 380 DIGILINE 049 152 CARREFOUR 018 177 DIXI 049 152 195 379 413 CASCADE 049 064 152 195 DORIC...
- Page 57 BESCHIKBARE FABRIKANTNUMMER VOOR TV NAAM fabrikant (merk) LIJST MET CODENUMMERS NAAM fabrikant (merk) LIJST MET CODENUMMERS (BESTAANDE UIT 3 CIJFERS) (BESTAANDE UIT 3 CIJFERS) FISHER 018 041 050 065 069 102 104 107 139 HANIMEX 156 172 209 320 324 379 408 414 421 HANSEATIC 018 049 050 094 104 107 113 152 172 195 241 324 378 379 391 421 455 467...
- Page 58 BESCHIKBARE FABRIKANTNUMMER VOOR TV NAAM fabrikant (merk) LIJST MET CODENUMMERS NAAM fabrikant (merk) LIJST MET CODENUMMERS (BESTAANDE UIT 3 CIJFERS) (BESTAANDE UIT 3 CIJFERS) INTERNAL 049 152 LENOIR 050 195 INTERVISION 045 049 055 076 107 123 152 225 232 LESA 378 379 380 413 421 LEYCO...
- Page 59 BESCHIKBARE FABRIKANTNUMMER VOOR TV NAAM fabrikant (merk) LIJST MET CODENUMMERS NAAM fabrikant (merk) LIJST MET CODENUMMERS (BESTAANDE UIT 3 CIJFERS) (BESTAANDE UIT 3 CIJFERS) MINERVA 080 090 232 247 249 407 454 OCEANIC 086 094 104 107 108 109 139 172 209 MINOKA 049 152 426 470 425 466 469 475...
- Page 60 BESCHIKBARE FABRIKANTNUMMER VOOR TV NAAM fabrikant (merk) LIJST MET CODENUMMERS NAAM fabrikant (merk) LIJST MET CODENUMMERS (BESTAANDE UIT 3 CIJFERS) (BESTAANDE UIT 3 CIJFERS) PHILIPS 014 049 050 065 079 089 112 152 160 REDSTAR 049 152 182 193 216 217 220 226 247 249 324 REFLEX 049 152 427 455 482...
- Page 61 BESCHIKBARE FABRIKANTNUMMER VOOR TV NAAM fabrikant (merk) LIJST MET CODENUMMERS NAAM fabrikant (merk) LIJST MET CODENUMMERS (BESTAANDE UIT 3 CIJFERS) (BESTAANDE UIT 3 CIJFERS) SERINO 380 435 SYTONG SHARP 018 094 170 190 320 362 TACTUS SHORAI 042 094 TANDBERG 065 074 078 172 182 210 213 420 449 SIAM 049 152...
- Page 62 BESCHIKBARE FABRIKANTNUMMER VOOR TV NAAM fabrikant (merk) LIJST MET CODENUMMERS NAAM fabrikant (merk) LIJST MET CODENUMMERS (BESTAANDE UIT 3 CIJFERS) (BESTAANDE UIT 3 CIJFERS) TRAKTON WHITE TRANS CONTINENS 046 049 152 171 307 379 WHITE WESTINGHOUSE 049 050 113 152 213 379 467 TRANSONIC 049 152 380 458 WINCO...
-
Page 63: Probleemoplossing
PROBLEEMOPLOSSING Probleem Mogelijke oorzaak Oplossing van het probleem Geen display op het Stekker van het stroomsnoer zit Stop de stekker van het voorpaneel; niet goed in het stopcontact. stroomsnoer goed in het Geen stroomtoevoer stopcontact. Geen afbeeldingen op het Ontvanger in stand-by-modus; Stel ontvanger in op ‘Aan’;... -
Page 64: Technische Specificaties
TECHNISCHE SPECIFICATIES Stroomtoevoer Type: SMPS Inputvoltage: AC 230V~, 50/60Hz Zekeringsnelheid: 250V/T1,6AH Stroomverbruik: Max. 30W Stand-by: Tuner & demodulator Inputfrequentie: VHF-, UHF-BAND (50~870 MHz) Demodulatie: QAM DVB-C Frequentiesnelheid: MAX 7 Msps Constellatie: 16, 32, 64, 128, 256 QAM Kabel uit: Lus uit voor analoge ontvanger RF-input Inputaansluiting: IEC, hol... - Page 65 TECHNISCHE SPECIFICATIES BASIS-BAND AUDIO/VIDEO-OUTPUT A/V-output SCART(TV) : VIDEO(CVBS/RGB), AUDIO L/R SCART(VCR) : VIDEO(CVBS), AUDIO L/R RCA-TOESTEL: VIDEO(CVBS), AUDIO L/R DIGITALE AUDIO-OUTPUT: OPTISCH GEHEUGEN Flash: SDRAM: 64MB INGEBOUWDE HARDE SCHIJF 160GB TOEGANG EXTERNE HARDE SCHIJF USB2.0 (HOST) BESTANDSINDELING AFSPEELBARE INHOUD Muziek: Foto: FYSIEKE SPECIFICATIE Afmeting (B x D x H):...
- Page 67 DCB-P850R / DCB-P850 R S Mode d’emploi BOÎTIER DÉCODEUR NUMÉRIQUE AVEC DISQUE DUR INTÉGRÉ DÉCODEUR NUMÉRIQUE AVEC DISQUE DUR INTÉGRÉ...
-
Page 68: Consignes De Sécurité
CONSIGNES DE SÉCURITÉ Ce décodeur est conforme aux normes internationales de sécurité. Veuillez lire attentivement les consignes de sécurité suivantes. ALIMENTATION SECTEUR : 230 V CA, 50/60 Hz SURCHARGE : Ne surchargez pas les prises murales, les rallonges ou les adaptateurs au risque de provoquer un incendie ou un choc électrique. - Page 69 CONSEILS DE SÉCURITÉ AVERTISSEMENT ! 1. Respectez les instructions suivantes afin de ne pas endommager le cordon d’alimentation ou la fiche. ● Ne modifiez pas ou ne manipulez pas arbitrairement le cordon d’alimentation ou la fiche. ● Ne pliez pas ou ne tordez pas excessivement le cordon d’alimentation. ●...
- Page 70 TABLE DES MATIÈRES Consignes de sécurité ......................2 Principales fonctions ....................... 5 Raccordement de votre décodeur ..................6 Description ..........................8 Panneau avant ............................8 Panneau arrière ............................9 Télécommande ............................10 Configuration des fonctions du téléviseur à l’aide de la télécommande ..........12 Installation initiale ........................
-
Page 71: Principales Fonctions
PRINCIPALES FONCTIONS 1. SECTION UTILISATEUR 400 CANAUX PROGRAMMABLES GUIDE ÉLECTRONIQUE DES PROGRAMMES ÉVOLUÉ PRISE EN CHARGE DE PLUSIEURS LANGUES POUR L’OSD PRISE EN CHARGE DE PLUSIEURS LANGUES POUR LES SOUS-TITRES ET LE TÉLÉTEXTE TÉLÉCOMMANDE À INFRAROUGE DOTÉE DE FONCTIONS COMPLÈTES ... -
Page 72: Raccordement De Votre Décodeur
RACCORDEMENT DE VOTRE DÉCODEUR 1. EMPLACEMENT DU DÉCODEUR Vous devez installer votre décodeur dans des conditions de ventilation appropriées. Ne le placez pas dans une armoire complètement fermée, vous risquez de limiter la circulation d’air et de provoquer une surchauffe. Le décodeur doit être installé... - Page 73 RACCORDEMENT DE VOTRE “STB” Schéma de raccordement Câble de signal Si la qualité d’image est médiocre lors du visionnage de films à la demande protégés contre la copie, raccordez le décodeur directement au poste de télévision. Ne le raccordez pas à un magnétoscope.
-
Page 74: Description
1 fente pour la carte à puce Irdeto. les cartes à puce sont distribuées uniquement par des fournisseurs de services et des distributeurs spéciaux et non par SAMSUNG. 3. Port USB Permet de raccorder un périphérique de stockage USB externe tel qu’un disque dur USB ou une clé... -
Page 75: Panneau Arrière
DESCRIPTION Panneau arrière Ventilateur Le ventilateur tourne en permanence lorsque l’appareil est allumé. Veillez à maintenir un espace libre de 10 cm au minimum de chaque côté du ventilateur lors de l’installation de l’appareil. 1. ALIMENTATION SECTEUR Permet de brancher le cordon d’alimentation secteur. La plage de tension d’entrée est de 230 V, 50/60 Hz. -
Page 76: Télécommande
DESCRIPTION Télécommande 1. TV Permet de passer en mode TV. 2. STB Permet de passer en mode décodeur. 3. TV/RADIO Permet de basculer entre une chaîne de télévision et une chaîne radio. 4. INPUT SEL. Permet de sélectionner un signal d’entrée externe. - Page 77 DESCRIPTION 14. Touches (/) de RECHERCHE Permettent d’effectuer une recherche vers l’avant ou vers l’arrière. 15. Touche LIVE () Permet d’interrompre la lecture en mode HDD ou de revenir à la diffusion en direct lorsque la fonction Time Shift est activée. 16.
-
Page 78: Configuration Des Fonctions Du Téléviseur À L'aide De La Télécommande
3. Saisissez le code du fabricant du téléviseur à l’aide des touches NUMÉRIQUES(0~9) tout en appuyant sur la touche TV. Pour un téléviseur Samsung par exemple, appuyez, dans cet ordre, sur 0, 0 et 1 à l’aide des touches NUMÉRIQUES(0~9) tout en appuyant sur la touche 4. -
Page 79: Installation Initiale
INSTALLATION INITIALE Vous devez configurer votre décodeur lorsque vous le branchez pour la première fois. Pour ce faire, appuyez sur la touche MENU ( ), sélectionnez Réglage > Système > Installation initiale. Après avoir saisi votre code PIN (le code par défaut est “0000”), exécutez les actions suivantes : Réglage de la langue ●... -
Page 80: Fonctions De Base
FONCTIONS DE BASE 1. Écran d’affichage Avant de pouvoir visionner le programme de télévision, vous devez procéder à l’installation. Par conséquent, seules les images du menu apparaîtront dans un premier temps. Une fois les chaînes de télévision programmées, l’image suivante (la bannière) s’affichera chaque fois que vous changerez de chaîne : ●... - Page 81 FONCTIONS DE BASE 2. Contrôle du volume Pour contrôler le niveau du volume : ● Appuyez sur les touches VOL +/- pour régler le niveau du volume. ● Appuyez sur la touche (MUET) pour passer en mode silencieux. ● Appuyez de nouveau sur la touche (MUET) ou sur les touches VOL +/- pour annuler le mode silencieux.
- Page 82 FONCTIONS DE BASE 5. Liste des chaînes ● Appuyez sur la touche OK lorsque vous regardez un programme. ● Appuyez sur la touche TV/RADIO pour sélectionner une chaîne de télévision ou de radio. Vous pouvez sélectionner une liste de chaînes de télévision ou de radio ou bien la liste de toutes les chaînes.
- Page 83 FONCTIONS DE BASE 7. Télétexte Si le programme diffusé propose la fonction télétexte, appuyez sur la touche JAUNE (TEXT) pour afficher la liste actuelle des langues disponibles pour le télétexte. Appuyez une première fois pour afficher le télétexte VBI (intervalle de trame) et une seconde fois pour afficher le télétexte.
- Page 84 FONCTIONS DE BASE 9. Guide Électronique des Programmes (GEP) Le guide électronique des programmes permet d’obtenir des informations sur les programmes de la chaîne sélectionnée. 1. ce service dépend du fournisseur de services. 2. Une fois que le décodeur a reconnu l’heure GMT à...
- Page 85 FONCTIONS DE BASE 10. Enregistrement immédiat Cette fonction vous permet de lancer directement un enregistrement tout en profitant des programmes de télévision ou de radio en direct. Le fichier enregistré est automatiquement sauvegardé dans les dossiers Vidéo et Radio du menu Bibliothèque. Cette fonction n’étant pas destinée à...
- Page 86 FONCTIONS DE BASE Pour enregistrer une chaîne : ● Allez sur la chaîne que vous souhaitez enregistrer, puis appuyez sur la touche REC pour commencer l’enregistrement. ● Pour interrompre l’enregistrement, appuyez sur la touche ARRÊT () ou REC. Le menu des options d’enregistrement s’affiche.
- Page 87 FONCTIONS DE BASE 12. Fonction Répéter A–B Permet de lire en boucle une section définie (A–B). ● Appuyez sur la touche REPEAT pendant la lecture. ● Appuyez sur la touche OK au début de la scène que vous souhaitez répéter. ●...
- Page 88 FONCTIONS DE BASE Pour supprimer un signet : ● Appuyez sur les touches / pour sélectionner le signet que vous souhaitez supprimer. Le numéro du signet sélectionné est modifié. ● Une fois la sélection effectuée, appuyez sur la touche BLEUE (PRE.CH) pour procéder à la suppression à partir des signets prédéfinis.
- Page 89 FONCTIONS DE BASE - [PIP] : après avoir actié cette fonction (“On”), vous pouvez regarder deux chaînes simultanément en affichant une image principale et une image secondaire. Lorsque vous regardez 2 programmes simultanément, utilisez la touche ROUGE (LIBRARY) pour basculer entre l’image principale et l’image secondaire.
- Page 90 FONCTIONS DE BASE 14.3. Infos signal Vous pouvez vérifier l’intensité et la qualité du signal de la chaîne affichée à l’écran. 14.4. État de l’enregistrement Vous pouvez contrôler l’état de l’enregistrement en visualisant le numéro de la chaîne, le nom de l’événement, le type d’enregistrement, la fréquence et la durée restante.
-
Page 91: Fonctionnement Du Décodeur
FONCTIONNEMENT DU DÉCODEUR Menu principal Après avoir raccordé correctement votre système d’antenne et le décodeur : ● Branchez la prise secteur et allumez le décodeur. ● Appuyez sur la touche MENU ( ) pour afficher le menu principal. L’écran suivant apparaît. Le menu principal s’affiche sur l’écran de télévision comme sur la photo ci-dessous. -
Page 92: Guide Complet
FONCTIONNEMENT DU DÉCODEUR 1.1. Guide complet Cette fonction vous permet d’obtenir des informations sur l’ensemble des chaînes. Ce service dépend du fournisseur de services. Lorsque vous sélectionnez une chaîne à l’aide des touches/, différentes informations s’affichent : l’heure et la date actuelles, le nom de la chaîne, le nom du programme, la programmation ainsi que l’état des programmes (enregistrement, canal préféré, etc.). -
Page 93: Chaînes
FONCTIONNEMENT DU DÉCODEUR 2. Chaînes Le menu Chaînes comporte quatre sous-menus : Chaînes favorites, Numérisation auto, Liste des chaînes et Guide parental. Ces options vous permettent de modifier les réglages des chaînes. Vous pouvez définir les réglages de votre choix. ●... - Page 94 FONCTIONNEMENT DU DÉCODEUR 2.1.2. Nouveau numéro Vous pouvez modifier le numéro d’une chaîne sélectionnée dans la liste. ● À l’aide des touches /, sélectionnez la chaîne à laquelle vous souhaitez attribuer un nouveau numéro, puis appuyez sur la touche VERTE (ALT). ●...
-
Page 95: Recherche Auto
FONCTIONNEMENT DU DÉCODEUR 2.2. Recherche auto Ce menu permet de télécharger automatiquement les chaînes disponibles. ● À l’aide des touches /, sélectionnez des éléments, puis appuyez sur les touches/ pour procéder à la modification. ● Appuyez sur la touche OK pour lancer la recherche. ●... - Page 96 FONCTIONNEMENT DU DÉCODEUR 2.3.1. Trier Vous pouvez trier les chaînes enregistrées dans la liste des chaînes. ● Appuyez sur la touche ROUGE (LIBRARY) pour trier les chaînes. ● À l’aide des touches /, sélectionnez la méthode de tri désirée : tri Alphabétique ou Valeur par défaut. ●...
-
Page 97: Guide Parental
FONCTIONNEMENT DU DÉCODEUR 2.4. Guide parental Cette fonction permet d’empêcher les enfants ou les personnes non autorisées de regarder certains programmes. Vous pouvez également modifier votre code PIN (numéro d’identification personnel). le code PIN par défaut est “0000”. 2.4.1. Cote du programme Une fois défini, tous les programmes ne répondant pas à... -
Page 98: Bibliothèque
FONCTIONNEMENT DU DÉCODEUR 3. Bibliothèque Vous pouvez lire et modifier des enregistrements de chaînes de télévision ou de radio, des fichiers vidéo, des fichiers photo et des fichiers musicaux dans le menu Bibliothèque. Vous pouvez également écouter les fichiers JPG et MP3 enregistrés dans votre périphérique de stockage USB externe. - Page 99 FONCTIONNEMENT DU DÉCODEUR ● Après avoir sélectionné un fichier, vous pouvez utiliser les touches suivantes : - [Touche JAUNE (TEXT)] : vous pouvez trier les fichiers en fonction de leur support (Vidéo, Musique, Photo et Radio) à l’aide de la touche / et OK. - [Touche VERTE (ALT)] : vous pouvez modifier des fichiers à...
- Page 100 FONCTIONNEMENT DU DÉCODEUR 3.1.3. Renommer Vous pouvez modifier le nom d’un fichier ou d’un dossier. ● Appuyez sur la touche BLEUE (PRE.CH) pour renommer le fichier ou le dossier. - [Touches ///] : permettent de déplacer le curseur. - [Touche OK] : permet de saisir des caractères. - [Touche ROUGE (LIBRARY)] : permet de basculer entre le mode majuscule et minuscule.
- Page 101 FONCTIONNEMENT DU DÉCODEUR 3.1.7. Supprimer A–B Vous pouvez supprimer la section A–B définie. ● Après avoir sélectionné le point de démarrage, appuyez sur la touche OK sur la barre de mise en surbrillance A. Le curseur se déplace vers la barre B. ●...
-
Page 102: Musique
FONCTIONNEMENT DU DÉCODEUR 3.2. Musique Vous pouvez lire et modifier des fichiers musicaux d’extension *.mp3. ● À l’aide des touches ///, sélectionnez un fichier musical, puis appuyez sur la touche OK. - [Touche LIRE/PAUSE (II)] : permet de lire ou mettre en pause le fichier actuel. - Page 103 FONCTIONNEMENT DU DÉCODEUR 3.2.2. Trier Vous pouvez trier des fichiers musicaux enregistrés dans la liste des fichiers. ● À l’aide des touches /, sélectionnez le critère en fonction duquel vous souhaitez trier les fichiers, par exemple le nom ou la taille des fichiers. ●...
-
Page 104: Photo
FONCTIONNEMENT DU DÉCODEUR 3.3. Photo Vous pouvez lire et modifier des fichiers photo d’extension *.jpg. ● À l’aide des touches ///, sélectionnez un fichier photo, puis appuyez sur la touche OK. - [Touche LIRE/PAUSE (II)] : permet de lire ou mettre en pause le diaporama. - Page 105 FONCTIONNEMENT DU DÉCODEUR 3.3.2. Options du diaporama Vous pouvez régler la vitesse du diaporama et activer ou désactiver la musique de fond. ● À l’aide des touches /, sélectionnez l’option désirée (Normal, Lent, Rapide, On ou Off), puis appuyez sur la touche OK pour confirmer.
-
Page 106: Radio
FONCTIONNEMENT DU DÉCODEUR 3.4. Radio Vous pouvez lire et modifier des enregistrements de chaînes de radio. ● À l’aide des touches ///, sélectionnez l’enregistrement d’une chaîne de radio, puis appuyez sur la touche OK. ● Pour ouvrir un dossier, commencez par appuyer sur les touches ///... -
Page 107: Programmation D'enregistrement
FONCTIONNEMENT DU DÉCODEUR 4. Programmation d’enregistrement Vous pouvez programmer des enregistrements pour les chaînes de télévision et de radio. ● À l’aide des touches /, sélectionnez Enregistrement programmé dans le menu principal, puis appuyez sur la touche . ● À l’aide des touches /, sélectionnez un sous-menu, puis appuyez sur la touche OK ou . -
Page 108: Réglage Gep
FONCTIONNEMENT DU DÉCODEUR 4.1.2. Éditer Vous pouvez éditer les enregistrements programmés dans la liste réservée. ● À l’aide des touches / sélectionnez l’enregistrement programmé que vous souhaitez éditer, puis appuyez sur la touche VERTE (ALT). ● À l’aide des touches ///, éditez les éléments de l’enregistrement programmé, puis appuyez sur la touche ROUGE (LIBRARY) pour confirmer. -
Page 109: Réglage Manuel
FONCTIONNEMENT DU DÉCODEUR 4.3. Réglage manuel Vous pouvez régler les paramètres des programmes à l’aide de la fonction GEP. ● À l’aide des touches ///, définissez la chaîne, la date, l’heure de début, l’heure de fin ainsi que la fréquence, puis appuyez sur la touche ROUGE (LIBRARY) pour confirmer. -
Page 110: Réglage
FONCTIONNEMENT DU DÉCODEUR 5. Réglage Vous pouvez régler les éléments tels que le PVR, les Préférences, la Langue, le Système, la Boîte aux lettres et l’État CA Irdeto. ● À l’aide des touches /, sélectionnez Réglage dans le menu principal, puis appuyez sur la touche . ●... -
Page 111: Préférences
FONCTIONNEMENT DU DÉCODEUR 5.2. Préférences Vous pouvez définir vos paramètres personnalisés. ● À l’aide des touches /, sélectionnez un sous-menu, puis appuyez sur la touche OK ou . 5.2.1. Format d’image Vous pouvez définir le format d’image. ● À l’aide des touches /, sélectionnez le format d’image de votre choix (par exemple 4:3 ou 16:9), puis appuyez sur la touche OK. - Page 112 FONCTIONNEMENT DU DÉCODEUR 5.2.3. Sortie vidéo Vous pouvez régler le format du signal de sortie vidéo. ● À l’aide des touches /, sélectionnez le format du signal de sortie vidéo désiré (par exemple RGB ou Composite), puis appuyez sur la touche OK. - [RGB] : destiné...
-
Page 113: Langue
FONCTIONNEMENT DU DÉCODEUR 5.3. Langue Vous pouvez définir les langues pour les éléments suivants : OSD, Sortie audio, Priorité audio et Sous-titres. 5.3.1. OSD Vous pouvez définir la langue de l’OSD. ● À l’aide des touches /, sélectionnez la langue désirée, puis appuyez sur la touche OK. -
Page 114: Système
FONCTIONNEMENT DU DÉCODEUR 5.4. Système Vous pouvez accéder aux options du menu du système. ● À l’aide des touches /, sélectionnez un sous-menu, puis appuyez sur la touche OK ou . 5.4.1. Installation initiale Vous pouvez procéder à l’installation initiale. ●... -
Page 115: Boîte Aux Lettres
FONCTIONNEMENT DU DÉCODEUR 5.4.2. Infos produit Vous pouvez afficher les informations concernant le produit, notamment le nom de la bande, le nom du produit, la version du chargeur, la version du logiciel et la taille du disque dur. Pour mettre à jour le logiciel : ●... -
Page 116: État Ca Irdeto
FONCTIONNEMENT DU DÉCODEUR 5.6. État CA Irdeto Vous pouvez afficher les informations relatives à la carte à puce, au service, au chargeur et aux composants. État de la carte intelligente Indique l’état de la carte à puce Irdeto comme sur la photo ci-contre. -
Page 117: Numéros De Fabricants De Téléviseurs Disponibles
(MUET) Nom du fabricant (MARQUE) LISTE DES NUMÉROS DE CODE (3 CHIFFRES) Nom du fabricant (MARQUE) LISTE DES NUMÉROS DE CODE (3 CHIFFRES) SAMSUNG 001 002 003 004 005 006 007 008 009 ATLANTIC 049 050 071 113 152 236 379... - Page 118 NUMÉROS DE FABRICANTS DE TÉLÉVISEURS DISPONIBLES Nom du fabricant (MARQUE) LISTE DES NUMÉROS DE CODE (3 CHIFFRES) Nom du fabricant (MARQUE) LISTE DES NUMÉROS DE CODE (3 CHIFFRES) CAPSONIC 049 076 152 380 DIGILINE 049 152 CARREFOUR 018 177 DIXI 049 152 195 379 413 CASCADE 049 064 152 195...
- Page 119 NUMÉROS DE FABRICANTS DE TÉLÉVISEURS DISPONIBLES Nom du fabricant (MARQUE) LISTE DES NUMÉROS DE CODE (3 CHIFFRES) Nom du fabricant (MARQUE) LISTE DES NUMÉROS DE CODE (3 CHIFFRES) FISHER 018 041 050 065 069 102 104 107 139 HANIMEX 156 172 209 320 324 379 408 414 421 HANSEATIC 018 049 050 094 104 107 113 152 172 195 241 324 378 379 391 421 455 467...
- Page 120 NUMÉROS DE FABRICANTS DE TÉLÉVISEURS DISPONIBLES Nom du fabricant (MARQUE) LISTE DES NUMÉROS DE CODE (3 CHIFFRES) Nom du fabricant (MARQUE) LISTE DES NUMÉROS DE CODE (3 CHIFFRES) INTERNAL 049 152 LENOIR 050 195 INTERVISION 045 049 055 076 107 123 152 225 232 LESA 378 379 380 413 421 LEYCO...
- Page 121 NUMÉROS DE FABRICANTS DE TÉLÉVISEURS DISPONIBLES Nom du fabricant (MARQUE) LISTE DES NUMÉROS DE CODE (3 CHIFFRES) Nom du fabricant (MARQUE) LISTE DES NUMÉROS DE CODE (3 CHIFFRES) MINERVA 080 090 232 247 249 407 454 OCEANIC 086 094 104 107 108 109 139 172 209 MINOKA 049 152 426 470 425 466 469 475...
- Page 122 NUMÉROS DE FABRICANTS DE TÉLÉVISEURS DISPONIBLES Nom du fabricant (MARQUE) LISTE DES NUMÉROS DE CODE (3 CHIFFRES) Nom du fabricant (MARQUE) LISTE DES NUMÉROS DE CODE (3 CHIFFRES) PHILIPS 014 049 050 065 079 089 112 152 160 REDSTAR 049 152 182 193 216 217 220 226 247 249 324 REFLEX 049 152...
- Page 123 NUMÉROS DE FABRICANTS DE TÉLÉVISEURS DISPONIBLES Nom du fabricant (MARQUE) LISTE DES NUMÉROS DE CODE (3 CHIFFRES) Nom du fabricant (MARQUE) LISTE DES NUMÉROS DE CODE (3 CHIFFRES) SERINO 380 435 SYTONG SHARP 018 094 170 190 320 362 TACTUS SHORAI 042 094 TANDBERG...
- Page 124 NUMÉROS DE FABRICANTS DE TÉLÉVISEURS DISPONIBLES Nom du fabricant (MARQUE) LISTE DES NUMÉROS DE CODE (3 CHIFFRES) Nom du fabricant (MARQUE) LISTE DES NUMÉROS DE CODE (3 CHIFFRES) TRAKTON WHITE TRANS CONTINENS 046 049 152 171 307 379 WHITE WESTINGHOUSE 049 050 113 152 213 379 467 TRANSONIC 049 152 380 458 WINCO...
-
Page 125: Dépannage
DÉPANNAGE Problème Causes possibles Solutions Aucun affichage sur la façade ; Le cordon d’alimentation n’est pas Branchez correctement le cordon pas d’alimentation branché correctement. d’alimentation. Aucune image à l’écran Le décodeur est en mode veille. Allumez le décodeur. La prise péritel n’est pas Vérifiez les branchements et correctement branchée à... -
Page 126: Fiche Technique
FICHE TECHNIQUE Alimentation Type : SMPS Tension d’entrée : 230 V CA, 50/60 Hz Calibre du fusible : 250 V/ T 1,6 Ah Consommation : 30 W max. Veille : 18 W Syntoniseur et démodulateur Fréquence d’entrée : BANDE VHF, UHF (50~870 MHz) Démodulation : MAQ DVB-C Taux de symbole :... - Page 127 SPÉCIFICATIONS TECHNIQUES SORTIE AUDIO/VIDÉO DE BANDE DE BASE Sortie A/V Péritel (TV) : VIDÉO (CVBS/RVB), AUDIO G/D Péritel (magnétoscope) : VIDÉO (CVBS), AUDIO G/D PRISE RCA : VIDÉO (CVBS), AUDIO G/D SORTIE AUDIO NUMÉRIQUE : OPTIQUE MÉMOIRE Flash : 8 Mo Mémoire SDRAM : 64 Mo DISQUE DUR INTÉGRÉ...
- Page 129 DCB-P850R / DCB-P850 R S Instructions for use DIGITAL CABLE RECEIVER WITH BUILT-IN HARD DISK DRIVE DIGITAL CABLE RECEIVER WITH BUILT-IN HARD DISK DRIVE...
- Page 130 SAFETY INSTRUCTIONS This STB has been manufactured to satisfy international safety standards. Please read the following recommended safety precautions carefully. MAINS SUPPLY: AC 230V~, 50/60Hz OVERLOADING: Do not overload wall outlets, extension cords or adapters as this can result in fire or electric shock. LIQUIDS: Keep liquids away from the STB.
- Page 131 SAFETY INSTRUCTIONS WARNING! 1. Follow these directions in order not to damage the power cord or plug. ● Do not modify or process the power cord or plug arbitrarily. ● Do not bend or twist the power cord too much. ●...
- Page 132 CONTENTS Safety Instructions ........................2 General Features ........................5 Connecting Your “STB” ......................6 Description ..........................8 Front Panel ............................... 8 Rear Panel ..............................9 Remote Control ............................10 Setting Up TV Operations with the Remote Control ................12 Initial Installation ........................13 Basic Functions ........................
-
Page 133: General Features
GENERAL FEATURES 1. USER SECTION 400 PROGRAMMABLE CHANNELS ADVANCED ELECTRONIC PROGRAMME GUIDE MULTI LANGUAGE SUPPORTED FOR OSD SUBTITLE & TELETEXT SUPPORTED WITH MULTI LANGUAGES FULL FUNCTION INFRARED REMOTE CONTROL AUTO SCAN FACILITY CHANNEL ORGANISING (PROGRAMMABLE) ... -
Page 134: Connecting Your "Stb
CONNECTING YOUR “STB” 1. LOCATION OF THE RECEIVER Your receiver should be placed under proper ventilation. Don’t put in completely enclosed cabinet that will restrict the flow of air, resulting in overheating. The location should be safeguarded from direct sunlight, excess moisture, rough handling or household pets. - Page 135 CONNECTING YOUR “STB” Connecting Figure Signal Cable If degraded picture quality is observed while viewing copy-protected VOD (Video-on-Demand) movies, connect the set-top box directly to the TV set. Do not connect through a VCR. Manufactured under license from Dolby Laboratories. “Dolby” and the double-D symbol are trademarks of Dolby Laboratories.
-
Page 136: Description
Turns the receiver on and off (standby). 2. Smart Card Slot 1 slot for Irdeto smartcard. Smart Cards are only distributed by service providers and special distributors, not by SAMSUNG. 3. USB Port Connects an external USB storage device such as USB-HDD or thumb-drive. -
Page 137: Rear Panel
DESCRIPTION Rear Panel The fan always revolves when the power is on. Ensure a minimum of 10cm clear space on all sides of the fan when installing the product. 1. AC MAINS This is to plug in the AC mains power cord. The input AC voltage range is 230V~, 50/60Hz supply. -
Page 138: Remote Control
DESCRIPTION Remote Control 1. TV Switches the TV mode. 2. STB Switches the STB mode. 3. TV/RADIO Toggles between the TV channel and Radio channel. 4. INPUT SEL. Selects input signal in external input mode. 5. STANDBY/ON Turns the receiver on and off (standby). 6. - Page 139 DESCRIPTION 14. SEARCH(/) Buttons Used for searching backwards or forwards. 15. LIVE() Button Used for stopping play in HDD mode or returning to Live Broadcasting when the Time Shift is active. 16. TIME SHIFT(II) Used for starting and pausing play in HDD mode or starting the Time Shift.
-
Page 140: Setting Up Tv Operations With The Remote Control
2. Point the remote control towards the TV. 3. Enter the TV manufacturer number by using the NUMERIC(0~9) buttons while pressing the TV button. E.g. For a Samsung TV, press 0, 0 and 1 in this order by using the NUMERIC(0~9) buttons while pressing the TV button. -
Page 141: Initial Installation
INITIAL INSTALLATION You have to set up your receiver when it is plugged in for the first time. For this action, after pressing the MENU( ) button, select Setup > System > Initial Installation. After entering your PIN code (the initial setting is “0000”), do the following actions: Setting Language ●... -
Page 142: Basic Functions
BASIC FUNCTIONS 1. Display Screen Before you can view the television programme, you must perform the installation. Therefore you will see only menu images at first. After the television channels have been programmed, you will see the following picture (banner) each time you change channels: ●... - Page 143 BASIC FUNCTIONS 2. Volume Control To control the volume level : ● Press the VOL +/- buttons to adjust the volume level. ● Press the (MUTE) button to turn to silence mode. ● Press the (MUTE) button again or VOL +/- buttons in order to cancel the mute function.
- Page 144 BASIC FUNCTIONS 5. Channel List ● Press the OK button while you are watching a programme. ● Press the TV/RADIO button to select a TV or Radio channel. You can select any of TV, Radio, and All channel lists. ● Press the / buttons to select a desired channel, then press the OK button.
- Page 145 BASIC FUNCTIONS 7. Teletext When the current broadcasting programme provides teletext, press the YELLOW(TEXT) button to see the current teletext language list. The first press displays the VBI (vertical blanking interval) teletext and the second press displays the OSD teletext. To change the teletext language: ●...
- Page 146 BASIC FUNCTIONS 9. Programme Information (EPG—Electronic Programme Guide) The electronic programme guide shows you programme information for the selected channel. 1. This service depends on the service provider. 2. After the receiver recognises the GMT-time from the signal which takes few seconds, it can display correct EPG information.
- Page 147 BASIC FUNCTIONS 10. Instant Recording Directly records while enjoying Live TV or Radio programme. The recorded file will be automatically saved to Video and Radio folders in the Library menu. This is not for permanent recording, so if you plug out the set without stopping the record, no file is saved. You can also record two separate channels at the same time.
- Page 148 BASIC FUNCTIONS To record one channel: ● Change to the channel you want to record, then press the REC button to start recording. ● To stop the recording, press the STOP() or REC button. The recording option menu will appear. Press the STOP() button again.
- Page 149 BASIC FUNCTIONS 12. A–B Repeat Function Repeatedly plays a selected section (A–B). ● Press the REPEAT button during playback. ● Press the OK button at the scene you want to start repeating. ● Press the OK button again at the scene you want to end repeating.
- Page 150 BASIC FUNCTIONS To delete a bookmark: ● Press the / buttons to select the bookmark that you want to delete. The selected bookmark number changes. ● After selection, press the BLUE(PRE.CH) button to delete from the preset bookmarks. The final bookmark number decreases by 1 with no change to locations.
- Page 151 BASIC FUNCTIONS - [PIP]: After setting it to “On,” you can watch two channels with main and sub pictures. When you are watching 2 programmes at a time, use the RED(LIBRARY) button for swapping between main and sub pictures. The channel on the sub picture is changed upward by the YELLOW(TEXT) button, while it is changed downward by the BLUE(PRE.CH) button.
- Page 152 BASIC FUNCTIONS 14.3. Signal Info You can check the signal strength and quality of the current channel. 14.4. Recording Status You can check the recording status such as channel number, event name, record type, frequency, and remaining time. When there are 2 recordings available, use the / buttons to see the recording status between recording 1 and recording 2.
-
Page 153: Operating The Receiver
OPERATING THE RECEIVER Main Menu After installing your aerial system and STB with appropriate connectors. ● Plug in the AC main power and switch on the receiver. ● Press the MENU( ) button to bring up the main menu. The following on screen display will appear: You will see the main menu on the TV screen as shown below. -
Page 154: Full Guide
OPERATING THE RECEIVER 1.1. Full Guide The function gives you information for the full channels. This service depends on the service provider. When you select a channel using the / buttons, it will display various information such as current time and date, channel name, programme name, schedule of programmes, and programme status (Recording, Favorite Channel, etc.). -
Page 155: Channel
OPERATING THE RECEIVER 2. Channel Channel menu have four sub menus: Favorite Channel, Auto Scanning, Channel List, and Parental Guide. These options enable you to change channel settings. You can set the various settings you want. ● Use the / buttons to select Channel in the main menu, then press the ... - Page 156 OPERATING THE RECEIVER 2.1.2. Renumber You can change the channel number of the selected one on the list. ● Use the / buttons to select the channel you want to renumber, then press the GREEN(ALT) button. ● Use the / buttons to change the channel number, then press the OK button.
-
Page 157: Auto Scanning
OPERATING THE RECEIVER 2.2. Auto Scanning This menu enables download of available channels automatically. ● Use the / buttons to select items, then press the / buttons to change. ● Press the OK button to start scanning. ● After scanning completes, press the OK button to save. ●... - Page 158 OPERATING THE RECEIVER 2.3.1. Sort You can sort channels on the channel list. ● Press the RED(LIBRARY) button to sort channels. ● Use the / buttons to select a desired sorting method from Alphabetic and Default. ● When you press the OK button, channel list is sorted by your desired sorting method.
-
Page 159: Parental Guide
OPERATING THE RECEIVER 2.4. Parental Guide This function prevents children or unauthorized persons from watching programme. Also you can change your PIN (Personal Identification Number) code. The factory preset PIN code is “0000.” 2.4.1. Program Grade When it is set, any programme that violates the setting is blocked. -
Page 160: Library
OPERATING THE RECEIVER 3. Library You can play and edit TV channel recordings, Radio channel recordings, video files, photo files, and music files in the Library menu. You can also enjoy JPG and MP3 files stored in your external USB storage device. ●... - Page 161 OPERATING THE RECEIVER ● After selecting a file, you can use the following buttons: - [YELLOW(TEXT) button]: You can list the files by the selected media such as Video, Music, Photo, and Radio using the / and OK buttons. - [GREEN(ALT) button]: You can edit files using Sort, Move, Rename, Lock, Delete, New Folder, Delete A–B, Combine, and Divide.
- Page 162 OPERATING THE RECEIVER 3.1.3. Rename You can change the name of file or folder. ● Press the BLUE(PRE.CH) button to rename the name of file or folder. - [/// buttons]: Moves the cursor. - [OK button]: Enters characters. - [RED(LIBRARY) button]: Toggles between upper case and lower case.
- Page 163 OPERATING THE RECEIVER 3.1.7. Delete A–B You can delete the selected A–B section. ● After selecting the starting point, press the OK button on the highlight bar A. The cursor moves to the bar B. ● Select the ending point and press the OK button. ●...
-
Page 164: Music
OPERATING THE RECEIVER 3.2. Music You can play and edit music files with the extension *.mp3. ● Use the /// buttons to select a music file, then press the OK button. - [PLAY/PAUSE(II) button]: Plays or pauses the current file. - [STOP() button]: Stops playback and exit to the file list. - Page 165 OPERATING THE RECEIVER 3.2.2. Sort You can sort music files in the file list. ● Use the / to select a desired sorting type such as file name and size. ● When you press the OK button, the file list is sorted by your desired sorting type. 3.2.3.
-
Page 166: Photo
OPERATING THE RECEIVER 3.3. Photo You can play and edit photo files with the extension *.jpg. ● Use the /// buttons to select a photo file, then press the OK button. - [PLAY/PAUSE(II) button]: Plays or pauses the slide show. - [STOP() button]: Stops playback and exit to the file list. - Page 167 OPERATING THE RECEIVER 3.3.2. Slide Option You can set the slide show speed and background music on or off. ● Use the / buttons to select a desired option among Normal, Slow, Fast, On, and Off, then press the OK button to check.
-
Page 168: Radio
OPERATING THE RECEIVER 3.4. Radio You can play and edit Radio channel recordings. ● Use the /// buttons to select a Radio channel recording, then press the OK button. ● For entering a folder, first use the /// buttons to select a folder, then press the OK button. -
Page 169: Timer Recording
OPERATING THE RECEIVER 4. Timer Recording You can schedule timer recordings for the TV and Radio channels. ● Use the / buttons to select Timer Rec. on the main menu, then press the button. ● Use the / buttons to select a sub menu, then press the OK or ... -
Page 170: Epg Setting
OPERATING THE RECEIVER 4.1.2. Edit You can edit the timer recordings in the reserved list. ● Use the / buttons to select a timer recording you want to edit, then press the GREEN(ALT) button. ● Use the /// buttons to edit the items of the timer recording, then press the RED(LIBRARY) button to confirm. -
Page 171: Manual Setting
OPERATING THE RECEIVER 4.3. Manual Setting You can set the channels using EPG. ● Use the /// buttons to set the channel, date, start time, end time, and frequency, then press the RED(LIBRARY) button to confirm. - [/ buttons]: Adjusts the values. - [/... -
Page 172: Setup
OPERATING THE RECEIVER 5. Setup You can set the setup items such as PVR, Preferences, Language, System, Mailbox, and Irdeto CA Status. ● Use the / buttons to select Setup in the main menu, then press the button. ● Use the / buttons to select a sub menu, then press the OK or ... -
Page 173: Preferences
OPERATING THE RECEIVER 5.2. Preferences You can set the preferences menu. ● Use the / buttons to select a sub menu, then press the OK or button. 5.2.1. Screen Ratio You can set the screen ratio. ● Use the / buttons to select a desired screen ratio (such as 4:3 and 16:9), then press the OK button. - Page 174 OPERATING THE RECEIVER 5.2.3. Video Out You can set the video output signal format. ● Use the / buttons to select the desired video output signal format (such as RGB and Composite), then press the OK button. - [RGB]: Selects for SCART cable. - [Composite]: Selects for RCA cable.
-
Page 175: Language
OPERATING THE RECEIVER 5.3. Language You can set the languages for OSD, Audio Out, Audio Priority, and Subtitles. 5.3.1. OSD You can set the OSD language. ● Use the / buttons to select a desired language, then press the OK button. 5.3.2. -
Page 176: System
OPERATING THE RECEIVER 5.4. System You can set the system menu. ● Use the / buttons to select a sub menu, then press the OK or button. 5.4.1. Initial Installation You can set the initial installation. ● Enter your own PIN code, then press the OK button. ●... -
Page 177: Mailbox
OPERATING THE RECEIVER 5.4.2. Product Information You can display the product information including brand name, product name, loader version, software version, and hard disk size. To upgrade software: ● Press the OK button on the Product Information menu, then the SW Upgrade menu will appear. ●... -
Page 178: Irdeto Ca Status
OPERATING THE RECEIVER 5.6. Irdeto CA Status You can see information about smartcard, service, loader, and components. Smart Card Status It shows you the status of the Irdeto smartcard as shown in the picture. Service Status It shows you the status of the digital broadcastng services as shown in the picture. -
Page 179: Available Tv Manufacturer Numbers
Maker (BRAND) NAME CODE NUMBER (3DIGIT) LIST Maker (BRAND) NAME CODE NUMBER (3DIGIT) LIST SAMSUNG 001 002 003 004 005 006 007 008 009 ATLANTIC 049 050 071 113 152 236 379 010 050 066 076 102 195 217 365 379... - Page 180 AVAILABLE TV MANUFACTURER NUMBERS Maker (BRAND) NAME CODE NUMBER (3DIGIT) LIST Maker (BRAND) NAME CODE NUMBER (3DIGIT) LIST CAPSONIC 049 076 152 380 DIGILINE 049 152 CARREFOUR 018 177 DIXI 049 152 195 379 413 CASCADE 049 064 152 195 DORIC 104 105 CASIO...
- Page 181 AVAILABLE TV MANUFACTURER NUMBERS Maker (BRAND) NAME CODE NUMBER (3DIGIT) LIST Maker (BRAND) NAME CODE NUMBER (3DIGIT) LIST FISHER 018 041 050 065 069 102 104 107 139 HANIMEX 156 172 209 320 324 379 408 414 421 HANSEATIC 018 049 050 094 104 107 113 152 172 195 241 324 378 379 391 421 455 467 FLINT 049 102 123 152 380...
- Page 182 AVAILABLE TV MANUFACTURER NUMBERS Maker (BRAND) NAME CODE NUMBER (3DIGIT) LIST Maker (BRAND) NAME CODE NUMBER (3DIGIT) LIST INTERNAL 049 152 LENOIR 050 195 INTERVISION 045 049 055 076 107 123 152 225 232 LESA 378 379 380 413 421 LEYCO 049 076 094 102 152 LIESENK &...
- Page 183 AVAILABLE TV MANUFACTURER NUMBERS Maker (BRAND) NAME CODE NUMBER (3DIGIT) LIST Maker (BRAND) NAME CODE NUMBER (3DIGIT) LIST MINERVA 080 090 232 247 249 407 454 OCEANIC 086 094 104 107 108 109 139 172 209 MINOKA 049 152 426 470 425 466 469 475 MITSUBISHI 013 018 049 065 105 131 152 157 190...
- Page 184 AVAILABLE TV MANUFACTURER NUMBERS Maker (BRAND) NAME CODE NUMBER (3DIGIT) LIST Maker (BRAND) NAME CODE NUMBER (3DIGIT) LIST PHILIPS 014 049 050 065 079 089 112 152 160 REDSTAR 049 152 182 193 216 217 220 226 247 249 324 REFLEX 049 152 427 455 482...
- Page 185 AVAILABLE TV MANUFACTURER NUMBERS Maker (BRAND) NAME CODE NUMBER (3DIGIT) LIST Maker (BRAND) NAME CODE NUMBER (3DIGIT) LIST SERINO 380 435 SYTONG SHARP 018 094 170 190 320 362 TACTUS SHORAI 042 094 TANDBERG 065 074 078 172 182 210 213 420 449 SIAM 049 152 TANDY...
- Page 186 AVAILABLE TV MANUFACTURER NUMBERS Maker (BRAND) NAME CODE NUMBER (3DIGIT) LIST Maker (BRAND) NAME CODE NUMBER (3DIGIT) LIST TRAKTON WHITE TRANS CONTINENS 046 049 152 171 307 379 WHITE WESTINGHOUSE 049 050 113 152 213 379 467 TRANSONIC 049 152 380 458 WINCO TRANSTEC WINDSTAR...
-
Page 187: Troubleshooting
TROUBLESHOOTING Problem Possible cause Solution of the problem No display on the front panel; Power cord not plugged in Power cord plug in correctly. No power supply correctly. No pictures on the screen. Receiver in Standby mode; Set Receiver to “On”; Check SCART not connected tightly connection and correct;... -
Page 188: Technical Specifications
TECHNICAL SPECIFICATIONS Power Supply Type: SMPS Input voltage: AC 230V~, 50/60 Hz Fuse rating: 250V/T1.6AH Power consumption: Max. 30W Stand by: Tuner & Demodulator Input frequency: VHF, UHF BAND (50~870 MHz) Demodulation: QAM DVB-C Symbol rate: MAX 7 Msps Constellation: 16, 32, 64, 128, 256 QAM Cable out: Loopout for analog receiver... - Page 189 TECHNICAL SPECIFICATIONS BASE-BAND AUDIO/VIDEO OUTPUT A/V Output SCART(TV) : VIDEO(CVBS/RGB), AUDIO L/R SCART(VCR) : VIDEO(CVBS), AUDIO L/R RCA JACK : VIDEO(CVBS), AUDIO L/R DIGITAL AUDIO OUTPUT: OPTICAL MEMORY Flash: SDRAM: 64MB BUILT-IN HDD 160GB ACCESS EXTERNAL HDD USB2.0 (HOST) PLAYABLE CONTENTS FILE FORMAT Music: Photo: PHISICAL SPECIFICATION...