Table of Contents
Advertisement
Quick Links
Advertisement
Table of Contents

Related Manuals for Caple WDI3300


Summary of Contents for Caple WDI3300
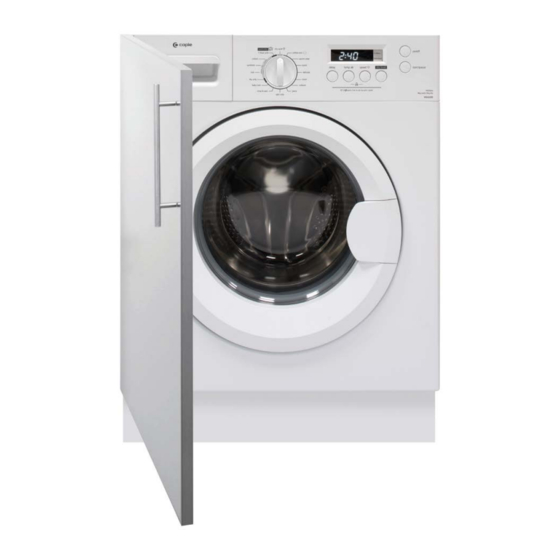
- Page 1 Washer Dryer Model: WDI3300 Service Manual...
-
Page 2: Table Of Contents
Contents 1 PRECAUTION ………………….………………..…………………………………………………. 3 1.1 Safety Precautions 1.2 Servicing Precaution 1.3 Cautions For Safety 2 PRODUCT SPECIFICATIONS ……………………………………………………..………….. 3 USER MANUAL ……………………………………………………………………………….…. 11 4 WIRING DIAGRAM /PCB LAYOUT ……………………………………………………….… 12 5 SERVICE MODE......…………….………………………………………………….… 14 6 ERROR CODES AND EXPLANATIONS ....…………………………………….… 18 7 TROUBLESHOOTING ……………………………………………………………………………... -
Page 3: Precaution
1 PRECAUTION When performing troubleshooting and part replacement during servicing, note the following safety precautions: 1.1 Safety Precautions 1.1.1 Use Genuine Parts The components of the washing machine have safety features such as non-combustibility and voltage with standing. Therefore, always use the same part as suggested by the manufactuerer. -
Page 4: Cautions For Safety
1 PRECAUTION 1.3 CAUTIONS FOR SAFETY Please observe the following notes for safety. • The symbols indicate as follows. • Symbol Meaning Indicates possibility of death or serious injury of a repair technician and a person nearby through the misconducted WARNING work , or of a user by a defect of the product after the work performed by the technician. - Page 5 1 PRECAUTION WARNING After repair, measure insulation resistance between the charging part(power cord plug) and the non-charging metallic part (ground) with an insulation resistance meter (500V).The resistance shall be 10M or more. CHECK INSULATION Failing to check the insulation resistance may cause a short RESISTANCE circuit, electric shock or other diseases to the customer.
- Page 6 1 PRECAUTION WARNING Do not touch the laundry before the spin basket stops completely. The laundry entangles your hand causing an injury even if DO NOT TOUCH the basket rotates slowly. Pay special attention to children. Must be installed by a qualifed installer. Install the product securely and safely according to the electrical equipment technical standard and the INSTALL...
-
Page 7: Product Specifications
2 PRODUCT SPECIFICATIONS Product Specifications Caple Brand WDI3300 Model White Color Features Washing Capacity Rated Spinning Capacity Drying Capacity 220-240V Power Supply 50Hz Rated Frequency 1900W Rated Power 1300W Drying Power Rated Current 1400RPM Max. Spin Speed Display Type BLDC Motor... -
Page 8: Wiring Diagram/Pcb Layout
4 WIRING DIAGRAM/PCB LAYOUT Warning care should be taken when diagnosing or replacing components as the appliance may store static electrical charge. 4.2 The circuit program(Inverter Motor) -
Page 9: Service Mode
5 SERVICE MODE 5.1 Service mode Before entering into service mode, make sure no water remains in the inner drum, if not, select drain only program to drain them out. Turn on the machine and take turns [K2] [K4] [K2] [K4] buttons in 30s. Press [K1] or [K2] to select test program. - Page 10 5 SERVICE MODE 5.1 Service mode Check Check Method Check Item Target Display The whole LED UI Checking Press [K6] button display flashes Press [K6] button to drain out all the Drain-pump remaining water. If all water drained out, LED LED displays “PPt”...
- Page 11 5 SERVICE MODE 5.1 Service mode Check Check Method Check Item Target Display Press [K6] button, inner drum rotates in Rotating 45r/m clockwise for 15s and stop for 10s then LED displays checking rotates counterclockwise for 15s, over and over “tUB”...
- Page 12 5 SERVICE MODE 5.2 Self-check Push and hold the function and pre-washing buttons, turn the program knob to the position of cotton and hold for 3s, then the program will be in the state of self test. When the buzzer beebs, all the indicating lights will flash 3 times ( pushing 0.5s, the 0.5s light is on and off), then the lights are on all the time.
-
Page 13: Error Codes And Explanations
6. ERROR CODES AND EXPLANATIONS Error code Reason Possible cause Solution If the washer fills very slowly, the The water level water pressure from the house doesn’t change in 3 might be too low. If the water inlet minutes during filling valve isn't leaking and there are the water. - Page 14 6. ERROR CODES AND EXPLANATIONS If the washer won't drain water check the drain hose. Be sure the hose did not get kinked behind Drain hose the washer. Also, remove the hose from the pump and check it for obstructions. In 3 minutes, If the washer won't drain water the water level...
- Page 15 6. ERROR CODES AND EXPLANATIONS 1.Check the speed transmit line of The PCB can’t get the motor to prevent fall of The speed don’t speed transmit signal 2.Check the PCB and the motor transmit signal 3.Check the motor communicate when the motor drive wire 1.Check the speed transmit line The speed...
- Page 16 Error Unit Define Causes Explanation Notes Code Action Transducer Check the wire connect before replacing the (Transducer Error) Transducer Error Error Transducer (X means different Check the wire connect before replacing the E50-E5X Transducer Error letter or number) Transducer In the drying process, (Outlet and inlet the temperature Check the inner wire before replacing the...
-
Page 17: Troubleshooting
7 TROUBLE SHOOTING Fault tree 1. Maintenance not heating malfunction Not heating Whether NTC is short or open Change NTC circuit Whether the connection is Reliable connection correct Heater O/C Change the heater Change the PCB... - Page 18 7 TROUBLE SHOOTING 2. Door not locking & its maintenance Door not locking Close the door Whether the door correctly is closed correctly Whether the inner wire between the Reconnect and PCB and the door secure the PCB and lock has loose door lock wiring wiring Broken or O/C...
- Page 19 7 TROUBLE SHOOTING 3. No water inlet or water inlet overtime No water inlet or water inlet overtime Whether the tap is Open the tap open Whether the water Wait the water pressure is between pressure meet the 0.05MPa~1MPa standard Whether the Check drain hose Drain Hose...
- Page 20 7 TROUBLE SHOOTING 4. Over heating Over heating Faulty O/C S/C Change the NTC Check resistance Change the PCB...
-
Page 21: Maintenance Of Non-Drain Or Drain Exceed The Setting Time
7 TROUBLE SHOOTING 5. Maintenance of non-drain or drain exceed the setting time Non-drain or overtime drain Whether the Check the drain Drain Hose is hose height & syphoning or blockage blocked Whether the Clean the filter/pump/ filter or pump is blocked Pump O/C Change the... -
Page 22: Water Inlet Overflow Malfunction Maintenance
7 TROUBLE SHOOTING 6. Water inlet overflow malfunction maintenance Water inlet overflow Valve faulty, O/C, Change the inlet valve check resistance Whether the pressure switch is Change pressure faulty, check switch break after blow Change the PCB... -
Page 23: Drum Non-Rotating Malfunction Maintenance
7 TROUBLE SHOOTING 7. Drum not rotating malfunction maintenance Drum not rotating Whether the belt is Installed the belt installed correctly correctly Whether the wiring connection Refit & secure wiring is loose Shut down the power, open the door and The drum is blocked, Rotate the drum . - Page 24 7 TROUBLE SHOOTING Problem and solution Problem Solution The washing machine Close the washing machine's door. Check power supply. does not work Correctly connect the inlet water pipe. Water leakage Check plumbing & door seal. The speed of the clothes is Reload and distribute the laundry evenly in the drum.
- Page 25 7 TROUBLE SHOOTING Level the washing machine & lock feet. Check if the internal packing for the transportation Vibration of the washing have all been removed. machine Remove transit bolts and spacers. Check if the detergent is excessive, if it is the detergent for the cylinder washing machine.
-
Page 26: Component Data
8 COMPONENT DATA (Inverter Motor-8/10KG) Before repairing, use multimeter to judge circuit stand of fail No Parts Picture Test Description Parameter Remarks 1.Measuring two Water straight line Break over after blow- Level terminals PASS Switch 2.Measuring two vertical terminals 2 seconds after the power supply can automatically locked Door... -
Page 27: Disassembly Component Location
9 DISASSEMBLY COMPONENT LOCATION DISASSEMBLY COMPONENT LOCATION 1. Undo the back cover 2. Undo top cover 3. Undo the control panel and PCB 4. Undo the door assembly 5. Undo the front plate 6. Undo the detergent box 7. Undo the inlet valve 8. - Page 28 9 DISASSEMBLY COMPONENT LOCATION Operation Picture 1. Undo the rear cover Undo the 4 screws between the rear plate and the cabinet, and then pull it out. 2. Undo the top cover Undo 6 screws fit back Cabinet. Push back the top cover 15mm until it leaves away from the control panel, and then take it down.
- Page 29 9 DISASSEMBLY COMPONENT LOCATION 4. Undo the PCB Remove the control panel assembly. Remove 3 screws between the control panel and the PCB housing. III. Remove the PCB. 5. Undo the door lock Open the door of the washing machine. Pull open the door gasket.
- Page 30 9 DISASSEMBLY COMPONENT LOCATION 8. Undo the inlet valve Remove the top cover plate. Unplug connector and undo 2 screws between cabinet and inlet valve. III. Release the clamp fixing the inlet valve and the inlet hose, and then pull out the inlet hose.
- Page 31 9 DISASSEMBLY COMPONENT LOCATION 11. Undo the gasket Undo the top cover, control panel, door lock, front panel. Undo 2 screws on clip spring. III. Loosen the inner gasket clamp between the door seal and the front of the outer tub. IV.
- Page 32 9 DISASSEMBLY COMPONENT LOCATION 15. Undo the filter of drain Open the lint filter door. Rotate the filter knob anticlockwise, and then pull out the filter. 16. Undo the drain pump Undo the front panel. Remove 4 screws, unplug connector, nip out the clamp between the drain hose and the drain pump, and then pull out the drain...
- Page 33 9 DISASSEMBLY COMPONENT LOCATION 19. Undo the absorber pin I.Undo the front panel. II.Use pliers to pinch the absorber pin’s and knock the absorber pin out from back lightly; in the same way, remove the other two. 20. Undo the tub assembly I.Undo the rear cover, top cover, control panel, front panel, top bracket, lower counterweight,...
- Page 34 9 DISASSEMBLY COMPONENT LOCATION 22. Undo the upper counterweight Remove lid. Remove two screws fit on the upper counterweight and then pull out the upper counterweight. 23. Undo the motor Disconnect motor wires and grounding wire. II. Use spanner to remove the motor screws and remove motor.
- Page 35 9 DISASSEMBLY COMPONENT LOCATION 26. Undo the door glass Open the door, remove 2 screws fixing the hinge and the front panel, and then remove the door. II. Remove 11 screws on the inner door. III. Undo the outer door and the inner door with special tool.
-
Page 36: Service Tools
10 SERVICE TOOLS...
Need help?
Do you have a question about the WDI3300 and is the answer not in the manual?
Questions and answers