
Related Manuals for Beko CN160240XB


Summary of Contents for Beko CN160240XB
- Page 1 Refr gerator User Manual מדריך למשתמש מקרר CN160120X -CN160235BG-CN160230X -CN160235X CN160230-CN160235W-CN160235XB-CN160240XB EN/HE 4196 0000/AU -EN-...
- Page 2 Please read this user manual first! Dear Customer, Thank you for preferring our product. We hope that you get the best results from your product which has been manufactured with high quality and state-of-the-art technology. Therefore, please read this entire user manual and all other accompanying documents carefully before using the product and keep it as a reference for future use.
-
Page 3: Table Of Contents
Contents 1. Safety and environment instructions 3 5 Using the product 1.1. General safety ..... . 3 5.1. Indicator panel..... 13 1.2. -
Page 4: Safety And Environment Instructions
1. Safety and environment instructions This section provides the safety instructions ren. The device can only be used by necessary to prevent the risk of injury and material such persons under supervision and damage. Failure to observe these instructions will instruction of a person responsible for invalidate all types of product warranty. - Page 5 Important instructions for safety and environment In case of malfunction, do not use Take care not to trap the power • • the product, as it may cause electric cable. shock. Contact the authorised servi- ce before doing anything. Plug the product into an earthed •...
-
Page 6: Intended Use
Important instructions for safety and environment supply if water has not been drawn sure, ask for the help of a professio- • nal plumber. for 5 days. If there is risk of water hammer ef- • Store raw meat and fish in suitable •... -
Page 7: Compliance With The Weee Directive And Disposing Of The Waste Product
Important instructions for safety and environment If the product’s door comprises a • lock, keep the key out of children’s reach 1.4. Compliance with the WEEE Directive and Disposing of the Waste Product: This product complies with EU WEEE Directive (2012/19/EU). -
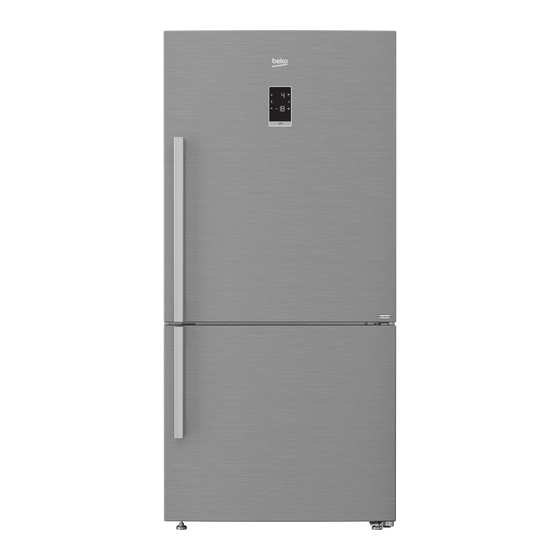
Page 8: Your Appliance
Your appliance 1. Door shelves of fridge compartment 11. Water tank 2. Display 12. Crisper 13. Chiller compartment Water dispenser filling tank 4. Egg section 14. Bottle shelf 5. Water dispenser reservoir 15. Odor filter 6. Rotary storage container 16. Glass shelves of fridge compartment 7. -
Page 9: Installation
Installation Always have the installation and repairing to direct sun light and kept in humid places after procedures carried out by the Authorized Service installation. Agent. Manufacturer shall not be held liable for • Your product requires adequate air circulation to damages that may arise from procedures carried function efficiently. -
Page 10: Electrical Connection
Installation 3.4. Adjusting the feet install the wedges, remove the screws on the product and use the screws given in the same If the product stands unbalanced after pouch with the wedges. installation adjust the feet. Taking help from 3.3. Electrical connection someone to slightly lift the product will facilitate this process. -
Page 11: Transportation Of The Product
Installation 3.7. Transportation of the product 1. Unplug the product before transporting it. 2. Clean the interior of the product as recommended in the “Maintenance and cleaning” section. 3. Secure the shelves, accessories, crisper and etc. in the product by adhesive tape before repackaging it. -
Page 12: Preparation
Preparation 4.1. Things to be done for energy saving Inside of your product must be cleaned. If two coolers are to be installed side Connecting the product to electric energy saving systems is risky as it may cause by side, there should be at least 4 cm distance between them. -
Page 13: Preparation
Preparation 4.3. Initial use Before starting to use the product, check that all preparations are made in accordance with the instructions in sections "Important instructions for safety and environment" and "Installation". • Clean the interior of the product as recommended in the “Maintenance and cleaning”... -
Page 14: Using The Product
Using the product 5.1. Indicator panel Indicator panels may vary according to the product model. Audio – visual functions on the indicator panel helps you in using your product. 1. Fridge Compartment Indicator 2. Error status indicator 3. Temperature indicator 4. - Page 15 5 Using the product 1. Fridge compartment indicator 6. Compartment selection button Fridge compartment light is illuminated while the Selection button: Press compartment selection fridge compartment temperature is set. button to switch between fridge and freezer compartments. 2. Error status indicator 7.
- Page 16 5 Using the product *optional Fridge compartment temperature setting button Icematic Off Indicator Key lock button (*In some models) Freezer compartment temperature setting button Economic usage indicator Error status indicator Quick freeze function indicator Key lock indicator Quick freeze function button/ Icematic on-off button Eco Extra Function Indicator Freezer compartment temperature indicator Eco Extra / Vacation Button...
- Page 17 Using your appliance 1. Fridge compartment temperature setting changing of the temperature setting of the button product. To activate it press and hold fridge compartment temperature setting button and Press this button to set the temperature of the freezer compartment temperature setting fridge compartment to 8, 7,6, 5,4,3, 2, 8...
- Page 18 Using your appliance Water flow from water tank will stop when this function is selected. However, This function is not recalled when ice made previously can be taken from power restores after a power failure. the icematic. 10. Economic usage indicator 13.
- Page 19 Using your appliance Sabbath Mode:*optional Press the Quick Cool Button for 3 seconds to activate or deactivate the Sabbath Mode. When Sabbath Mode is activated, the display, alarm, door opening or light buttons will not function: If the user does not deactivate the Sabbath mode, the refrigerator will automatically cancel it in 76 hours.
-
Page 20: Dual Cooling System
Using your appliance 5.2. Dual cooling system • Materials to be used for packaging must be tear-proof and resistant to cold, humidity, Your product is equipped with two separate odor, oils and acids and they must also cooling systems to cool the fresh food be airtight. -
Page 21: Recommendations For Preserving The Frozen
Using your appliance 5.4. Recommendations for Divided the food into portions according to preserving the frozen food your family’s daily or meal based consumption needs. • Frozen food that you have purchased should Pack the food in an airtight manner to prevent be stored in accordance with the frozen food them from drying even if they are going to be manufacturer's instructions for a frozen food... -
Page 22: Ice Machine
Using your appliance 5.7. Ice machine 5.8. Icematic *optional *optional Icematic allows you to obtain ice from the Icematic allows you to obtain ice from the product easily. product easily. Using the icematic Using the icematic 1. Remove the water tank from the fridge 1. -
Page 23: Ice Container
Using your appliance 5.9. Ice container ForHarvestFresh, Fruits and vegetables stored in crispers *optional illuminated with the HarvestFresh technology Icematic allows you to obtain ice from the preserve their vitamins for a longer time thanks product easily. to the blue, green, red lights and dark cycles, Using the ice container which simulate a day cycle. -
Page 24: Description And Cleaning Of Odor Filter
Using your appliance 5.12. Description and cleaning of 5.13. Snack compartment odor filter It is used for storing food such as fish, red Odor filter prevents unpleasant odor build-up in meat, chicken meat, and dairy products such your product. as cheese, yoghurt and milk that need to be 1. -
Page 25: Sliding Storage Container
Using your appliance 5.15. Rotary storage container 5.14. Sliding storage container *optional *optional Rotary storage container can also be moved This accessory is designed to increase the to right or left. In this way, long bottles, jars or usable volume of the door shelves. It allows boxes can be placed easily in the bottom shelf you to easily place the tall bottles, jars and tins (Fig. -
Page 26: Crisper
Using your appliance 5.16. Crisper Crisper of the product is designed specially to keep the vegetables fresh without loosing their humidity. For this purpose, cool air circulation is intensified around the crisper in general. Remove the door shelves that stand against the crisper before removing the crispers. -
Page 27: Using The Water Dispenser
Using your appliance 5.17. Using the water dispenser 5.18. Filling the water dispenser's tank *optional Water tank filling reservoir is located inside the It is normal for the first few glasses of door rack. water taken from the dispenser to be 1. -
Page 28: Cleaning The Water Tank
Using your appliance Use clean drinking water only. Capacity of the water tank is 3 liters; do not overfill. 5.19. Cleaning the water tank 1. Remove the water filling reservoir inside the door rack. 2. Remove the door rack by holding from both sides. -
Page 29: Drip Tray
Using your appliance 5.21. Humidity-controlled crisper 5.20. Drip tray (Ever Fresh) Water that dripped while using the water dispenser *optional accumulates in the spillage tray. Humidity rates of the vegetables and fruit are Remove the plastic filter as shown in the figure. kept under control with the feature of humidity- With a clean and dry cloth, remove the water that controlled crisper and the food is ensured to stay... - Page 30 Using your appliance 3” Alarm off warning function Freezer compartment temperature setting Energy saving indicator indicator Key lock function Freezer compartment temperature setting Key lock indicator function Power failure / High temperature / error war- Quick freeze function button icematic on-off ning indicator button (3”) function Quick bottle cooling/quick ice making selection...
- Page 31 Using your appliance 1.Freezer compartment temperature indica- temperature of the fridge compartment to 8, 7, 6, 5, 4, 3, 2 degrees, respectively. Indicates the temperature set for the Freezer 7.Quick fridge function button Compartment. When you press the quick fridge button, the temperature of the compartment will be 2.Freezer compartment temperature setting colder than the adjusted values.
- Page 32 Using your appliance and the vacation indicator will illuminate. The 15.Key lock indicator cooling of the fridge compartment is stopped This indicator will illuminate when the key lock and the temperature of the fridge compartment function is active. is fixed to 15 degrees to prevent bad odors. 16.Power failure / High temperature / error When this function is active, the fridge warning indicator...
-
Page 33: Quick Bottle Cooling/Quick Ice Making Compartment
Using your appliance and hold the quick bottle cooling-quick ice 18.Quick bottle cooling/quick ice making making button for 3 seconds while “2” is being function indicator displayed, the quick ice making button will be Displays the set function. If "1" is displayed, enabled and the quick ice making indicator this means that the quick bottle cooling will turn on. - Page 34 Using your appliance If you see "0" warning message When the cooling is done, the "=" on the display when you want to symbol on the indicator disappe- ars. After the process ends, remo- activate the ice making function, ve the beverage or the ice you have wait for a while.
- Page 35 Using your appliance Do not leave a cold beverage insi- de the compartment for your own hygiene and safety. Keeping your fizzy drinks in the compartment for a long time may lead to risks such as cracking etc. When the ice making function is over, the ice in the icebox may melt as the compartment will return to fresh food storing temperatures.
-
Page 36: Maintenance And Cleaning
Maintenance and cleaning Cleaning your fridge at regular intervals will ex- • To remove door and body shelves, tend the service life of the product. remove all of its contents. • Remove the door shelves by pulling them up. After cleaning, slide them from top to bottom to install. -
Page 37: Troubleshooting
7. Troubleshooting • Defrosting is active. >>> This Check this list before contacting the service. is normal for a fully-automatic Doing so will save you time and money. This list defrosting product. The defrosting is includes frequent complaints that are not related to carried out periodically. - Page 38 Troubleshooting • The freezer or cooler door may be the temperature in the freezer ajar. >>> Check that the doors are compartment. Wait until the fully closed. temperature of relevant parts reach • The product may be set to the sufficient level by changing the temperature too low.
- Page 39 Troubleshooting and sufficiently durable to bear the There is condensation on the product’s internal product. walls. • Hot or humid weather will increase The vegetable bin is jammed. icing and condensation. This is normal • The food items may be in contact and not a malfunction.
- Page 40 4 הכנ ה 1 הוראות סביבה ובטיחו ת 3 4 שימ ש ר ש 2 המכשי ר 5 שימוש במכשיר 3 התקנ ה י מ 1 5 ל ל 2 5 מ ר ת קיר ר ל תק 1 3 מיק רי...
- Page 41 הוראות סביבה ובטיחות 1.1 בטיחות כללית י ת ר ת ק ת מ מק ל י ת מ שי ל י ר ל • ק לר ש י דר ש ת די למ ל שי ת שי ת י י ת של ל ל י...
- Page 42 1 הוראות סביבה ובטיחות ידית ל ל ל ת תק דלת ך ת ידיך מלתק מ • י של מ ר לקי ד מ ל דלת ל יש י לדר ך • לקי ד מי של מ יר ת ל ילת מ ר י...
- Page 43 1 הוראות סביבה ובטיחות לי י ר מ מי י ת מי ת י ל תקי • י לי ש י ק ת י למ י קיי יר ת מ י ק ל י ק מ מת ימי ל לי ת מר...
- Page 44 1 הוראות סביבה ובטיחות דיק ת לממ תי קשמ ל ר מ ש ר ל ש ש ש ר מ שי ריש מ לש ר ת לש ש ל שמ שמ ריש מ ר מ ת ל ת ילילש ת לש י...
- Page 45 2 המכשיר מ ל מי קיר ר מד י דלת ת מ ירת ירק ת ת מ ל ת ת קיר ר מי מ ל למיל י מתק מד ל ק קי י י י רי ת מ מי מ ל מתק קיר...
- Page 46 התקנה ת די לת קד ר ר ד רש מ ר תיק י תק ל ת ק ד תמיד ש ר דר מ ר ימ ק י יל ת י ר ל ייש י שיר ת מ מך ל ידי מ...
- Page 47 3 התקנה יק משמשי לי ירת מר ק די רי י ל רי מ ר לקיר יר י שר רימת ל ר ר יק למ ל ת 2 רי י רי י י ר ל תק ת י שמ ד רי...
- Page 48 הכנה פעולות לחיסכון באנרגיה ל ד מתקי י ש י מקררי מ 4 ת יש ל ק יד ל מר ק של ל י י ר ת מ ר למ ר ת שמל ל מ ל ל ת מ י ש ר...
- Page 49 הכנה שימוש ראשון ל י שתת יל ל שתמש מ ר ד ש ש ל רקי ל ר ת מ י ת ת ת תק י ת ש ת ר ת מל ת מ ר ל י י ת ק •...
- Page 50 שימוש במכשיר לוח מחוונים מ ר לד ת ש יי ל שת ת י ת מ ל י מ יי ת שימ ש מ ר מ רק לי ת ל ק י ת קיר ר ת מ ש י מ מ ר ר מ...
- Page 51 5 שימוש במכשיר 7. מחוון תא הקפאה 1. מחוון תא הקירור דרת ר קיר ר מ יר ל רת ת דרת ר קיר ר מ יר ל רת ת ק מ ר רת ת קיר ר מ ר רת ת 8. מחוון מצב חיסכון 2. מחוון סטאטוס שגיאה ר י י ל מ מ...
- Page 52 5 שימוש במכשיר *אופציונאלי מ רק ת י ק קתמ י י ר ת ת תר ר מ תרד ר ריק ימ ד מ קל ל ישקמ תלי מ ש מיש י ר ת ת תר ר מ תרד ק מ...
- Page 53 5 שימוש במכשיר 6. מחוון פונקציית חיסכון נוסף 1. כפתור הגדרת טמפרטורת תא הקירור יל י ק יית מ יי ש די ל דיר ת מ ר רת ת ל ל ל respectively 8 מקרר מ ית מ ר י תר יל ק י די ל דיר ת מ ר רת ל...
- Page 54 5 שימוש במכשיר 01. מחוון השימוש החסכוני רי ת של י יל ת ל מ מ יי ש מ ר ר ל ק י ית לש ר ל מ ר רת יל י י שמל מ קת שמל קיר ר שמ ל ק ק...
- Page 55 5 שימוש במכשיר :מצב שבת *אופציונאלי קיר ר מ יר משך 3 ש י ת ל ל ל ש ת ל ש ית ת מ יל די ל י ת ש ת ל ל מ שר מ ל ר ל י תי...
- Page 56 5 שימוש במכשיר מערכת קירור כפולה ל י ת רי מרי ל מ י רי ל י ת לי מ ימי רד ת לקיר ר ת מ ר שתי מ ר ת קיר ר י לשימ ש מת ימי ש יי מ מרי רי...
- Page 57 5 שימוש במכשיר המלצות לשימור המזון הקפוא י רי מרי י ק ר מיד ד ק ר ל ר ת ת שק ית ק מ יש ל מד ק ל י ת ק ת ת ל מ י ר מי ת ק...
- Page 58 5 שימוש במכשיר קיר ר ת מ ל מי מת יר ת ת מתק ק י ת קר מי ת מ ל מי 2 מל מי ת מתק ק י ת קר 2 מל י י ק י ת ת יל ת...
- Page 59 5 שימוש במכשיר מתקן לאחסון ביצים 5.11 חרקה לכמב שומיש דלת י י ת מתק ל ית ל תקי ת ת ר תמ רק ק י מקרר ר י מד ר י למ רק ל מ ת ימ ל ת ת ך מקרר מ מל ל י ל...
- Page 60 5 שימוש במכשיר תא חטיפים 5.13 :תיאור מסנן הריחות וניקויו 5.12 שר שר ד מ ד י מ משמש ל ר ת של רי ת ל רי ת מ מ ל י ר י מ מ רי ל מ ר ימי קריר י תר מקרר...
- Page 61 5 שימוש במכשיר מכל אחסון סיבובי 5.15 *אופציונאלי י ית ל י ימי י ת מ ל קל ת י ית ל שמ ל ת לת ת ת ק י ק קי )1 י ר ת ת ל ידי ת ל מד ש...
- Page 62 5 שימוש במכשיר מגירת ירקות 5.16 מי ד ד מ ירת ירק ת מ ר ת ד לשמ ר ל ירק ת ריי מ לי שי ללי מת רת ך לש ל ת ש י מ ירת ירק ת ל י יר...
- Page 63 5 שימוש במכשיר שימוש במתקן המים 5.17 מילוי מכל המים של מתקן 5.18 המים *אופציונאלי ת ך מ ש דלת מ ל למיל י מי ממ ק מ ל ת מ ת ת ר יל ש מי י ת מי ת מ מתק ר ש ת י ריי...
- Page 64 5 שימוש במכשיר ניקוי מכל המים 5.19 ת ך מ ש דלת ר ת מ ל למיל י מי י ת מש י ר ת מ ש דלת ל ידי די ת ר 3 מש ך ת מ ל מי מש י די 45°C ית...
- Page 65 5 שימוש במכשיר מגירת ירקות עם בקרת לחות 5.21 מגש גלישת המים 5.20 מי מ לך שימ ש מתק י מי שמ )FreSHelf( מ ש לישת מי רי מ )(תכונה זו היא אופציונאלית י ר י שמ יק ל ר ת מ יר ת שמרי שי רי ל ת של ירק ת ר...
- Page 66 5 שימוש במכשיר 3” מ תרד ת לש ר ר מ ק מ י י ר תיי ק תרד ר ר מ ת ק תיי ק ישקמ תלי ל תיי ק ק רי מ תיי ק מ ישקמ תלי ל ל...
- Page 67 5 שימוש במכשיר 1.מחוון טמפרטורת תא ההקפאה שר קיר ר מ יר י יר למקרר מ מ ק לת מ ר ר ש ק ת מ יי ק י ל י ל יל ק י קיר ר מ יר קיר ר מ יר מ ל...
- Page 68 5 שימוש במכשיר 31.מחוון פונקציית החיסכון באנרגיה (התצוגה ת ת ך דק ל ל י ש ל ל )כבויה י ק דמת של מ ר לת מ ך ר ת משך מ דלת ת מ ר ש ר ת מ יר י ירת קר ק...
- Page 69 5 שימוש במכשיר 81.מחוון הפונקציה קירור בקבוקים מהיר/יצירת קרח מהירה ר מ מ דר ק י ש ת מ י ק י קיר ר ש יר ש ד ר מ ר ר מ יר תי ק קי ק י ש יר ש ד ר 2 ר מ...
- Page 70 5 שימוש במכשיר / תא קירור בקבוקים מהיר 5.22 ת ת ת ר יצירת קרח מהירה ש ת ר ד ת ק י יל ת ל ר )(קירור מהיר מת מ מ י ירת קר י ש י ל ר ד ת )(תכונה זו היא אופציונאלית מיי תשתמש ת מ יר ק...
- Page 71 5 שימוש במכשיר ל י יי ל שמיר למ י ל ש יר משק ת י ת ש רת ת ך ת קרי ת למשך י משק ת ת ת ל ל ל רק מ ממ שך דקי מ ק י י ירת לת...
- Page 72 אחזקה וניקיון 2. 6 הגנה על משטחי פלסטיק דיר י ריך ת יי יק י מ ר יק ל ל ל י שמ ש ש ך ל מש • מי יש ל ק ת מיד ק למש ל ר שמל ל י יק י מקרר תק...
- Page 73 פתרון בעיות דש ד ל י תר מ ק ד י מ ר יית • שיר ת י למר ל י רשימ יי די לתק ת ר ת ד לי י תר מ רי י תר ך לך מ ד ר י מדי...
- Page 74 תולקת רותיא דיר ת מ ר ת ל מ ק • מדי ל מ מקרר מ ת • דיר מ ר י ת ק ל מ מקרר יש ש ל מ ת ד מי מי מי ת מ מק י ת מ ת ש...
Need help?
Do you have a question about the CN160240XB and is the answer not in the manual?
Questions and answers