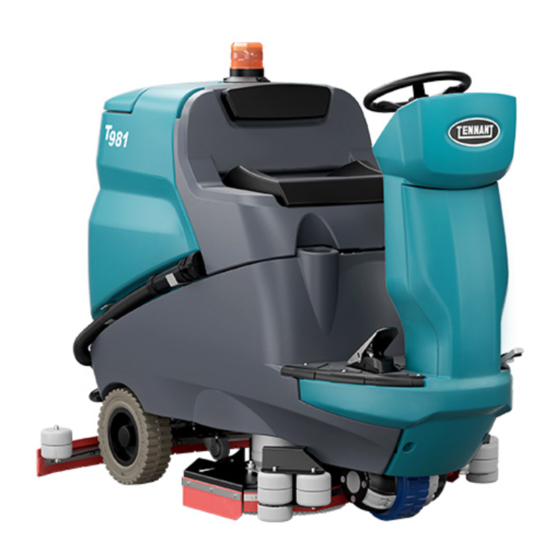
Tennant T981 Operator's Manual
Ride on scrubber dryer
Hide thumbs
Also See for T981:
- Technical & service manual (199 pages) ,
- Quick manual (2 pages) ,
- Operator's manual (42 pages)
Table of Contents

Related Manuals for Tennant T981


Summary of Contents for Tennant T981
- Page 1 TENNANT T981RIDE ON SCRUBBER DRYER OPERATOR MANUAL Clemas & Co. Unit 16 Ashchurch Business Centre, Alexandra Way, Tewkesbury, Gloucestershire, GL20 8NB. Tel: 01684 850777 Fax: 01684 850707 Email: info@clemas.co.uk Web: www.clemas.co.uk...
-
Page 2: Table Of Contents
TABLE OF CONTENTS IMPORTANT SAFETY PRECAUTIONS ..............3 SAFETY SYMBOLS ....................6 TECHNICAL SPECIFICATIONS ................7 MACHINE DIMENSIONS ..................8 GENERAL INFORMATION ..................9 Purpose of this manual ........................9 Identifying the machine ........................9 Documentation provided with the machine ..................9 TECHNICAL INFORMATION .................10 General description ........................ -
Page 3: Important Safety Precautions
IMPORTANT SAFETY PRECAUTIONS Do not use the machine: without having read the operating and maintenance man- ual. Parts of the text requiring special attention are printed in bold and preced- without having been trained in its use. ed by the symbols illustrated and described below. if legally under age. - Page 4 Replace- Never use the machine to transport people or goods or ment of the cable should be entrusted to a TENNANT ap- for towing. proved service technician. Detach both connections of Do not wear jewellery, watches, ties or other items.
- Page 5 Never use parts removed from other machines or from other kits. When the machine is to be loaded onto or unloaded from a vehicle: Empty the tanks before loading the machine. Raise the scrub head and remove the squeegee from the machine.
-
Page 6: Safety Symbols
SAFETY SYMBOLS WARNING! RISK OF CUTTING WARNING! RISK OF ABRASION MAXIMUM SLOPE OPERATOR MANUAL, INSTRUCTIONS FOR USE READ THE OPERATOR'S MANUAL DIRECT CURRENT SYMBOL INSULATION CLASS: THIS CLASSIFICATION ONLY APPLIES TO BATTERY POWERED MACHINES. EXTERNAL BATTERY CHARGER CONNECTION POINT. LIFTING POINTS ON THE MACHINE. -
Page 7: Technical Specifications
TECHNICAL SPECIFICATIONS 80cm Disk 90cm Disk 75cm Cylindrical Brush Cleaning width Squeegee width 1010 1100 1010 Cleaning capacity per hour 4800 5300 4300 Number of brushes Brush diameter 150x750 Maximum brush pressure Brush rotation speed 1000 Brush motor power 400x2 400x2 1000 Drive motor power... -
Page 8: Machine Dimensions
MACHINE DIMENSIONS X-Y-Z: See “TECHNICAL SPECIFICATIONS” table... -
Page 9: General Information
GENERAL INFORMATION Purpose of this manual This manual has been written by the Manufacturer and is an integral part of the machine operators information for maintenance personnel The terms “right” and “left”, “clockwise” and “anti-clockwise” refer to the forward movement of the machine. Constant compliance with the instructions provided in this manual guarantees the safety of the operator and the machine, ensures low running costs and high quality results and extends the working life of the machine. -
Page 10: Technical Information
TECHNICAL INFORMATION Main parts of the machine The main parts of the machine are listed below: General description 1. Dirty water tank. 2. Solution tank. This machine is a scrubber dryer for washing and drying 3. Control panel. 4. Head assembly. 5. -
Page 11: Control Panel
Control panel 30. Work program buttons (AUTOMATIC MACHINE OPERATION): buttons used to set the machine’s work program: The machine has the following controls and indicator lights: 1, light intensity cleaning program for smooth 18. Attach/release brush button (disk brushes only) that enables the automatic brush attachment or 2, medium intensity cleaning program for release. -
Page 12: Handling And Installation
HANDLING AND INSTALLATION Release the parking brake by pressing the lever next to the pedal Before unpacking the machine, check that the Lifting and transporting the palletized head assembly is raised. machine ! ATTENTION: during all lifting operations, make sure tipping over or being accidentally dropped. -
Page 13: Batteries
Batteries Press the programming button three times, the message “GEL battery” will appear on the display. ! ATTENTION: do not use NON-rechargeable batteries machines: Leak-proof tubular batteries (WET): the electrolyte level must be checked regularly. GEL or AGM batteries: this type of battery requires no maintenance. -
Page 14: Wet Batteries, Preparation
! DANGER: during installation of the batteries removal of the batteries must be entrusted or any type of battery maintenance, the to a TENNANT-approved service technician skilled technician must be provided with (referred to hereinafter as skilled technician). the necessary personal protection devices (gloves, goggles, overalls, etc.) to limit the risk... -
Page 15: Selection Of Battery Charger
Tilt the seat forward and the tank backwards, then place Selection of battery charger the batteries in the compartment, positioning them as indicated by the drawing on the battery box. ! DANGER: use a battery charger with the Connect the wiring terminals to the battery poles, tighten CE marking, in compliance with the pertinent and cover with Vaseline. -
Page 16: Battery Charger Settings
Battery charger settings The position of the squeegee is factory-set. Should the squeegee blade require adjustment, refer to the section “Squeegee adjustment”. ! ATTENTION: where machines are shipped without batteries, the machine is factory set for GEL-AGM Squeegee adjustment Depending on the type of batteries installed, make ! ATTENTION: before carrying out the operations sure the battery charger is properly set. -
Page 17: Fitting The Brush/Pad Holder
The angle of the blades can be adjusted by turning the Fitting the Brush/Pad Holder knob positioned above the squeegee. ! ATTENTION: before carrying out the operations apply the parking brake. ! ATTENTION: Before installing the Pad Holder on the machine, make sure you have attached the PAD to the Pad Holder Fitting the brushes (or Pad Holder):... -
Page 18: Fitting The Brushes (Cylindrical Brush Model)
Fitting the brushes (Cylindrical Brush Model) ! ATTENTION: before carrying out the operations apply the parking brake. ! NOTICE Where the terms RIGHT and LEFT appear, this is always referred to the forward movement of the machine Assembly: Turn the ignition key to switch the machine on. Remove the cover from the brush compartment by pulling the release lever. -
Page 19: Fitting The Side Brushes (Cylindrical Brush Model)
Fitting the side brushes (Cylindrical Brush Model) ! ATTENTION: before carrying out the operations apply the parking brake. ! NOTICE Where the terms RIGHT and LEFT appear, this is always referred to the forward movement of the machine Assembly: Undo the screw on the motor shaft. Check that the drive key is located in the keyway of the motor shaft. -
Page 20: Filling The Detergent Tank
Filling the detergent tank ! ATTENTION: before carrying out the operations apply the parking brake. temperature of between 4 and 55 °C. ! ATTENTION: the machine has been designed for use with detergents supplied or recommended by the Manufacturer. The use of other detergents or ! ATTENTION: the selected detergent should be utilized rationally, in accordance with the directions given on the packaging of the product. -
Page 21: Practical Guide For The Operator
PRACTICAL GUIDE FOR THE Working OPERATOR reading the operating and maintenance manual. Clothing and equipment ! NOTICE Wear safety shoes with non-slip soles. Releasing the accelerator pedal, all of the functions Wear protective goggles or visor and safety garments. are stopped automatically within 5 seconds (Power Depending on the surface being cleaned and on the environment, the protective measures necessary for corresponding to the selected program will blink. - Page 22 Use the drive selector to select forward drive. From the three available programs, select the one most suitable for the work being performed; by pressing these buttons, all of the functions relating to the selected program will be activated (brush motor, suction motor): 1, light intensity cleaning program for smooth 2, medium intensity cleaning program for 3, high intensity cleaning program for rough...
-
Page 23: Service Brake And Parking Brake
Start cleaning, turning the steering wheel by hand To apply the parking brake, depress the brake pedal fully. and depressing the accelerator pedal. ! NOTICE As a safety feature, the accelerator pedal must be The maximum operating speed can be set by turning the speed potentiometer. -
Page 24: Dual Wash
Dual wash dirt, scrubbing and drying operations can be performed in two separate stages. Prewash with brushes or pads: Turn the ignition key to switch the machine on. When scrubbing particularly dirty areas, give the action of detaching and suspending the dirt in the Drying: Press the brush button. -
Page 25: Picking Up Water (Without Washing)
Picking up water (without washing) ! ATTENTION: do not attempt to clean surfaces on slopes or gradients steeper than indicated on the machine data plate. The machine can be used to mop up spills of water or ! ATTENTION: Do not operate the machine on slopes Press the suction motor button: the squeegee is lowered or gradients steeper than indicated on the data plate. -
Page 26: Detergent Solution Tank Empty Indicator
Detergent solution tank empty indicator Battery charge indicator The display indicates the battery voltage: when this When the solution tank is empty, the indicator lights up and all cleaning functions are inhibited. The detergent solution disabled, whereas traction remains enabled; proceed with the recharge, follwing the instruction given in the section refer to the section “Filling the detergent solution tank”. -
Page 27: Emptying The Solution Tank
Emptying the cylindrical brush debris bin ! ATTENTION: before carrying out the operations apply the parking brake. To empty the cylindrical brush debris bin, rotate the bottom of the bin clockwise then pull bin directly outward. Empty the debris and wash the bin. Emptying the solution tank ! ATTENTION: before carrying out the operations apply the parking brake. -
Page 28: Moving The Machine When Not In Operation
brushes from under the head. Moving the machine when not in operation To move the machine, proceed as follows: Turn the ignition key to switch the machine on. Press the accelerator pedal. The top speed of the machine is adjusted by turning the potentiometer. -
Page 29: Maintenance Instructions
Maintenance operations on the electrical circuit — and in any event, all other operations not explicitly described in this operating manual — must be performed by a TENNANT approved service technician, in compliance with current safety regulations and as indicated in the maintenance manual. -
Page 30: Fuses
! ATTENTION: never install a fuse with a current The replacement of fuses must be entrusted only to a TENNANT service centre or to a TENNANT-approved service technician. Tilt the tank to the rear, disconnect the battery wiring... -
Page 31: Checking The Electrolyte Level Of Wet Batteries
! DANGER: during any type of maintenance on the batteries, the skilled technician must wear low, proceed to top up the electrolyte using distilled water the Personal Protective Equipment (gloves, only: eyewear, overalls, etc.) needed to limit the risk Position the container of distilled water at a height at least one metre above the top rim of the battery. -
Page 32: Battery: Removal
! ATTENTION: before carrying out the operations ! ATTENTION: the operation of removing the batteries must be carried out by a skilled technician. apply the parking brake. ! ATTENTION: before carrying out the operations ! ATTENTION: before recharging, make certain that the battery charger is set up correctly for the type of apply the parking brake. -
Page 33: Replacing The Squeegee Blades
Replacing the squeegee blades Cylindrical Brush Model side brushes wear adjustment ! ATTENTION: before carrying out the operations ! ATTENTION: before carrying out the operations apply the parking brake. apply the parking brake. time, and the constant wiping action, the edge of the blade due to excessive wear, they can be adjusted as follows: Move the side brush to the working position. -
Page 34: Periodic Checks
TANK CHECK THE BATTERY ELECTROLYTE LEVEL HAVE THE ELECTRICAL SYSTEM CHECKED BY A TENNANT-APPROVED SERVICE TECHNICIAN PERIODS OF INACTIVITY If the machine is not used for some time, for example, on display in a showroom or stored in the warehouse for a... -
Page 35: Troubleshooting
TROUBLESHOOTING PROBLEMS CAUSES SOLUTIONS The machine does not work The batteries are disconnected Connect the batteries to the machine Recharge the batteries Fuse tripped Reset the fuse Ignition key not engaged Turn the key Emergency button pressed Release the emergency button Head brushes not turning The dirty water tank is full Empty the dirty water tank... -
Page 36: Alarms/Warnings Displayed
ALARMS/WARNINGS DISPLAYED ERROR CODE CAUSE SOLUTION BRUSH TEMPER. Machine being overworked. Wait 30 minutes for the temperature to come down. The work program selected is too Drop from 3 to 2 or 1. heavy for the type of surface. Electronics damaged Replace the power pcb. -
Page 37: Drive Wheel Pcb Alarms
DRIVE WHEEL PCB ALARMS means of the status LED. In the absence of malfunctions, the status LED remains permanently alight while the machine is in operation. If a malfunction is detected, the status LED provides two types of information, a slow blink (2 Hz) or a fast blink (4 Hz) to indicate the severity of the malfunction. -
Page 38: User Menu
USER MENU To access the user program, turn the ignition key to “1”; after 5 seconds, press the programming button and hold for button. To change the value of the selected parameter, press the “-” or “+” button: “-“ to decrease, “+“ to increase. To store the changes and exit, press and hold the programming button until the display shows the battery voltage. -
Page 39: Recommended Spare Parts
RECOMMENDED SPARE PARTS T981 75cm Cylindrical Part Number Descriptions SPPV01286 BRUSH, SOFT, PPL, 75CM [STD] SPPV00457 BRUSH, MED, PPL, 75CM SPPV01364 BRUSH, SOFT, MIX 5, 75CM SPPV01201 BRUSH, ABRV, 75CM (TYNEX) SPPV75790 BRUSH, SIDE, PPL, MEDIUM [STD] SPPV75794 BRUSH, SIDE, ABRV... - Page 40 RDGR00039 GEARBOX, BRUSH MOTOR MEVR05203 CARBON MOTOR BRUSH MLML00240 SPRING, RETAINER 897524 BEARING, BALL, 8B 30D 11W T981 90cm Disk Part Number Descriptions SPPV01539 BRUSH, PPL, 48CM [STD] SPPV01540 BRUSH, ABRV, 48CM (TYNEX 120) SPPV01541 BRUSH, ABRV, 48CM (TYNEX 240)
- Page 41 FTAC00038 FILTER, ASSY, SOLUTION FTAC00047 FILTER, SOLUTION 9017783 MOTOR, VACUUM, ASSY, 36V 9017737 SENSOR FLOAT WATER TANK TBBP00485 HOSE ASSY, DRAIN, RECY MECB01227 POTENTIOMETER, TRACTION MECB01228 CONTACT, MICRO, PEDAL MEEV00043 SOLENOID VALVE RTRT00518 WHEEL SWIVEL PMVR01141 TUBE, AIR OUTLET PMVR01139 HOSE, DRAIN, SOL TANK MOCC00394 ACTUATOR...
Need help?
Do you have a question about the T981 and is the answer not in the manual?
Questions and answers