
Related Manuals for Axair MIAP


Summary of Contents for Axair MIAP
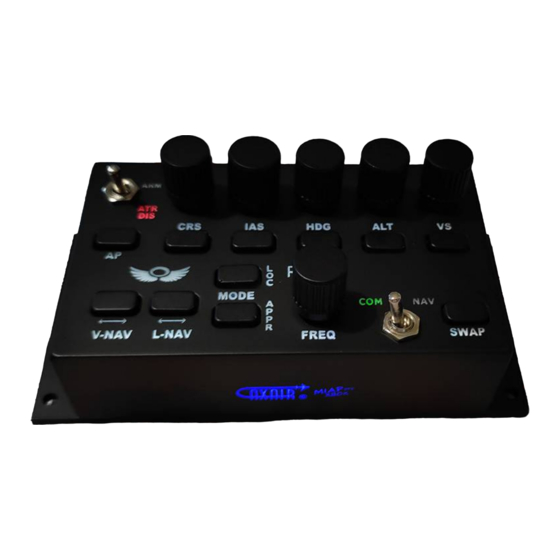
- Page 2 Flight-simulator 2020 on XBOX series S/X. The unit its firmware is flashed into the main processor of the MIAP to act as an solo keyboard or an extension to an existing keyboard connected to the game console.
- Page 3 Connect the MIAP to the XBOX series S or Series X by plugging the USB connector in any of the console USB ports. USB hubs can be used in general but we cannot guarantee correct MIAP functionality using your hub. In any way, a powered USB hub is recommended.
- Page 4 STEP 4: Click in the SEARCH BY NAME tab to search for the action you wish to assign, In this example we choose to assign an action to a rotary knob that will increase the Autopilot altitude. STEP 5: Type ‘reference’ and note that all actions that can be assigned and have reference in the name will show up.
- Page 5 STEP 7: Click in the grey TAB showing ‘START SCANNING’ STEP 8: Rotate the ALT knob clockwise. STEP 9: In this case “ALT + ; ” will show in the scan TAB. Use reference sheet A to check if the input is correct.
- Page 6 STEP 10: In the actions list you will now see the knob that we have been rotating assigned to perform the action ‘INCREASE AUTOPILOT REFERENCE ALTITUDE’ . Step 11: Go back to the main menu after saving the profile you created. Start a flight and check the actions you assigned.
- Page 7 STEP 12: Click in the TAB next to ‘TOGGLE AUTOPILOT HEADING HOLD’ STEP 13: START SCANNING by clicking in the corresponding window STEP 14: Press the HDG button on the MIAP once...
- Page 8 STEP 15: ‘RIGHT CTRL + \’ should show in the scan window after pressing the button on the MIAP. If for some reason it does show a different string. than try to scan the button again. Click on VALIDATE to confirm the action for the button we just pressed.
- Page 9 STEP 17: Search for ‘COM1’ and click in the TAB next to ‘INCREASE COM1 (WHOLE)’ STEP 18: Rotate the FREQ button clockwise. check if the string is correct using the reference table ‘A’ Validate the action. Repeat the steps by scanning ‘DECREASE COM1 (WHOLE) and rotating the FREQ knob anti-clockwise. Next press on top of the FREQ knob once and repeat the steps but now by selecting INCREASE COM1 (FRACT) and DECREASE COM1 (FRACT) If preformed correctly you can toggle between tuning in MHz and kHz by pressing once on the rotary.
- Page 10 Possible assignment Key Code Description OBS 1 + L_CTRL+KEY_SEMICOLON Increase VOR1 OBS OBS 1 - L_CTRL+KEY_GRAVE Decrease Vor1 OBS OBS 2 + L_CTRL+KEY_COMMA OBS 2 - L_CTRL+KEY_BACKSLASH IAS+ L_CTRL+KEY_BRACKET_LEFT Increase autopilot reference airspeed IAS- L_CTRL+KEY_BRACKET_RIGHT Decrease autopilot reference airspeed HDG+ L_CTRL+KEY_APOSTROPHE Increase heading bug HDG-...
Need help?
Do you have a question about the MIAP and is the answer not in the manual?
Questions and answers